How to Snap a Screenshot Using Screen Capture Module
Detailed steps to show you how to use Screen Capture module in Leawo Screen Recorder to capture any area of your screen as screenshot with ease.
- Home
- /
- Leawo Screen Recorder
- /
- User Guide
How to Snap a Screenshot Using Screen Capture Module
Leawo Screen Recorder provides an intuitive interface and clear guidance for both novices and experts to capture screenshot.
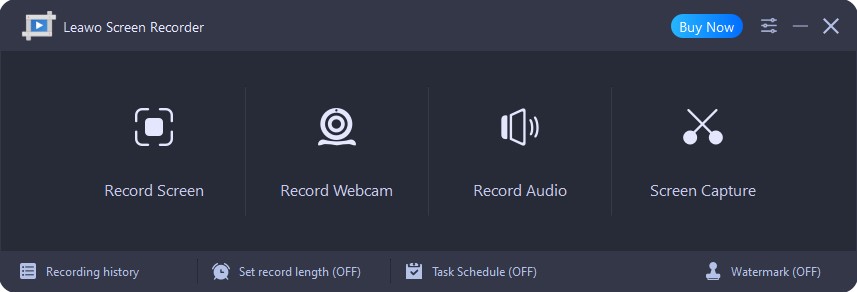
Step 1: Launch Leawo Screen Recorder
Launch Leawo Screen Recorder on your computer.
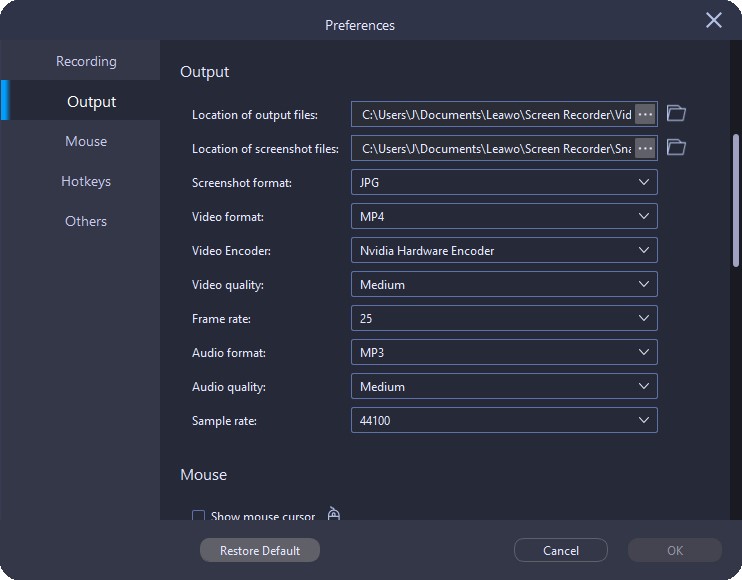
Step 2: Set Output Directory
Before capturing screen, you can first set the output directory, and confirm the screenshot format. Click the three-bar icon on the top menu bar and choose "Settings" option in the drop-down menu, a "Preferences" panel will pop up. Click "Output" tab in the left column to set output preferences.
- Output directory: Click the three-dot icon in the end of "Location of screenshot files" option, then browse and choose a local folder as the screenshot output directory.
- Screenshot format: By default, the output format of screenshot is JPG, which is immutable.
Step 3: Start to Snap a Screenshot
Leawo Screen Recorder offers 3 modes for screenshot taking – Custom Mode, Full Screen Mode, and Auto Detection Mode. You can click the "Screen Capture" button to start taking a screenshot, or press the hotkeys you set to capture screen. By default, the hotkeys to capture screen are "Ctrl + Alt + C".
- Custom Mode: By default, after clicking the "Screen Capture" button on the main interface, you will enter the Custom Mode. To snap a screenshot in Custom Mode, toggle the frame over the screen and release it. The selected area is the screenshot.
- Full Screen Mode: After taking a screenshot in Custom Mode, a control panel will be shown up near the selected area. Click the "Full screen" button to switch to Full Screen Mode.
- Auto Detection Mode: This mode will automatically detect the screenshot area. Hover your mouse over the entire window or separated blocks, frames, widgets, etc., and click to snap a screenshot.
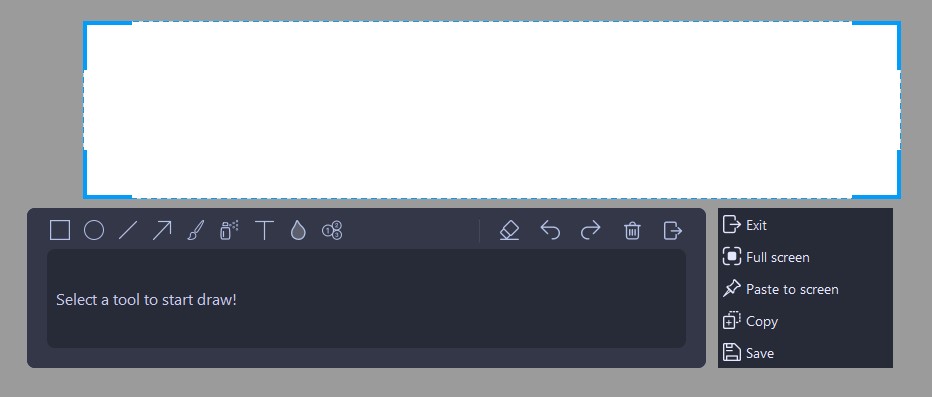
Step 4: Add Effects to Screenshot
A drawing board will be provided automatically after taking the screenshot, including Rectangle  , Ellipse
  , Line
  , Arrow
  , Brush
  , Air brush
  , Text
  , Blur
  , and Callout
  . Under each paint tool, you can adjust the brush thickness by clicking different circles next the "Size" option, and specify the brush color by clicking the different color blocks. For professionals, a custom palette is provided in the end of "Color" option. Under "Blur" tab, you can drag the scrollbar before the rectangle icon to modify the blur level.

If you accidentally apply a wrong effect, click the "Undo" button  to cancel the most recent change, or click the "Redo" button
  to resume the last operation. Alternatively, if you want to selectively erase the applied effects, click the "Erase" button
  , then smear on the drawing and annotation to erase. Or, you can click the rectangle button
  under the "Erase" tab to erase the applied effects in the framed area. Plus, you can clear all applied effects by clicking the trash can button
  . To exit drawing board editing, click the exit button
  .
.
Step 5: Output Screenshot
After taking screenshot, the control panel offers 3 output paths – Save, Copy, and Paste to screen.
- Save: Click to browse and save the screenshot to a local folder.
- Copy: Click to copy the screenshot to clipboard.
- Paste to screen: Click to paste the screenshot to your screen for further use.