How to use Leawo PowerPoint to Video Pro
This guide introduces you detailed steps on how to convert PowerPoint file to video with Leawo PowerPoint to Video Pro.
- Home
- /
- Leawo PowerPoint to Video Pro
- /
- User Guide
How to Convert PowerPoint to Video with Leawo PowerPoint to Video Pro
Step 1: Add PowerPoint files
Click on the "Add" icon  to add source PowerPoint files into this PPT to video converter program. You can add unlimited number of PPT files at once time and convert PPT to videos all within one click. After loading source PPT files, you could adjust the converting order by selecting a certain loaded PowerPoint file and then clicking the Move Down button
  and Move Up button
  , remove a loaded file by clicking the Remove button
  and remove all loaded files by clicking the Clear button
 ![]() . Also, you could play back a loaded file with the built-in PowerPoint slide viewer, and double click a loaded file to customize it.
. Also, you could play back a loaded file with the built-in PowerPoint slide viewer, and double click a loaded file to customize it.
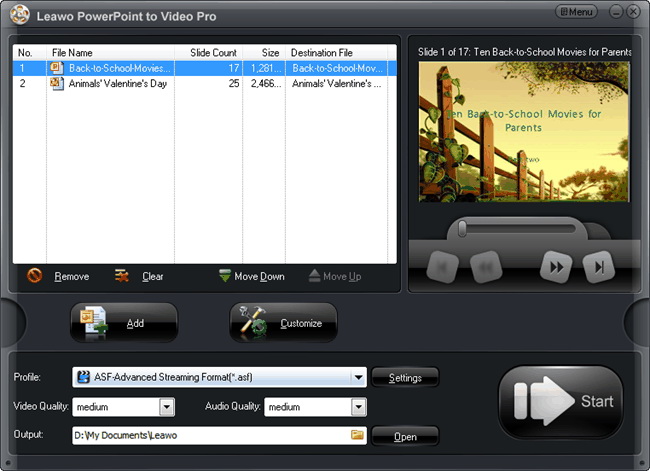
Step 2: Output settings
2.1 Set output profile
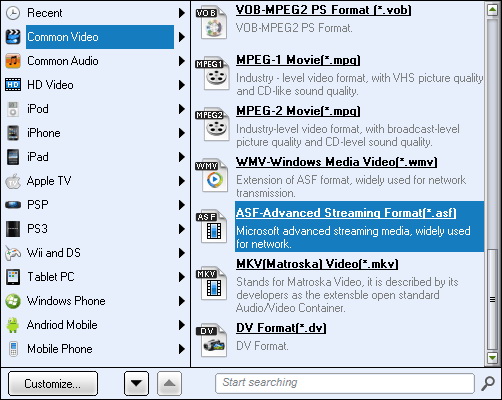
Various video profiles have been predefined and embedded in the PPT to video converter program. Choose an appropriate output video format from the "Profile" box  . You could choose output profile according to your final use on the Profile panel. On the Profile panel, you could click the Customize button
  to adjust the layout of profile, like hiding infrequent used profiles. You could also make use of the quick profile search bar
  to search desired output profile quickly.
2.2 Adjust output profile parameters
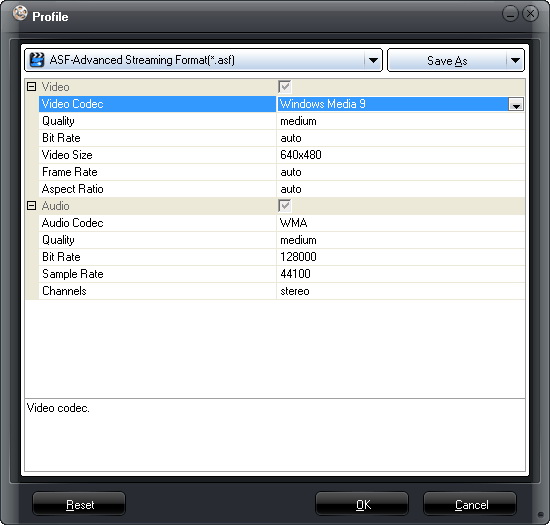
Once you've chosen an output profile, you could click the Settings button  on the main interface to adjust video and audio parameters of selected output profile. You could adjust video codec, quality, bit rate, video size, frame rate, aspect ratio, audio codec, quality, bit rate, sample rate, channels, etc. After adjusting, you could click Reset button
  to reset changes, hit OK button
  to apply changes and click Cancel button
  to cancel all changes and quit the parameter editing panel. You could also click the Save as button
  to save edited profile for future use.
2.3 Set output directory
After setting output profile, you then need to set an output folder for the exported files in "Output" box  . Click the Folder button
  to set a directory and hit the Open button
  to open output directory. Make sure the output folder you've set gets enough space.
Step 3: Customize
Leawo PowerPoint to Video Pro allows you to customize PowerPoint files before you start to convert PowerPoint to video files. You could set slide duration, background music, add watermark, determine video layout, etc. Click the Customize button  to enter the Customize Settings panel:
3.1 Presentation customize settings
Once you open the Customize Settings panel, you will firstly see the Presentation tab, on which you firstly select a loaded PowerPoint presentation file and then determine its Timing, Music, Audio and Slide.

Timing: Under the Timing option, you could determine the default transition time between slides, and set it as default or apply to all.
Music: Unser Music option, you could add background music from your local music library, remove added background music, play back loaded background music, move up or down, etc.
Audio: The Audio option enables you to determine whether to ignore audio in source PowerPoint file or not.
Slide: Under the Slide option, you could determine whether to keep the aspect ratio of slides or not.
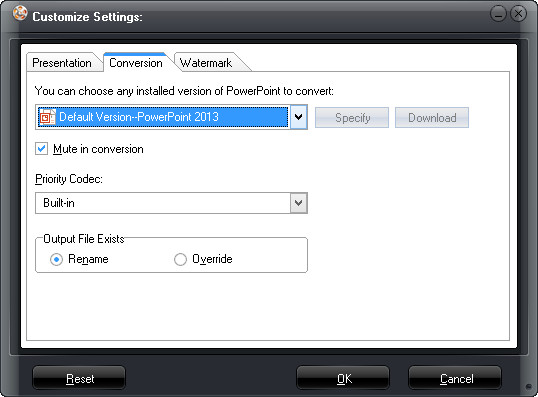
3.2 Conversion customize settings
Open the Conversion tab to set conversion customization settings, including: choose installed version of PowerPoint to convert, Mute in conversion, Priority Codec, and what to do if output file already exists.
3.3 Watermark customize settings
By clicking the Watermark tab, you could enter the Logo & Layout window to set image watermark as logo and determine the output Video Layout. You could add a logo to protect your PowerPoint presentation copyright.
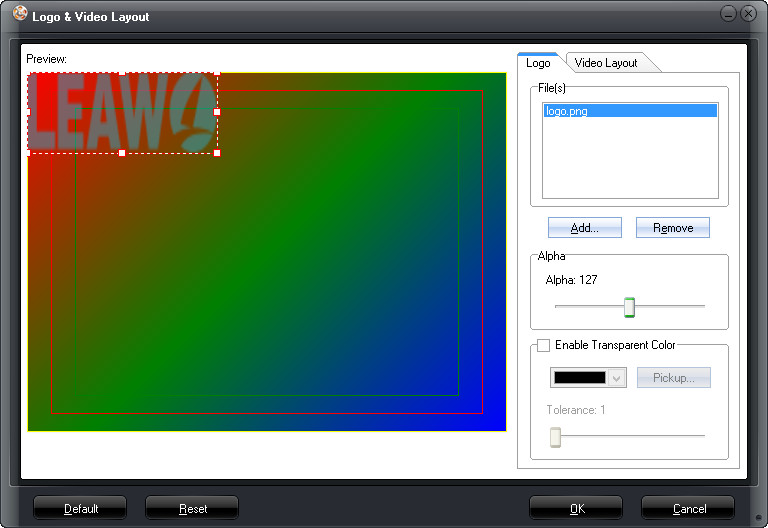
3.3.1 Add Logo
Under the Logo option, click the Add button (add-logo.jpg) to browse and add image as logo from your local image library. You could also click the Remove button ![]() to remove loaded image logo. You could set the logo position and adjust logo size by direct dragging the dot-frame of added logo on the left Preview panel. Also, you could adjust the logo Alpha, enable Transparent Color, adjust Tolerance, or Pickup the Transparent Color of logo.
to remove loaded image logo. You could set the logo position and adjust logo size by direct dragging the dot-frame of added logo on the left Preview panel. Also, you could adjust the logo Alpha, enable Transparent Color, adjust Tolerance, or Pickup the Transparent Color of logo.
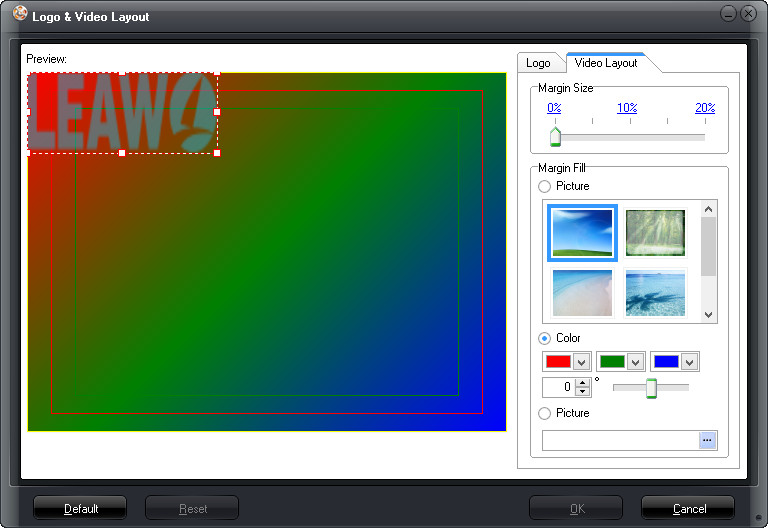
3.3.2 Set Video Layout
Open the Video Layout tab to set output video layout. You could determine the Margin Size, and Margin Fill (including preset picture, color or picture from local drive).
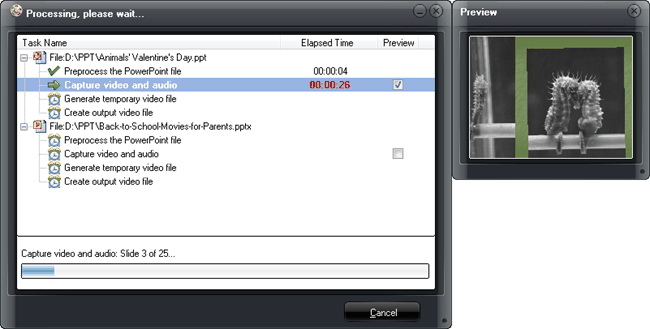
Step 4: Conversion
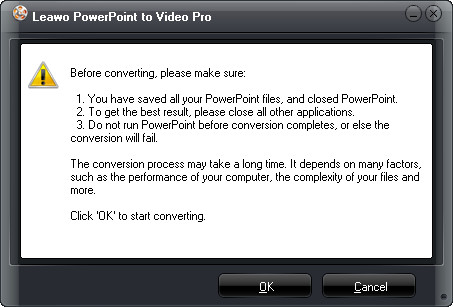
When all the settings are done, click the big "Start" icon  at the bottom right corner to start the conversion. Once you click the Start button, there would pop up a confirming window to let you confirm the start of converting PowerPoint to video. Click the OK button to continue.
You will then be guided to the converting panel, where all converting tasks are displayed with detailed time clearly showed to you. You can preview the output video in real time during conversion by ticking the  button under the Preview tab. Click the Cancel button if you want to cancel converting.