How to Use Leawo DVD Ripper
This page shows you detailed steps on how to register Leawo DVD Ripper so as to enjoy the full feature of Leawo DVD Ripper and get better DVD movie ripping experience.
- Home
- /
- Leawo DVD Ripper
- /
- User Guide
Convert DVD
Kick off Leawo Prof. Media (DVD Ripper is a module of Prof. Media) to enter the home page, where you need to click “Convert” button on the sub-menu or “DVD Ripper” button in the middle to enter the "Convert" interface.

Step 1: Import Source DVD Files into Program
On the "Convert" interface, click “Add Blu-ray/DVD” to import DVD disc, folder, or ISO image file. Alternatively, you can directly drag and drop source DVD files into the "Convert" interface.

Once DVD content is selected, you will be provided three options for you to import DVD file(s): Full Movie, Main Movie and Custom Mode. Full Movie allows you to import all titles, and Main Movie only imports the longest title by default while you can freely choose titles for importing under Custom Mode. Choose a mode and click “OK” button to start importing source DVD files.

Once source files are imported, you can preview source files via the inbuilt media player, select subtitles and audio tracks, enable chapters to select chapters for converting from source DVD movie files if loaded titles contain multiple chapters, edit source files, etc.

For the multi-angle DVD discs, you can see an extra Angle drop-down box. It allows you to select the video angle from the source content. Click on it and select one angle.

Step 2: Choose output profile
There is a drop-down box named “MP4 Video” by default next to “Add Photo” button. Click the box to pop up a small panel, where you need to click “Change” 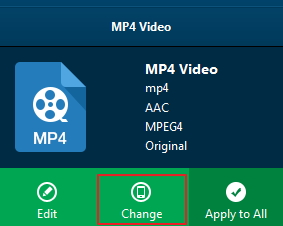 to enter the “Profile” panel. You can choose either video/audio format or mobile device as output profile under “Format” or “Device” group. Various video/audio formats and device models are available for selection, like 4K MP4, 4K MKV, HD MP4, HD AVI, MOV, iPhone 6s, iPad Air, etc. You can also make good use of the quick searching box on the left to fast locate your desired profile.

Step 3: Set video and audio parameters (optional)
Leawo DVD Ripper allows you to change the video and audio parameters of selected profile like Video Codec, Bit Rate, Resolution, Frame Rate, Aspect Ratio, Audio Codec, Channel, Sample Rate, etc. You could enter the Profile Settings panel by clicking the same drop-down box and then clicking “Edit” option instead of “Change” option 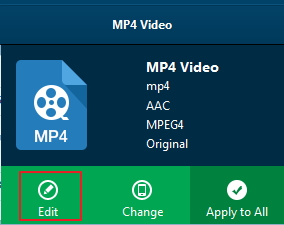 . After setting parameters, you could click “Save to Custom” option
  to add customized profile to “Custom” group.
Step 4: Set output directory
After profile settings, you will be returned to the "Convert" interface, on which you need to click the green “Convert” button to set output directory for saving the output files. Once  is clicked, a small side bar will pop up, and you need to set a directory under “Save to” box for containing the output files.

Step 5: Start conversion process
Click the “Convert” button  at the bottom of sidebar to start conversion process. During the conversion process, you could click “Cancel” button to call off the process.
