
How to use Leawo DVD Creator
With the internal video editor, Leawo DVD Creator allows you to edit video and create 3D movies. This page shows you how to edit video and convert 2D video to 3D DVD in detail.
- Home
- /
- Leawo DVD Creator
- /
- User Guide
How to Edit the Video
The DVD Creator program has some built-in video editing features that allow you to edit the video before you burn it.
To go to the video editing panel, click the Edit  button on the file. There are 7 built-in video editing features: Video & Audio, Trim, Watermark, Crop, Effect, 3D, and Create Chapter.

a. Video & Audio

In Video & Audio section, you can adjust Playback Speed from 1x to 4X for output, check to Remove Noise, adjust video VolumeZoom, and rotate video in horizontal-flip, vertical-flip, 90-degree clockwise, or 90-degree counterclockwise.
b. Trim

In Trim section, you can cut the video by setting the exact time at which the video will start and end. You can drag the slider under the time bar to choose two time points  , and the time points on the slider are the same as the Start Time and End Time shown under the slider. And you can put in the exact time as to when the video will start and end accurate to microseconds. On the right side of the time bar are several buttons. Click the Play button
  to start playing the video on the preview window above. Click the Start Time button
  to set the current time point of the playing video as the start time. Cliclk the "End Time" button
  to set the second time point as the end time. This Play
  button is for playing the selected part of the video. The Clip Length
  shows the length of the video you've chosen. And you can undo all the above changes by clicking Reset
  button.
c. Watermark

Click the Watermark button  to enable watermark on the video. You can choose to add either text or image on the video, but you can’t do both.
1. Add text.
Click the Text button  to enable text watermark. And input the text you want in the text box
  .
.
1.1. Click the button next to the text box to change the color of the font. In the color selecting window, you can choose whatever color it has on the colorboard for the text.

1.2. Click the  button to open the Select Font window. You can choose another font, select a font style you like, and set the right size for the text. You can also set the font effect to be Strikeout and Underline. There’s a preview box showing the sample of the font.

2. Add image
Enable image watermark by clicking the button  next to the Image option. To add image watermark click the Folder button
  to choose an image file from your computer to add to the video.
3. Other watermark settings
After adding text or image to the video, you can adjust several parameters.
3.1. Adjust the transparency of the watermark from 0% to 100% with the slider.
![]()
3.2. Adjust the size of the watermark by inputting the exact number of pixels.

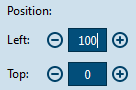
3.3. Adjust the position of the watermark by directly dragging it to the ideal location or inputting the coordinates.
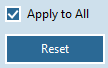
3.4. You can apply the watermark to all videos you’ve imported to the program by checking Apply to All or delete the watermark by clicking Reset button.
d. Crop
In Crop tab, you can choose one fraction of the movie screen and remove other parts. There are two ways to crop the video: you can either directly choose one part of the screen on the preview window or enter the coordinates of left and right and the size value.
The buttons on the right side of the time bar is for adjusting the selected part of the screen. Click  to flip the screen horizontally; click
  to flip the screen vertically; click
  to rotate the screen 90 degree clockwise and click
  to rotate the screen 90 degree counter clockwise.
There are several options in the Zoom section for you to adjust the border of the screen.

e. Effect
in the Effect section, some parameters of the video are provided for you to adjust. Adjust the brightness , saturation , and contrast of the video by directly dragging the slider or inputting a value. While adjusting the parameters, you can see the changes to the video on the preview window on the right. Check Apply to All  to apply the adjustment to all videos.

f. 3D
In the 3D section you can convert the video from 2D to 3D. First enable 3D effect by clicking the 3D Mode button, and then choose 3D mode among Red/Cyan, Red/Green, Red/Blue, Blue/Yellow, Interleaved and Side by Side. And you can also adjust 3D depth by sliding the slider or enter a value between -50 to +50.

g. Create Chapter
Under Create Chapter tab, you can create and insert custom chapters into the disc. Click "Insert chapter" button to create a chapter at the current playing time. Click "Delete" button to delete a selected chapter in the right of the chapter list sidebar, while click "Delete All" to delete all chapters in one time.
