How to Use Leawo Photo Enhancer to Enhance Photos
Detailed steps to show you how to use Leawo Photo Enhancer to enhance photos in various ways. You learn batch photo enhancement and single photo enhancement here respectively.
- Home
- /
- Leawo Photo Enhancer
- /
- User Guide
How to Use Leawo Photo Enhancer
Leawo Photo Enhancer is quite simple and handy to set and use. You could set the program, and then enhance photos in several simple clicks. The AI photo enhancer will do all things for you quickly and intelligently. The below guide would show you detailed steps on how to use Leawo Photo Enhancer in single photo processing and batch photo processing respectively.
Step 1: Add photos
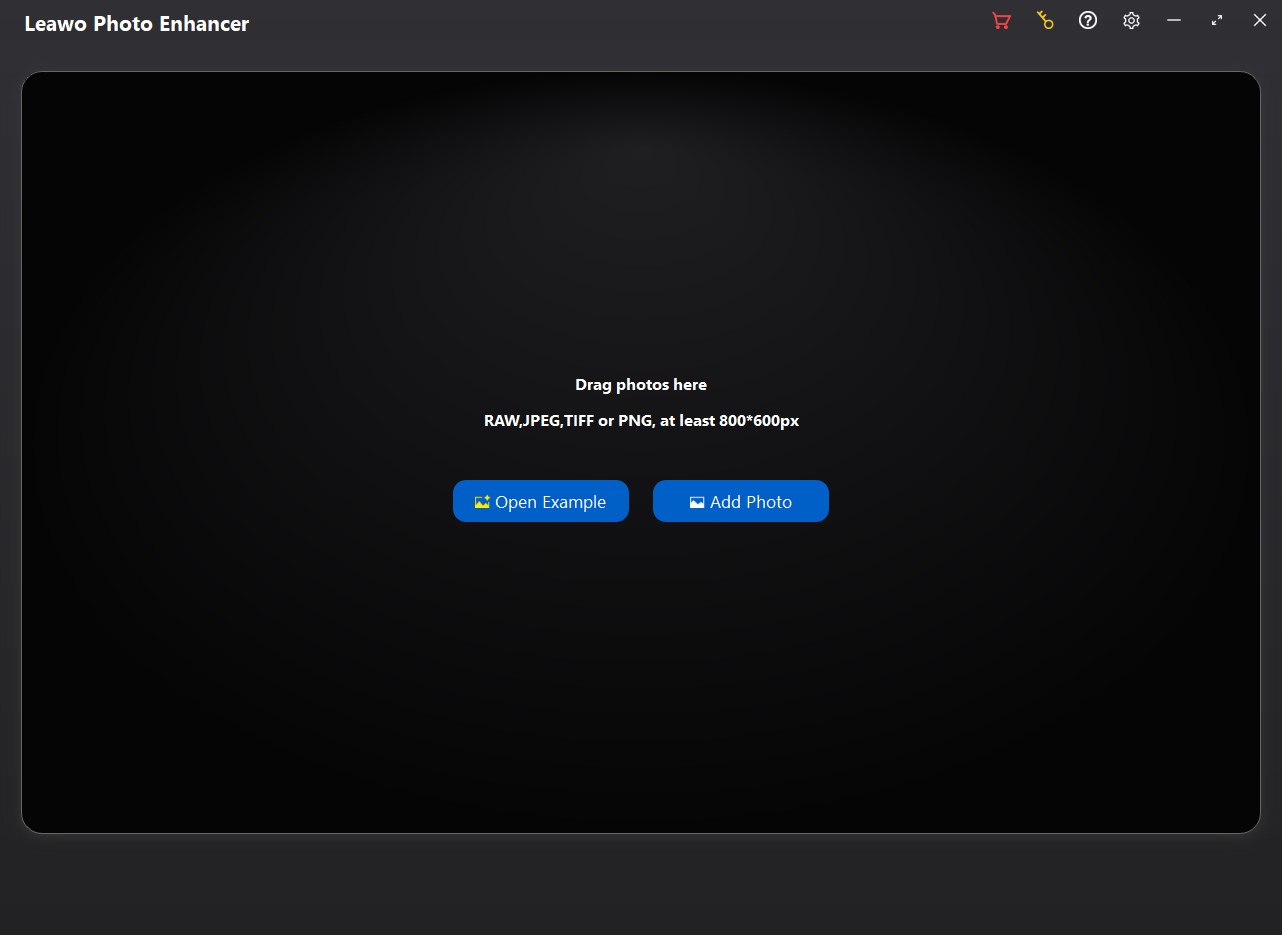
To enhance your photos with this AI photo enhancer, you need to firstly add source photos into Leawo Photo Enhancer. Kick off Leawo Photo Enhancer on your computer first. Then, follow either way listed below you to add photos for AI enhancing:
- Click "Add Photo" button to browse and load source photos from your computer hard drive into Leawo Photo Enhancer.
- Directly drag and drop your source photos into Leawo Photo Enhancer main interface.
Once you have loaded source photos, you could right click on the loaded photo, and then choose to delete or export selected photo. By right clicking in the spare area, you could delete or export all loaded photos. You could also click the "Add Files" button at the bottom-left corner to add more photos for photo AI enhancing.
It should be noted that:
- Leawo Photo Enhancer supports RAW, JPEG, TIFF, and PNG files that are at least 800x600px.
Step 2: Enhance photos
Leawo Photo Enhancer enables you to batch enhance photos or enhance photos one by one through the internal photo AI enhancer. After loading source photos, you could do the below operations to either enhance photos in batch or enhance a single photo every time.
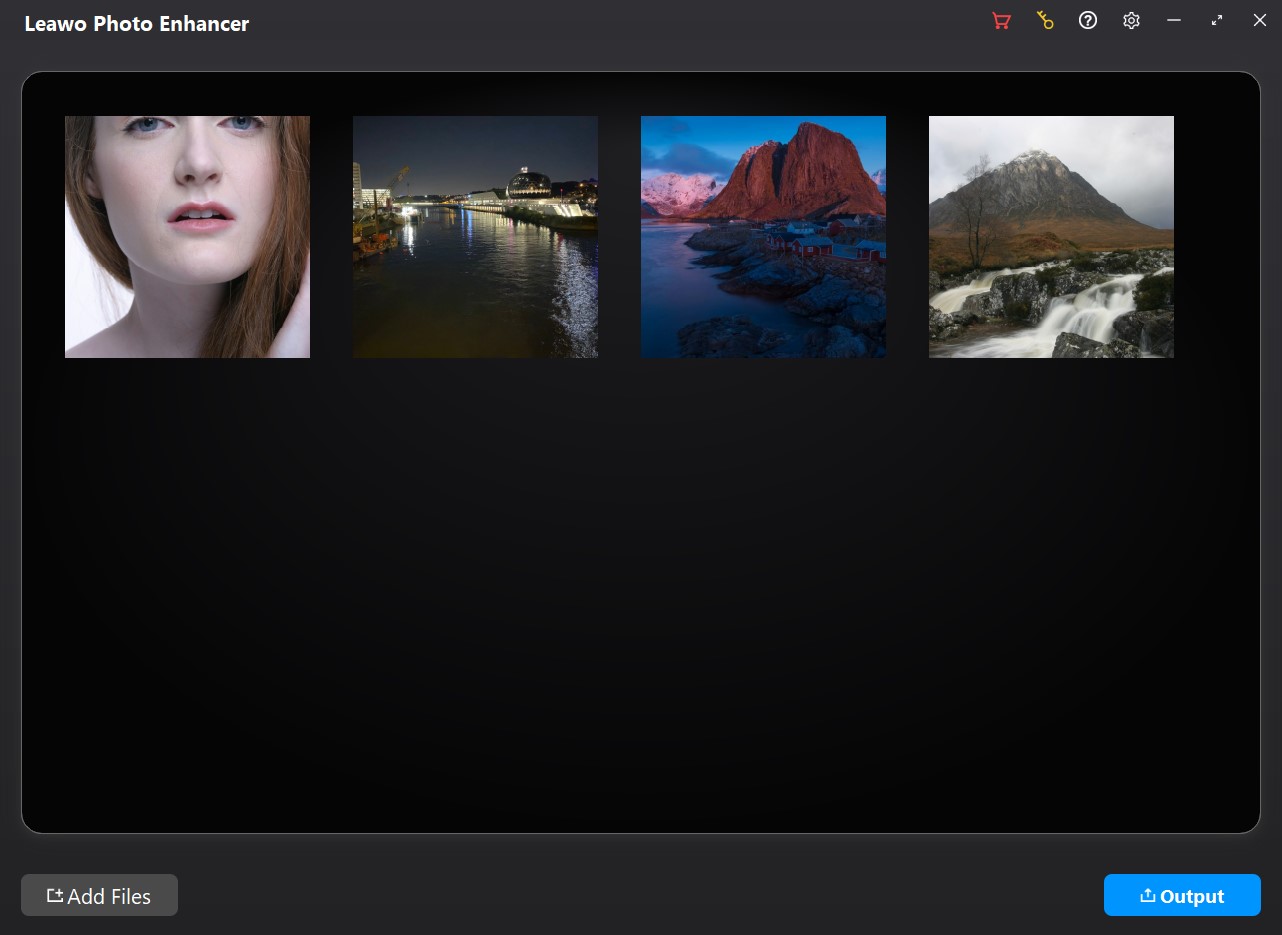
1. Enhance photos in batch
Leawo Photo Enhancer enables you to batch AI enhance photos after you load source photos. To AI enhance photos in batch, just click the "Settings" button in wheel icon on the top-right corner, and then navigate to the "Settings" option on the drop-down panel to enable "Automatic Lens Correction", "Face enhance" and/or "Enlarge eyes" features. Leawo Photo Enhancer will then automatically enhance photos in batch according to the features you have enabled for output. You then only need to click the bottom right "Output" button for output settings.
2. Enhance photos one by one
You could also enhance photos one by one within this AI photo enhancer software. After loading source photos, select one loaded photo and double click it to enter the photo enhancer editing interface.
This photo AI enhancer will then automatically adopt "AI enhance" tech to AI enhance photos for you, and then enable you to apply/remove other AI photo enhancing features including "Automatic Lens Correction", "Face Enhance" and "Enlarge Eyes", which have been set in "Settings" panel mentioned above.
- AI Enhance: This is enabled by default, and can’t be disabled. All loaded photos will be AI enhanced for output.
- Lens Correct: This is available for RAW photos only, used for correcting the lens for RAW photos.
- Eyes Enlarge: Enlarge the eyes in source photos to make eyes stunning.
- Face Enhance: Enhance portrait photo by retouching skin, removing freckles, enhancing eyes, adjusting lighting and more.
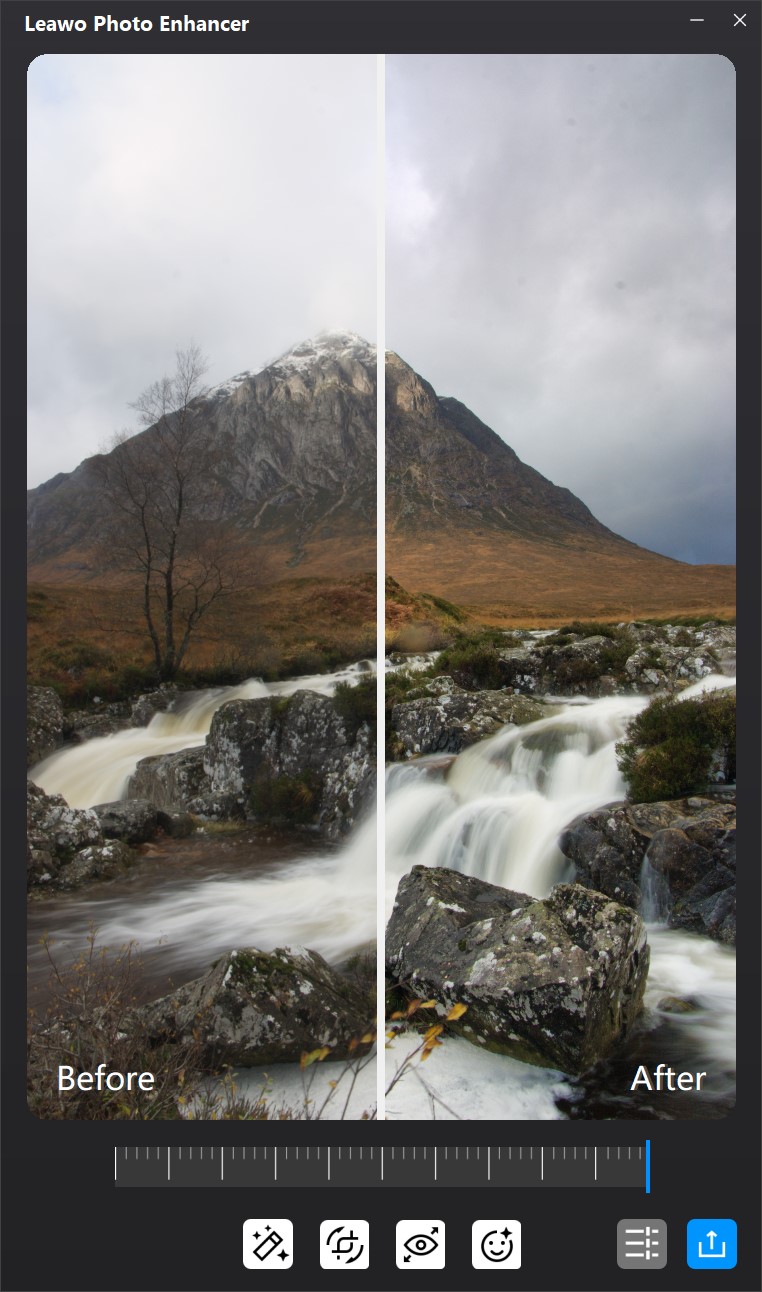
There is an effect adjuster bar right below the previewer, which enables you to adjust the photo AI enhancing degrees. By driving the slider to the right, the AI photo enhancing effect will be much more obvious. By putting the slider to the right end, you get maximize AI photo enhancement. You could apply the adjustment to single photo easily.
Once the AI photo enhancing completes, on the photo AI enhancing interface, you can get an instant previewer to view the photo effects "Before" and "After" photo AI enhancer gets involved. You could drag the slider on the preview window freely to get large scale preview and instant comparison.
Note:
- You could enhance multiple photos one by one for batch output within Leawo Photo Enhancer. After completing editing one photo, click the close button on the editing interface. Leawo Photo Enhancer will save all editing features you have applied to this photo for output. Then, you could double click another photo for AI photo enhancing.
- Leawo Photo Enhancer will keep "AI Enhance" effect in all output photos, and other AI photo enhancing effects (Lens Correct, Eyes Enlarge and Face Enhance) according to your last editing choice before clicking "Output" button at the bottom right corner.
After editing single photos, click the bottom right output icon to proceed for output settings.
Step 3: Output settings

After completing photo AI enhancing, click the bottom right "Output" button to proceed. There will pop up an "Output settings" window, where you need to complete some output settings. There are general output settings and Advanced settings for you. In general output settings, there are multiple things you need to complete:
1. Save to
Set an output directory to save output AI enhanced photos. You could click the "Position" button to change the output directory.
2. Format
Determine the photo file format for output photos from JPEG, PNG and TIFF.
3. Quality
Determine the output photo quality. If you choose JPEG as output format, you could choose output photo quality from High, Medium and Low. If you choose TIFF as output photo format, you could determine the output photo Compression from None, LZW and PackBits, and Depth from 8bits and 16bits.
Besides, you could open the "Advanced settings" drop-down menu to determine the output file name and resize output photos.
4. Naming
The filename of your image can be modified in several ways. You can add a prefix or suffix to your original filename, change the base, and make the letters uppercase or lowercase.
The "Prefix", "Suffix", and "Base" can be modified in the following ways:
None: If you select this option under "Prefix" and "Suffix", no prefix or suffix will be added to your filename. This option can’t be selected under the "Base" and is replaced by the Filename option. If you select Filename under base and None under Prefix and Suffix, your filename won’t be modified.
Filename: If you select Filename under Prefix, the prefix will be the name of the imported file. If you select Filename under Suffix, the suffix will be the name of the imported file.
Let’s say you want to modify an image named London.jpeg and select Prefix > Filename. In this case, the exported image name will be London_London.jpeg. If you also select Suffix > Filename, the image will be saved as London_London_London.jpeg.
Custom Text: Custom text allows you to enter a name manually. If you want to modify your image name without adding any prefixes or suffixes, select Custom Text under Base and enter a new name.
Counter: In the counter, enter a starting number that will be added to your images. If you’re exporting more than one photo and type 4 in the counter field under Suffix, for instance, your images will be saved as Filename_4.jpeg, Filename_5.jpeg, Filename_6.jpeg, and so on. If you select Counter under Base, your filename will be replaced by that number.
Timestamp: If you select Timestamp under Prefix or Suffix, the current date will be added before or after your filename. If you select Timestamp under Base, the current date will replace your original filename.
Letters: Leave as it is, Upper case, or Lower case.
In each naming method, you could get instant preview of samples right below.
5. Resize
On the "Resize" drop-down menu, you get 3 different options for output file size, respectively: Original, Compression and Dimensions.
Original: The output file size would be the same as that of the source file.
Compression: This AI photo enhancer will automatically compress images to the size that best shows the photo according to the original file size for each photo output here. People could see the detailed file size after compression by right clicking one file to select "Export 1 picture" option, and then going to "Advanced settings > Resize > Compression" option.
Dimensions: You could enter absolute dimensions in pixels for output files.
Step 4: Output AI enhanced photos
Then, finally, on the "Output settings" window, click the blue "Output <number> photos" button to output AI enhanced photos. If the target folder has pictures with the same name, Leawo Photo Enhancer will notice you.
1. For free trial version:
If you are using free trial version, you will get a "Get Pro" notice window that shows you the limitation of free trial version and offers you options to "Buy Pro" and "Continue". You could click "Buy Pro" option to purchase Pro version and register Leawo Photo Enhancer to experience its full features, or click "Continue" button to experience the free trial version.
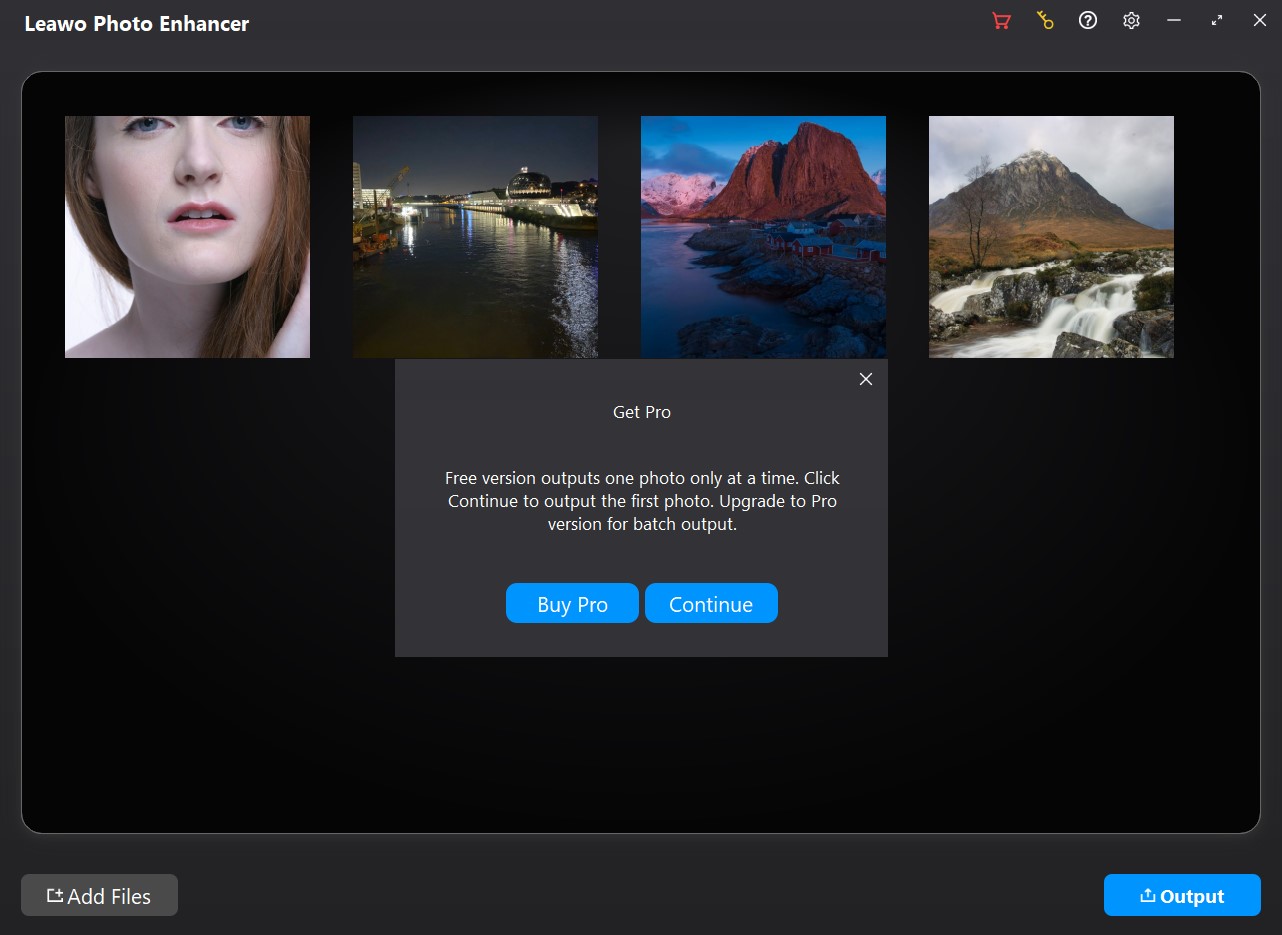
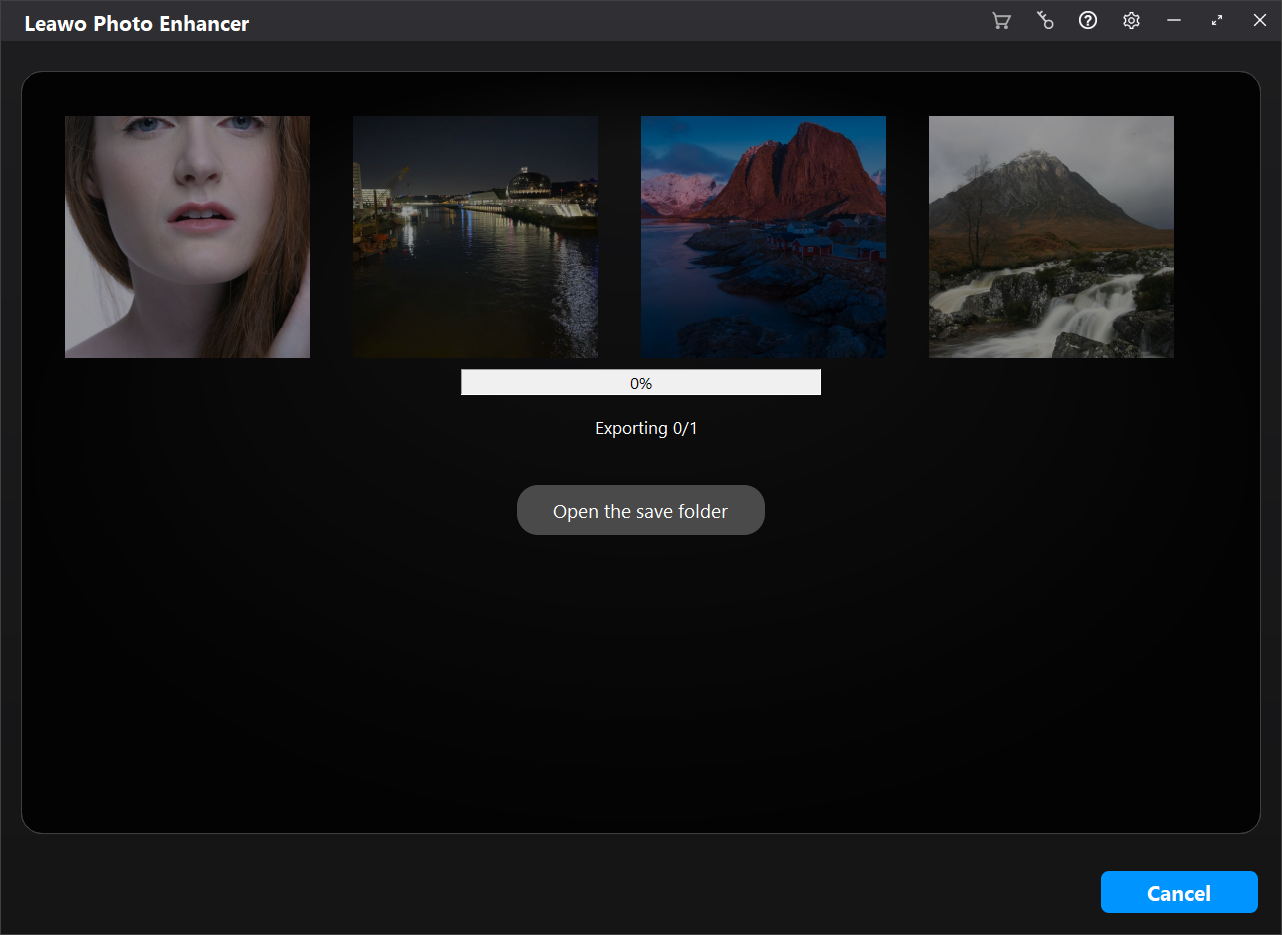
By clicking "Continue" button, you will come to the below window, which helps you output 1 photo only.
2. For registered version:
If you have registered Leawo Photo Enhancer, you will be directly led to the exporting window, which will show you the exporting progress through the progress bar.
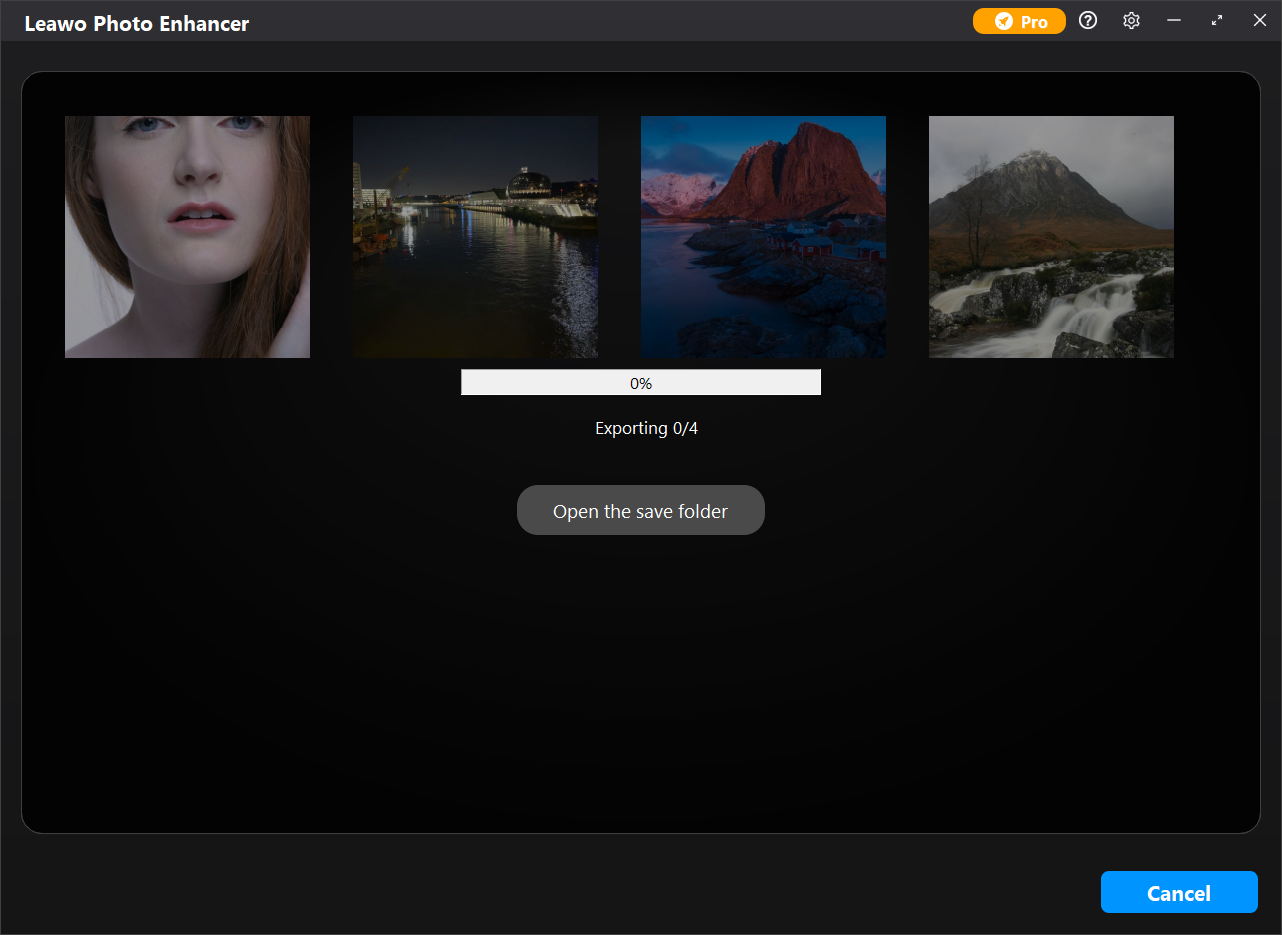
You could click the "Cancel" button anytime you like during the exporting process. When the exporting completes, you could click the "Open the save folder" button to open the folder that saves all AI enhanced photos exported.