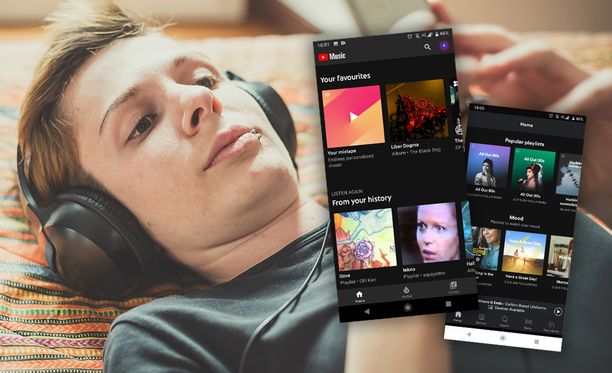
Referring to music streaming platform, YouTube Music vs Spotify are both titans in their fields and boast great influence and astonishing active users. Services like YouTube Music vs Spotify allow you to stream music, create playlists, discover new songs, etc.
It seems that they share the great similarity in function, and some are indecisive to decide what to pick. Don’t worry. This post will compare YouTube Music vs Spotify specifically and give out advice about how to choose between them.
You may also be interested in:
Part 1: YouTube Music vs Spotify: Free Version Comparison
There is freemium available for both YouTube Music vs Spotify, which offers you decent user experience in streaming entire content library with limitation. But you can choose to get rid of these limitations by upgrading to premium. For quick and easy reference, we’ve laid out those differences below.
-
- 1. Source Accessibility
-
- YouTube Music: What to play and how to play are assigned by users. In addition, both video and audio are offered to select at will.
- Spotify: Search ability us limited, and you are allowed to choose the songs you want to play on specific playlists like the personalized Daily Mix. Only songs are available and there is no music video there.
-
- 2. Skipping Ads
-
- YouTube Music: You can choose to skip the ads when they are played for 5 seconds.
- Spotify: No option for skipping ads.
-
- 3. Play in Background
-
- YouTube Music: Upgrade to Premium version or play music in background on Web player only.
- Spotify: Play music in background as you like at all platforms no matter you are premium or not.
-
- 4. Song Skips
-
- YouTube Music: Unlimited times for skipping the audio or video playback.
- Spotify: You can skip the maximum of 6 songs per hour.
-
- 5. On-demand Playback
-
- YouTube Music: It is available for all platforms.
- Spotify: Available for desktop and web player solely.
-
- 6. Download Option
- Both YouTube Music vs Spotify offer no download option for free version. You need a premium for download option.
-
- 7. Audio Quality Settings
-
- YouTube Music: 2 settings for desktop app and web player (Low: 48kbps and Normal: 128kbps.) There is only normal audio quality setting for mobile.
- Spotify: 4 settings for desktop app and mobile app (Automatic, Low: 24kbps, Normal: 96kbps and High: 160kpbs.) There is only normal audio quality setting for web player.
-
- 8. Highest Audio Quality
-
- YouTube Music: 128kbps
- Spotify: 160kbps
Part 2: YouTube Music vs Spotify: Detailed Comparison
After you read the article above, you may have a general idea about YouTube Music vs Spotify. Looking for more information about them to see which one is worth your money? Just keep reading. We’ll introduce them in details from different aspects so that you can make a good choice.
| Features | YouTube Music | Spotify |
| Content | Focused on music and music video and provide rare versions ( remix, live,instrumental, etc.) | Wider selection of podcast and indie collection. |
| Music Discovery | Impressive “You Mix”. |
|
| Price and Plans | Better option for those who want other music-related content. |
|
| Sound Quality | Max streaming quality for 256kbps using AAC | Max streaming quality for 320kbps using AAC & Ogg Vorbis (Number fluctuates depending on your connection.) |
| Convenience |
|
|
| Connectivity | Support playback from your Chrome browser or app to a supported smart TV. Work smoothly with Google Nest Audio smart speakers for voice controls. | There are apps for iOS, Android, Windows, macOS, Xbox, PlayStation and plenty of smart TVs. Support voice control in both Amazon Echo and Google Nest smart speakers. |
| Stability | There are some UI bugs, especially when using the app offline, casting, and at times even trying to manage or browse your own library. | Runs smoothly but crash sometimes |
| Design | Better search function but feels somewhat unfinished in its design. | With eye-catching picture, smart playlist descriptions, and striking headers. |
Part 3: YouTube Music vs Spotify: Which to Choose?
Both services are awesome. However, we can say that Spotify almost winner in the contest thanks to its reputation from features, content and updates. But we can still find some specific features in each service really match your needs, and we make a conclusion for your information.
YouTube Music is better:
- For music video lover. YouTube Music has a great choice of millions of official titles, albums, radios" as well as music videos.
- For YouTube Premium member. YouTube Premium includes premium for YouTube Music, and you don’t need to pay for upgraded service.
- For easy access. YouTube Music freemium meet your need and you don’t need to log in for free service.
Spotify is better:
- For people who own smart home. Spotify is certainly compatible with most of the smart devices.
- For extremely perfect audio seeker. 320kbps in sound quality with less time to load.
- For new things chaser. Spotify has been putting on a masterclass in algorithm-based music discovery for years.
- For family with kids. Spotify’s Premium Family plan gives subscribers access to Spotify Kids. There are also additional perks in place for those who sign up for a Premium Student plan. Aside from a 50% discount, students also get access to two popular VOD streaming services, Hulu and SHOWTIME.
Part 4: How to Download YouTube Music without Premium?
CleverGet Video Downloader works as a YouTube video audio downloader that allows you to download audio from YouTube. It is one of the best video downloaders that can download TV shows, live stream videos and music videos from more than 1000 websites, including YouTube, Dailymotion, Facebook, Twitter, Instagram, etc. Besides, it downloads videos ranging from 480p, 720p, 1080p, 4K and even 8K resolution with 320Kbps audio quality. With this excellent app, you can effectively and efficiently download YouTube video audios in playlist or in batch. What's more, it is convenient to use as you can download audio from YouTube by using the direct URL. There are Windows and Mac versions available for different platforms. Follow the steps below, you can easily download audio from YouTube on Windows & Mac.
△Step 1. Download the YouTube Audio Downloader
Click the download link below to get the installation package of CleverGet, and then install it on your computer in seconds.
-
CleverGet Video Downloader
- Download Video & Music from 1000+ Sites
- Download Live Stream Videos from YouTube Live and Others
- Up to 8K UHD Video Downloading with 320 kbps Audio Quality
- Smarter Downloading Settings
- 1-Click to Play Downloaded Videos
- Provide Precise Video Info
△Step 2. Set Output Directory for Saving YouTube Audios
Before you download YouTube video audio, set the output directory if needed. Run CleverGet and click the three-dot icon in the top-right corner of the interface to enter "Settings" panel. Click the folder icon at the right of "Save Video To" option to browse and select a target output folder to save the downloaded YouTube videos and audios. Finally, click the "Save" button.

△Step 3. Open Target YouTube Video
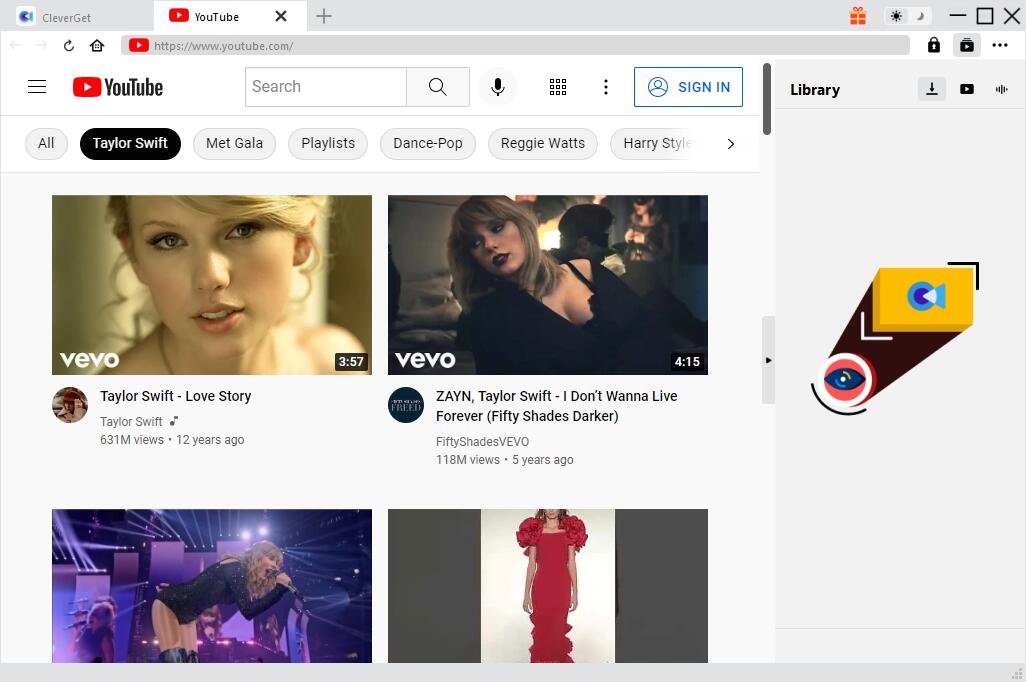
Copy and paste the URL of the target YouTube video into the address bar. Alternatively, you can click the YouTube icon on the main interface to enter the official and search for the video you want to download via the built-in browser.
△Step 4. Download YouTube Video Audio
Once the YouTube video is played, CleverGet will detect downloadable sources automatically and instantly. Then all available sources will be listed in different formats, sizes and resolutions in the pop-up download panel. Select the option(s) you prefer and then click "Download" button to start downloading audio from YouTube.

△Step 5: Manage Downloaded YouTube Video Audios
In the Library sidebar, you can manage the video or audio you are currently downloading, stop or end the downloading task if you want. When the downloading process is complete, the downloaded video audio will be listed under Audio tab. You can double-click the audio to play.

After downloading, you need to make use of the Video Converter to convert downloaded YouTube videos to MP3 audio files or other formats for PowerPoint. Actually, with Leawo Video Converter, you could convert YouTube to Apple TV, make iPhone ringtones from YouTube video, convert YouTube to MP3, etc. It could convert video files between hundreds of video formats like FLV to MKV, MP4 to MKV, MP4 to AVI, AVI to MKV, etc.
Part 5: How to Download DRM-free Spotify Music?
Leawo Prof. DRM is a powerful software that can remove DRM from iTunes videos, iTunes music, Spotify music, e-books, and so on, and convert these files into popular DRM-free files for users to better use. On the one hand, as a professional DRM removal software, in order to eliminate the limitation of only using certain video or music files on specified devices, Leawo Prof. DRM integrates DRM video converter (it is able to convert M4V movies and TV shows protected by iTunes DRM to DRM-free MP4), DRM music converter (it is able to convert M4P protected by iTunes DRM and non-DRM iTunes M4A music files to MP3 files), DRM audiobooks converters (it is able to complete the task of removing DRM from M4B, AA, AJAX file, and converting any can be heard of AA, AJAX files into MP3 without authorized by iTunes), DRM eBook converters (it is able to remove different types of DRM protection of the Kindle, Kobo, Adobe eBook, and convert a file in a particular format, which includes EPUB, MOBI, AZW3, azw, KFX, PRC, HTML, TXT and so on, into a DRM-free format file.) and DRM Spotify converter (similar to delete iTunes DRM, it can mass-delete DRM from Spotify music files and save it to a common format).
-
Leawo Prof. DRM
- Convert iTunes DRM-protected M4V movie and TV show to DRM-Free MP4
- Remove DRM from M4B, AA, AAX files and convert any Audible AA, AAX file to MP3, even without iTunes authorization
- Convert iTunes DRM-Protected M4P and non-DRM iTunes M4A Music to MP3
- Remove DRM-protection on Spotify music and convert to Universal audio format for enjoying music offline on any devices
- Convert DRM-protected eBook from Kindle, Kobo, Adobe to DRM-free epub, mobi, azw3, txt, etc., format
On the other hand, by using today's most advanced digital media processing technology, Leawo Prof. DRM can easily remove DRM of iTunes music files, Spotify music files and e-books in Kindle, Kobo and Adobe, retaining 100% of the original audio, video, and image quality, music ID tags, captions, and so on without any loss.
The following steps will be used to remove the DRM from the DRM-protected M4P music file in iTunes and convert it to MP3 by using Leawo Prof. DRM:
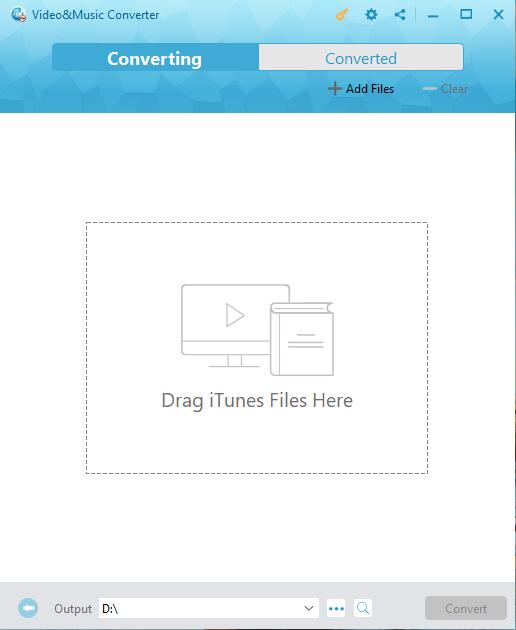
Step 1: To run Leawo Prof. DRM
Download Leawo Prof. DRM and install it on your computer, then boot it up. At this point, you need to authorize the computer by signing in with your Apple ID so that it can play the M4P music files you bought or rented in iTunes. Please do not use iTunes while Leawo Prof. DRM removes the iTunes DRM.
Step 2: To import all the M4P music files from iTunes into Leawo Prof. DRM
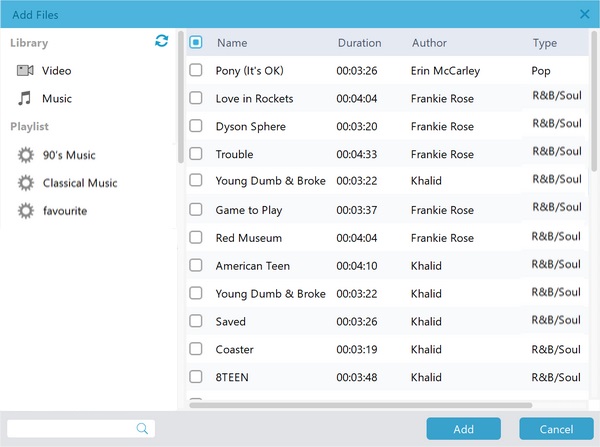
On the home page of Leawo Prof. DRM, you need to click the "Add File" button in the upper right corner or click "Add Files" on the submenu bar. A "Add Files" panel will then pop up that you can use to import one or more M4P music files that you need to remove DRM protection from into Leawo Prof. DRM. Of course, you can also drag and drop the M4P music file directly into Leawo Prof. DRM's interface to complete the import of the M4P music file.
Step 3: To set the channel, sampling rate, and bit rate in Leawo Prof. DRM
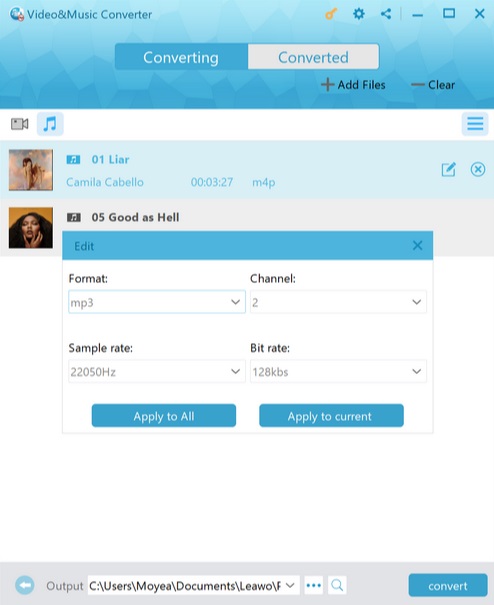
After importing the M4P music files from iTunes, the main page of Leawo Prof. DRM will display information about these M4P music files. You can view each of these M4P music files individually, and by clicking on the “Edit” button, then an “Edit” panel will pop up. You can use this panel to set the channel, sampling rate and bit rate of M4P music files.
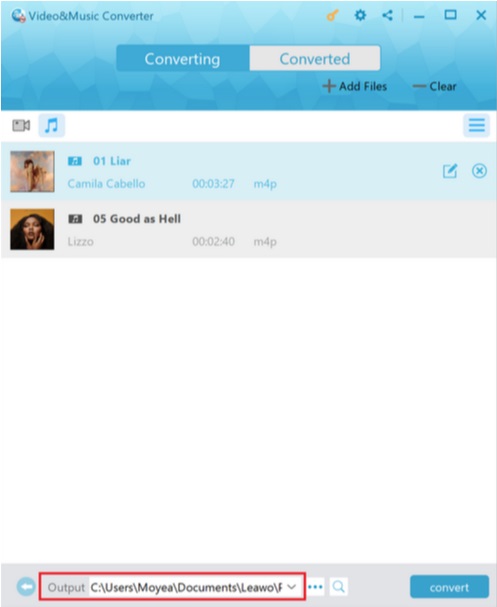
Step 4: Set the location of the output file
After you have edited the channels, sampling rate, and bit rate of the M4P music files, it will return to the main page of Leawo Prof. DRM. At the bottom of the main page of Leawo Prof. DRM, you can click on the "...” button to set the location of the MP3 files that have been converted.
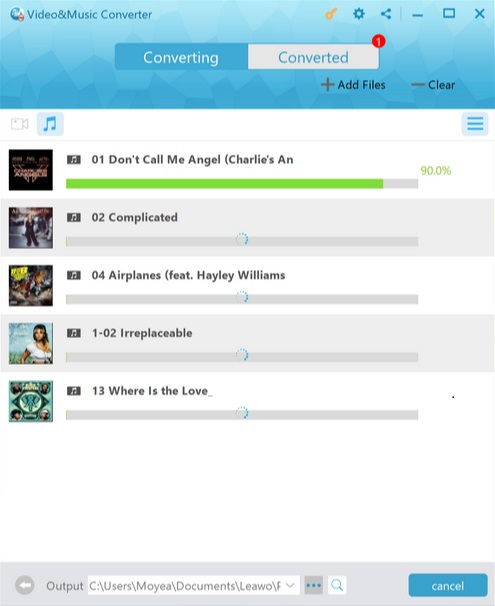
Step 5: Let Leawo Prof. DRM get to work
After you complete the above steps, click the blue "Convert" button in the lower right corner of Leawo's Prof. DRM home screen. Leawo Prof. DRM will then start removing DRM from M4P and converting M4P to MP3 at the same time. After a while, Leawo Prof. DRM will have done all the work. At this point, you can use Spotify to play all the MP3 files you get and enjoy the music.

