There are many iDevice users who are pursuing the latest version of iOS system desperately. When there is a new beta of iOS released in the market, they may be excited to be the first one to try the new beta. However, they do not realize the problems that may occur after they update their iOS system. In some cases, in order to avoid these annoying issues, they may decide to downgrade iOS. Here are some tips on how to get this work done perfectly. You need also pay attention to some issue before you carry out the downgrading process.
Part 1: What You Need to Know Before Downgrading iOS?
Downgrading iOS system is a hard decision and you need to know some information before you conduct the process. Here are some aspects for your reference.
△ 1. Check the verification channel of the older iOS version
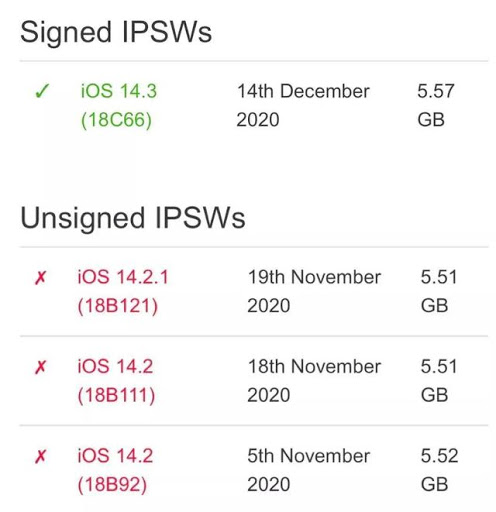
First, you need to know that if Apple has closed the verification channel of the last version of iOS. If yes, you will not be able to downgrade to this version. Therefore, you need to go to the official website of Apple company to know this info clearly before you downgrade iOS to an older version.
△ 2. Avoid data losing of downgrading
Another important thing you need to be clear is that downgrading will erase all data on your iDevice, which calls for a new backup before you downgrade. If you desire to downgrade cross versions like downgrading from iOS 15 to iOS 14, the two backups may not be compatible. Fortunately, if you use Leawo iTransfer to back up and transfer your data, it will be easy for you to recover your original backup. As for how to use this tool to help you, you can navigate to Part 2 in this tutorial to check out.
△ 3. Should You Downgrade iOS?
As for the necessity of downgrading iOS, you are recommended to consider the practical conditions. If you find that your new iOS system often occurs some unpleasant errors, including app breaking, fast battery drain, random restarting, and so on, it is time for you to think about the downgrading method to get rid of these bugs. However, if there is no such errors with your new iOS system, you can just keep using it instead of downgrading it to a lower version, for it may cause data losing in many cases.
Part 2: How to Back Up Before You Downgrade iOS?
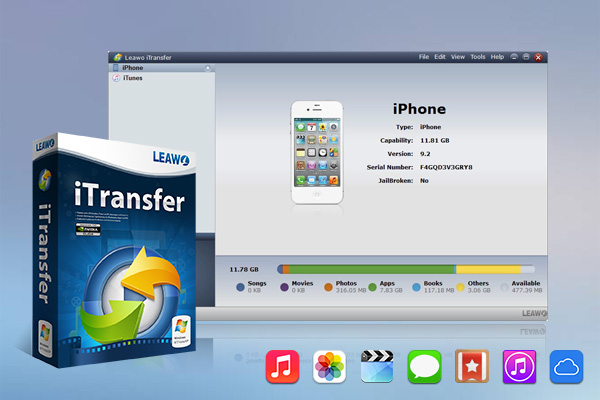
For avoiding data losing before you downgrade iOS, you can make use of Leawo iTransfer to back up your iDevice data accurately. It is safe and reliable, which can assist you to transfer 12 kinds of files among iDevices, iTunes, and computers. This great program is simple to handle, you can give it a go with the detailed steps in the following to help you to back up your files on iDevice with just several clicks. iPhone songs will be taken for example in this part.
Step 1. Download and install Leawo iTransfer
Navigate to the official website of iTransfer to download its installation pack and then install it on your computer in seconds.
-
Leawo iTransfer
- Transfer files among iOS devices, iTunes and PCs with ease.
- 6x faster than iTunes
- Transfer up to 14 kinds of data and files without iTunes.
- Support the latest iOS devices like iPhone 12, iPhone 12 Pro, etc.
- Play back, view, and delete data and files on iOS devices.
- Support Windows & Mac OS
Step 2. Connect iPhone to the computer and start the program
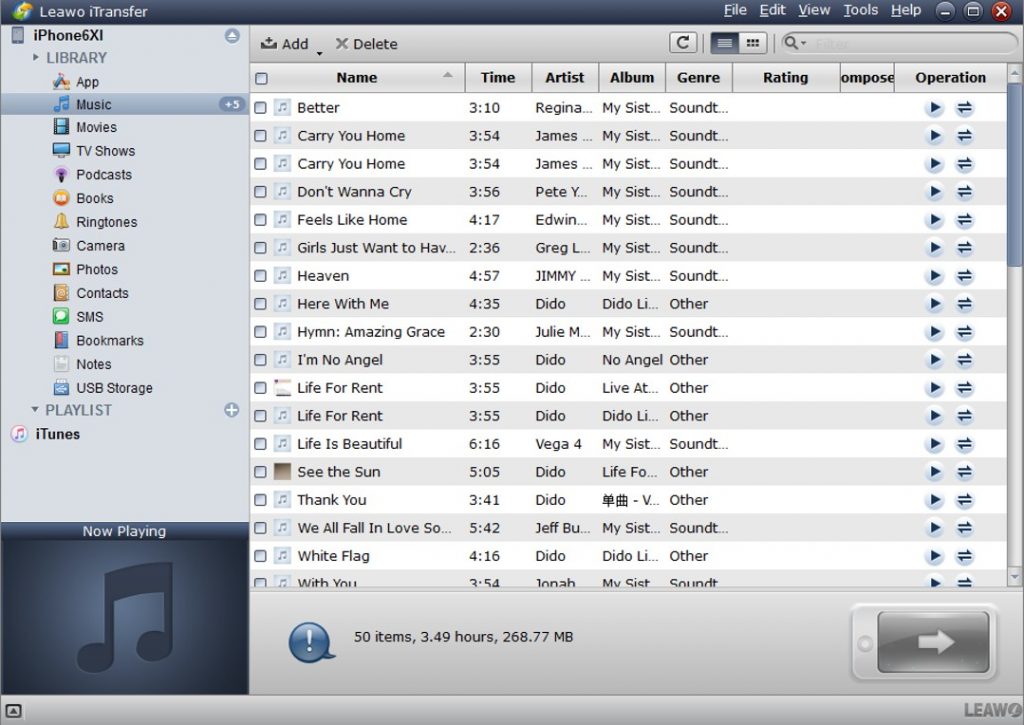
Find a proper USB cable to connect your iPhone to computer and then fire up the software. It can recognize your iPhone device automatically. All your iPhone info will be shown in the main interface for you to check out. Hit on the iPhone name and you will be able to check all libraries. You can select one iPhone library you desire to back up.
Step 3. Select target files to back up
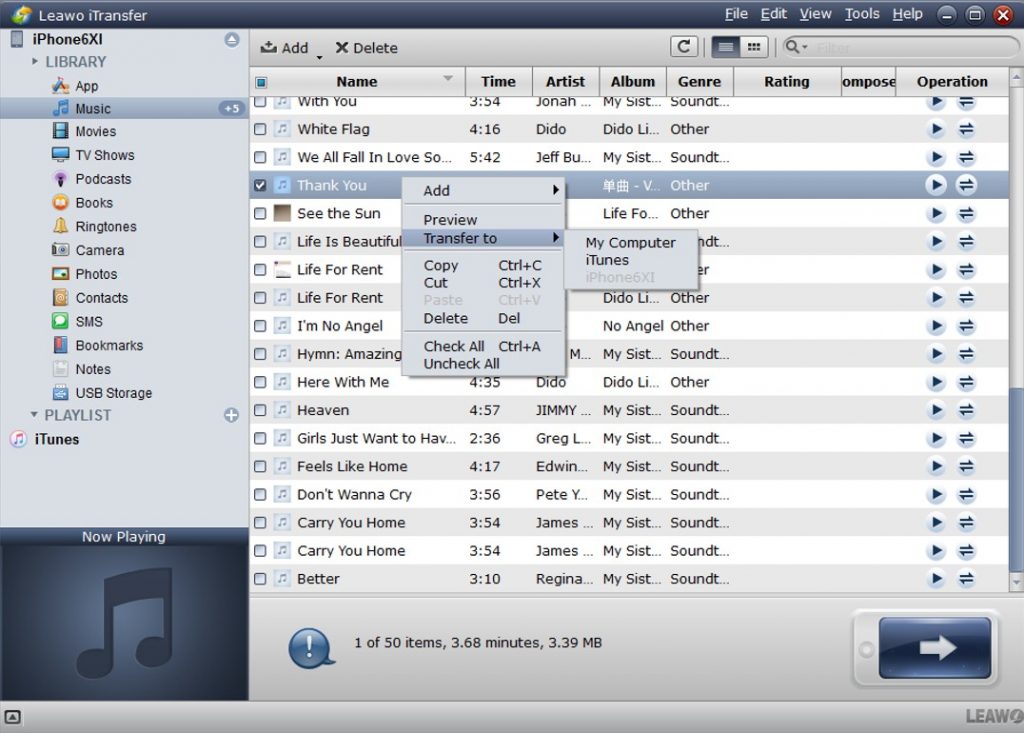
For instance, you can hit on “LIBRARY> Music” to check out all your iPhone songs. In the right part of the software window, you can choose the files you to desire to back up and hit the transfer button at the bottom right corner or right-click on the selected files to choose “Transfer to” > “My Computer” to continue.
Step 4. Set export directory
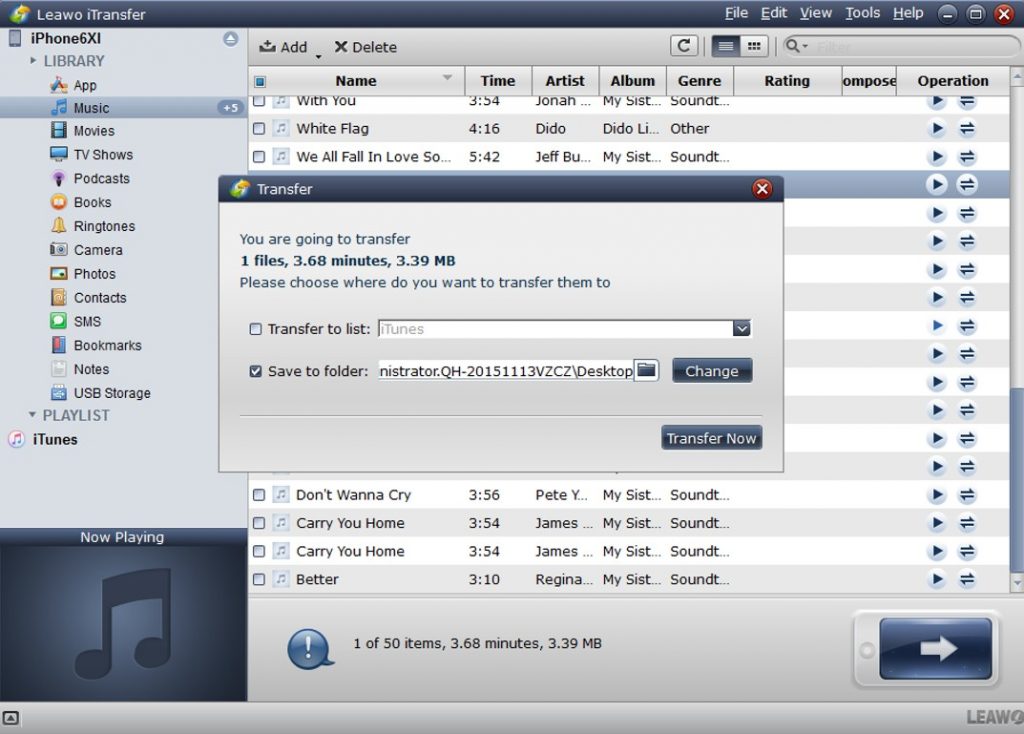
A settings panel will show up, here you can check “Save to Folder” and then hit “Change” to choose a proper directory to save the exported files. In the end, you can hit on “Transfer Now” to begin to back up iPhone files to your computer local folder. The process will be quite quick, and you just need to wait for several seconds to check your iPhone songs on your computer at ease.
You can continue to use the steps shown above to back up other types of data to your computer before you downgrade iOS. It is quite efficient and professional for you to make use of.
Part 3: How to Downgrade iOS with iTunes?
As for how to downgrade iOS, you can resort to iTunes to help you to make it. It is totally free and always comes in handy when you have any iOS issues.
Step 1. Prepare the iOS version you desire to downgrade to
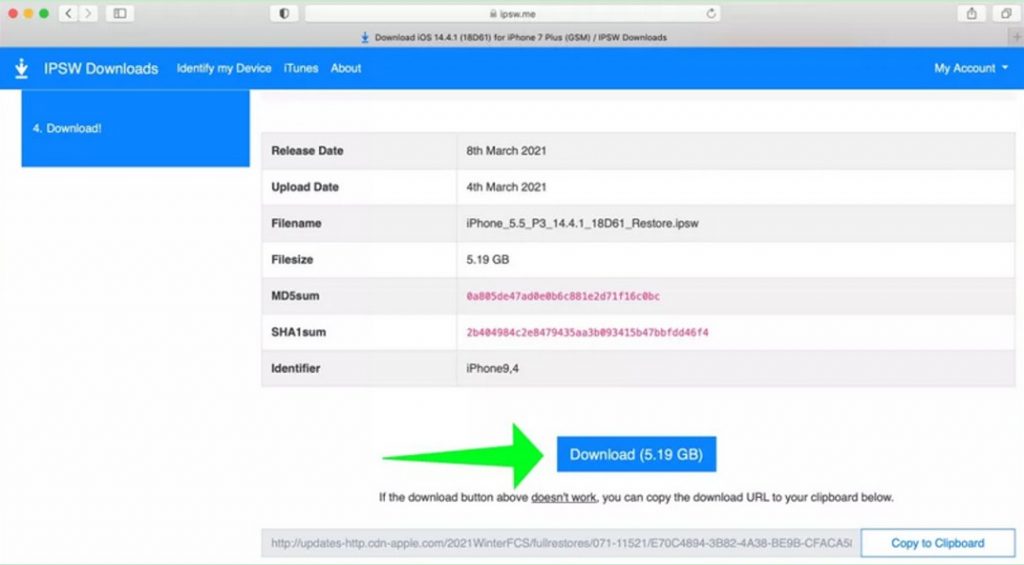
Go to the ipsw.me website and then choose the iDevice model you would like to downgrade. After that, you need to choose the iOS version you desire to download for preparation. You can use iTunes to downgrade to the “Signed IPSWs”. As for the older unsigned version, you need to jailbreak your iDevice to restore with other tools. Hit on the “Download” button to save the IPSWs to your computer local folder.
Step 2. Put your iDevice to recovery mode
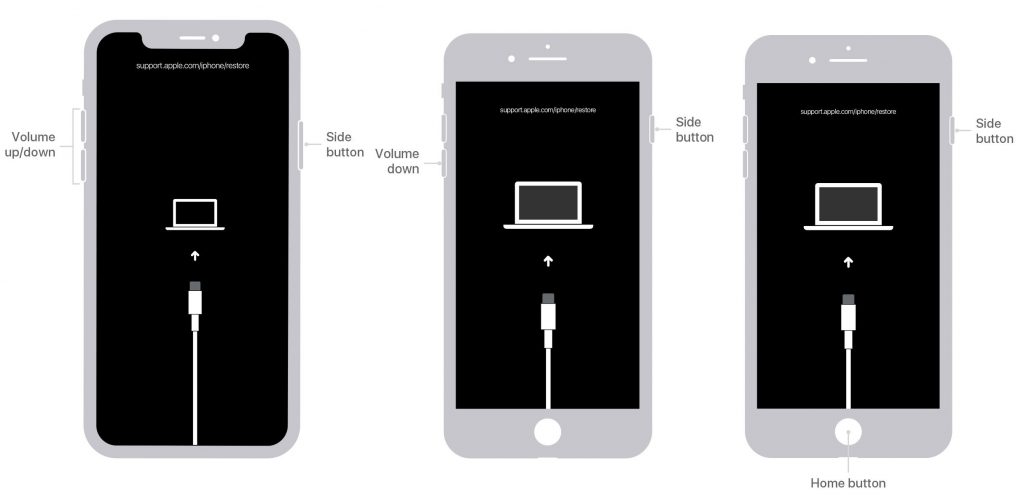
Once you have downloaded the version you desire to downgrade to, you can click here to learn several ways to put your iDevices into recovery mode. You need to know the methods can vary due to the differences of iDevice models.
Step 3. Use iTunes to downgrade
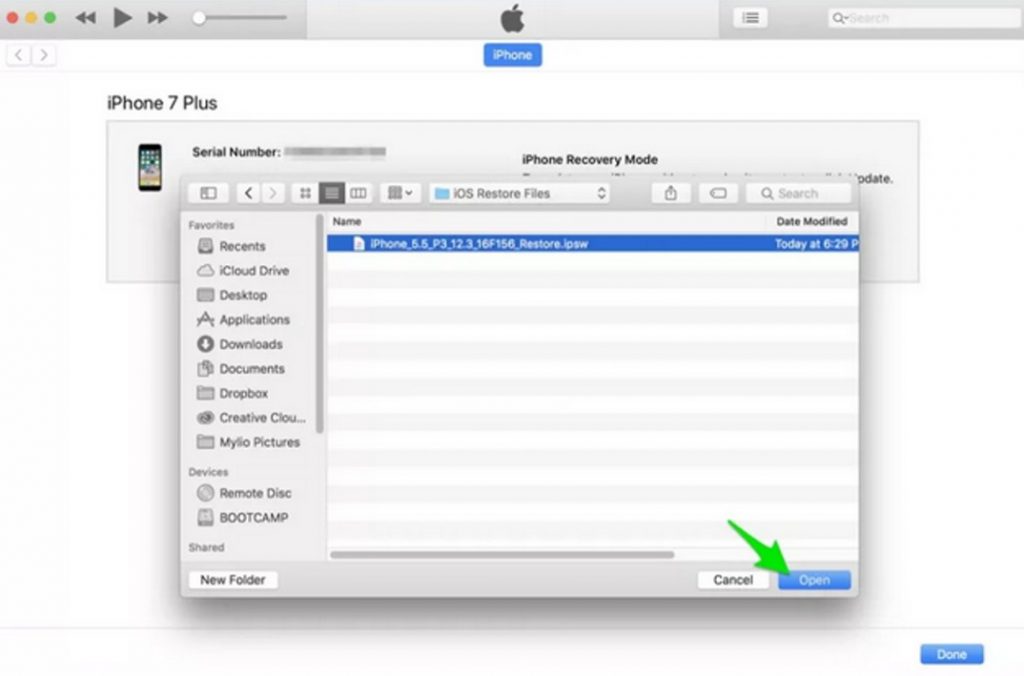
Hold down Shift (PC) or Option (Mac) and hit on the “Restore” button on the pop-up panel. Then you need to browse your computer to find the IPSW file you have downloaded for preparation to choose it and hit on “Open” button to continue. Finally, you can hit on the “Restore” button to begin to downgrade your iDevice.
Part 4: How to Downgrade iOS in One-Click Without iTunes
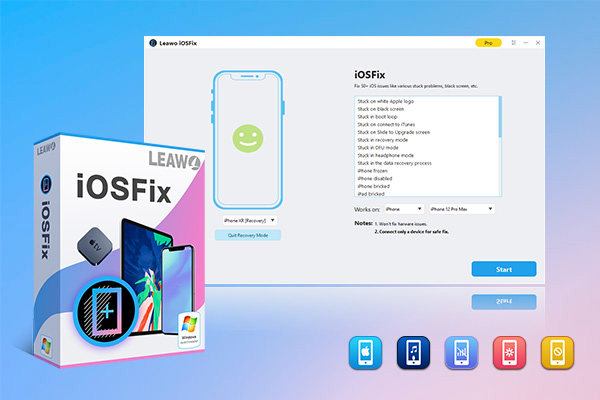
If you find iTunes fails to help you to downgrade properly, you can take advantage of Leawo iOSFix to reach your aim. This tool is able to downgrade iOS from beta to previous version, and fix over 50 types of iOS/tvOS errors, such as stuck in boot loop, stuck in recovery mode, stuck on verifying update screen and so forth. This tool is quite popular among users, for its friendly interface and easy-to-use features. It can also be used to quit recovery mode of iDevice with just one click. Read the following steps and you can figure out how to downgrade iOS without little effort.
Step 1: Download and install Leawo iOSFix
Go to the official webpage of Leawo iOSFix and then download its installation package to your computer. Install it for fixing how to downgrade iOS.
-
Leawo iOSFix
- Fix 50+ iOS/tvOS issues on iPhone, iPad, iPod or Apple TV
- 2 repair modes for data lossless fixing
- Fix all iOS and tvOS versions in clicks
- Multiple iOS/tvOS system fixing pathse
- One-click to upgrade to the latest iOS/tvOS version
- One-click to enter/exit Recovery Mode
- Troubleshoot iOS/tvOS not recognized issues in detail
Step 2: Connect iPhone to computer
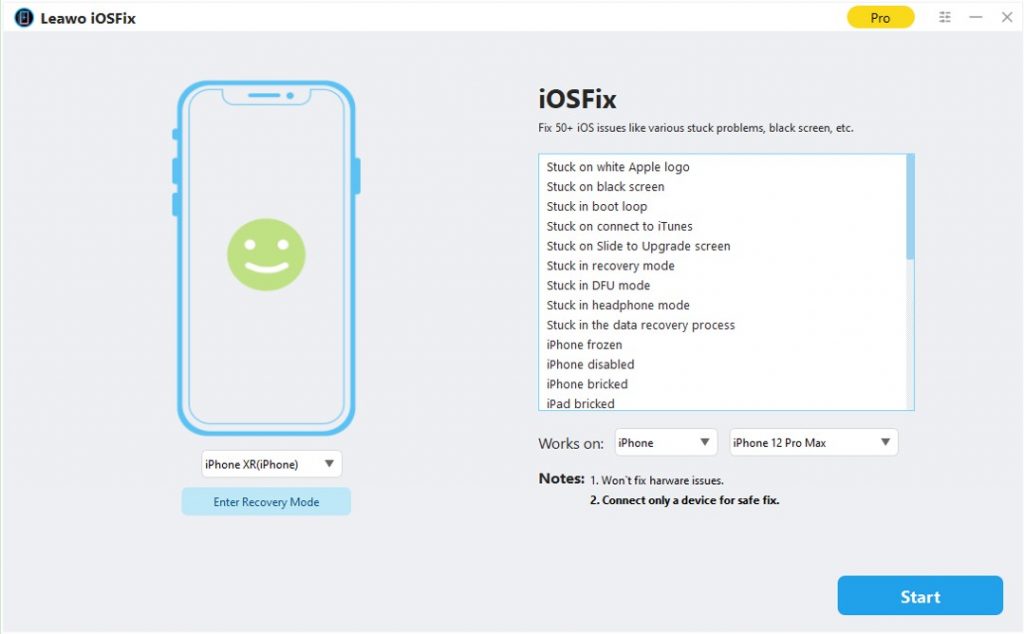
Use a proper USB cable to connect iPhone with computer. Run the Leawo iOSFix program and then the tool will detect your iPhone intelligently. Your iPhone info will be shown in detain in the main screen of the software.
Step 3: Choose a mode to fix how to downgrade iOS
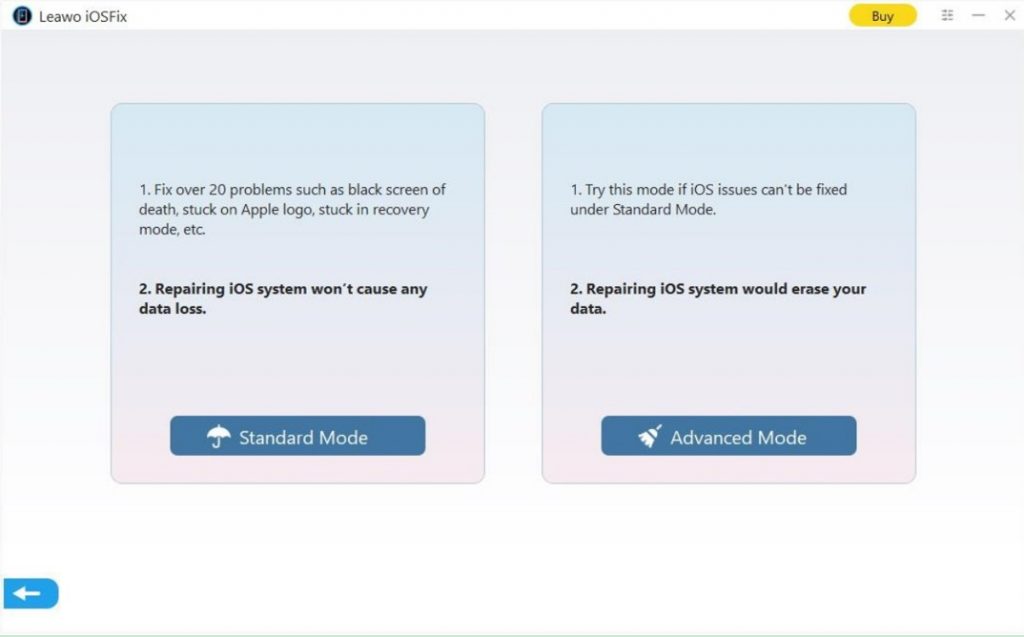
You are recommended to select the Standard Mode first, for this mode will not erase any data on your device. The Advanced Mode will erase all your iDevice data, which calls for backing up before using this mode. You can turn to Leawo iTransfer for help whenever you need to back up your iDevice data, for it’s the most professional data transfer tool I have ever used.
Step 4: Download firmware
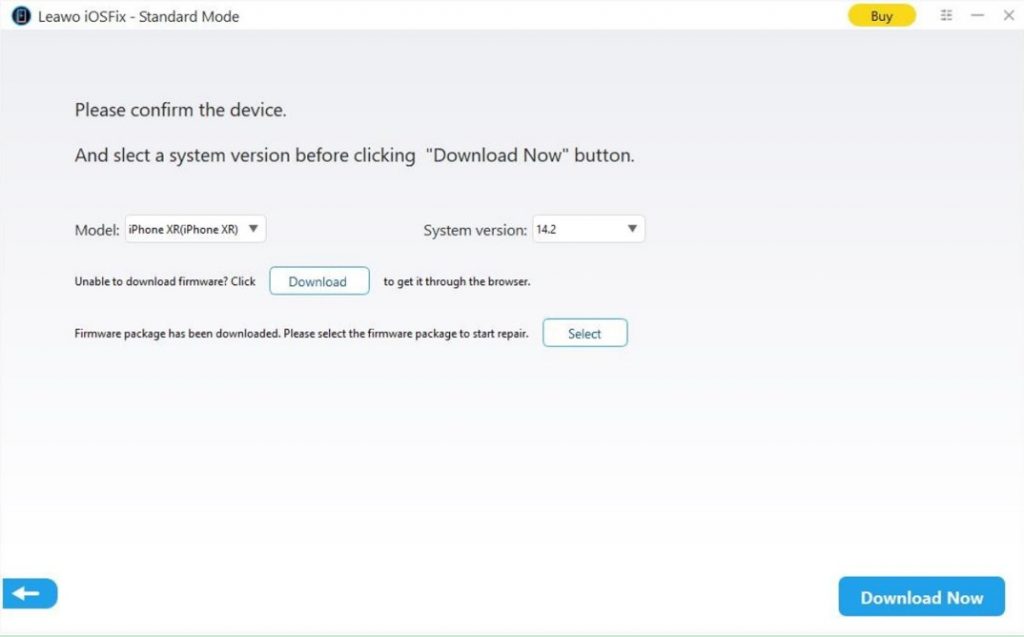
After you verify your device info, you need to hit on the “Select” option to choose an older version for installation. Be sure to download the older version to your computer local folder in advance. As for how to get this work done, refer to the Step 1 in Part 3 to help you.
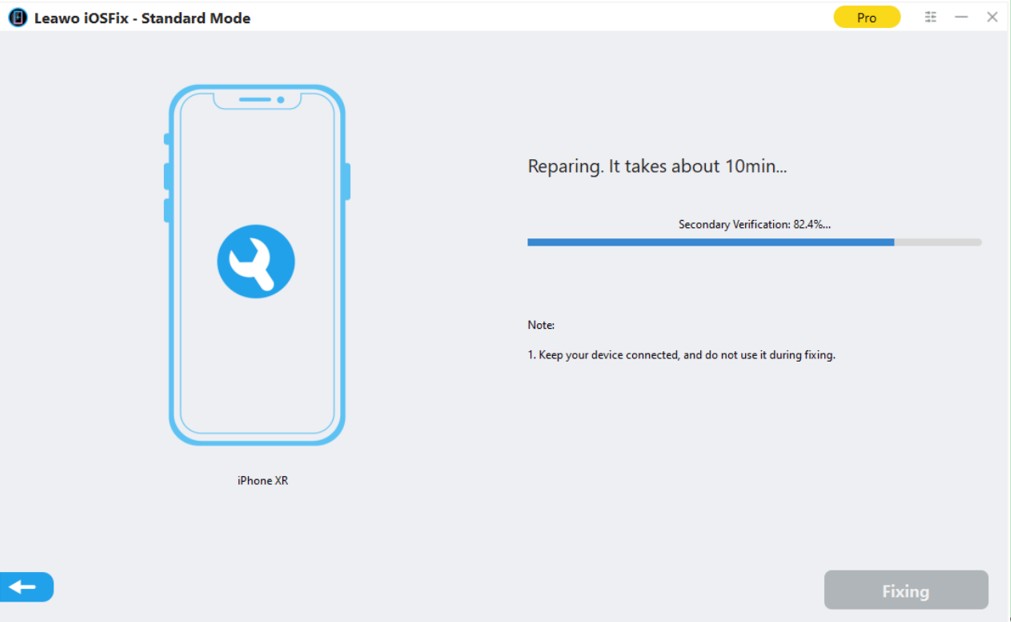
Step 5: Begin to fix how to downgrade iOS
Hit on the button of “Fix Now” to begin to fix how to downgrade iOS quickly.
After a while, you will be able to use your iPhone with the previous version smoothly. Thus, your iDevice system will be stable and the errors will be gotten rid of effectively. If you’ve got other iOS errors, you can also use Leawo iOSFix to assist you to get out of the trouble with just a few clicks. However, if the two modes of the software can not help you out of trouble, it is time for you to contact Apple for assistance.

