Chromebook is a new type of online computing thin client based on Google Chrome OS. The hard drive capacity of Chromebook is relatively small, but cloud storing can overcome the problem of limited hard drive space in conventional computer devices. All of your operations are supposed to be done with web-based APPs or surf the Internet through Chrome browser, with all related source materials stored in the cloud. Chromebook does not have any Windows or Mac applications. It even doesn't have an internal DVD drive due to relatively smaller hard drive capacity, which means you cannot directly watch DVD on Chromebook.
To play DVD on Chromebook, you need to rip DVD to Chromebook first. However, you need to know that currently there is no DVD ripper tools that could directly run on Chromebook. You have to turn to some DVD to Chromebook converters that run on elsewhere like Windows or Mac computer. Then, you have to transfer the converted DVD movies to Chromebook devices for playback. There are many DVD to Chromebook converters available in the market for Windows and Mac platforms, and we would like to introduce several solutions to watch DVD on Chromebook.
Part 1: Convert DVD Movies with Handbrake
Handbrake has been around for over ten years and remains one of the best DVD to Chromebook converter out there for transcoding video files from one format to another. Handbrake is open source and completely free of any attached strings or shady offers; you only get what you download, nothing else. Here are steps of how to use this application.
Step 1. Download and Install Handbrake
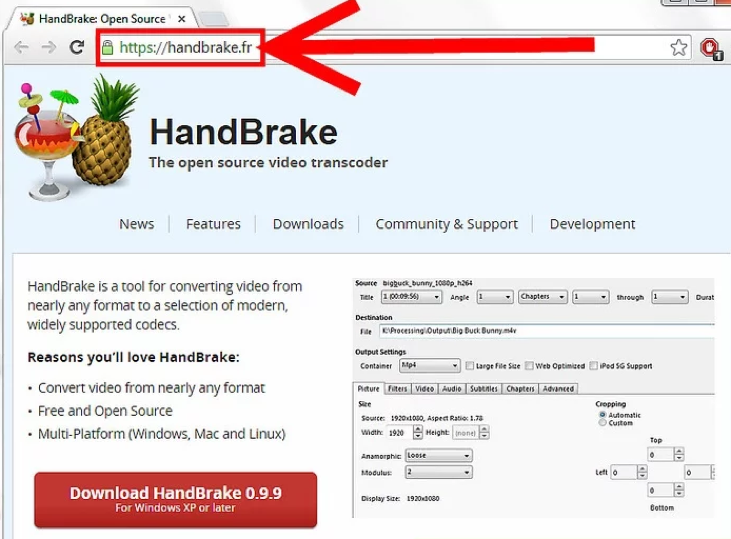
First, you need to download Handbrake and install it on your computer. Once downloaded, you'll be asked to install the program. Follow the directions on your screen and you'll be fine.
Step 2. Import DVD File
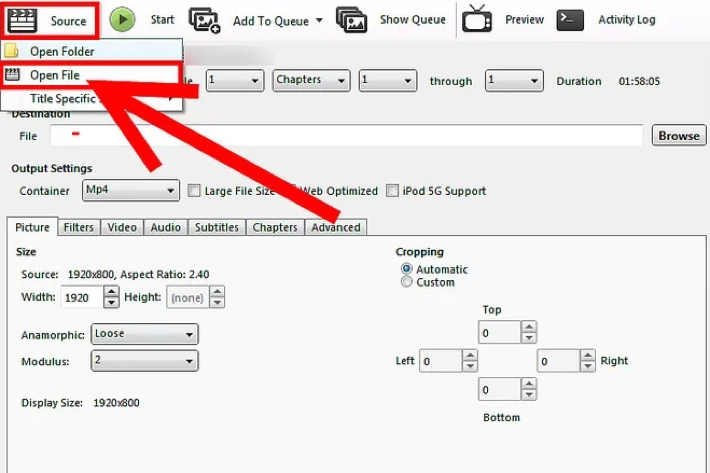
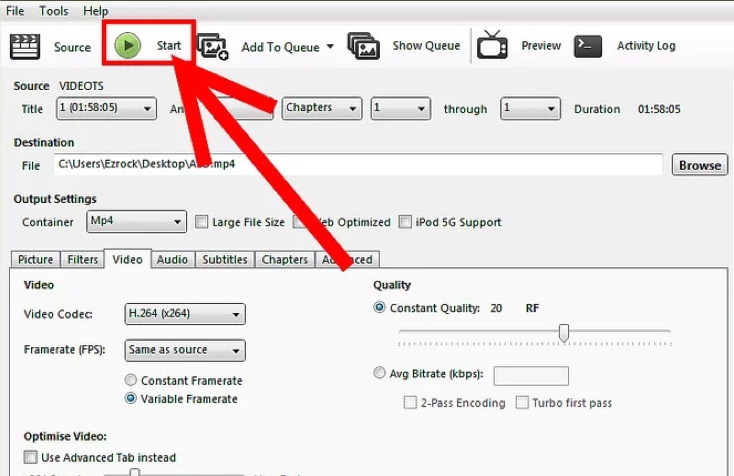
Open Handbrake and click on the "Source" button at the top left. Select DVD from the drop down list. Then browse for the location where your DVD is located. Select the DVD or the folder, and click "OK".
Step 3. Change the Destination Settings
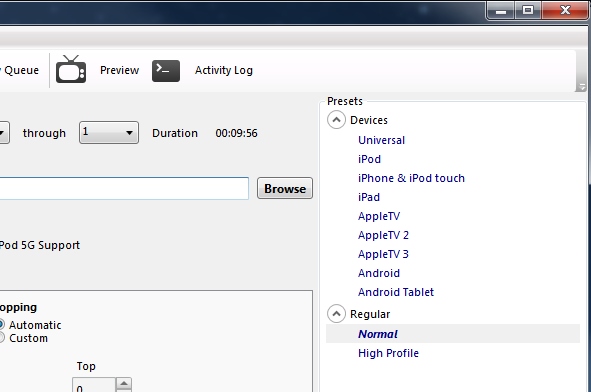
Once you've chosen the source, the software will automatically ask you to select the destination. The way your picture and sound quality will turn out in the resulting file depends on the settings you choose in this step. We click "Browse" for our file Destination, choose a location for our new file, as well as give it a fitting name. We’ll go ahead and save the file in the same location as our source and click "Save".
Step 4. Output settings
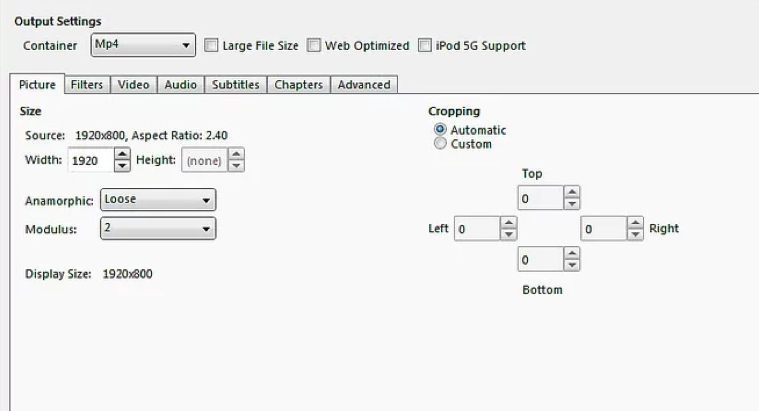
Go to the Output Settings and choose MP4 as the output format.
Step 5. Click Start
Once you've chosen the source and destination settings, you're pretty much set to go. Just click on the Start Encode button and the program will do the conversion for you.
Handbrake is easy to use, risk free, and we are able to achieve very desirable results, simply using the default settings.
Part 2: Convert DVD Movies with Leawo DVD Ripper
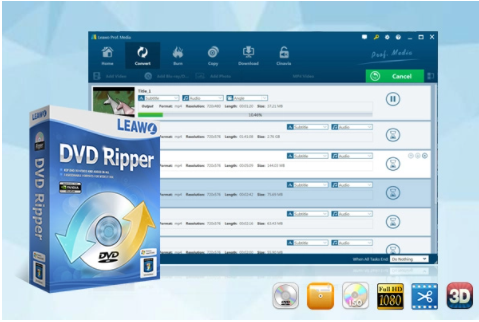
Leawo DVD Ripper, is a type of DVD to Chromebook converter that can help you achieve the wanted result. Here is a guidance of how to use it to enable your Chromebook to play DVD.
Before we start, we need to download and install Leawo DVD Ripper on our computer.
-
Leawo DVD Ripper
☉ Decrypt and rip DVD discs with disc protection and region code
☉ Convert DVD to MP4, MKV, AVI, MOV, FLV, and other 180+ HD/SD formats
☉ Convert DVD main movie to videos for space saving
☉ Convert 2D DVD movies to 3D movies with 6 different 3D effects
☉ Fast conversion with NVIDIA CUDA, AMD APP and Intel Quick Sync acceleration technologies
Step 1. Import Source DVD Files
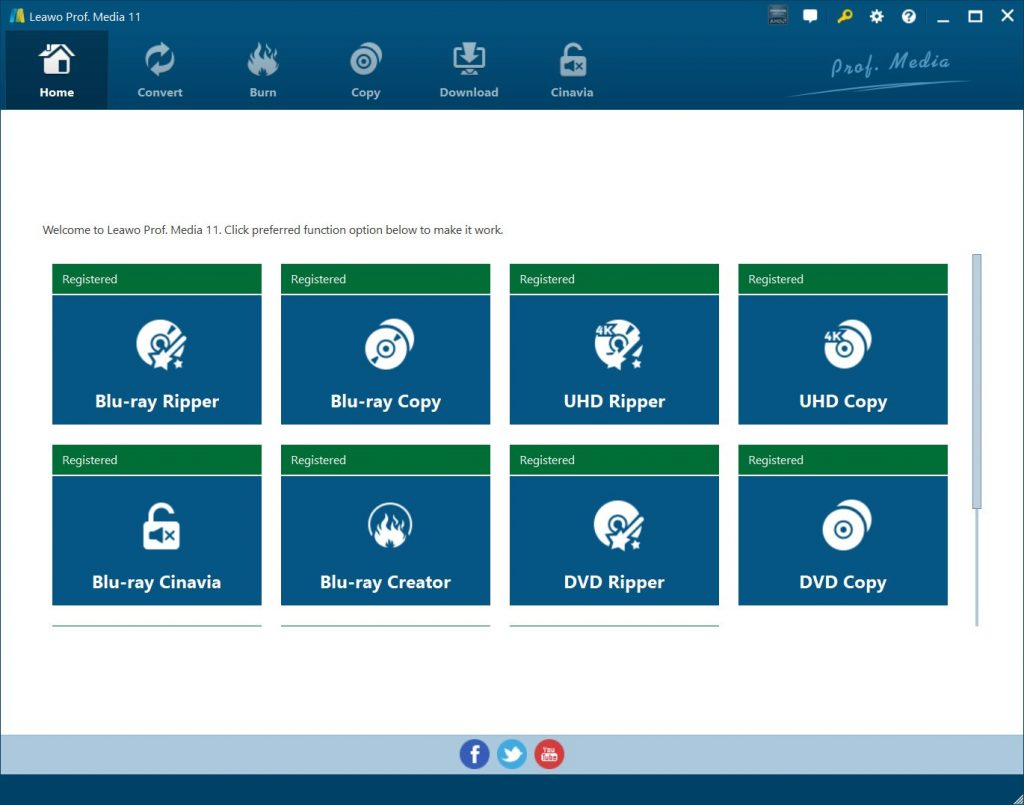
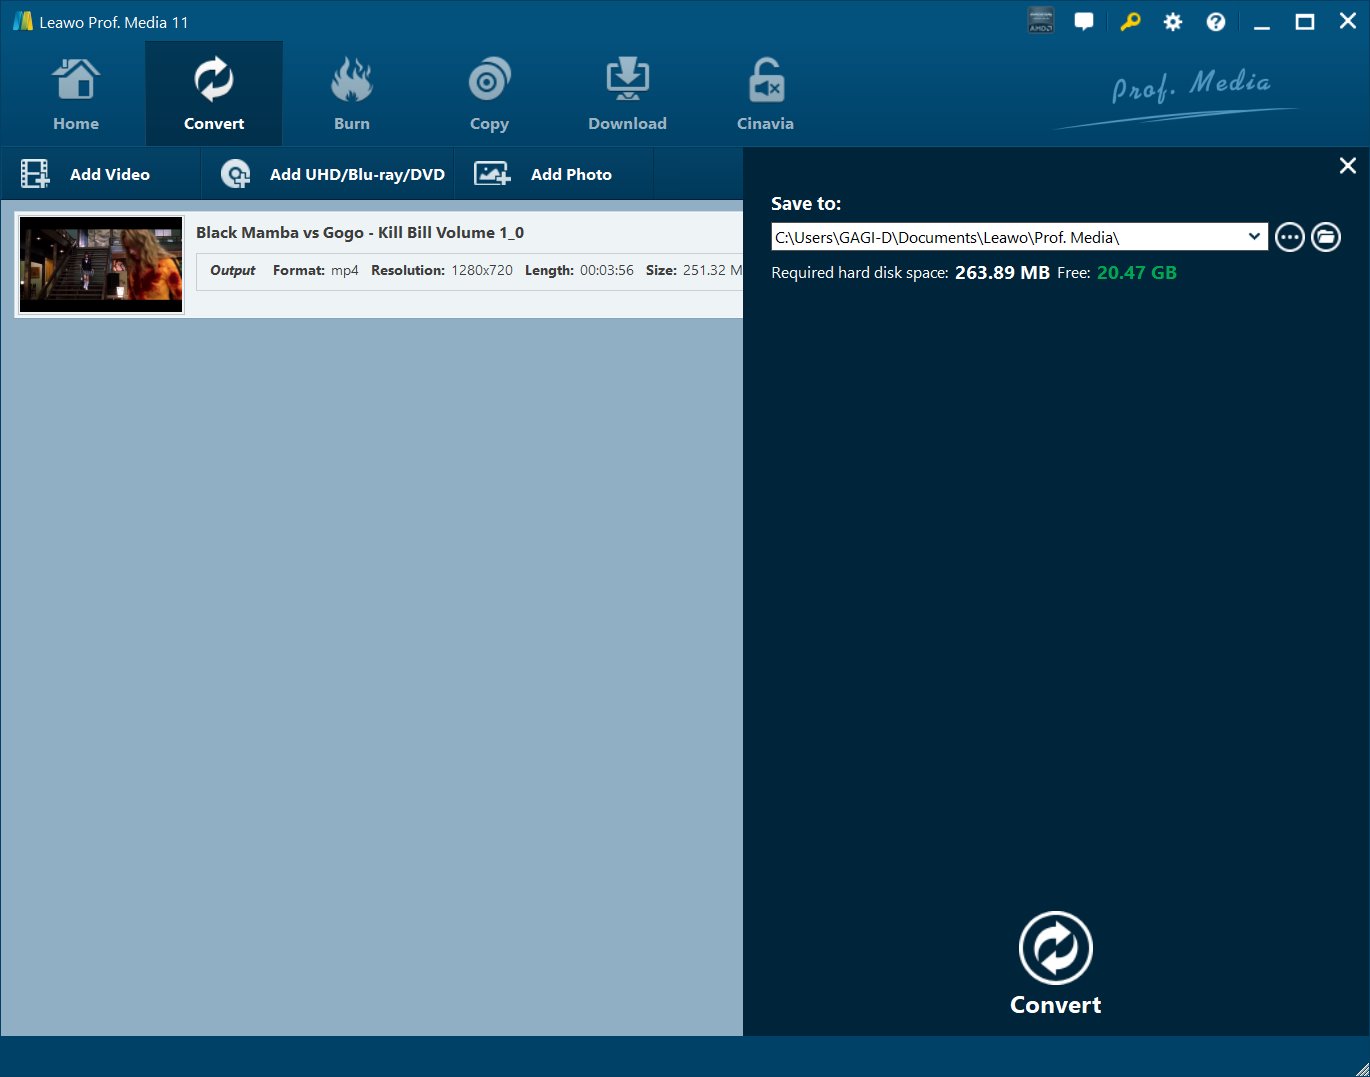
On the main program interface, click "Convert" module to enter the converting page where you need to click "Add UHD/Blu-ray/DVD" button to import source DVD files. After this step is done, you can choose subtitles and audio tracks, play back imported media files, adjust order, edit videos, etc.
Step 2. Choose Output Profile
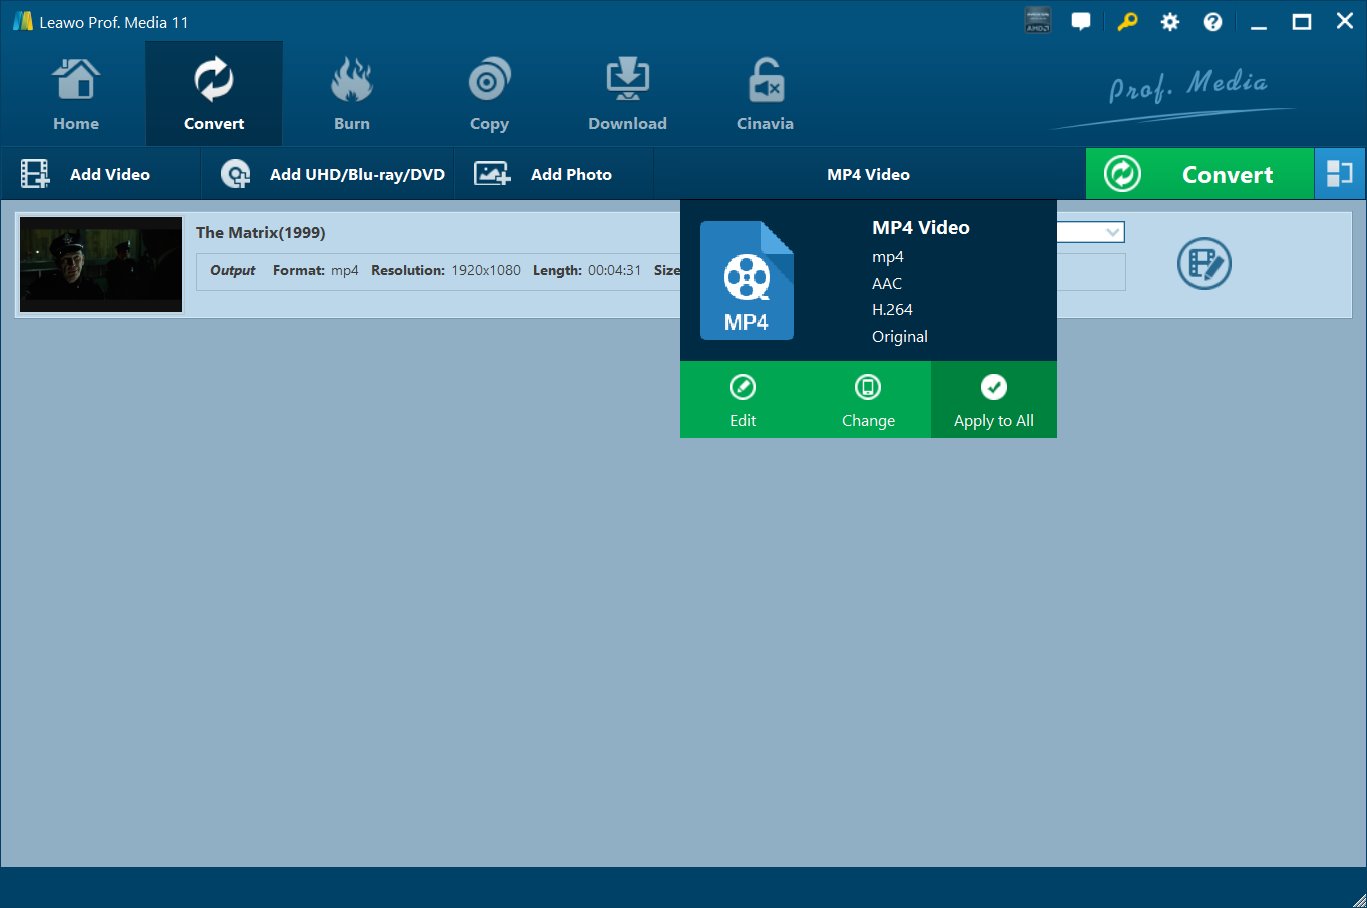
You need to click the box next to the "Add Photo" button, and then choose "Change" to enter the "Profile" panel for selecting a profile as output format. You can add profiles to Favorite section, Custom profiles, select profiles from Format or Device tab on the Profile setting panel.
Step 3. Edit Detailed Parameters
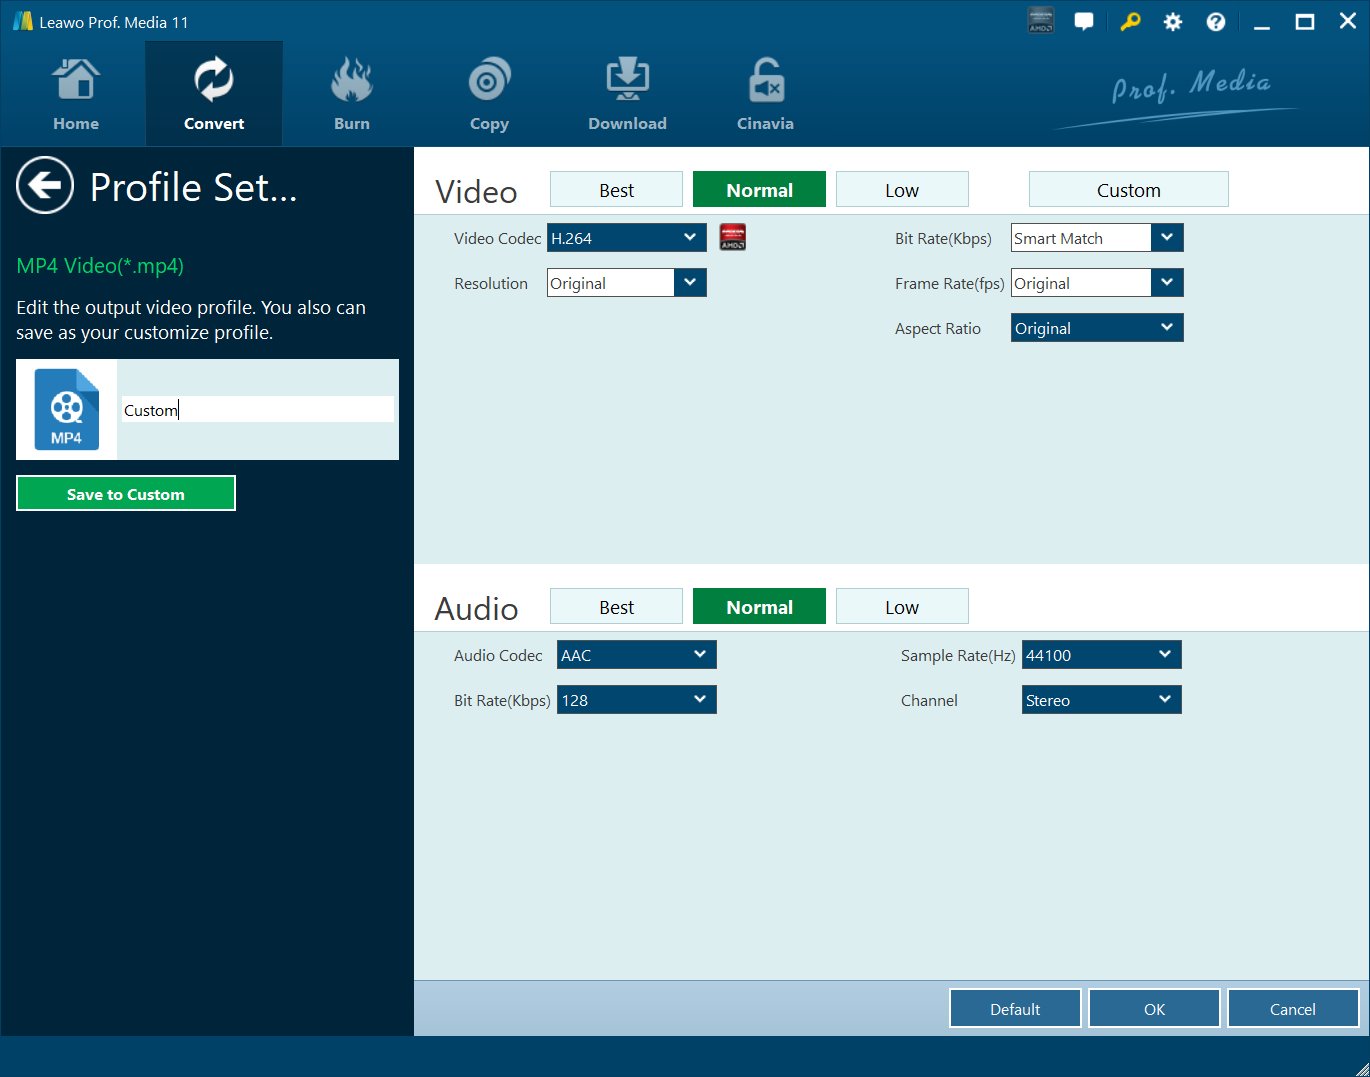
You can click the edit icon on the drop down box or the small edit icon on the Profile panel to edit the video and audio parameters of selected profiles. You can reset Video Codec, Quality, Bit Rate, Frame Rate, Aspect ratio, Audio Codec, Audio Quality, Sample rate, Channels, Resolution (choose from provided options, or manually input the resolution you desire into the box according to your devices or players), etc.
Step 4. Set Output Directory
Click the big green "Convert" button. Then a sidebar for you to set the output directory to save the output files will appear. You can choose where you want to save your movie.
Step 5. Start Converting
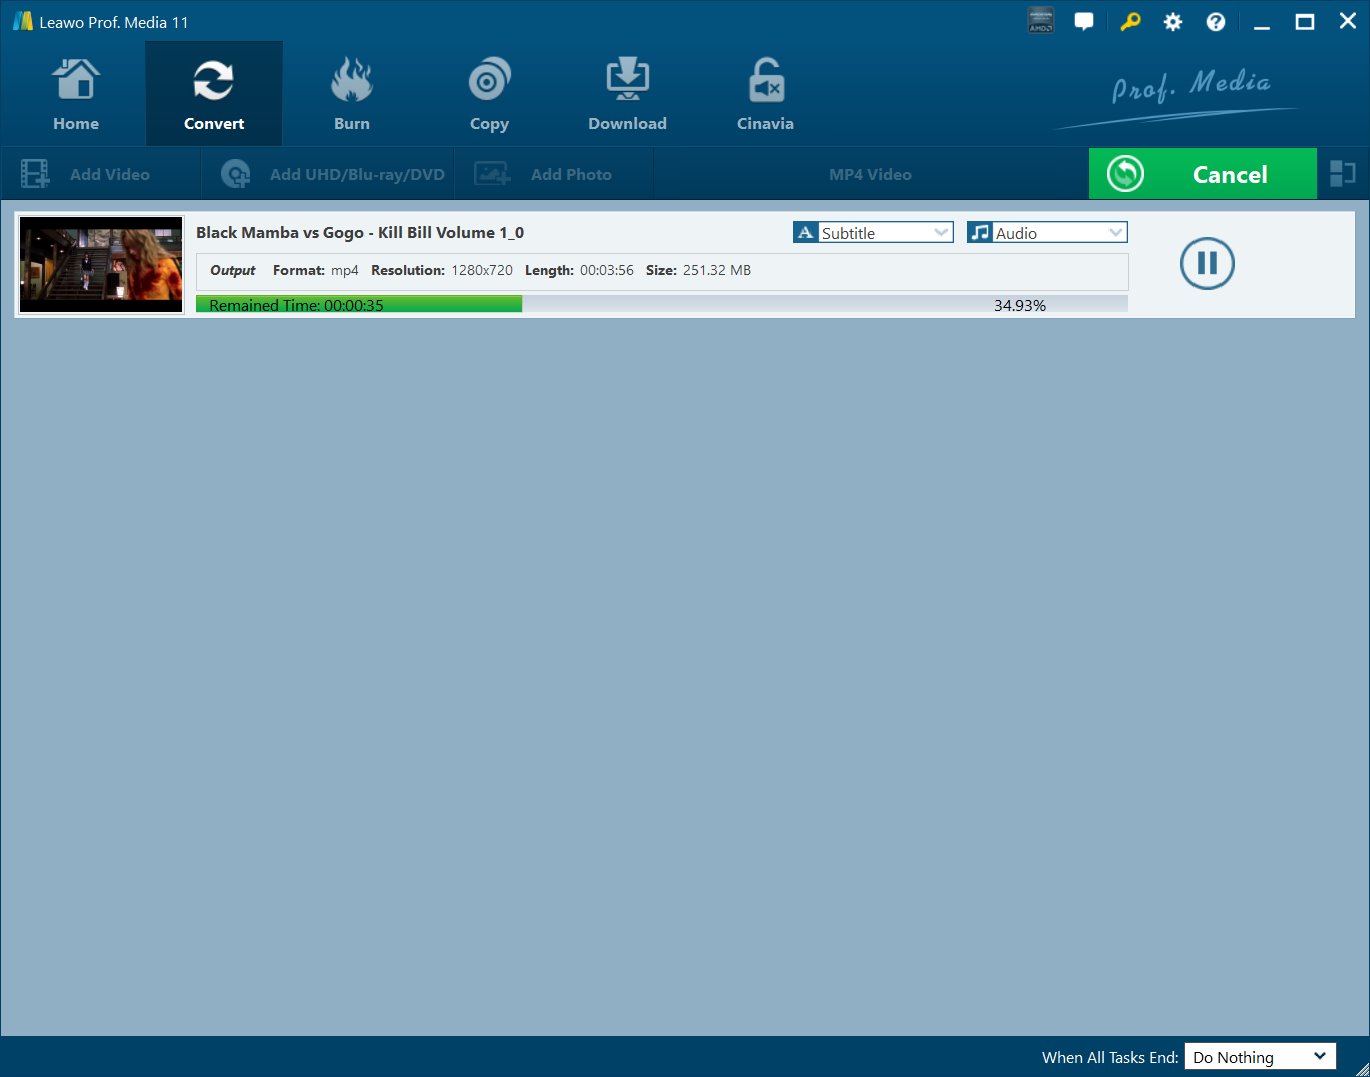
Click the "Convert" button at the bottom of the output directory setting sidebar to start converting DVD files. You will see that all converting progress on the converting panel are presented.
Part 3: Rip DVD to Chromebook using VLC
One of the world’s most popular media players, VLC Media Player can also help you to rip your DVDs, which could be surprising considering that this feature is a little hidden. You can stream directly from the internet with the Network Stream feature, you can add logos to your content, you can control it remotely, you can record live TV, and you can even play in ASCII mode. Therefore, to begin ripping your DVDs if you want to play DVD on Chromebook, follow the steps below;
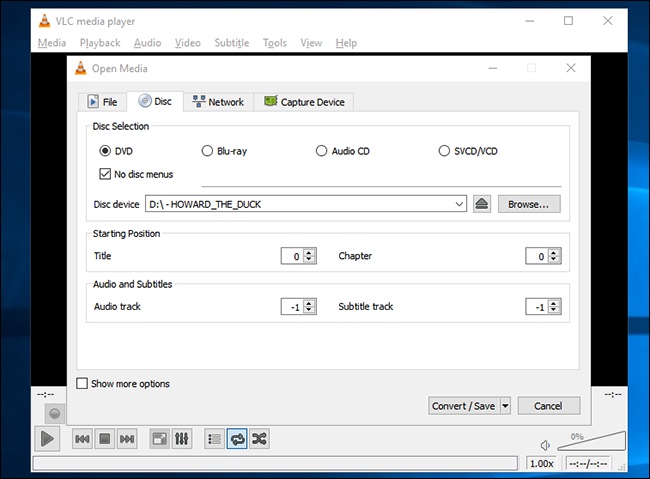
Step 1: Load the DVD you want to rip and launch VLC Media Player. Then, under Media, click on Convert/Save.
Step 2: The Open Media window will appear and you want to click on the the Disc tab, check the DVD box, and make sure that the “Disc Device” field points to your DVD drive.
Step 3: Begin the ripping. Click the Convert/Save button to ripping your DVD.
Part 4: Play DVD on Chromebook directly using external DVD drive
Because of their slim profiles and designs, Google Chromebooks have no built-in CD drives. Fortunately, there are many external CD drives you could try on your Chromebook. If you want to checkout the best external DVD drives for Chromebooks, kindly visit this link. If you have invested in an external DVD drive for Chromebook, we will first show you how to connect an external DVD drive for Chromebook. Afterwards, we will recommend a software for you to use to play the DVDs. Before you, you still need to remember these three points;
Any Chromebook external CD drive can only do the following;
- 1. Read discs, but strictly for accepted file types.
- 2. Play music, but only from accepted audio file types like MP3, AAC, etc.
- 3. Play movies and videos, but only from accepted video file types like MP4 etc.
- 4. Cannot burn any files or data to CD or DVD discs.
Therefore, to connect and use an external DVD drive for Chromebook, follow the steps below;
Step 1: Connect the external optical drive to your Chromebook, by plugging it in via USB.
Step 2: Access your CD files, in the same way you would access all your other local files. You do that by clicking the Launcher and then selecting ‘Files’.
What software can I use to play DVD on Chromebook?
The answer is quite simply VLC Media Player. On the preceding segment of this article, we mentioned that you can use VLC Media Player for macOS or Windows to rip DVD movies, which you can later transfer to your Chromebook. If you have snagged an external DVD drive for Chromebook, you can download the ChromeOS version of VLC Media Player, which is available for any Chromebook. It can play most video and audio files, network streams as well DVD ISOs, like the desktop version of VLC. You can download it directly from the developer website, or from the Play Store.

