
Q: “I am interested in video shooting very much. In order to make the video more fascinating, sometimes I need to cut parts of the video out and editing the video. But there are always some bugs and I cannot work the problems out. Are there any programs simple to use and powerful for video editing? Looking forward to your advice.”
Actually, either individual enthusiasts for interest or any enterprises and public institution for publicity or propaganda, a stunning video plays an important role in enriching the daily life and product promotion or culture dissemination. And you can share your video on Instagram stories, Facebook ads, or YouTube product testimonials as well. It is inevitable to create amazing videos and definitely to cut or edit it on many occasions. To make it, Avidemux would be one of the most popular ways which is free and powerful graphic tool that contains a lot of powerful features. Besides, there are also a large collection of programs that work efficiently on cutting or editing a video.
Part 1: What is Avidemux?
Avidemux is an open source video converter as well as a video editor which can convert videos between a bunch of different formats and it also comes with some useful video editing features that Avidemux calls Filters. Download and install Avidemux on your PC and follow my guide to be an expert on how to cut a video with Avidemux.

How to use Avidemux to cut video
When using Avidemux for the first time, you might be shocked by its interface because it might look a bit old-fashion in certain users' eyes and it is and it might take you a little time to get used to it. The whole video cutting process can be done directly on the main interface as it's fairly easy to cut video with Avidemux. It's got a lot of different buttons on the interface, as long as you can find the right button for the job, you are golden. Here's how to cut video with Avidemux.
1. Start Avidemux and then import the video you want to cut to Avidemux. There should be an Open File button on the top row of button below the menu bar (could be some other buttons depending on the settings). Click on it and select the needed video from the pop-up window. Or click File>Open, this way you can also import the video you need.

2. Select a video codec for the video you are cutting first so that the adjustments you make to the video can be effective.

3. In the bottom left-hand area there's a row of buttons and there are two buttons we need in them. And there's a progress bar below the preview window of the video. To cut a video you need to decide which point of the video to start and which point to stop. After deciding the start point and the end point of the video, you can locate them in the progress bar below the video preview window that I just mentioned.
First locate the start point on the progress bar and then click on the A button on the bottom row of buttons.

Next, make sure the end point is right and then click the B button.

Now you have cut the video successfully. To finish the cutting process, just click File>Save and choose where to save the output file in. Other than cutting a video, you can also use Avidemux to crop a video.
Part 2: Alternatives to Avidemux to cut video
Avidemux is a quite useful free program that works well on cutting or editing a video. However, sometimes there also might some bugs or not working problems. Under such occasion, you'd better get some other alternatives to Avidemux and get ready to any circumstances. Generally, there are indeed many alternatives for you to cut videos as you like. And here list 4 of them for reference.
1. Cut Video with Leawo Video Converter
The first alternative, also the most powerful one, is to try Leawo Video Converter to cut video. It's got a relatively more beautiful and intuitive interface than Avidemux and it's also very easy to use to cut and merge audio files and video files. And like Avidemux, you can also use it to convert video if you need because, after all, it's a video converter.
![]()
![]()
To give you a clue as to how this video editor inside Leawo Video Converter works, here's how to cut video with this Avidemux alternative.
The reason why you can use Leawo Video Converter to cut your video and audio is that it's got a built-in video editor that allows you to cut, trim videos, add watermark and change video effects like brightness, saturation and contrast. It cannot only cut videos but also resize video for instagram, YouTube and other platforms. The biggest surprise you will find from it might be its ability to add 3D effects on ordinary 2D videos. So if you need, you can do a lot of things other than cutting a video with it.
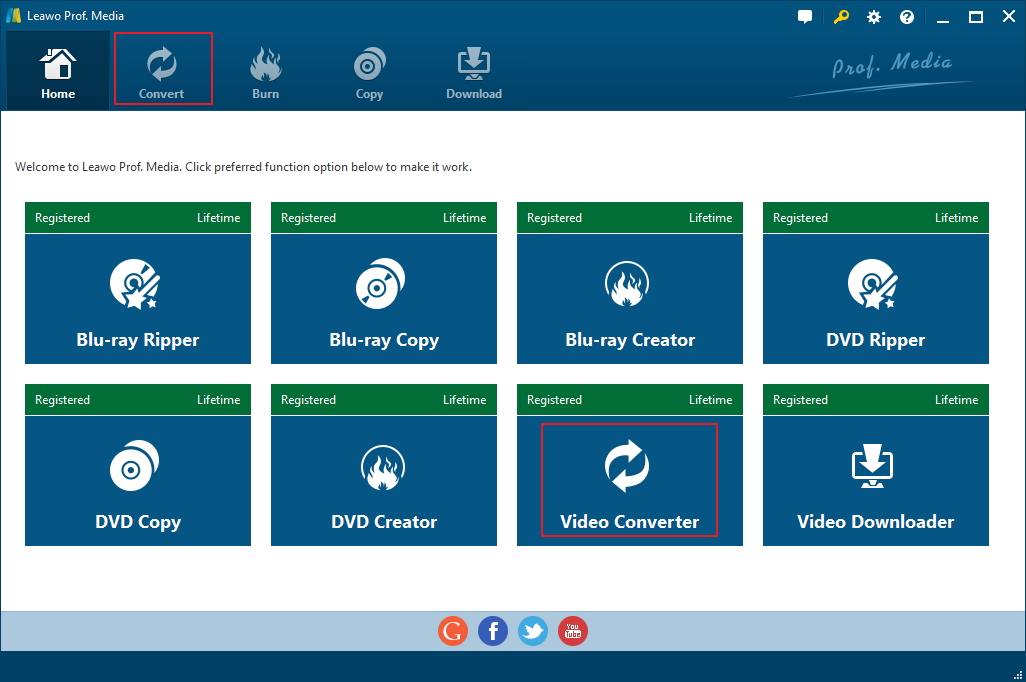
Before getting to the video cutting part, here's how to launch the video editor. You might need to know that after installing the program onto your computer, the name of the program isn't Leawo Video Converter. The program you install is actually Prof. Media. But that doesn't mean you've installed the wrong program. Leawo Video Converter is part of this program you install. Just open the program and you will find Leawo Video Converter in it.
Launch the video editor in Leawo Video Converter
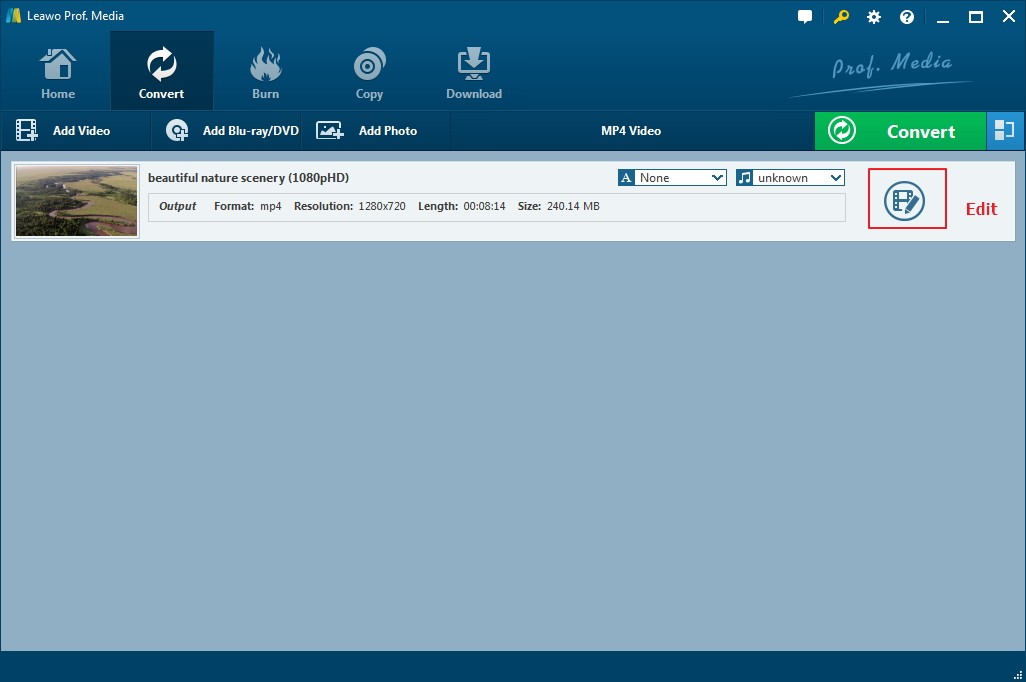
Open Prof.Media and click Video Converter tab. Inside the video converter module, drag the video you want to cut to the file list to import them to the program. Click the Edit button on the program to open the video editor.


After launching the video editor, the default page you will see should be the Trim page and that's exactly what we need.
You should see a progress bar and a bar with two indicators below the video preview window. To cut or say, trim a video, you need to decide which time point the video starts and which it ends. The two indicators are used for setting the start time and end time of the video.
There are 3 ways for you to cut the video:
- 1. You can directly drag the indicators on the bar to set the start time and end time of the video.
- 2. Play the video by clicking the Play/Pause button on the right side of the progress bar and when it gets to the start time, stop the video with the Play/Pause button and click the button next to the Play/Pause button to set the current time point as the start time. And you can set the end time with the same method.
- 3. Other than using the indicators, you can also manually input the time points in the boxes provided below the bar at the bottom.

After setting the time points, other parts of the video will be excluded from the video.
2. Cut video with Handbrake
HandBrake is also a free and open source video converting and editing program which can convert videos and movies into the files into MP4, M4V or MKV that can be read by various devices. It can work for multiple platforms including Windows, Mac and Linux. It is one of the most popular programs for users to cut video. After you download it free and install it on your PC, you can follow the steps below to cut your video as you like:
Step 1: Open a File to Add the video
Start Handbrake and click "Open a Single file" to browse and choose the video you are going to cut for importing. Or you can choose "Folder" to import a folder of video for a batch.

Step 2: Output settings
After importing the video, you are required to set the Destination file to save the output file. Besides, you can set the output format for your video as well as other setting such as Picture, Filters, Video, Audio, Subtitles and Chapters. The most important thing is to set the start time and end time of the video so that you can cut the unnecessary parts of the video.

Step 3: Start Cutting the Video
After all setting are done, you can click "Start Encode" on the sub-menu bar to start cutting the video. And the process will lasts a period of time depends on the size of your output video.
3. Alternatively cut video with OpenShot
OpenShot is free, open source, cross-platform video editor available for Windows, Mac and Linux. And OpenShot is also a simple to use, fast to learn and fantastically powerful video editor which allows you to quickly trim down your videos, and find those perfect moments. Besides, it offers powerful animation framework so that you can fade, slide, bounce, and animate anything in your video project. And the unlimited tracks, video effects, title editor, etc. Are also available with this powerful video editor. After you download it and install it on your PC, you can follow the tutorial guide here to cut your video and edit it as you want.
Step 1: Add a Project File in OpenShot
Click "File" and "Import" to add the video to the upper left panel, and then drag and drop the video to one of the tracks that lie on the bottom. After that you can preview the clip by pressing "play" on the video player if you want.

Step 2: Set Clip Properties
Right-click on the clip to get an options menu which allows basic video editing, including the implementation of basic fading in/out effects, volume settings, playback speed settings, rotation, copying, etc. You can adjust these common settings if necessary.

Step 3: Split and Cut Video Clips
Right-click on the video in the Project Files and select the "Split Clip" option.

When a new window opens up, you are allowed to set start and end points and split the video clip by naming the parts before importing it to the track line. And the other parts of the video clips can be cut.

Step 4: Export the video
Click "File" > "Export Video" to get the edited video file, you can also rename the file and set the output format and video quality.

4. Alternatively cut video with Clipchamp
Clipchamp is a wonderfully simple tool for preparing videos to be uploaded and cut. This is a free online solution for you to edit and cut the video with no ads. It is simple to use and allows you to edit videos with your browser to trim, crop, rotate, flip or adjust the colors in your video. After you sign up and login into the site, you can follow the guide to cut video in simple steps.
Step 1: Upload the video
Click "Add Media" to upload the video you need to cut and edit to the online video editor.

Step 2: Cut the video
Drag and drop the loaded video to the tracks at the bottom, then click Play icon on the right panel. Now you can click the Scissor icon to choose the clips you are going to cut, and then choose the Delete button or right click the selected parts to discard these parts.

Besides, you can also add effects to the video if needed when you click the selected parts.

Step 3: Export Video
When you finish setting and cutting, now you can click "Export Video" button on the top right corner to export and save the video in the normal quality for free.

Part 3: Comparison of the solutions
To sum up, there are 4 useful alternatives to Avidemux mentioned for cutting and editing videos when you are intended to make a video shorter or more amazing. Thus, whenever you are going to make a video edited, you can find the popular and simple ways here. In order to diversify the solutions here and help you to choose the solution most appropriate for you, a comparison table will be listed here.
|
Features |
Leawo Video Converter |
Avidemux |
Handbrake |
OpenShot |
Chipchamp |
|
|
Download and Installation |
Yes |
Yes |
Yes |
Yes |
No |
|
|
Video editing |
Yes |
Yes |
Yes |
Yes |
Yes |
|
|
Video convert |
Yes |
Yes |
MP4/MKV |
Yes |
No |
|
|
Slow Motion &Time Effects |
Yes |
Yes |
No |
Yes |
Yes |
|
|
3D animation |
Yes |
No |
No |
Yes |
No |
|
|
Video Effects |
Yes |
Yes |
No |
Yes |
Yes |
|
|
OS |
Windows |
Yes |
Yes |
Yes |
Yes |
Yes |
|
Mac |
Yes |
Yes |
Yes |
Yes |
Yes |
|
|
Linux |
Yes |
Yes |
Yes |
Yes |
Yes |
|
|
Cost |
Yes |
No |
No |
No |
No |
|
|
Video quality |
High |
Ordinary |
Ordinary |
Ordinary |
Low |
|
|
Working Speed |
6X Fast |
Ordinary |
Ordinary |
Ordinary |
Slow |
|
Anyway, the simple table above will give you an intuitive view for the differences of the solutions. Generally speaking, they have their own advantages and disadvantages. Leawo Video Converter, as the best alternative to Avidemux, is the simplest program which has the most powerful features. It can edit and cut the video, additionally, convert the video to different formats such as convert M4A to FLAC and more. The only disadvantage is that it costs some pennies. Avidemux and OpenShot would be the freeware which are multifunctional and powerful, though some of their features are not quite stable. While Handbrake is somewhat simple software to cut video, it cannot edit the video effects and has limited video formats for output. So it would be your choice only if you just want to simply cut video only. ChipChamp is the only online video editor here. Definitely it is simple to use and free. But it costs a lot of time to upload the video and you have to sign in the site. Only the common low resolution 480P can be supported for free. For higher resolution like HD, you should upgrade your account with some dollars. All in all, every coin has both sides. All you should do is to choose the better side you need.
 Jul. 16, 2018 by


 Prof. Media
 Blu-ray Ripper
 Blu-ray Copy
 iOS Data Recovery
 [12/29/23] MAX Downloader V15.0.0
 10,000,000 people are using Leawo!
 All Transactions are protected!
 30-Day Money Back Guarantee!