When it comes to video resolution and quality, most of us would think that the higher resolution is, the better. As in, 720P is better than 480P, and 4K is better than 1080P. But in fact, that is not always the case.
Sometimes videos in 4K resolution does not bring us a better watching experience. On the contrary, it could bring some unexpected issues and problems to the video that could potentially make the 4K video unplayable or choppy on 1080P TV. To solve that kind of problem, we may have to find a way downscale a 4K video to 1080P in exchange of a smoother video playback performance.
However, not everyone knows how to downscale at 4K video to 1080P. So today in this article, we're going to talk about some of the most effective ways to downscale 4K to 1080P and gave you clear instructions on how to do that. To begin with, let's have a deeper understanding of why we need to downscale 4K to 1080P.
Part 1: Why to Downscale 4K to 1080p?
What is 4K?
The detailed definition of 4K cannot be explained by a couple or words. But to put it simple, the term 4K is used to describe a video resolution that has approximately 4,000 pixels for the horizontal display. Although there are different 4K resolutions standardized by various organizations, most 4K videos are considered to have a resolution of 4096 X 2160 or similar.
4K is a drastic upgrade to 1080P which only has a resolution of 1920 X 1080. Because they have a higher resolution, the 4K videos usually look sharper and give more details than 1080P videos. With the rising popularity of 4K TV's, there are more and more 4K videos on the Internet or on various video hosting platforms.
Why Downgrade 4K to 1080P?
Since 4K can provide a better video quality than 1080P, why do we have to downgrade 4K to 1080P? Well, first of all, the video resolution can only be as high as your TV or monitor resolution, which means that if your TV or monitor has a 1080P display, then 4K videos would mean nothing to you because the image displayed on your screen would still be 1080P instead of 4K. Besides that, since 4K videos has way more data than 1080P videos, they require the CPU of your TV or PC to have a better processing ability. If your device cannot process that much of data in the video, then the video cannot even be played smoothly. You could encounter issues like choppy pictures, laggy video streams, audio loss and more.
So, if you don't have a 4K display device, or if you have encountered some of the video playback issues with your 4K videos, then you probably need to downgrade your 4K videos to 1080P. Now let's have a look at how to downgrade 4K to 1080P in premiere pro.
Part 2: How to Downscale 4K to 1080P in Premiere?
Adobe Premiere Pro is probably one of the most popular video processing applications right now. It can handle all kinds of video processing tasks with ease, including downscaling a 4K video to 1080P. Now let's have a look at how to downscale 4K to 1080P in Premiere Pro.
Step 1: Launch Premiere Pro and import the 4K video
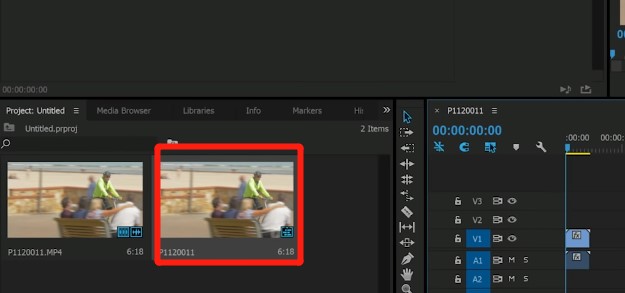
Launch Adobe Premiere Pro. to import the original 4K video clip into the program, simply drag and drop the original video clip into the media box of your project. Then, drag the video clip from the media box to the timeline, and premiere pro would automatically generate a video sequence. You should be able to see the newly generated video sequence in the media box right beside your original video clip.
Step 2: Go to sequence settings
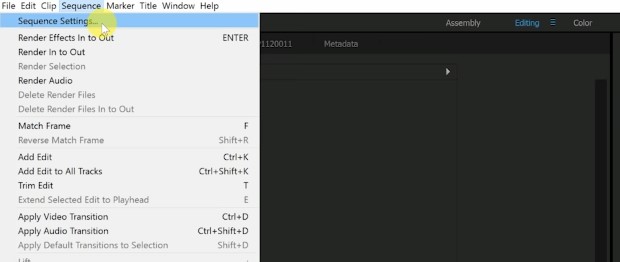
Make sure you select the auto generated sequence, then in the toolbar, click on “Sequence”, then choose “Sequence Settings”. You can also directly right click on the sequence and choose “Sequence Settings”.
Step 3: Change the resolution
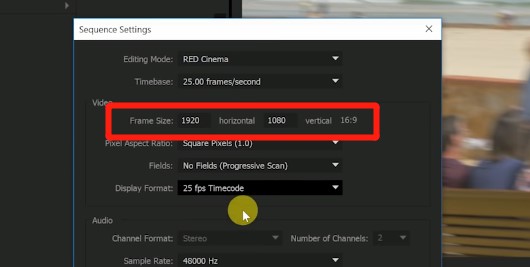
On the newly opened sequence settings window, find the “Frame Size” parameter in the “Video” zone. Then set the frame size to 1920 horizontal and 1080 vertical. After that, click “OK” to confirm and apply the change.
Step 4: Export the downscaled 1080P video
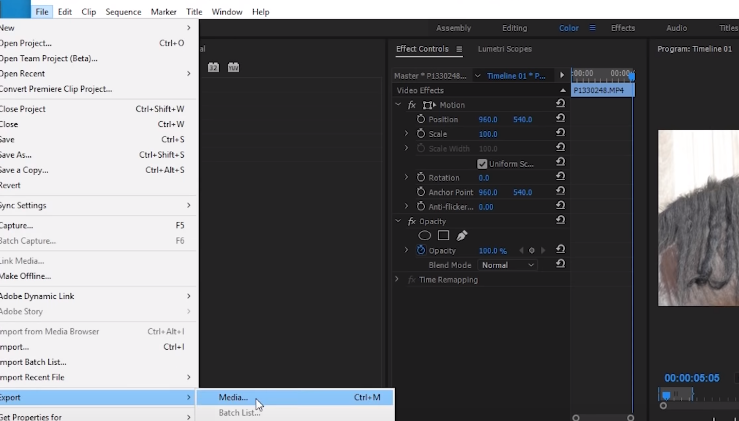
Now you have successfully changed the resolution of the video from 4K to 1080P. To export the new video, click on “File” in the toolbar, then go to “Export”, and choose “Media”. Now the output settings window will open, and you can set parameters for your output project. Finally, click on “Export” to export the video with the parameters you have set.
Part 3: Downscale 4K to 1080P with Leawo Video Converter
As you can see, Adobe Premiere Pro can downscale a 4K video to 1080P easily. But for those who does not have Adobe Premiere Pro as their go-to converter for video processing tasks, there are actually other options for you to do the downscaling task. For example, Leawo Video Converter is one of the most effective and popular alternatives to Adobe Premiere Pro when it comes to downscaling 4K to 1080P.
Leawo Video Converter is a professional video converting application, as well as video processing application which can not only convert videos from more than 1000 popular formats to each other, but also perform various advanced video processing tasks including converting 2D videos to 3D, editing, cropping and resizing videos, adding watermarks to a video, reducing background noise from the audio track, and of course, downscaling 4K videos to 1080P.

-
Leawo Video Converter
- Convert video and audio files between 180+ formats without quality loss
- Support 720P, 1080P and even real 4K video output
- Create photo slideshows from photos stored on camera, computer, camcorder, etc
- Built-in video editor to trim, crop, add watermark, apply special effect, etc
- 2D to 3D converter with 6 different 3D movie effects available
Leawo Video Converter is powerful in all its functions, and also easy to use. With an outstanding software design, Leawo Video Converter makes it easy for anyone to downscale 4K to 1080P in the program within only a couple of minutes. Now here is a detailed guide showing you how do use Leawo Video Converter to downscale your 4K videos to 1080P.
Step 1: Download and Launch Leawo Video Converter
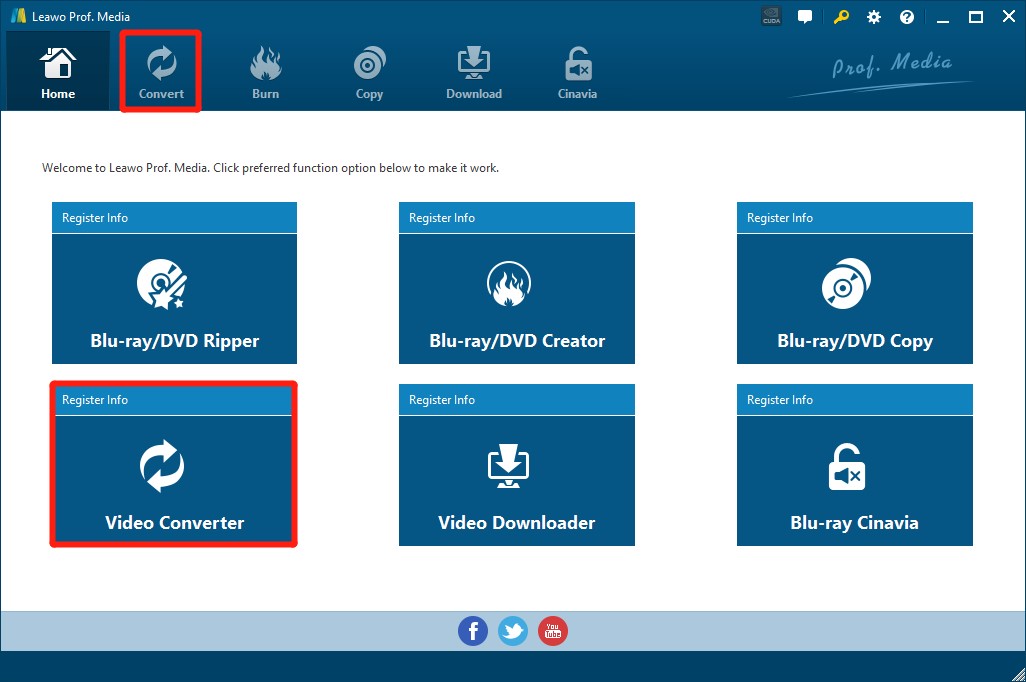
Download and install Leawo Video Converter on your computer. Leawo Video Converter is a component in the Leawo Prof. Media suite. So, after installing the application on your computer, you need to launch the application, and navigate to the "Video Converter" function module.
Step 2: Import your source 4K video
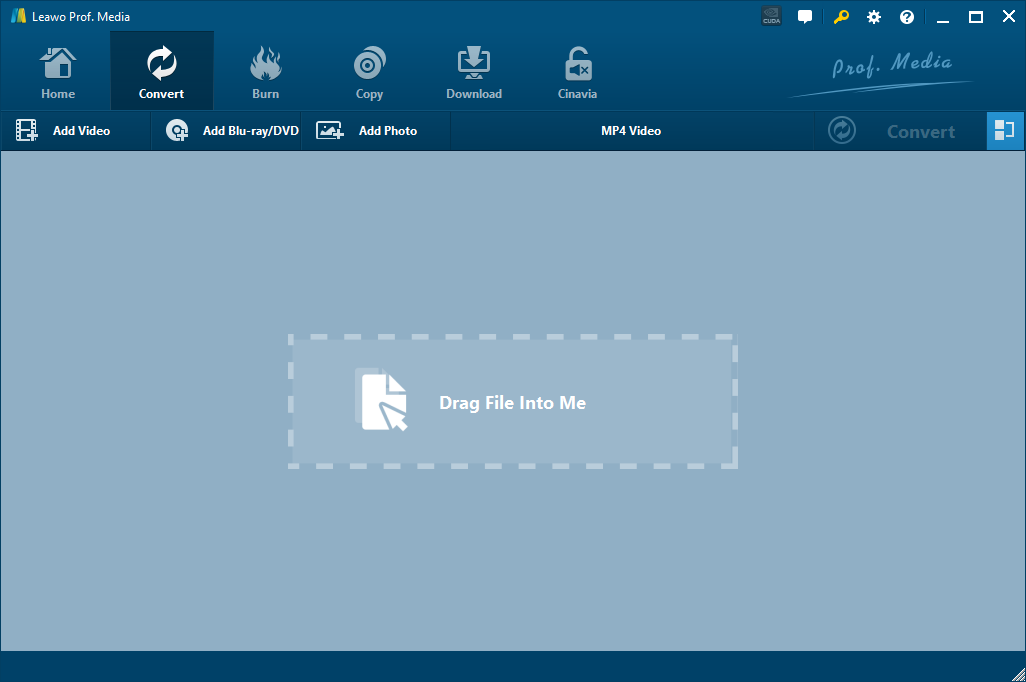
To import a video, simply click on the “Add Video” button, or directly drag and drop your source video into the main frame in the middle of the program interface.
Step 3: Change output format and resolution
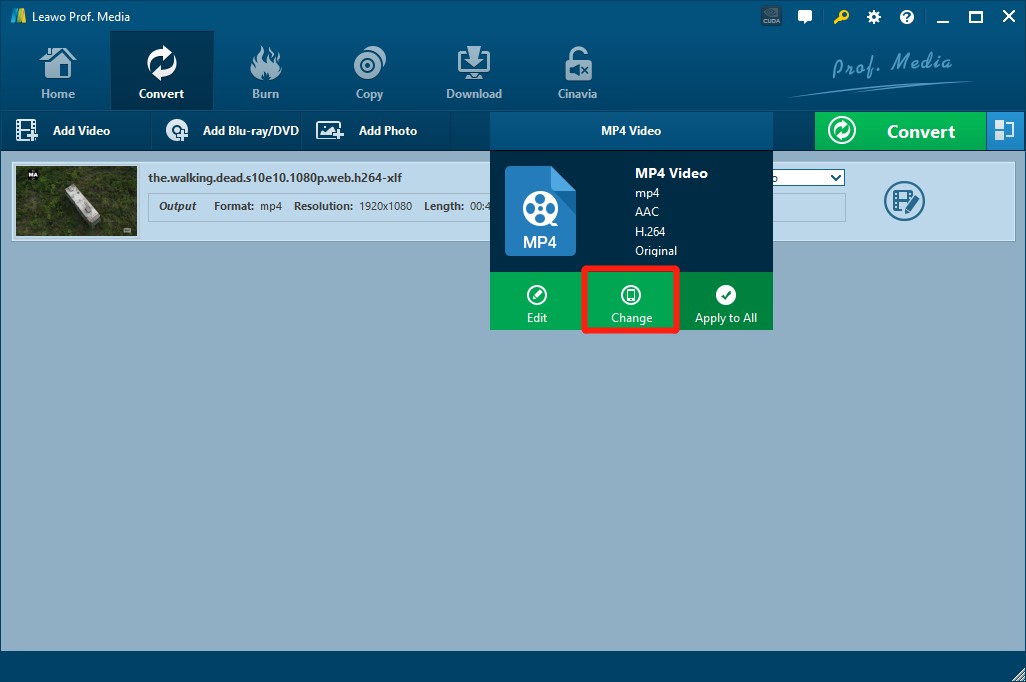
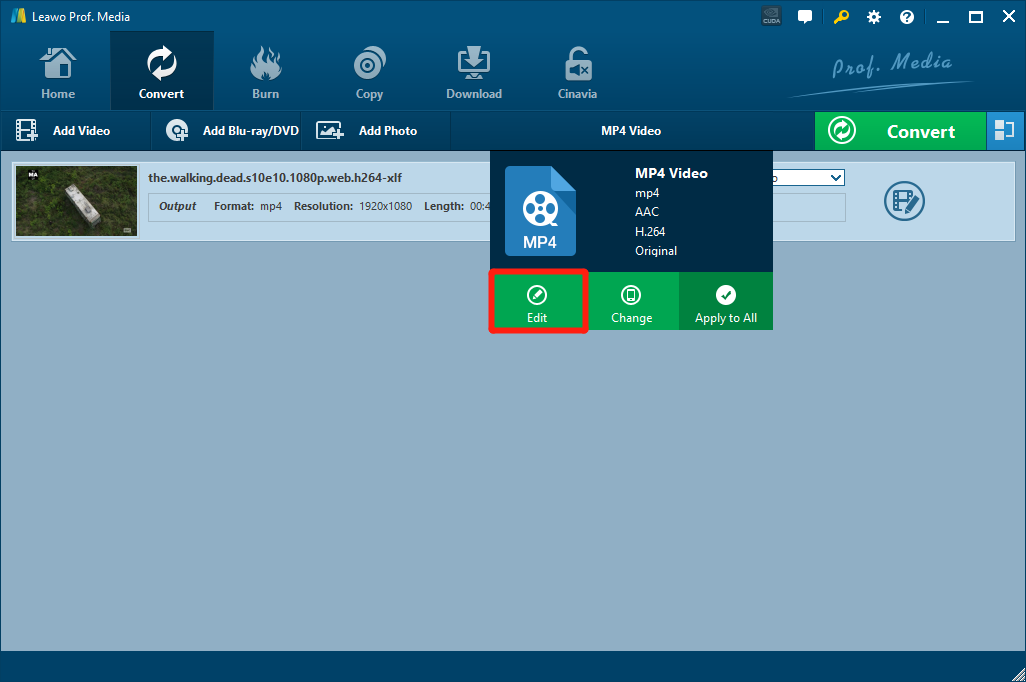
After importing your source video, click on the video format area next to the “Add Photo” button. Then on the dropdown panel, click on “Change” to go to the format selection window.
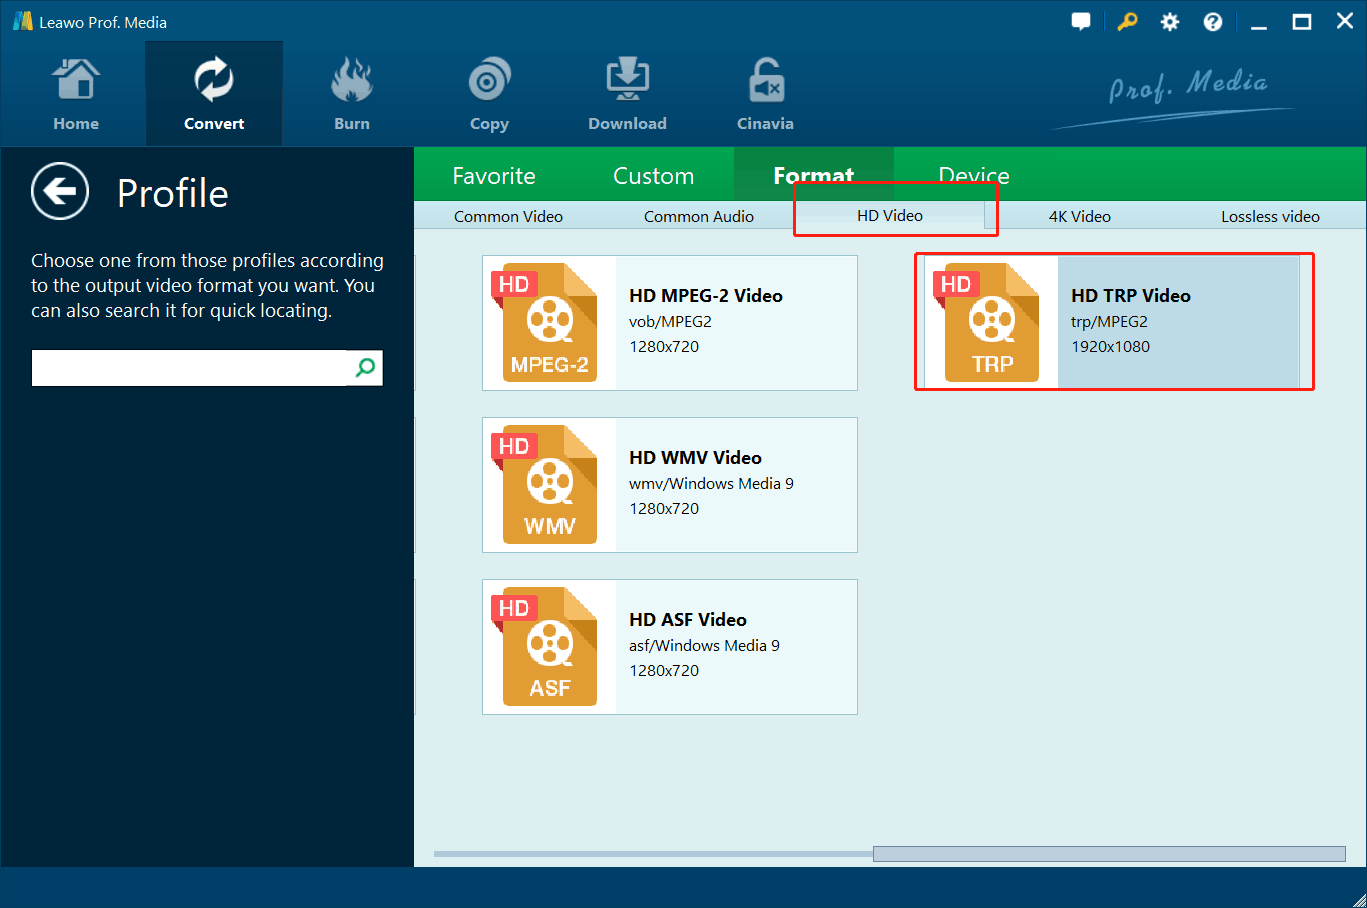
In order to downscale 4K to 1080P with the best quality, you need to firstly select a 1080P HD video format in the format selection window. To do that, go to the “HD Video” tab and choose one. I’ll take “HD TRP Video” as an example.
After choosing an HD video format, unfold the format option panel again and choose “Edit”.
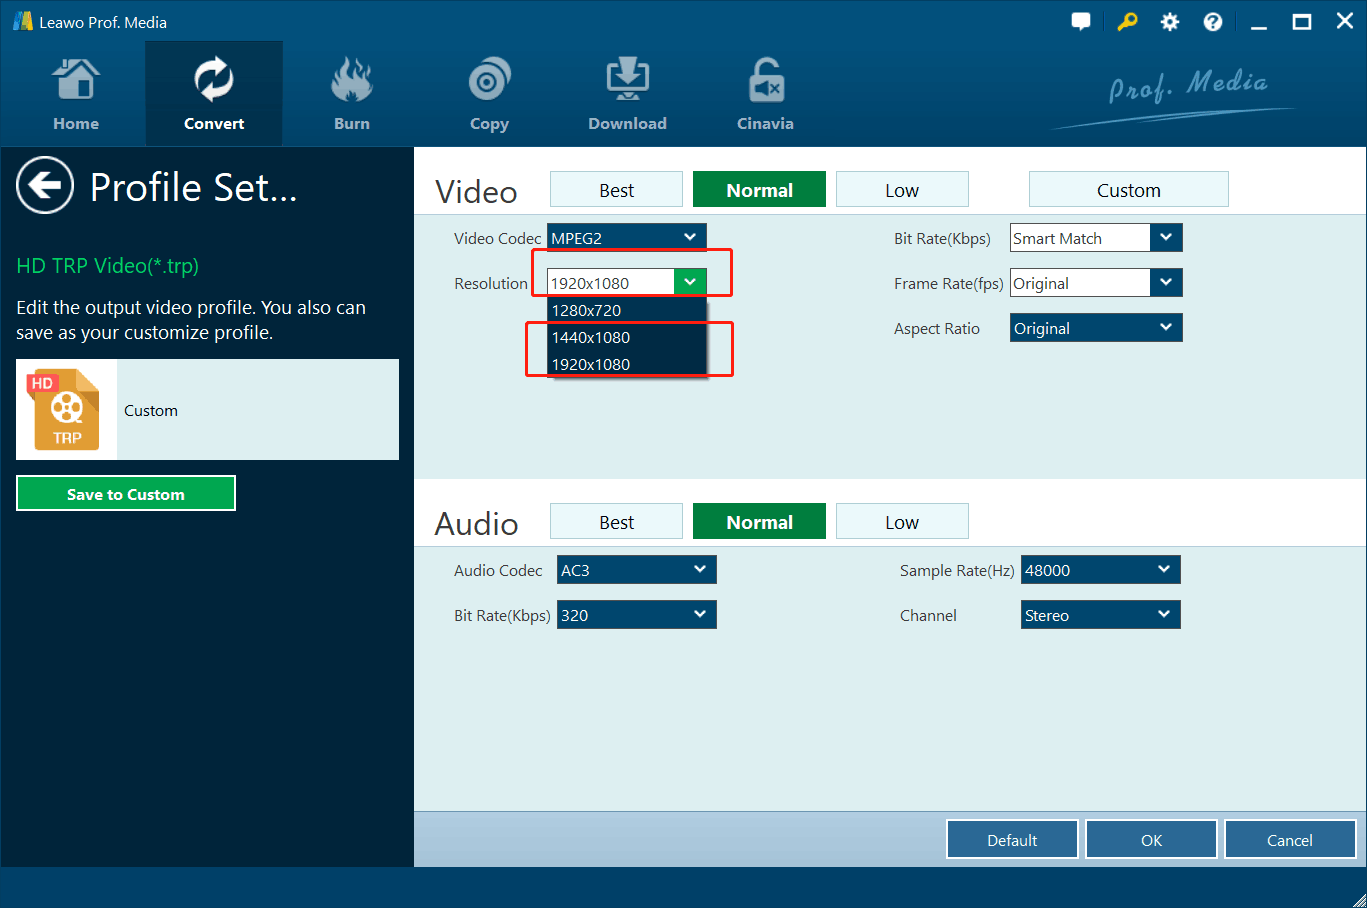
Now on the “Profile Settings” page, you can see a dropdown button labeled “Resolution”. Click on the dropdown button and choose "1920 x 1080" to downscale your current video to 1080P. Then click “OK” to apply the change.
Step 4: Start rendering
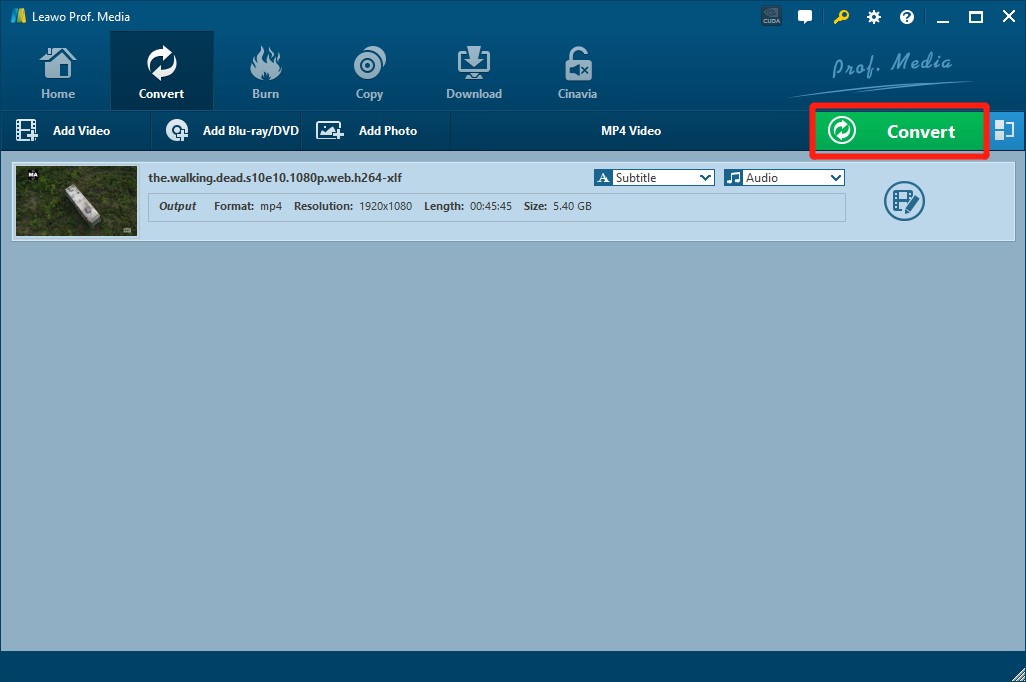
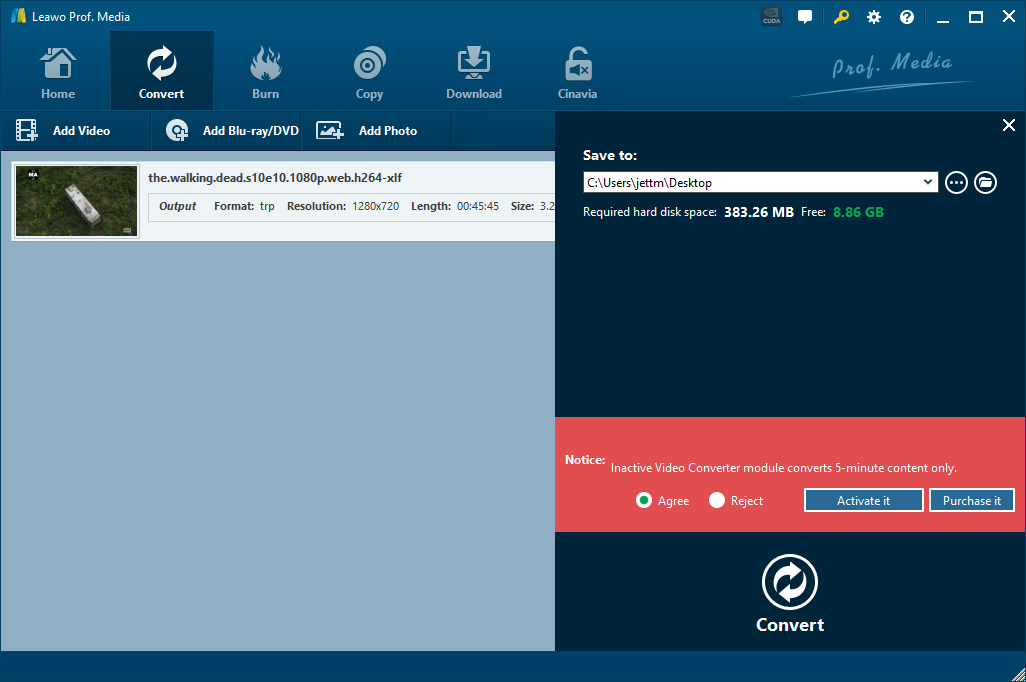
Now back to the main interface of the application, , click on the green “Convert” button to reveal the converting settings panel.
On the newly unfolded panel, set a target output folder in the “Save to” box and click on the convert icon below the start downscaling your 4K video to 1080P.
Part 4: The Better Software to Downscale 4K to 1080P
Today in this article, we introduced two ways for you to easily downscale a 4K video to 1080P. You can choose either of the applications according to your own needs. But in our opinion, for the 4K to 1080P downscaling task, Leawo Video Converter is definitely a better choice than Premiere Pro. Here are our reasons.
◎ Lower Price
As a powerful and professional video editor application, a full year's subscription for Adobe Premiere Pro would cost $239.88 while the lifetime license of Leawo Video Converter only costs $39.95.
◎Better Ease of Use
Leawo Video Converter is a versatile and easy to use video processing application. The software design is user oriented, so anyone can use the application to not only downscale 4K to 1080P, but also perform various video processing tasks within only a couple minutes, even they have never used the program before.
◎ More Stable Performance
Adobe Premiere Pro is an overly complicated application. It is known for his powerful video processing abilities as well as its all kinds of bugs and crashes. Compared to Adobe Premiere Pro, Leawo Video Converter can provide a more stable performance and make sure that your workflow does not get interrupted by any bugs or crashes.
As you can see from the comparisons above, Leawo Video Converter wins in almost every aspect in terms of downscaling 4K to 1080P. If you are not looking for a professional video creator application, then Leawo Video Converter is definitely sufficient for your daily video editing and converting tasks. It is easy to use, low in price, and can guarantee a high-quality output result. Give it a try and you shall not regret it.


 Try for Free
 Try for Free

