
For some users who incline to luxury home theaters entertainments, it could be very handy to utilize the Kodi media center. If you are right with Kodi for the PC, then the reason you are here is to figure out how to add subtitles to Kodi. Since subtitles can be essential during some cases, is it possible to add subtitles to Kodi directly? This article will show you how with additional information about Kodi.
Part 1: About Kodi
If you are wondering what method can help add subtitles to Kodi, probably you should know more about Kodi. Or maybe this could be your first time really getting to savvy the background knowledge. Take your time to digest the systemic introduction.
Kodi is commonly recognized as the Kodi media center and it is an award-winning program that offers solutions to read and play media content. This software was established on an open-source platform and every individual can apply it for free. The Kodi usually functions as a managing tool for all your media files. It has the capacity to playback videos, view photos, transmit podcasts, stream TV shows, and deliver audios.
One of the greatest features is the user interface that is designing with a size of 10-foot. With this exaggerating display size, playing movies in your living room can be extremely ideal. Arming a remote control, you can import nearly everything from the cozy sofa or a puffy chair. When the application is given access to the Internet, it can be installed with a large number of third-party add-ons and plug-ins. Without the network, media data from your hard drive or discs like DVDs are all playable. The GUI seems logical and well ordered.
Part 2: How to Add Subtitle to Kodi
Now buckle up for how to add subtitles to Kodi. The demonstration contains two sections from the installation of subtitle add-ons to how to make it run properly on Kodi.
Step 1. Turn on the Kodi working interface and find the System setting menu.
On the upper left corner of the screen, there are three icons standing for the power, settings, and search respectively. Choose the gear icon to get to the system menu.
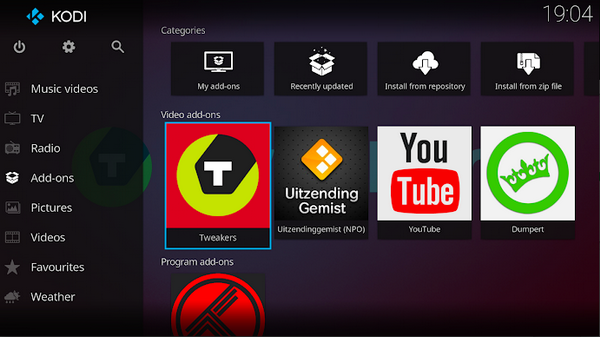
Step 2. Click on the "Add-ons" option.
The system panel will show you a couple of quick accesses. Generally, the "Add-ons" block will be sitting next to the File Manager.

Step 3. Choose the "Install from Repository".
The window comes out with five entries to each different pathway. Move down to select the middle gate of "Install from Repository".

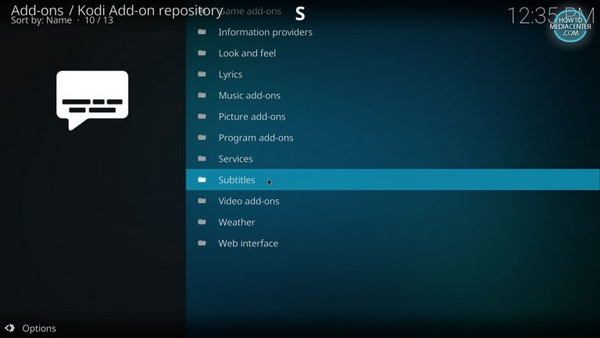
Step 4. Look for the Subtitles base.
As a whole, Kodi has its own repository integrating a wide range of themes and features in alphabetic sequence. Slide down the list and press the "Subtitles".
Step 5. Decide a subtitle add-ons source.
Since there are a bunch of add-ons providers, you should pay attention to the language that you get used to. I assume that most users are English speakers, so I would advise taking the Podnapisi. If you are a big fan of TV shows, then Addic7ed could be a fit. You can pick up the one you prefer.
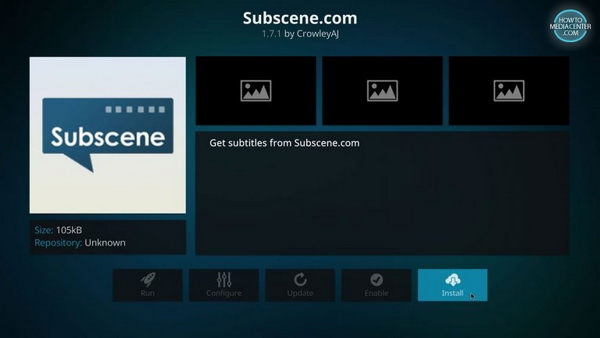
Step 6. Get started with the installation to add subtitles to Kodi.
Go inside of your choice and you will view some details about the source. If you are sure, then press the "Install" icon from the description page. So far, the way to add subtitles in Kodi is done.

Step 7. Set your desired subtitles.
From this step, switching on the subtitles is illustrated. Withdraw to the main entrance panel, select the cog icon under the KODI logo again to reach the System menu.
Step 8. Approach the Player settings sheet.
On the System Menu, the "Player" block is set as the first one under the "Settings" area and click on it.
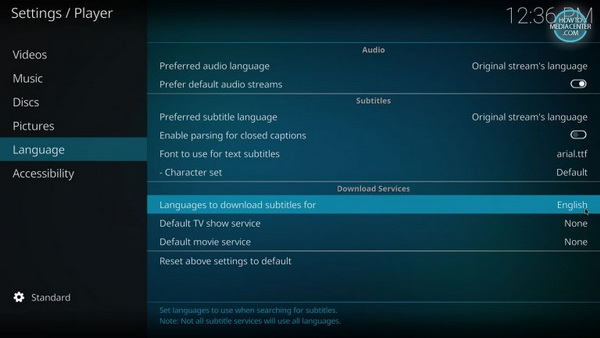
Step 9. Navigate to "Language to download subtitles for".
The player settings will open up a huge catalog from videos, music, discs, pictures, languages, to accessibility. Look at the left sidebar, highlight the "Language" label and guide yourself to the "Language to download subtitles for" option from the right extending board.
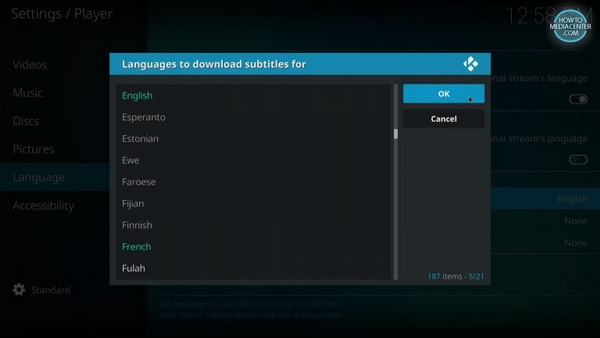
Step 10. Multiple selections are available for download.
It is acting friendly to multilingual users as not only one language can be confirmed. The selected one will turn to the green text color. Hit the "OK" to make changes.
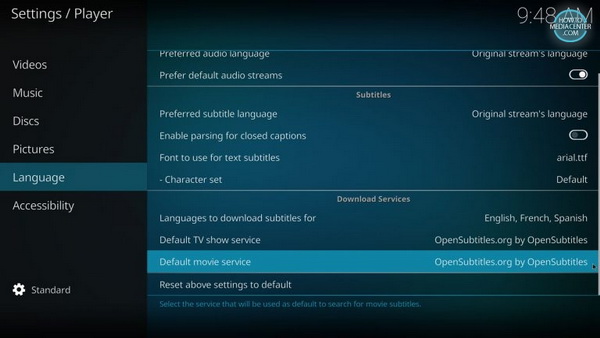
Step 11. Adjust default services.
The panel will jump back to the previous extending language sheet. Under the "Language to download subtitles for", you can see both "Default TV show service" and "Default movie service". Change them to your installed add-ons formally.
Step 12. Review the result.
This is to check if you are successful to add subtitles to Kodi. Play any media with Kodi and choose the Subtitle icon which is next to the setting button down to the right corner.

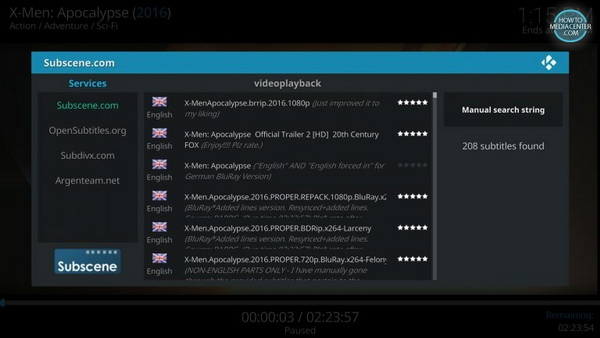
Step 13. Go for the "Download subtitles…" in the coming panel.

Step 14. Pick up a workable subtitle source to download.
You can choose different services on the left first. Once it is done, the playback will be with subtitles.
Part 3: How to Add Subtitles on Leawo Blu-ray Player
I know it takes some time to entirely control the Kodi media platform while starting from zero. But it is likely to get the shortcut to add subtitles to Kodi media videos on your computer as well. So the time you spend on toggling Kodi could be pointless if you have the best player software. That is the Leawo Blu-ray Player, which makes every minute worth it. You will save numerous hassles for navigating around how to add subtitles to Kodi.
Likewise, beyond the ability to perform cross-platform playback for all media files such as AVI, MPEG, WMV, ASF, FLV, etc., this Leawo Blu-ray Player program also supports any remote storage location from Blu-ray to DVD. In terms of optical discs, the cutting-edge processing technology of the best region-free player can break down the disc protection of any type. As a matter of fact, Leawo player is functioning as an amazing multimedia player on Windows and Mac working environments. On top of that, it guarantees the image and sound quality to be delivered with no loss. For 4K movies or high definition videos, this tool has the caliber to decode each of them flawlessly. The free control will carry the same convenience for users to manage media watching experience. But I will put most credit to the feature of adding subtitles effortlessly. The advanced settings are arranged reasonably and every novice will be more confident to add subtitles to Kodi files. There is a special bonus feature allowing you to transfer Blu-ray content to MKV files without quality damage.
Compared with how to add subtitles to Kodi, this tutorial is easier and more understandable.
Step 1. Download and install the matching Leawo Blu-ray Player software on different computing systems.
![]()
![]()
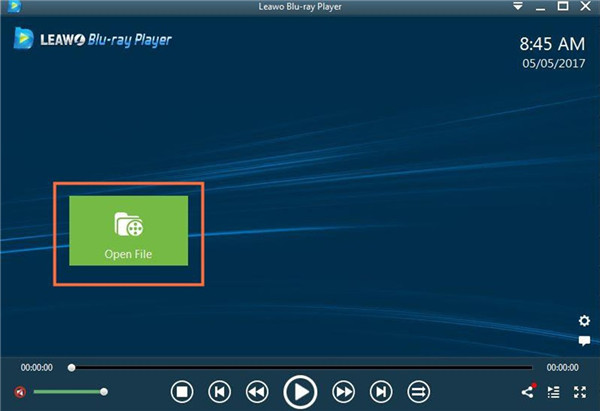
Step 2. Launch the best media player and load source media files.
The interface is leading to an easy-to-see option that is the "Open File". You can click on this green button to open local media folders and put the chosen one into the program. If you need to play Blu-ray or DVD discs, just insert them into the disc drive. In a second, the disc name will pop up in another box next to the green one on the home interface. Click on the disc icon to start playing optical content.
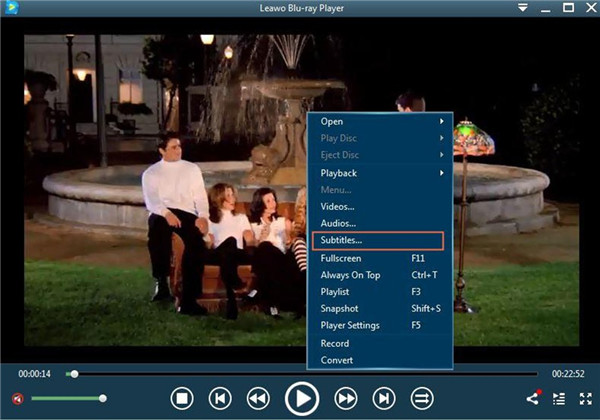
Step 3. Activate the subtitles setting panel.
When the media content is well added, the playback progress will automatically begin. Within the playing area, right-clicking any spot will call out a drop-down menu. The menu will offer various options including "Subtitles". Select this button to open up a new window.
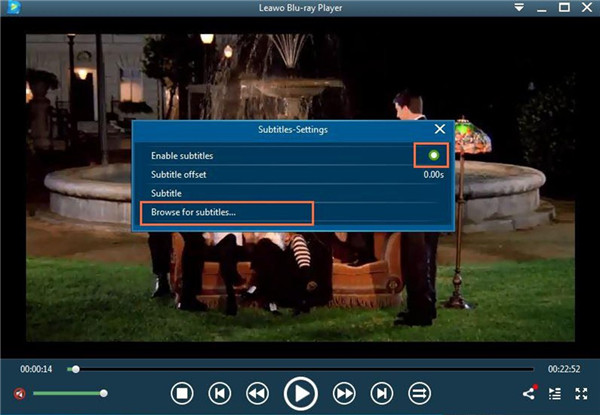
Step 4. Enable subtitles functionality.
The subtitles setting panel will pop up with the default as below. Tick the option of "Enable subtitles” to activate further availabilities.

Step 5. Define your own subtitles.
Move your sight to the last choice on this subtitle board, you can add external subtitles from native source. So be free to enjoy movies or videos with subtitles in no time.
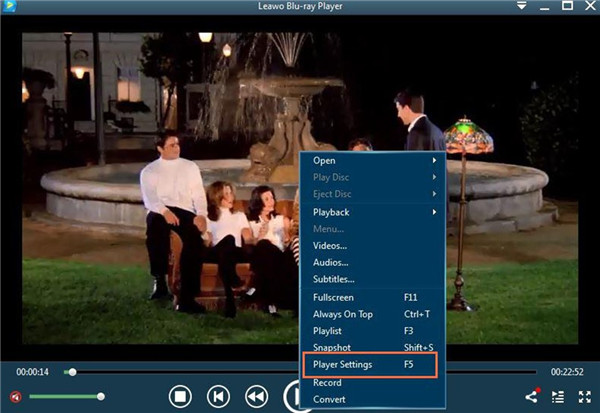
Step 6. Adjust professional settings through "Player Settings".
This step is optional. The playback settings are also provided by another system parameter page. From the right-click menu, tab the "Player Settings".
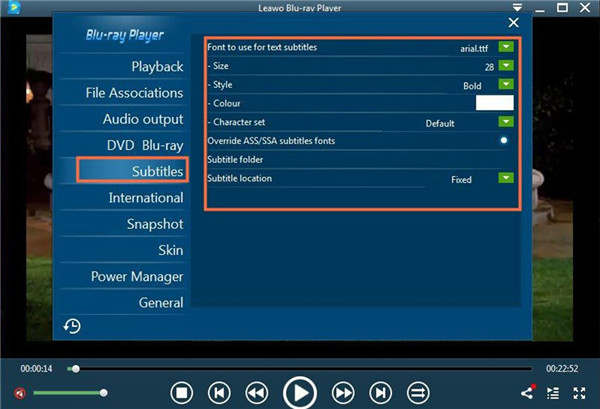
Here a whole set of playback controls are sorted into the left column. Click on the “Subtitles” tab and you can change all diverse subtitle-related choices.
Part 4: Conclusion
From the first introduction, we would acquire a general view of the Kodi media center. Then it is not difficult to learn how to add subtitles to Kodi following the manual steps we just listed. The Kodi system maybe looks a little bit complicated as there are just too many steps to add subtitles in Kodi center. When you are not strict with the media organizing program, it is better to take advantage of the practical Leawo Blu-ray Player. Because this player is able to add subtitles to movies or Kodi media content without installing troublesome add-ons. It is quicker and more effective to reach all the videos and audios.
 Oct. 14, 2019 by


 Prof. Media
 Blu-ray Ripper
 Blu-ray Copy
 iOS Data Recovery
 [12/29/23] MAX Downloader V15.0.0
 10,000,000 people are using Leawo!
 All Transactions are protected!
 30-Day Money Back Guarantee!