Last updated on 2021-02-24, by
When to Use a Wide or Narrow Aperture
Aperture is the most important concept of photography, referring to the opening of a lens’s diaphragm through which light passes. As one of the most important tools in photography, aperture has a direct effect on the exposure and plays a significant role in the depth of field and sharpness of the photograph. To get different effects, you may use a wide aperture and a narrow aperture to capture pictures. Read on this post to figure out what is aperture and how to set and use aperture in camera to make full use of aperture and get flattering pictures.
Outline
Part 1: What is Aperture Meaning in Camera?
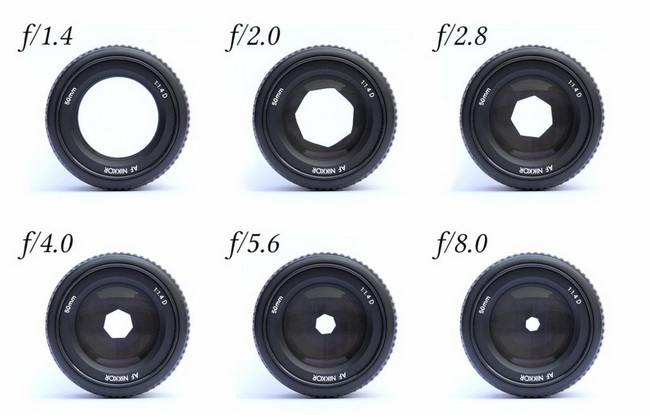
It is essential for both beginners and professionals to figure out what is aperture meaning in camera. Literally, aperture is the term used to describe what is simply the hole in the lens that light travels through to reach the camera’s sensor or film. Aperture value is known as “F-stop” like f/1.4, f/2, f/2.8, f/4, and so on to express the size of the lens opening. You really need to pay attention to the fact that the smaller the F-stop number is, the larger or wider the aperture will be and vice versa.
A wide aperture obviously affects the exposure, which will pass a lot of light, resulting in a brighter photograph. On the contrary, a small aperture makes a photo darker. Besides, aperture also controls the depth of field — the amount of your photograph that appears sharp from front to back. You specifically use a wide aperture to create a shallow focus effect, which draws attention to the subject. A smaller aperture to results in a small amount of background blur that effectively separates your subject from the background.
Part 2: How to Set Aperture in Camera?
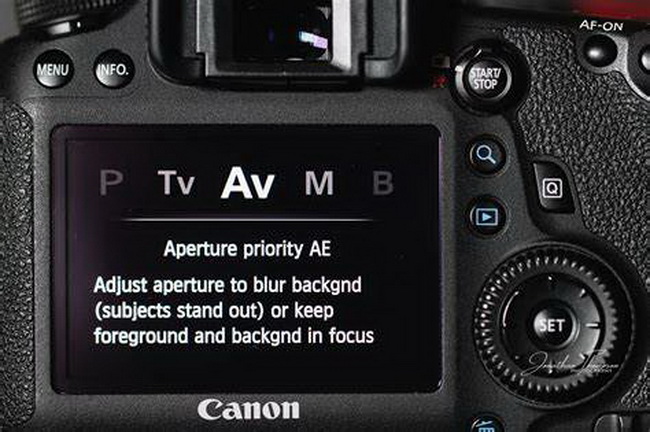
Since you have made it clear what is aperture, you should figure out how to set aperture in camera to make your photography to the next step. To capture amazing and spectacular photos, you’d better select your aperture manually in your camera. There are two modes can be set: aperture-priority mode and manual mode. Aperture-priority mode is written as “A” or “Av” on most cameras, which allows you to set the aperture and ISO, but lets the camera set the shutter speed automatically. While manual mode is written as “M”, in which you can select both aperture and shutter speed manually. There is no doubt that you are able to set the aperture on your camera and capture photos in a variety of looks by blurring out the background or keeping it sharp.
Part 3: When to Use a Wide Aperture?
As a matter of facet, there are still some common misunderstandings of how to use and work with a wide aperture camera. To put it simply, a wider aperture means more light entering the lens and reaching the image sensor. And measured in f-stops or f-numbers, a lower number translates into a wider aperture. For instance, an f/1.4 aperture can let more light in than an f/2.8 aperture. Then, when you need to use a wide aperture? Here come some recommendations.
1# Use a Wide Aperture in a Less Ideal Location
Whether to choose a wide aperture is depending on the type of photography you do. When you are not having the option of utilizing an ideal location, a wide aperture is here to help. On one hand, the wider aperture is capable of taking photos in the environments that are with low light. On the other hand, when you just have to get a specific photograph done right away and you aren’t able to find a new spot or in other locations that are not ideal, you ought to utilize a f-stop of f/2.0 or lower which helps you work with a less immaculate location and blur the flaws.
2# Use a Wide Aperture Generally for Portraits
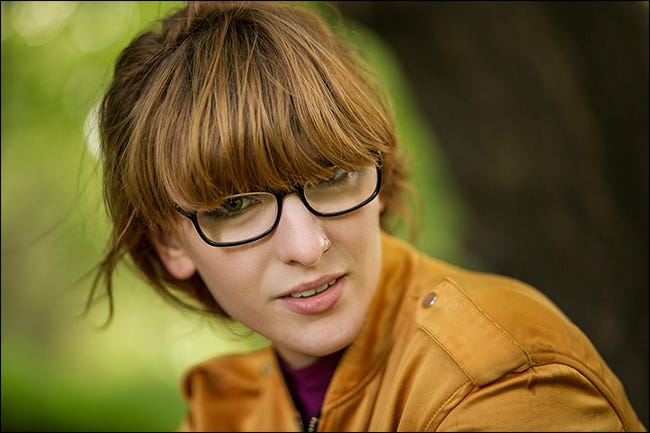
As you know, a wider aperture helps you capture a photography with more focus on a subject and background blur, which isolates specific subjects from their backgrounds to a large extent. To put it in detail, you can pick an area of the photo to focus on when you focus your camera. For example, it would be completely advantageous for taking portrait photos—making only the main subject sharp and the area in front and behind the subject out of focus. And f/1.8 or f/2 is typically used for portrait photography.
3# Use a Wide Aperture for Detail Shots
A wide aperture is also connected to a shallow depth of field which undoubtedly makes very beautiful detail shots. It is trendy for some photographers to use wide open apertures to capture photos of the rings, bouquets, pets and table settings and other detailed subjects. Since a shallow depth of field will keep the interest solely on your single subject, you can make the subject pop out of the frame and the background cease to be a distraction. If you want to bring out a detail while photographing, f/1.2 is wonderful.
Part 4: When to Use a Narrow Aperture?
To put it simply, a narrow aperture means that the depth of field is deeper, generally translating into an aperture of f/16 or even smaller. You definitely need to use a narrow aperture when elements in the foreground and background of your photo are important. Anyway, there are some occasions when you need to use a narrow aperture.
1# Use a Narrow Aperture for Landscape Photography
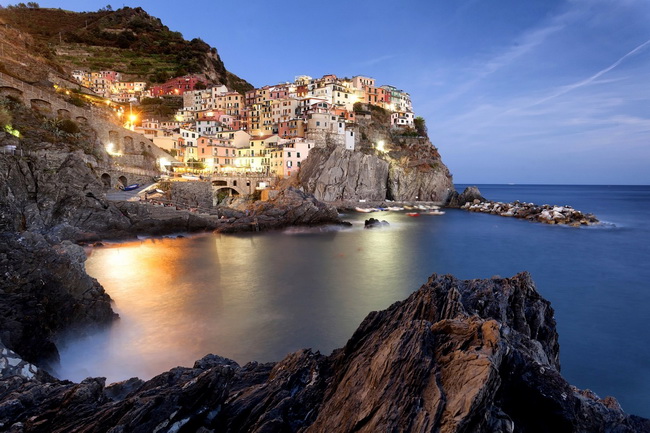
For landscape photography, narrow apertures are most often used when there is significant distance between your foreground and background. Usually, a landscape photographer may use a much smaller aperture such as f/13 or f/16 so that everything in the frame is in focus, from the foreground right through to the background.
2# Use a Narrow Aperture for Starburst Effect
Using a narrow aperture helps you achieve the starburst effect, which will cause a point of light to have spikes. Usually, photographers use narrow apertures to produce the starburst effect for street lights, and even the sun. For starburst effect of street lights, you’ll need a tripod and small apertures for taking long exposure photography. It has been proved that the smaller the aperture, the longer and thinner the spikes will be. For starburst effect of sunlight, you’d better find something in the foreground to block the sun, such as leaves on a tree, clouds as they pass the sun in the sky, or the horizon line as the sun begins to set.
Part 5: How to Enhance Photos Shot by a Wide or Narrow Aperture?
Eventually, you have to enhance photos captured by wide or narrow apertures with powerful photo enhancers. When you have captured a variety of photos by wide or narrow apertures, you may find that they are not perfect or spectacular enough due to overexposure, low light or other flaws on your photos. It is significantly necessary to fix these problems. And Leawo PhotoIns would be the best AI photo enhancer tool that helps you enhance photo quality and improve photos to the next step. Here comes the simple guide to enhance photos.
Step 1. Download and Install Leawo PhotoIns
Go to the official site and download Leawo PhotoIns for free. And then install the program on your computer in minutes.
-
Leawo PhotoIns
- Enhance portrait photos easily with advanced AI technology
- Fix photo exposure and white balance issues automatically
- Optimize photo colors and perfect photo tints
- Make photos perfectly clear with smart dehaze
- Boost photo lighting and color quality
- Process RAW and JPG files
Step 2. Add Photos Shot by Wide or Narrow Apertures
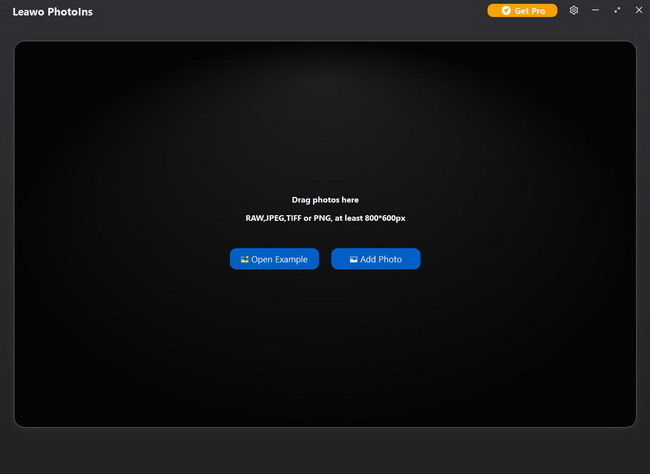
Launch Leawo PhotoIns and then click the “Add Photo” button to browse and load photos shot by wide or narrow apertures. Or you can also directly drag and drop the target photos to the program.
Step 3. Enhance the Loaded Photos
Leawo PhotoIns enables you to enhance photos both in batch or one by one by using the internal photo AI enhancer.
- Enhance Photos in Batch
- Enhance Photos One by One
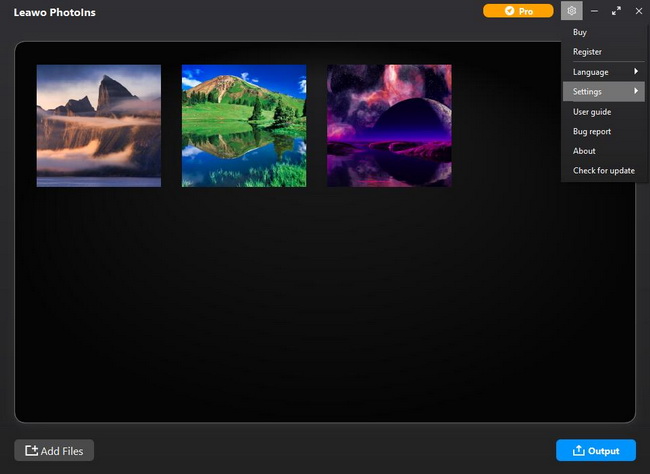
To batch enhance photos after loading the photos, just click the “Settings” icon on the top-right corner and navigate to “Settings” option to enable “Automatic Lens Correction”, “Face Enhance” or “Enlarge Eyes” relying on your needs. And the program will automatically enhance the loaded photos. Then you can click “Output” button for output settings.
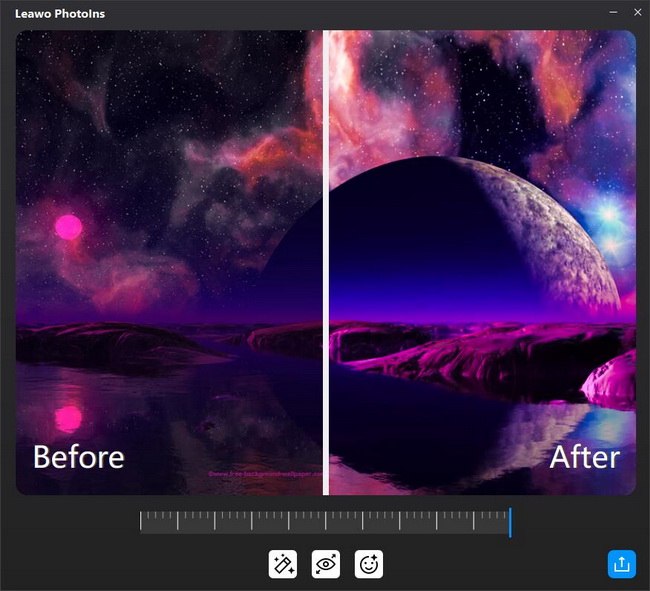
Choose a photo and double click a photo to enter the photo enhancer editing interface. The photo AI enhancer will automatically and intelligently enhance the photo for you. Moreover, there is an effect adjuster bar right below the previewer for you to manually adjust the photo enhancing degrees.
Step 4. Output Settings
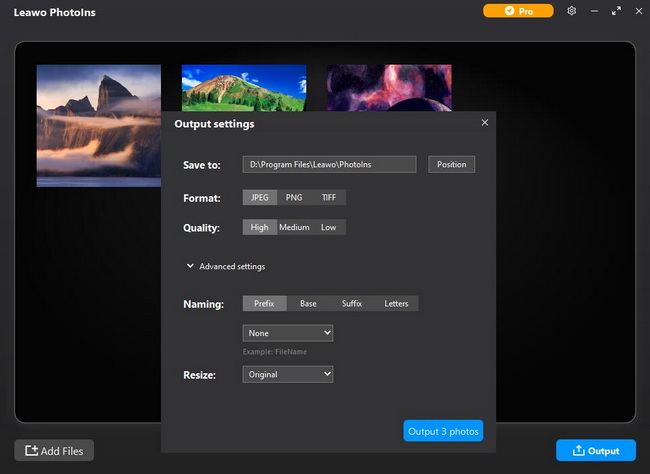
When finishing the AI enhancement, you can click the blue output button for output settings, including output directory, output format, output quality and so on.
Step 5. Export the Enhanced Photos
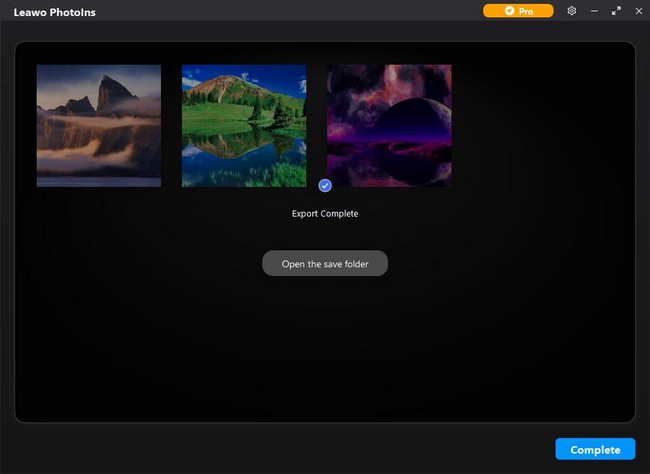
When the AI enhanced photos are exported, you can click “Open the save folder” button to locate and check the photos.


 Try for Free
 Try for Free

