When you encounter the issue that Instagram push notifications not working, how can you solve it? This problem is not hard to deal with as long as you know the methods. This guidance will show you the solutions to fix “Instagram notifications not working iPhone”. You can also know how to upload photos to Instagram from computer and how to transfer photos from computer to iPhone. Now let’s begin to read this tutorial to realize your goal.
You may also be interested in:
iPhone Won't Sync with iTunes, Here's Fix
How to Fix iTunes Not Recognizing iPhone in Windows 10
How to Fix "iCloud Backup Failed" Issue
Part 1: Methods to Fix "Instagram Notifications Not Working iPhone"
As for how to fix “Instagram notifications not working iPhone”, you can refer to the following methods to help you to get rid of this problem easily.
Method 1. Fix “Instagram Push Notifications Not Working” via Settings
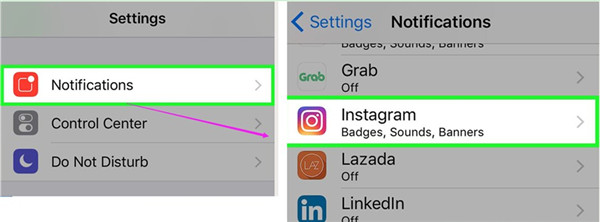
If push notifications for Instagram not working, you can check whether the “Notifications” on your iPhone has been turned off. If this is the problem, you can enable it to receive the notifications.
1. Click on the “Settings” panel on the home screen of your iPhone and then you need to head to “Notification > Instagram”.
2. Afterwards, you need to turn on the option of “Allow Notifications”. Thus, you can solve “Instagram push notifications not working” with a few clicks.
Method 2. Install Instagram Again and Allow Instagram Notifications to Fix “Push Notifications Instagram Not Working”
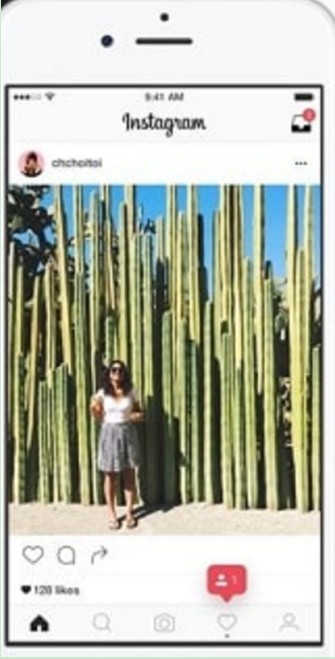
As for how to deal with “push notifications for Instagram not working”, you can try to reinstall Instagram to solve this problem. When the installation is over, you will see two pop-up dialogs to ask you whether you would like to allow notifications for Instagram. At this time, you need to tap the “Allow” button for the two messages.
Method 3. Solve “Instagram Notifications Not Working iPhone” by Resetting Network
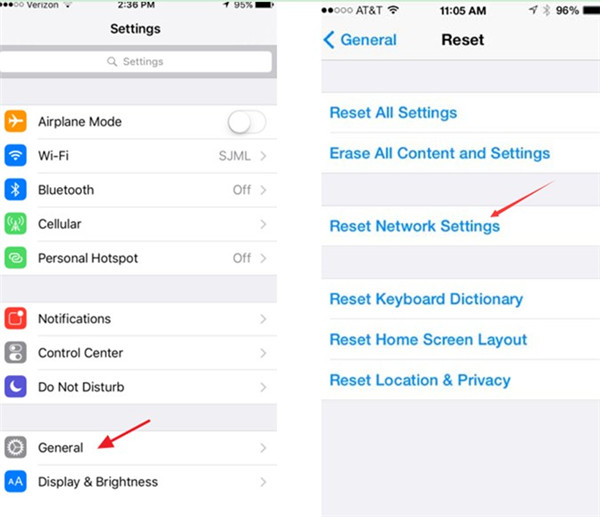
You can check the network setting to check if Instagram has been prevented from getting the connection of Internet. If this is the reason, you can reset the settings of network to fix “push notifications Instagram not working”. The detailed steps are as follows.
1. You need to head to “Settings > General” panel on your iPhone.
2. Afterwards, you need to choose “Reset” and then select the option of “Reset Network Settings”.
This method to fix “Instagram push notifications not working” is easy. If this still fails to realize your goal, you can continue to read the fourth method in this part.
Method 4. Turn Off “Do Not Disturb” to Fix “Instagram Push Notifications Not Working”
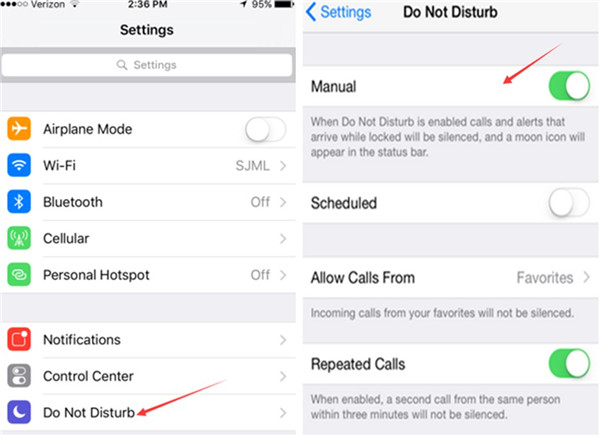
“Do Not Disturb” can also cause Instagram push notifications not working. In order to fix it, you need to follow the steps shown below.
1. Navigate to “Settings” on your iPhone.
2. Click on the panel of “Do Not Disturb” and then turn off “Manual” to solve this problem.
After you have used the methods shown above to fix “push notifications Instagram not working”, you can continue to read the second part of this tutorial to see how to upload pictures to Instagram from computer.
Part 2: How to Upload Photos to Instagram from Computer
When you have solved “push notifications Instagram not working”, you can continue to check how to upload photos from computer to Instagram. In fact, you can use a web browser to realize this goal. The detailed instructions are as follows. Here I would like to take Chrome for instance.
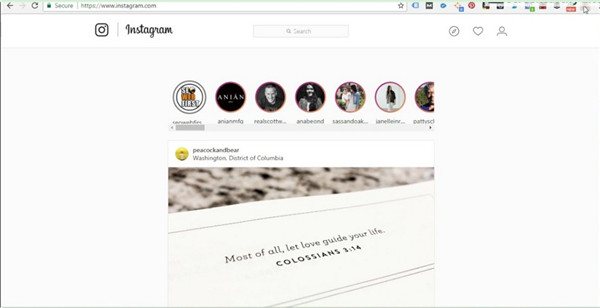
1. On your computer, you need to move to the Instagram.com in Chrome and then log into it.
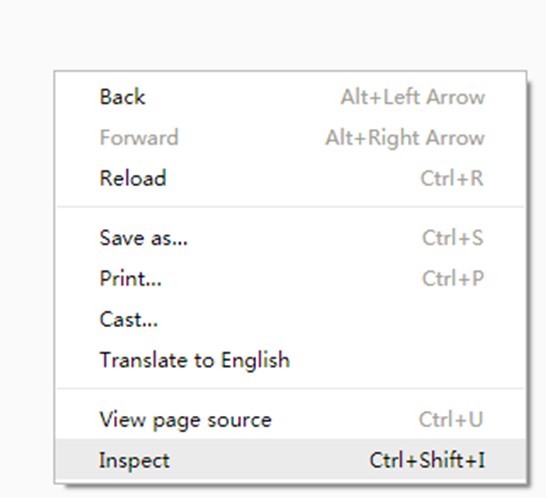
2. Afterwards, you need to right click the page and then choose “Inspect” to click on.
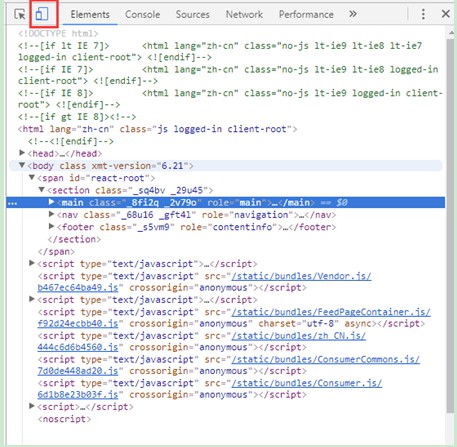
3. Tap the tablet icon at the top-left of the interface. After that, the page will switch to mobile view.
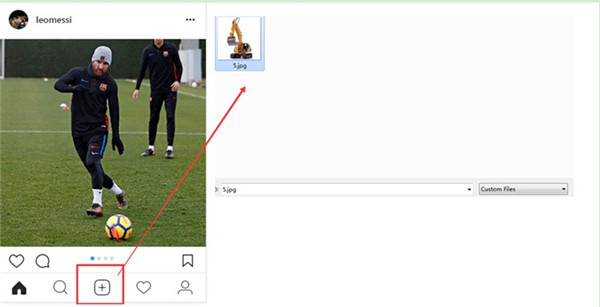
4. Click on the button with a “+” at the bottom middle of the interface and then browse your computer to upload the photos to Instagram directly.
This solution to transfer photos from computer to Instagram is quite simple. If you want to know how to move pictures from computer to iPhone, you can take a look at the third part of this guidance.
Part 3: How to Transfer Photos from Computer to iPhone via Leawo iTransfer
Leawo iTransfer can be your good tool to copy photos from computer to iPhone. This great software can be used to manage 12 kinds of files, such as songs, videos and etc. If you want to obtain professional and accurate transfer results, iTransfer is your best choice. Now let’s begin to take a look at how to use iTransfer to realize your transfer goal.
Leawo iTransfer
☉ Transfer files among iOS devices, iTunes and PCs with ease.
☉ Transfer up to 14 kinds of data and files without iTunes.
☉ Support the latest iOS devices like iPhone 7, iPhone 7 Plus, etc.
☉ Play back, view, and delete data and files on iOS devices.
1. Connect iPhone to Computer and Launch Leawo iTransfer
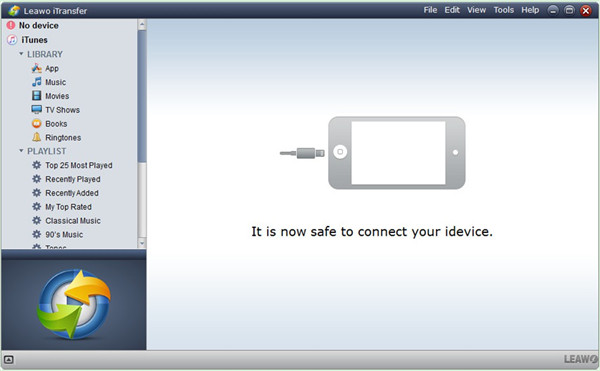
On your computer, you need to click to run iTransfer. Afterwards, connect your iPhone with computer by using proper USB cable. The information of iPhone will be displayed in the main window.
2. Add Photos to iPhone
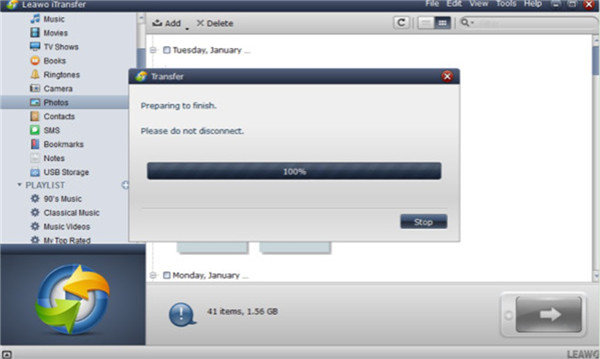
After that, you need to tap the iPhone icon in the interface and then move to click on “LIBRARY > Photos” tab. Find the “Add” button to click on and then you can browse your computer to find the pictures you want to move to iPhone. Click on the “Open” button and the transfer process will begin. In a few seconds, the procedure will come to an end. Finally, you can enjoy the computer photos on your iPhone.
This program is quite amazing to help you to solve how to transfer photos from computer to iPhone. You can try it to see how marvelous it is.

