When you have got an iPad, you may have some important files stored in it and don’t want to lose. Backing up iPad is a good way to protect your iPad data from losing, even if you lose data by accidental deleting, you can easily get the lost data back in the backups. So how to back up iPad? Actually, the methods of backing up iPad are various on the Internet. If you have no idea about how to backup iPad, this post would be your best reference.
Part 1: What is a Backup?
Your iPad or iPhone stores a lot of data that is very important to you. If the device has a problem or is lost, how can you ensure that the original data is not lost? You can use the device itself or some other software to back up. Backup, as the name suggests, is to prepare another copy to prevent the loss of the information on your iPad or iPhone. From time to time, various data in the device (including gallery, contacts, information, call records, memos, recordings, etc.) are stored on other media. Once the original data on the phone is lost, you can restore the backup data to the iOS device efficiently, avoiding many troubles caused by the loss of important information. For most people, the backup data include app data, iMessages, ringtones, health data, HomeKit, photos, videos, etc.
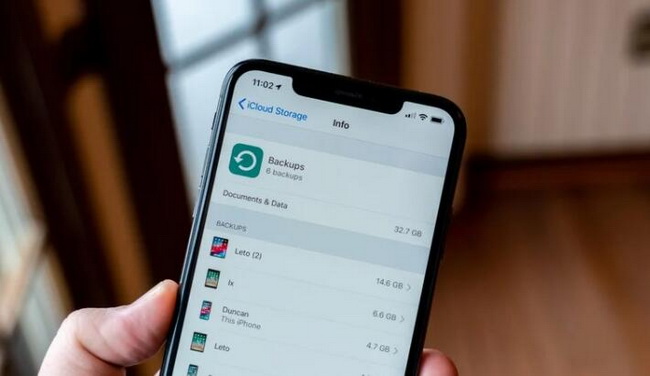
For iPad users, you can adopt the default backup tool iCloud to back up your device. If you use iCloud to back up the data, then all the backups would be stored locally in your iCloud account. In addition, iTunes can be another effective way to transfer your data to your PC for further backup. If you prefer to use iCloud, then you should make sure that you can get access to your iCloud account wherever you go using Wi-Fi, while you have to carry out the steps on your computer if you back up the data via iTunes. No matter which way you use to back up your iPad, there are some limits for the backup method. One of the major obstacles is you would only have 5GB storage on iCloud which is not enough at all. In the following parts, several detailed backup methods would be provided to solve the problem.
Part 2: How to Backup iPad to iCloud?
Have no USB cable available at hand? Don't know how to backup iPad to computer? iCloud can help you. iCloud, as a cloud storage app, allows you to upload your iOS files inside and download to your devices when you need. So iCloud can be used for backing up iPad data. The steps are also simple, you only need to enable the Backup on your iPad, you can follow the steps below to make it. It is easy to upload files to iCloud or back up data with iCloud, but the free space of iCloud is 5GB, and you are only permitted to back up limit kinds of files in it. What’s more, you are only able to download the files with the iPad connected over Wi-Fi, so it’s not that convenient. Here are the detailed steps.
Step 1: Connect your iPad to a Wi-Fi network.
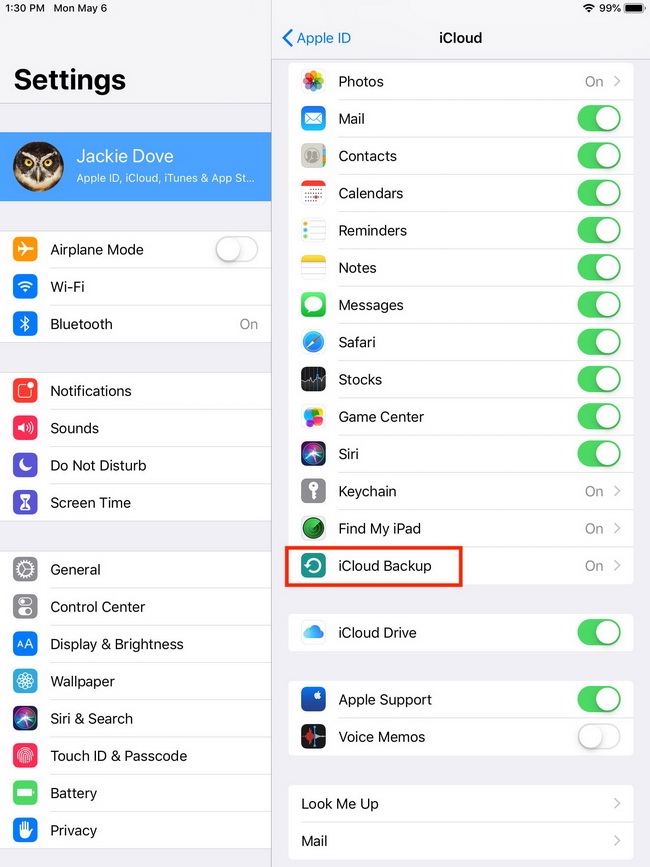
Step 2: Tap Settings > iCloud > iCloud Backup. (iOS 8 or later)
Tap Settings > iCloud > Storage & Backup. (iOS 7 or earlier)
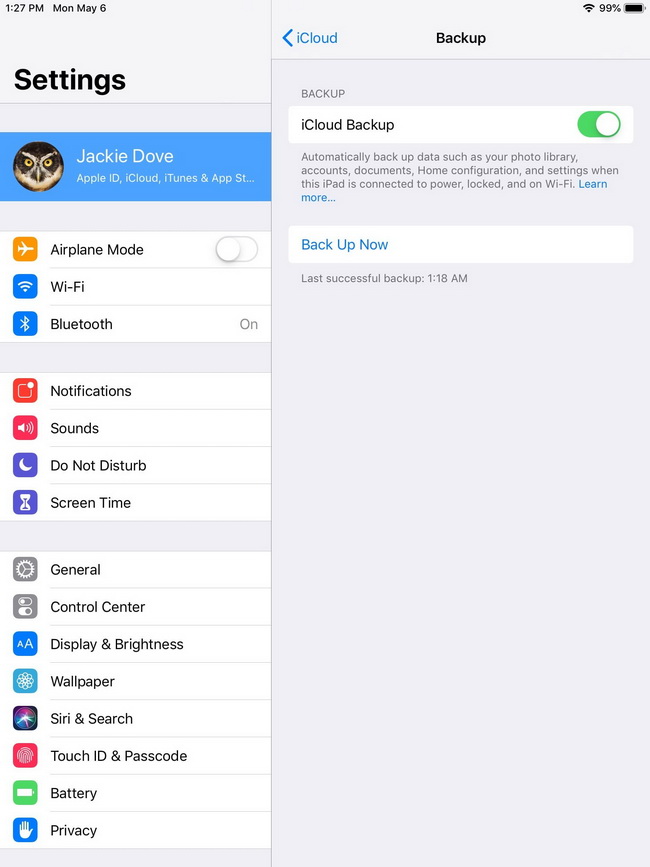
Step 3: Make sure that iCloud Backup is turned on.
Step 4: Tap Back Up Now. Stay connected to your Wi-Fi network until the process completes.
Step 5: Make sure the backup finished by tapping Settings > iCloud > Storage > Manage Storage, and then select your iPad.
Part 3: How to Backup iPad to iTunes?
If you're looking for a free method to do iPad backup, iTunes is undoubtedly a good choice. It helps to backup settings, wallpapers, app, voicemail, and more. Below is the detailed guide about how to backup iPad with iTunes.
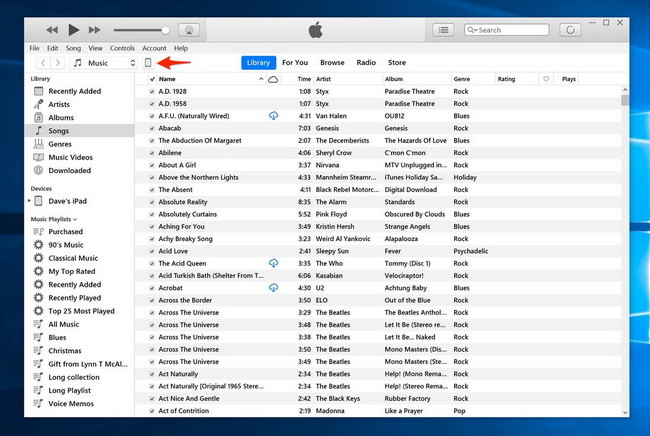
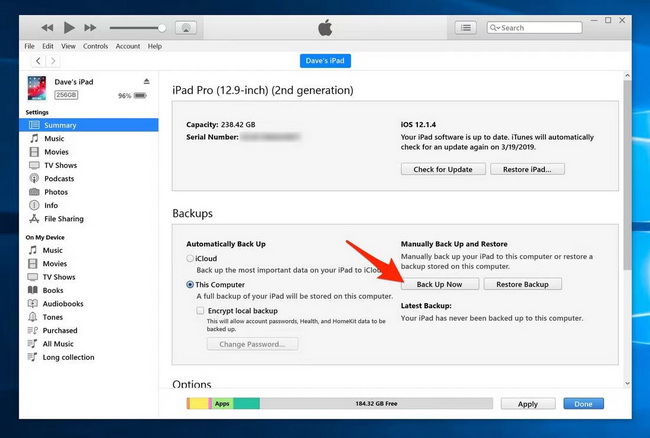
Step 1: Connect your iPad to computer using an USB cable. Then launch iTunes.
Step 2: Click device button to the left of the iTunes Store button in the top right corner in iTunes. Then click "Summary" in the left sidebar.
Step 3: Click "Back Up Now" in the right part, iTunes will begin to back up your iPad.
If you just want to back up your purchased files, the following steps will show you how to do it:
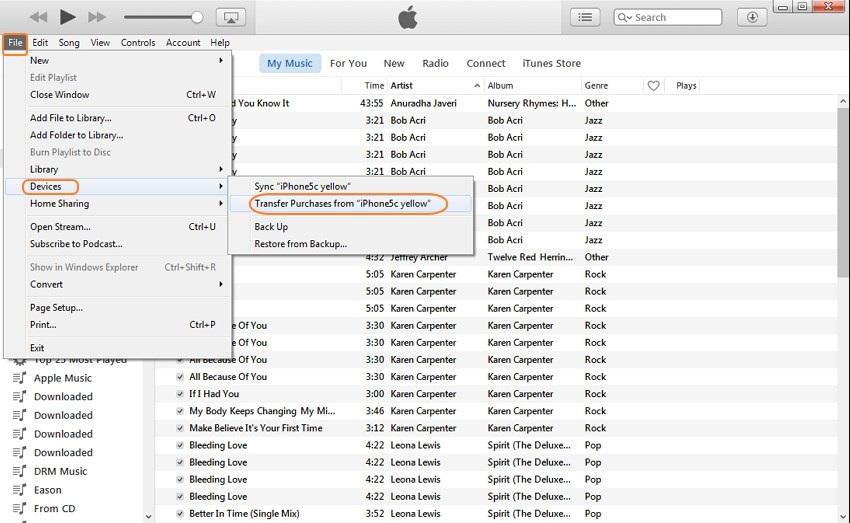
Step 1: Open iTunes and connect your iPad to your computer.
Step 2: Click File > Devices > Transfer Purchases. Then wait for the transfer to finish. If you're using Windows computer, hold down the Control and B keys.
Part 4: How to Backup iPad to Computer with Leawo iTransfer?
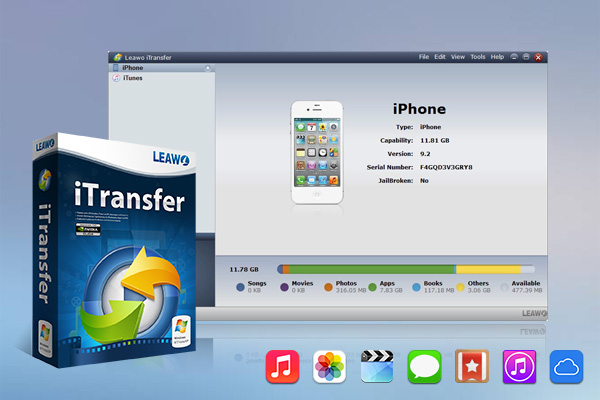
If you want to backup iPad data like apps, music, movies, TV shows, ringtones, photos, Camera, contacts and text messages, bookmarks, notes, usb storage to computer, you need the professional iPad backup software – Leawo iTransfer. To backup data on iPad to computer with the iPad transfer tool, you should download Leawo iTransfer first. Here is a quick how-to guide for you to backup music, movies, ringtones, apps, etc. to computer.
Step 1. Download and install Leawo iTransfer on your computer
Go to the official site and download iTransfer free in seconds. Then, install the program on your computer.
-
Leawo iTransfer
- Transfer files among iOS devices, iTunes and PCs with ease.
- 6x faster than iTunes
- Transfer up to 14 kinds of data and files without iTunes.
- Support the latest iOS devices like iPhone 12, iPhone 12 Pro, etc.
- Play back, view, and delete data and files on iOS devices.
- Support Windows & Mac OS
Step 2. Connect the iPad to computer
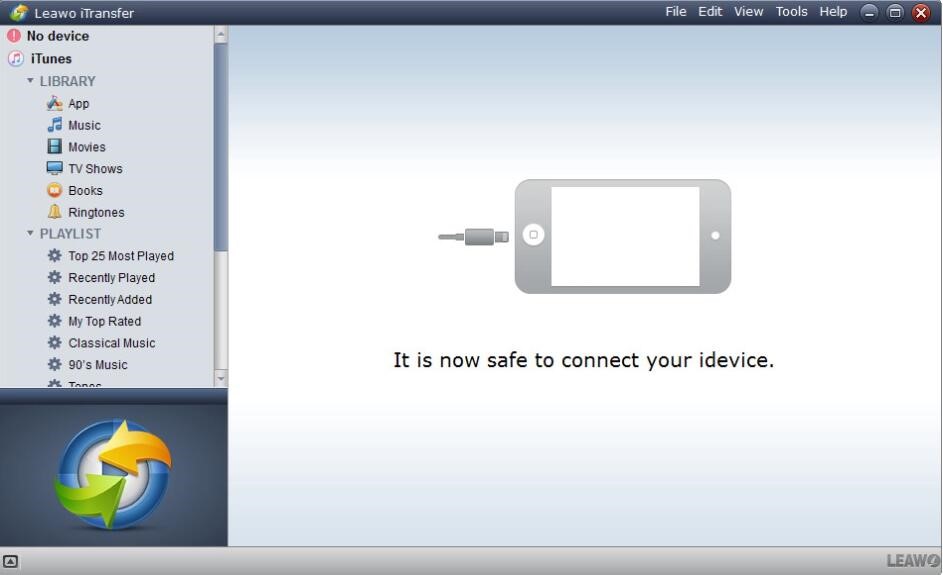
After downloading and installing Leawo iTransfer, launch it on your computer, then connect your iPad to PC. The program will detect the iPad and show all the iPad data in iPad Library on the left sidebar.
Step 3. Select files to be backed up
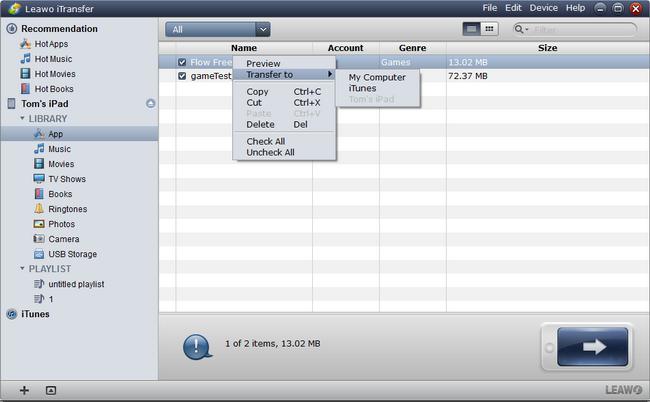
Next, you should select the files you want to backup from the files listed on the left sidebar. The files that can be selected for backup include app, music, movies, TV shows, books, ringtones, photos, etc. To select multiple files, you coluld hold "Ctrl" and click the files you want to back up, and right click the chosen files and choose "Transfer to > My Computer".
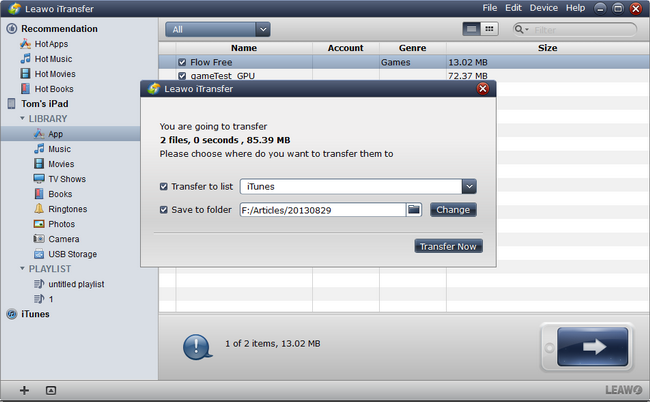
Step 4. Transfer Settings
Then a dialog box of transfer settings pops up for you to select a saving location on your computer, and in "Transfer to List", select your computer. When all the setings have been finished, click "Transfer Now" to start to back up iPad to computer.
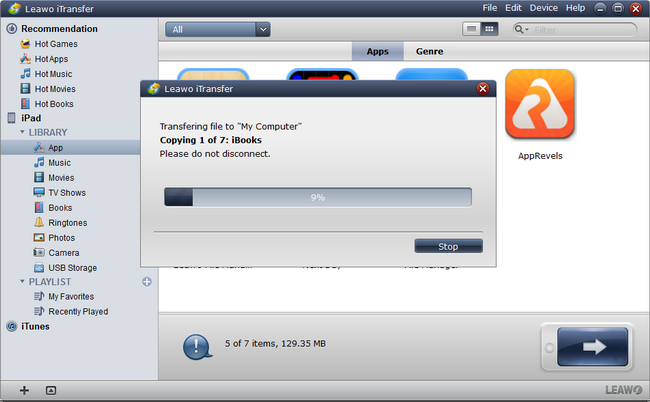
Step 5. Backup iPad to computer
After clicking "Transfer Now" button, all the files you have chosen begin transferring to the computer folder, you can watch the transferring process bar. Don't disconnect your iPad until the transferring finishes.
Part 5: How to Backup iPad to Mac?
Instead of depending on iTunes or other transfer programs, if you would like to backup iPad to Mac directly, then you can follow the steps below the complete the backup steps.
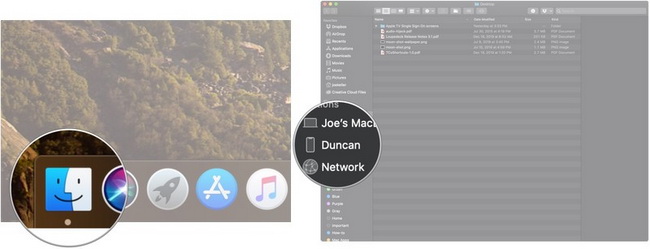
Step 1: Connect your iPad to Mac. Then click the Finder icon in the dock. Then you can find your device under Locations in the Finder sidebar.
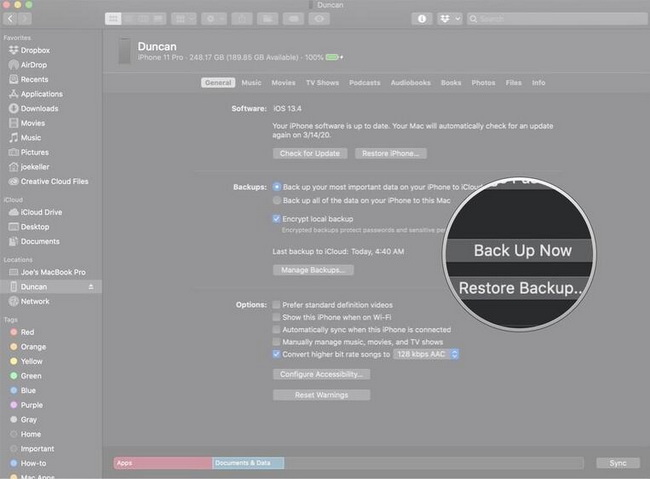
Step 2: Then, you can view all the iPad information on your Mac. Also, you can find the Back Up now option on the main interface. Click it to manually backup your iPad.
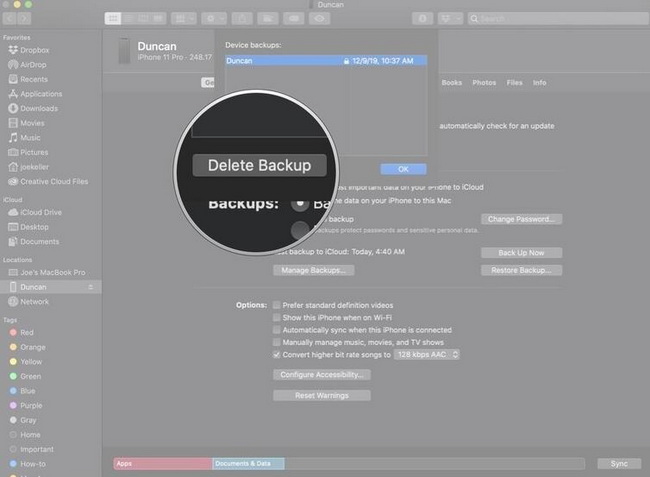
Step 3: Furthermore, you can click Manage Backups to view all the existing device backups. By the way, if you would like to delete some of the previous backups, you can click Delete Backup.
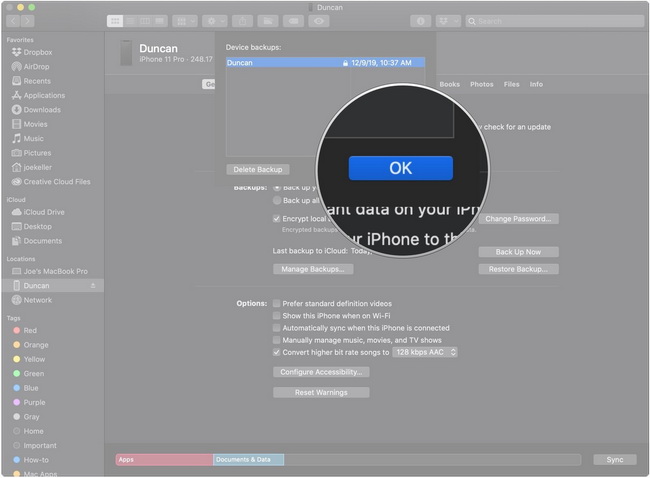
Step 4: After all settings have been done, you can simply click on OK to start backing up your iPad to Mac.
Additionally, if your Mac is running on the macOS Mojave system, the above steps would not be appropriate. In order to backup iPad to Mac under macOS Mojave, instead, using iTunes would be the exact method. On your Mac, connect your iPad to the computer and then open iTunes. Then, the steps would be similar to the above part on how to backup iPad to iTunes.
Part 6: How to Restore iPad Backup?
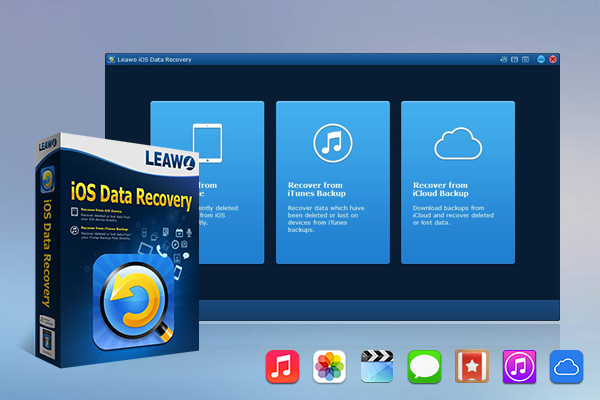
Once you have made the backup of your iPad, then you can transfer to the original iPad data to any other iOS devices you like. Based on this, what you need to get familiarize is to restore iPad backup to the new device, or how to sync apps to iPad accordingly. If you don’t want to download and install any third-party restore programs, you can restore your iPad with iTunes and iCloud directly. For better experience, you can refer to Leawo iOS Data Recovery as the excellent tool to restore your iPad in an efficient way. First of all, you should download and install Leawo iOS Data Recovery on your computer.
Step 1: Download Leawo iOS Data Recovery
Select a proper version of Leawo iOS Data Recovery, then download and install it on your computer for preparation.
-
Leawo iOS Data Recovery
- Recover lost or deleted data from iOS devices, iTunes backup and iCloud backup
- Retrieve files from iTunes and iCloud backup even for lost or broken iOS devices
- Restore 12 types of data, including photos, videos, SMS & MMS messages, contacts, call history, notes, calendar, etc.
- Fully support all iPhone, iPad and iPod touch models
- 100% safe, accurate and speedy recovery
- User-friendly interface and simple operations
Step 2: Choose recovery mode in main interface
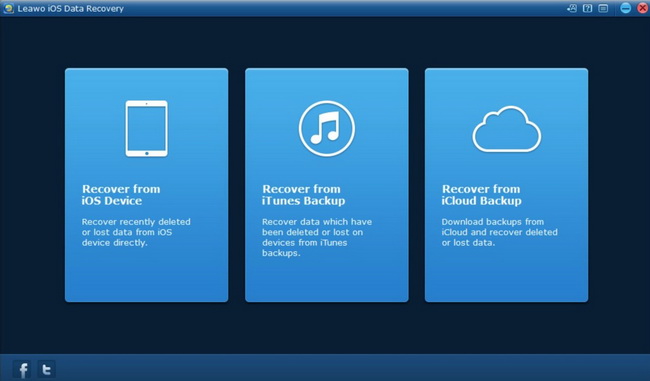
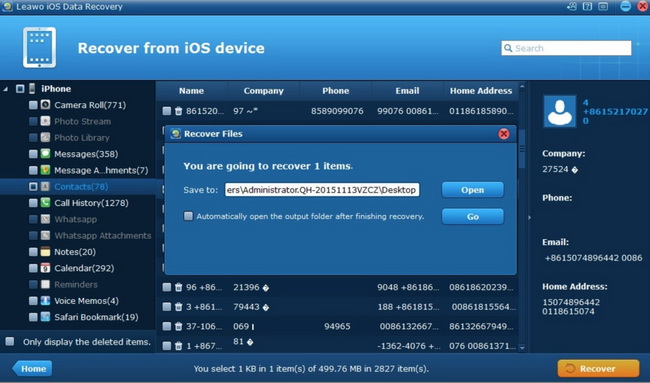
Run Leawo iOS Data Recovery on computer and then use a proper USB cable to connect iPad with your computer. This software will detect your iOS device automatically. After that, you need to pick up "Recover from iOS Device" to click on.
Step 3: Select the data to recover
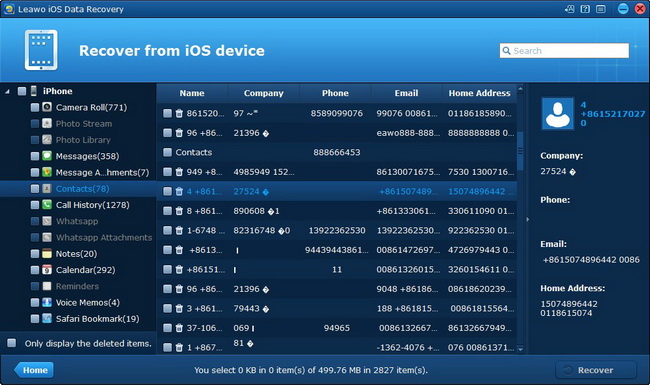
When you view all categories of iPad in the left sidebar of the software screen, you need to check your preferred data, like “Photo Library”, or “Camera Roll”. Afterwards, you need to click on the "Recover" button at the rightmost corner of the interface.
Step 4: Choose target folder on your computer
In the pop-up dialogue, you need to click on "Open" button and then browse your computer to choose a proper location to save the exported files. After you set the target directory well, you can tap on the button of "Go" to start the process to recover files. In a few seconds, the data will be available in the folder.

