
Nowadays, intelligent mobile phones have played an important role in our life due to the built-in advanced technologies. In many cases, you may come to know that your mobile phone could run very smoothly and nothing incorrect would happen since you purchased it. However, it is hard to guarantee the accessories equipped with your mobile phone can work properly all the time, especially the charging cable some some other accessories. Among them, one of the most frequently asked question is why was my accessory not supported by the mobile phone? If the accessory may not be supported, then the additional function would not be enabled smoothly. Then, how to fix the problem? Actually, sometimes this is not falling to the accessories’ problems. Follow the solutions below, you may resolve the problem efficiently.
Method 1: Restart your iOS device
The accessory may not be supported when your device is running improperly. In such a case, if you can restart your iOS device, including your mobile phone or other devices, some default settings may be reset correctly. Then, the accessory could be supported in the right way. Here are the detailed steps on how to restart your iPhone in various models. So, it is easy to handle with. Also, some users would worry about whether the content data may be erased while restarting the iPhone. Actually, just relax. The content would not be erased by restarting your iPhone in this way. Here are the simple instructions to restart your iPhone.
If you are using iPhone 6/6s/6S Plus or older, you can press Home button and Power button together until the Apple logo appears on the screen. Then, you should release the buttons to wait for the startup process about 10-20 seconds. If you are using iPhone 7/7 Plus, you should press and hold Power button and Volume Down button together until the Apple logo appears on the screen. Then the startup process would begin. If you are using iPhone XR/XS Max/8/8 Plus, you should press Volume Up button and then quickly release it. Secondly, press the Volume Down button and quickly release it. Finally, press and hold Power button until the Apple logo appears on the screen, then you can wait for some time to restart your iPhone. When your iPhone has been powered off, then press the Power button for about three seconds, then your iPhone could be powered on then. If you are using other iOS devices, the steps are similar.

Method 2: Test with another certified accessory
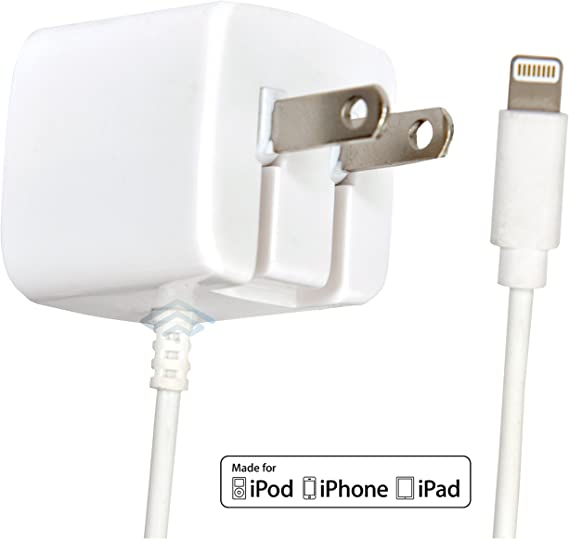
If you tried to restart your iOS device but it doesn’t work still, then you have to check whether the charging cable you have used is MFi-certified or not. Simply speaking, you have to make it clear that whether the charging cable isn’t consistent with Apple’s standards. Some people may choose to buy the charging cables online or in some personal stores instead of at the local Apple store. Usually, those are not MFi-certified always which have been made at the cheaper price. What’s more, this accessory would cause significant damage to your iPhone. In order to solve the problem, if possible, you can charge your iPhone with another certified accessory instead of the previous one. If this certified accessory can be supported by your device, that means your device is all right and the problem is caused by the incorrect non-certified accessory. Then, the assured way to solve the problem is to buy a new on at your local Apple store which is MFi-certified.
Method 3: Clean your lightning port and charging port
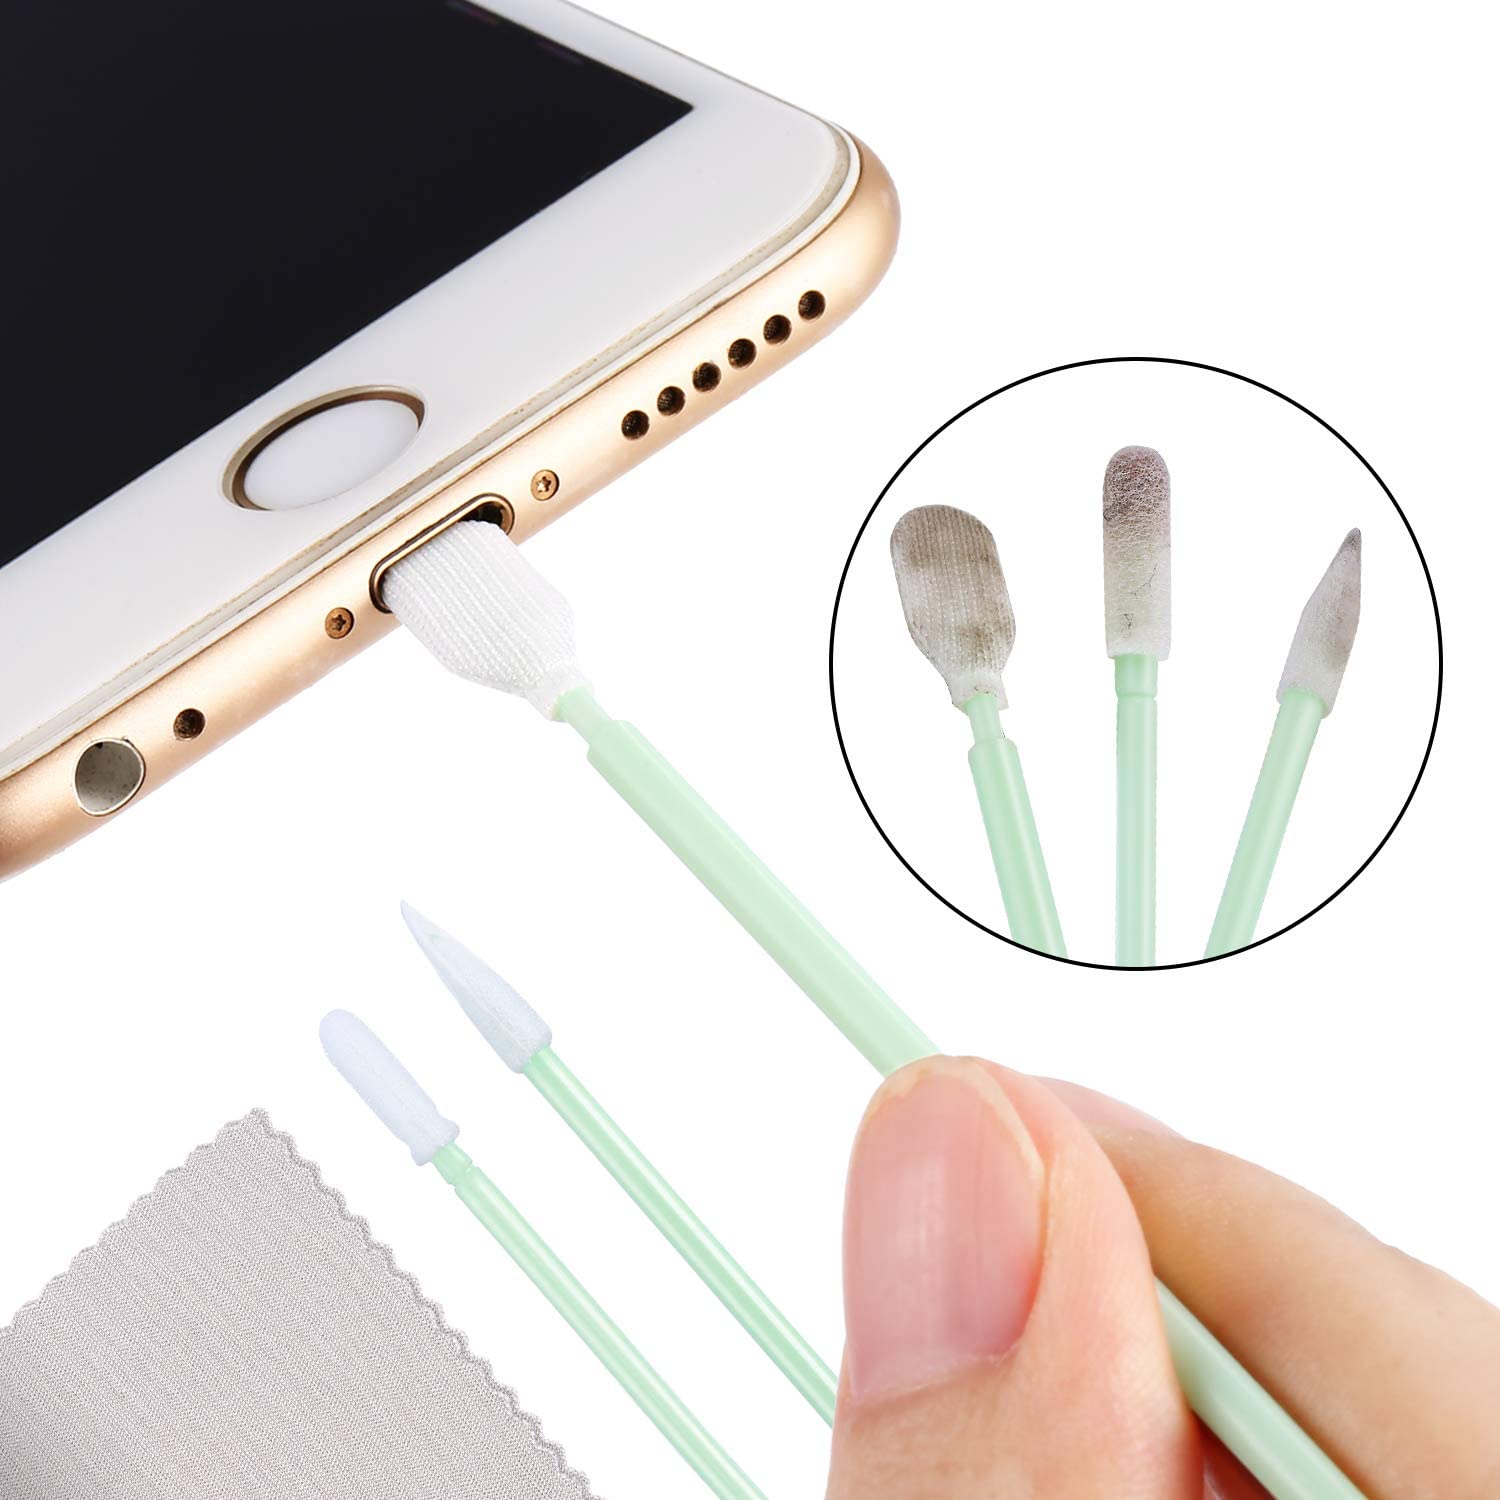
Asides from checking the certified charging cable and restarting your iOS device, you can take a deep look at the lightning port and charging port of your device. Usually, if the iPhone was covered by too much gunk, dirt or debris, then the accessory would not be properly connected to the device. Then “This accessory may not be supported” notification would appear on the screen. Just mentioned similarly, the lighting port should be checked carefully whether anything was stuck inside the port. If you have found something inside the lightning port or the charging port, then, what you should do it to clean them in the proper way. For example, you can get some anti-static brush or new toothbrush to wipe the dirty things away from the lightning port and charging port. Once it is done, you can try to connect the accessory with your iPhone to check whether any problem exists.
Method 4: Update your iOS
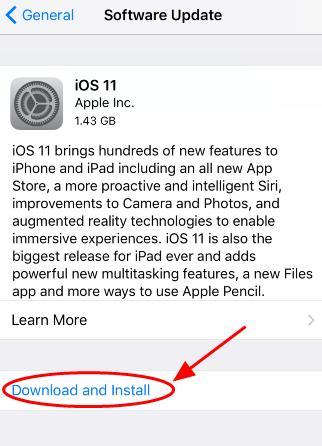
Last of all, if you have not resolved the problem by trying the above solutions, another way to help you out is to update your iOS. Usually the newer iOS would allow you to have a totally new iPhone to some extent. Sometimes the older version of iOS may cause some incompatibility issues. You can follow the steps below to update your iOS. Before updating, make sure you have already connect to Wi-Fi.
Step 1. Enter the Settings panels and select General and then Software Update.
Step 2. Start updating iOS system. Usually, if a newer iOS system has been released, there will be an option for Download and Install. You only need to tap this option. Follow other steps showed on the screen to complete the updating process. Usually the downloading would take some time.
Method 5: Recover your iOS device in recovery mode
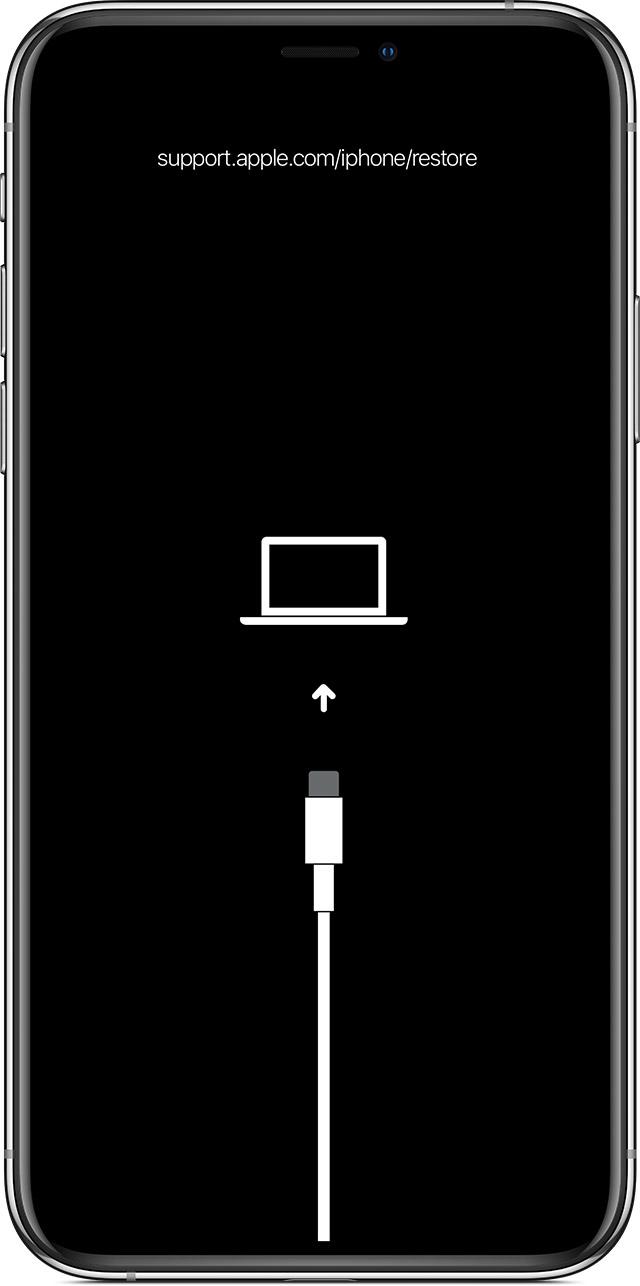
But in some cases, the above solutions would not let you out. Then these accessories are not supported by your iOS device still. There is another way for you to try. That is to recover your iOS device in recovery mode. In such a case, you can reset your iPhone in recovery mode. If you are not familiar with the recovery mode, follow the step below to complete the restoring process. But you have to be clear that restoring your iPhone in recovery mode would not keep your data safe and sound. Instead, all your data on the iPhone you stored before would be totally removed from your phone. In order to prevent these data from being lost from your iPhone, backing them up via iTunes or iCloud could be quite necessary. Once you can guarantee all your data have been backed up, then you can follow the steps below to restore your iPhone in recovery mode.
Step 1. Update your iTunes to the latest version.
Step 2. Connect your iPhone to your computer. You should press and then quickly release the Volume Up button. Then press and quickly release Volumn Down button. Then press and hold the Up button on the top still until your iPhone goes into the recovery mode. If your iPhone has the Home button, then you should press and hold both the Home and the Top (or Side) buttons at the same time. Hold them still until you can see the recovery mode screen.
Step 3. Update your iPhone. Once you have connected your iPhone to your computer and on the iTunes interface you can find the “Update” option. Then click it to allow your iPhone to download the backed up data from computer to your iPhone. As well, the previous data would be removed when you start it. Wait patiently and the recovery mode would last 15 minutes and the updates would be completed then.
What should you do if the data on iPhone have been lost?
While recovering the data on your iPhone, some important data may be lost by accident. Don’t worry too much about the problem. If you really desire to recover the lost data, then Leawo iOS Data Recovery could be the useful program you can turn to.

-
Leawo iOS Data Recovery
- Recover multiple deleted data directly from iPhone/iPad/iPod touch
- Extract and export 12 types of files from previous iTunes&iCloud backup
- Back up 12 kinds of data on iOS devices to computer
- Recover data lost due to jailbreak, iOS upgrade, deletion, etc.
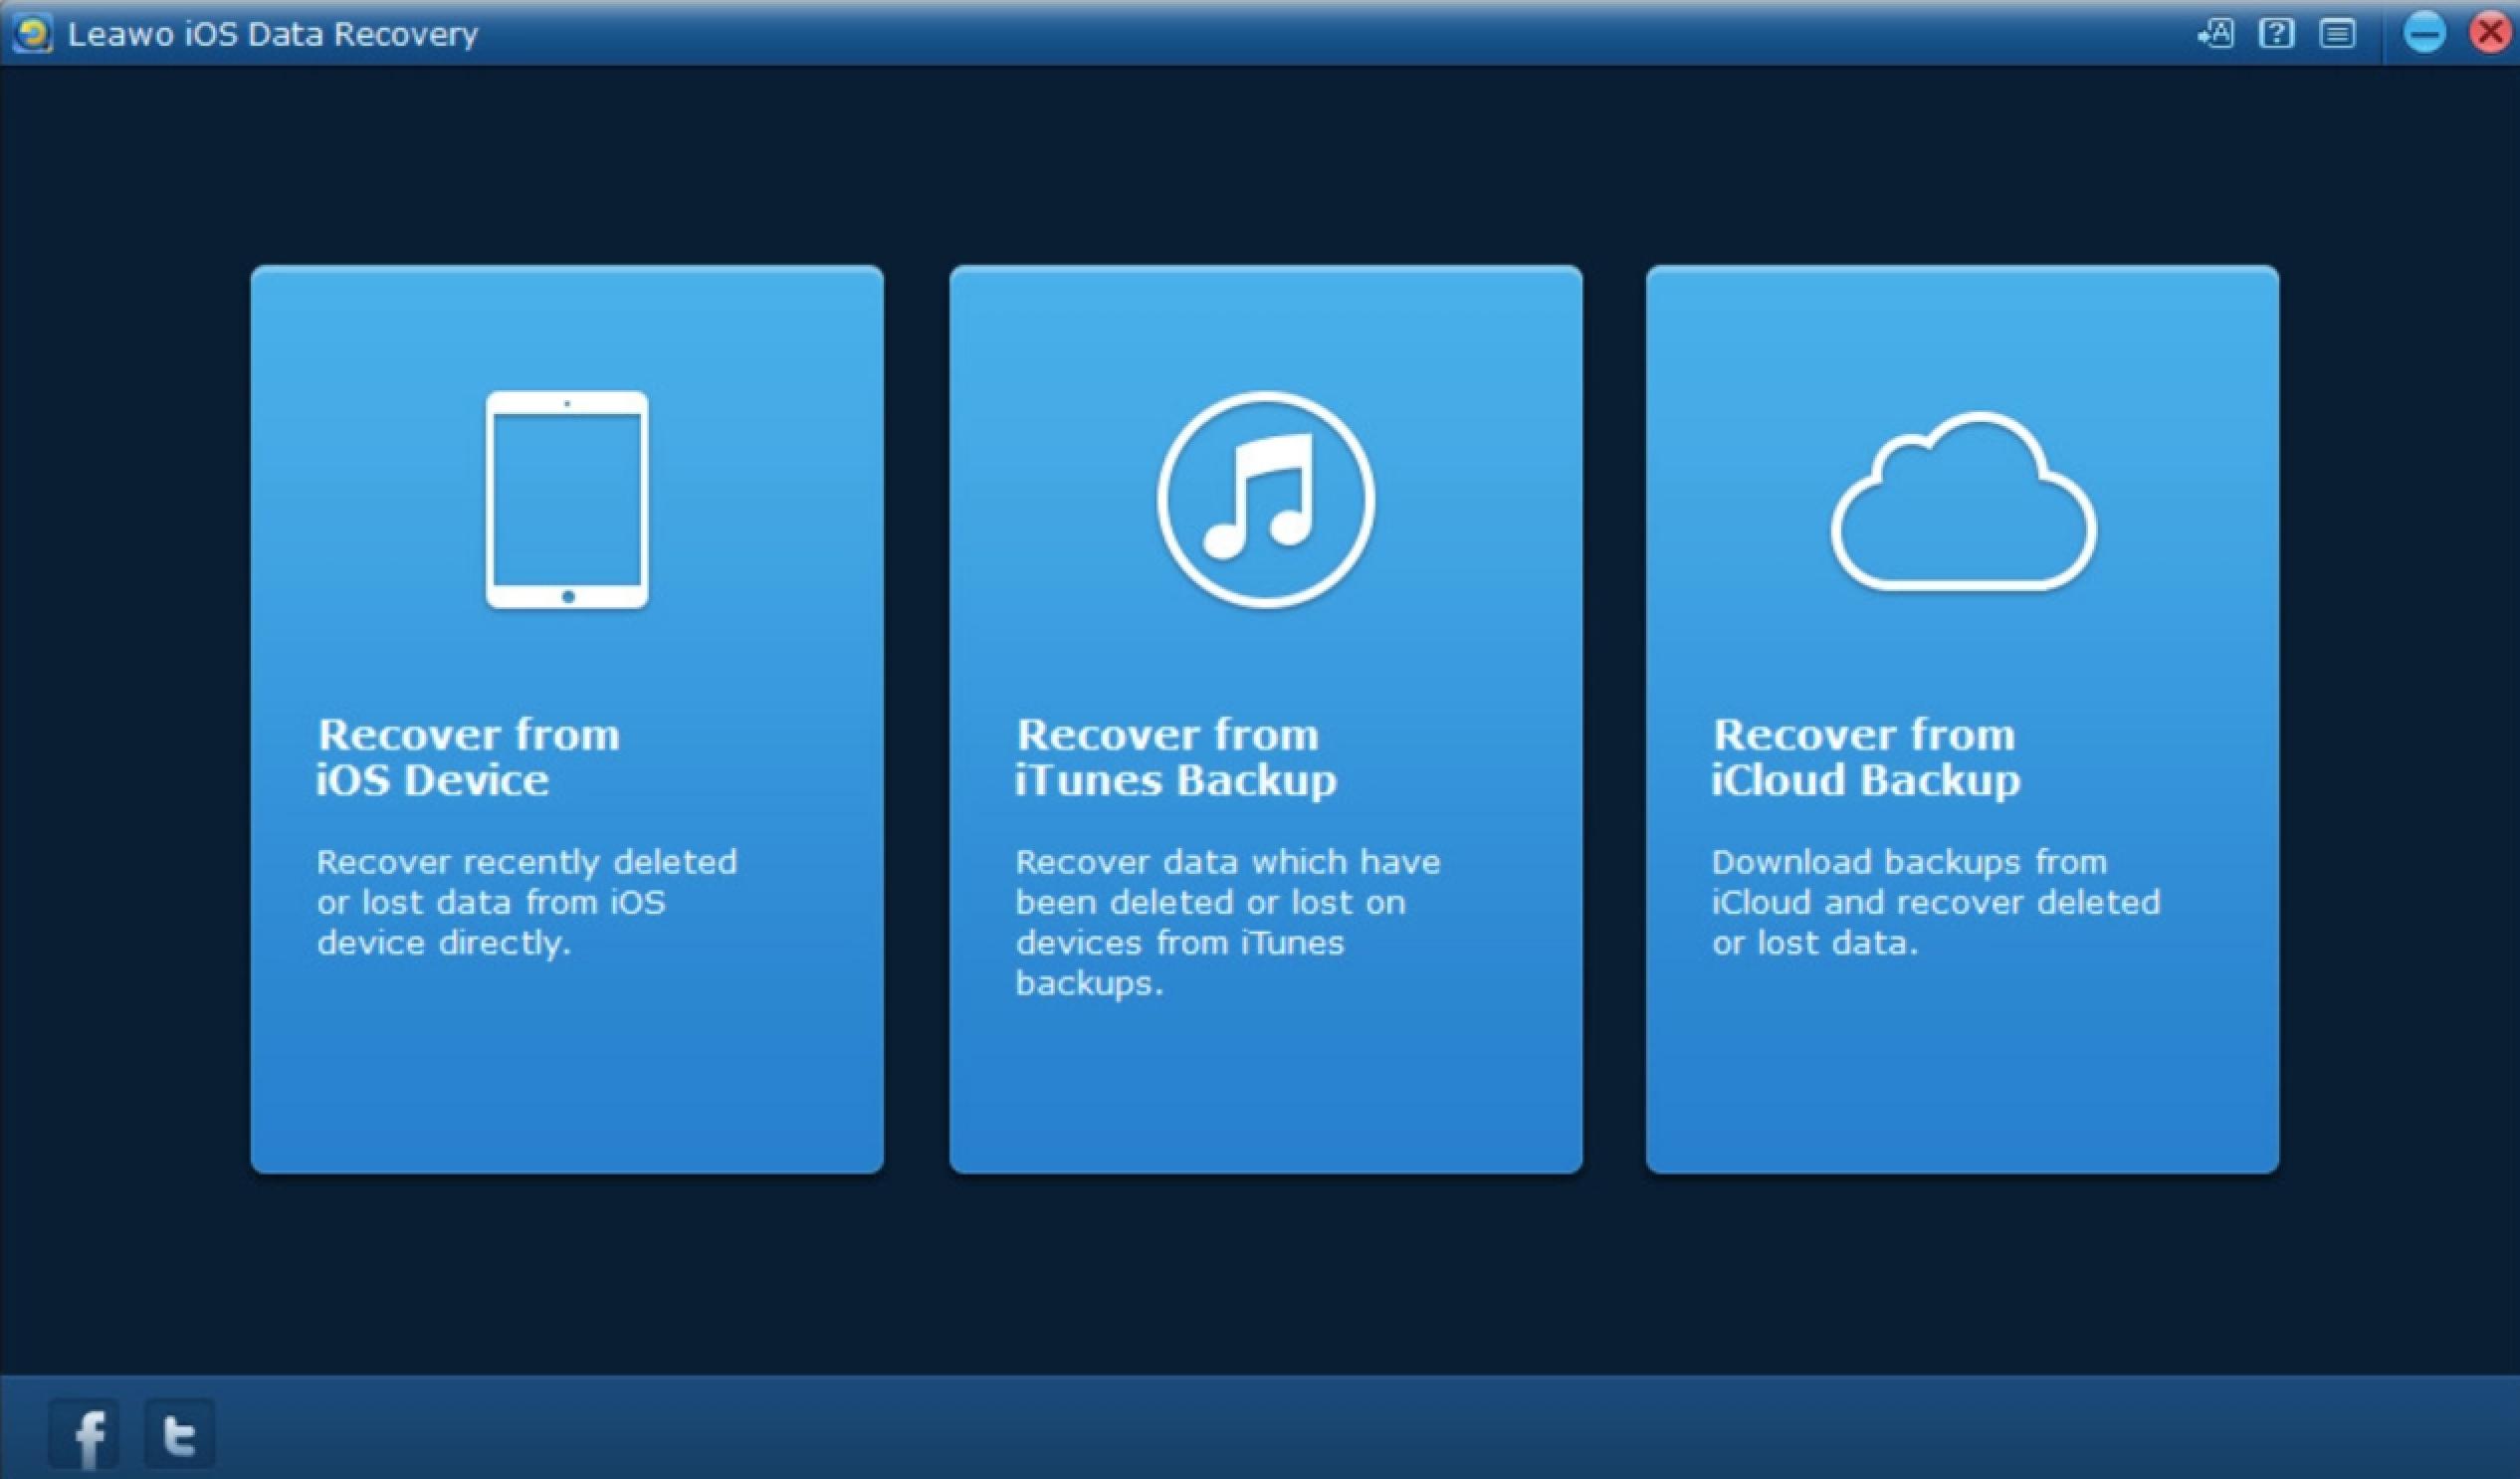
Step 1. Choose recovery mode in main interface
Run Leawo iOS Data Recovery on computer and then use a proper USB cable to connect iPhone with your computer. This software will detect your iOS device automatically. After that, you need to pick up "Recover from iOS Device" to click on.
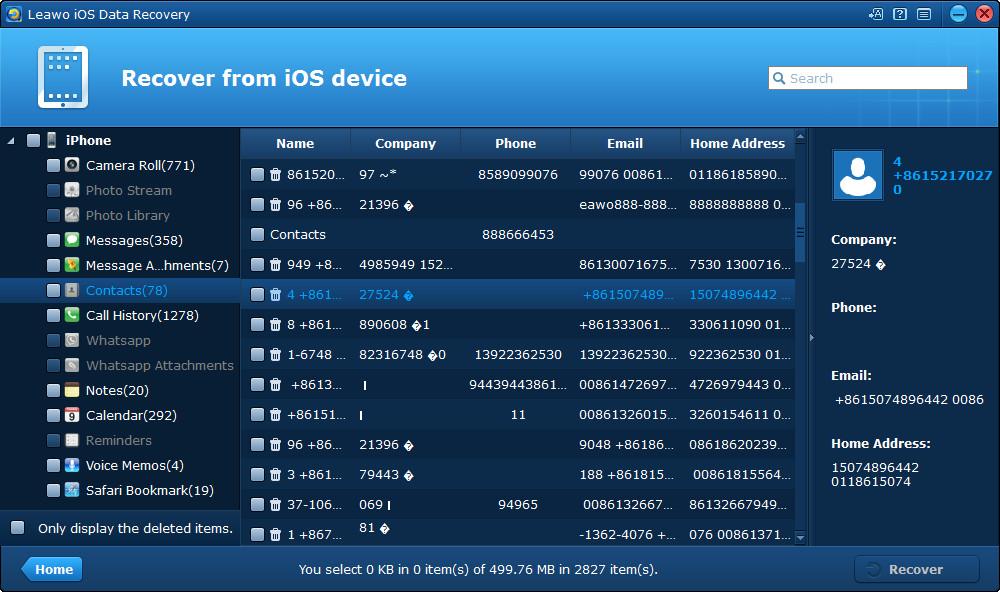
Step 2. Select data to recover
When you view all categories of iPhone in the left sidebar of the software screen, you need to check all the apps you would like to back up. Afterwards, you need to click on the "Recover" button at the rightmost corner of the interface.
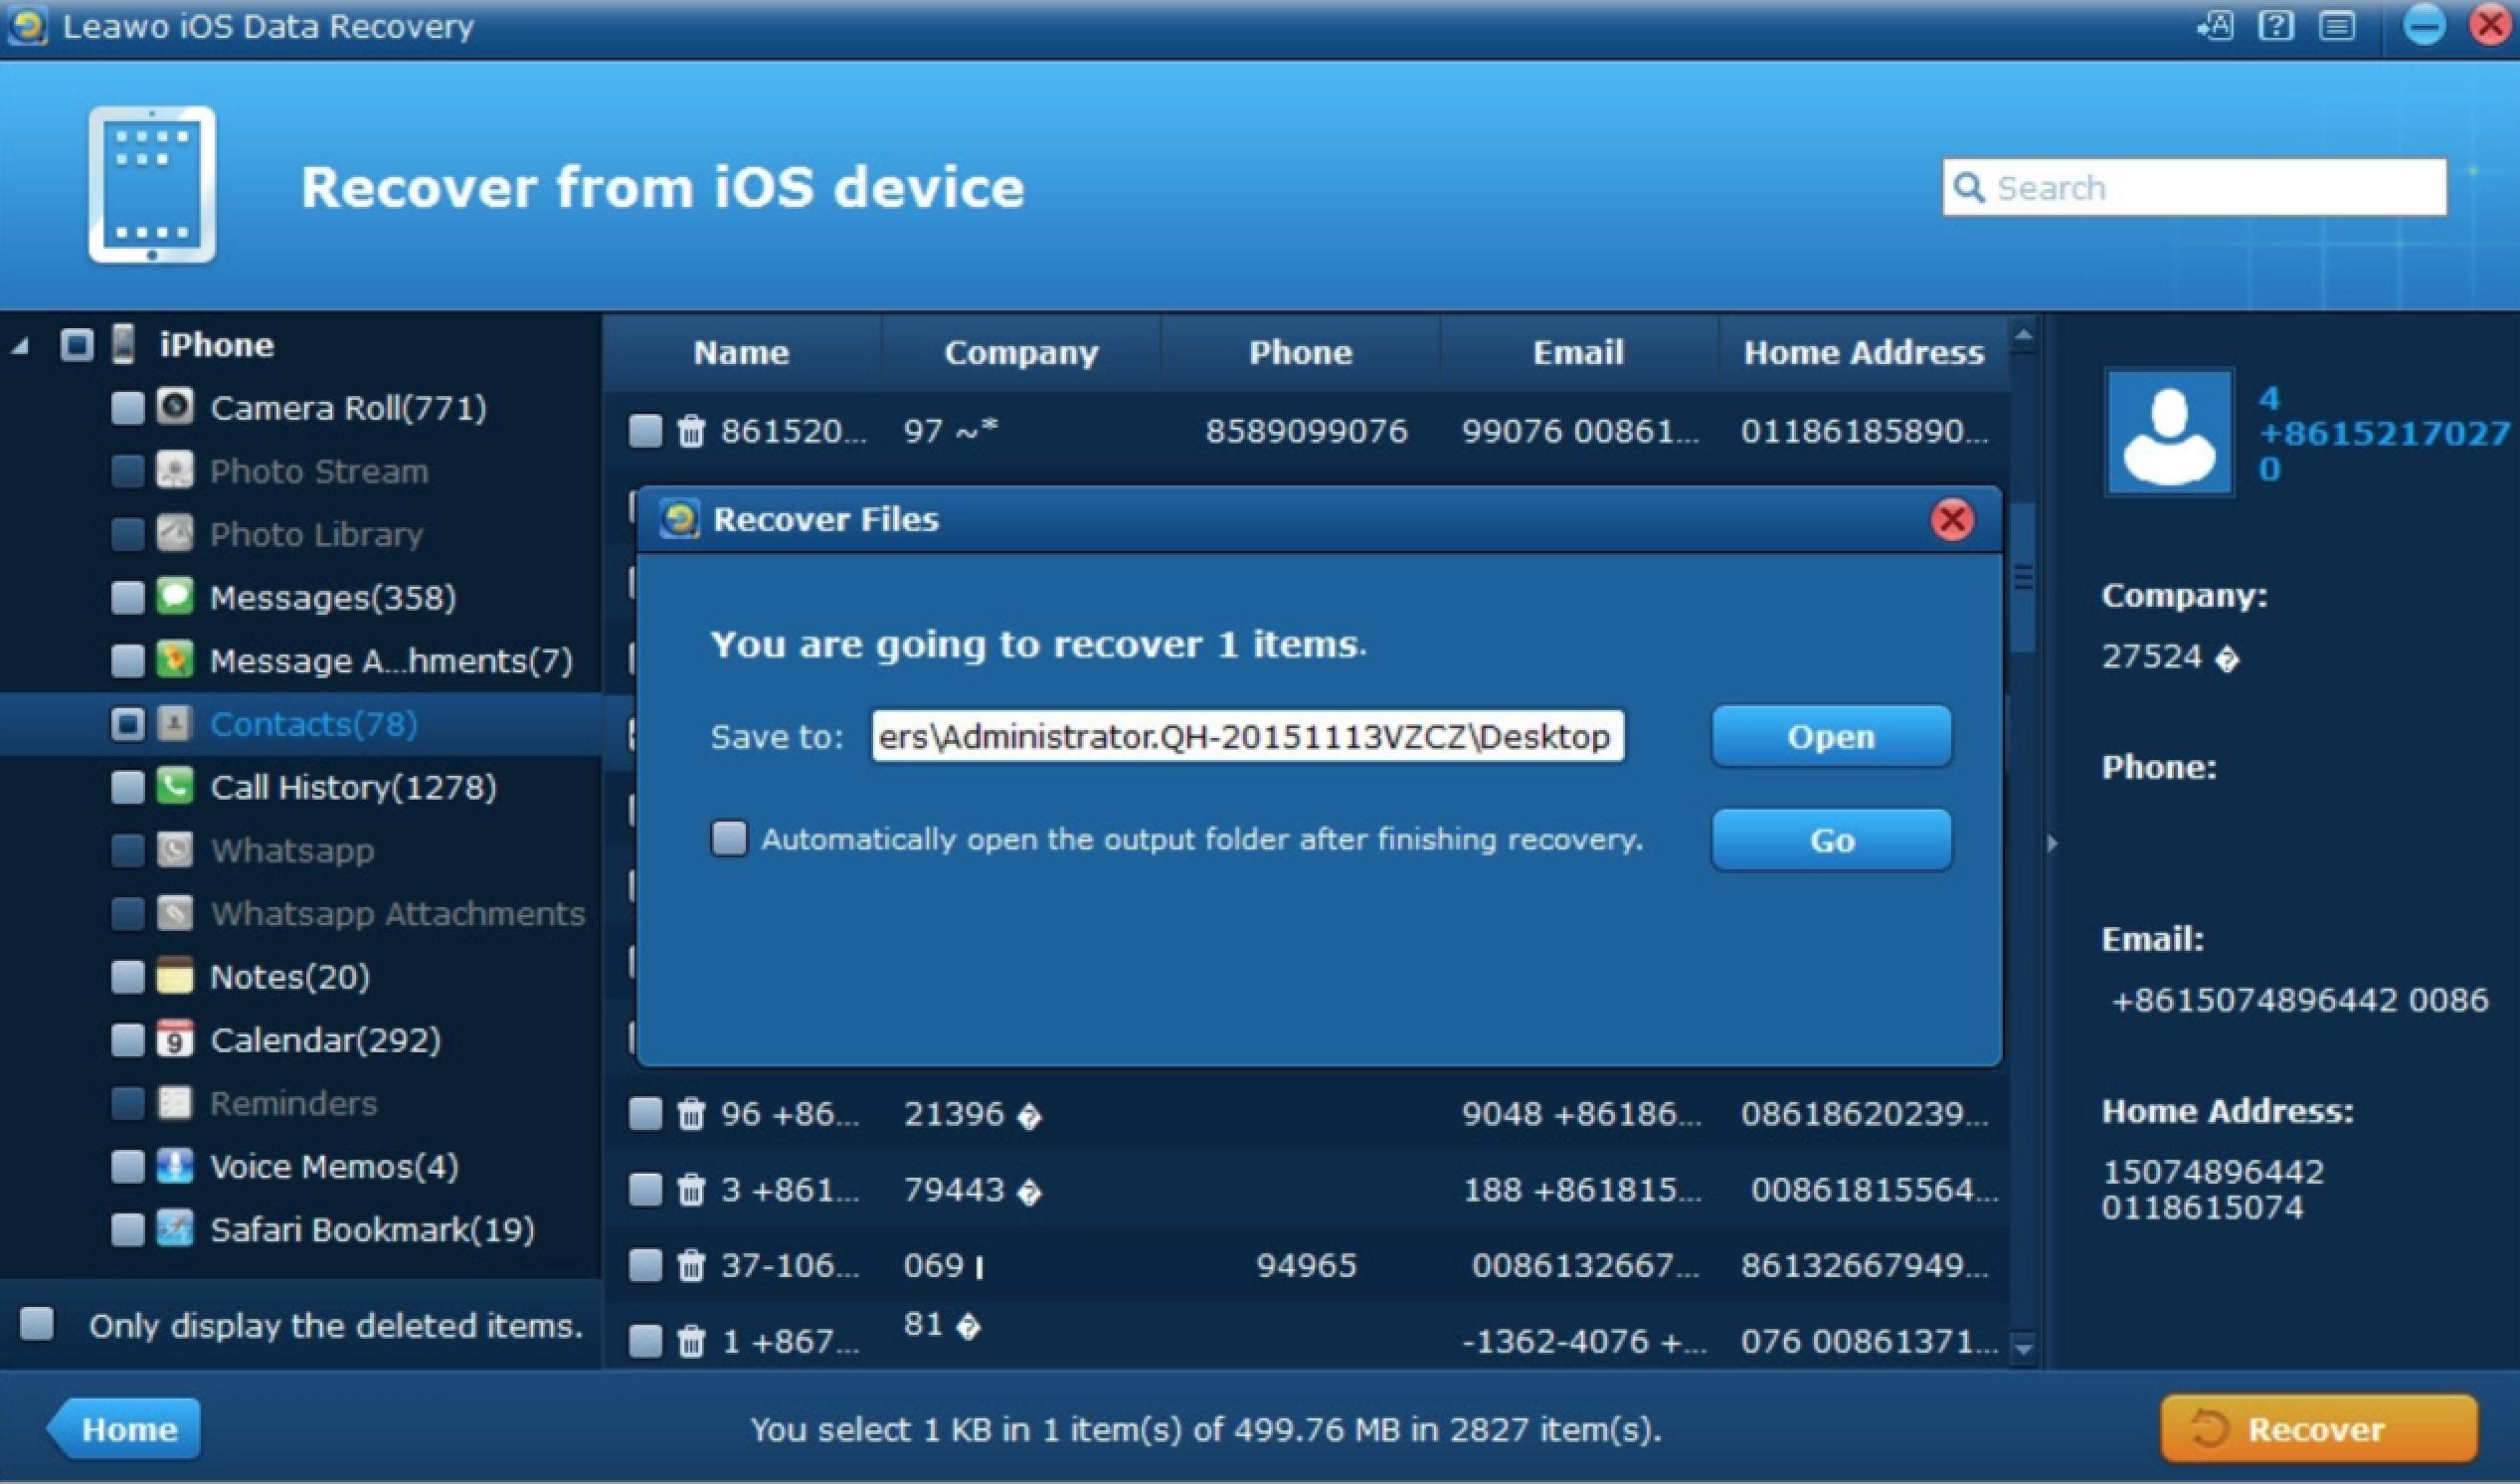
Step 3. Choose target folder on your computer
In the pop-up dialogue, you need to click on "Open" button and then browse your computer to choose a proper location to save the exported files. After you set the target directory well, you can tap on the button of "Go" to start the process to recover files. In a few seconds, the data will be available in the folder. Then you can go directly to the folder to locate the recovered data on your computer.
Follow the steps above and you can take a try to enable the accessory again. If the above solution still can’t solve the problem, you have to check whether your iOS device is all right. You had better go to local Apple Store to buy a totally new MFi-certified cable instead.
 Sep. 02, 2020 by


 Prof. Media
 Blu-ray Ripper
 Blu-ray Copy
 iOS Data Recovery
 [12/29/23] MAX Downloader V15.0.0
 10,000,000 people are using Leawo!
 All Transactions are protected!
 30-Day Money Back Guarantee!