
As a popular portable device, iPad has gained a high reputation in watching movies, especially the iPad Pro, which is equipped with 4 stereo speakers, and a high definition 12.9-inch display, providing users with the best audio-visual experience. However, iPad only supports limited video formats, including MP4, MOV and some AVI extension. Relatively speaking, MP4 has better compatibility, which is supported by most of portable devices. If you have downloaded some MP4 videos on your computer and want to watch them on your iPad on the go, you can then follow various methods offered in this tutorial to add and transfer MP4 to iPad.
Part 1: How to Transfer MP4 to iPad Without iTunes?
If you are going to add MP4 to iPad with iTunes, then the existing media files on your iPad will be in danger of being lost. Because when using iTunes to transfer files to iPad, it will first erase the existing files on your iPad and replace to the newly synced items. In such a case, you may need to find an iTunes alternative to get this job done. Leawo iTransfer is now the best iTunes alternative to transfer files between iDevices, computer and iTunes. The following guidance will show you how to transfer MP4 to iPad without iTunes but iTransfer.
Step 1: Download Leawo iTransfer
Click Download button below according to your computer system to download and install this software to your computer.

-
Leawo iTransfer
- Transfer files among iOS devices, iTunes and PCs with ease.
- 6x faster than iTunes
- Transfer up to 14 kinds of data and files without iTunes.
- Support the latest iOS devices like iPhone 12, iPhone 12 Pro, etc.
- Play back, view, and delete data and files on iOS devices.
- Support Windows & Mac OS
Step 2: Connect your iPad to computer
Connect your iPad to computer and launch this software. It will detect and recognize your iPad automatically.

Step 3: Choose files to transfer MP4 to iPad without iTunes
Choose Movies library below iPad section in the left sidebar. All contents on your iPad will be displayed in the right panel. Then, click the Add button in the top menu bar to browse and choose MP4 from the local drive of your computer to transfer MP4 to iPad without iTunes.
Apart from MP4 videos, this software can also be used to transfer other kinds of files, including photos, music, ringtones, eBooks, etc. You can download and experience it for free now.
Part 2: How to Transfer MP4 to iPad with iTunes?
If you insist on using iTunes, then this part will be helpful to you. iTunes is designed as a cross-system media player on both Windows and Mac. Moreover, it can also be used as an iOS transfer to help you transfer files between computer and iOS devices. But this software isn’t friendly at all. Because most files you can transfer are purchases, and sometimes, the files on your devices may get lost for it will erase existing data before syncing. If this doesn’t matter to you, then read on to learn more.
Steps:
- Connect your iPad to computer and launch iTunes.
- Unlock your iPad and trust the computer. If required, enter your iPad password.
- On the top menu bar of iTunes, click File > Add File to Library… to select MP4 videos you want to transfer from your local drive. Then, click Open to import MP4 to iTunes.
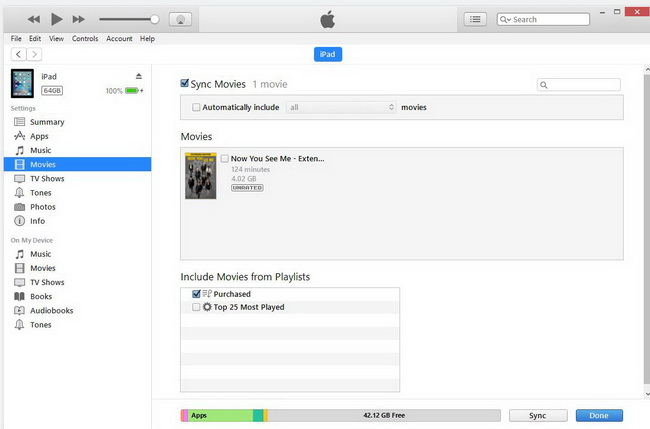
- Click the iPad icon, and choose Movies or TV Shows under Settings section.
- Check Sync Movies or Sync TV Shows box, and click Apply button to transfer MP4 to iPad with iTunes.
Part 3: How to Transfer MP4 to iPad with VLC?
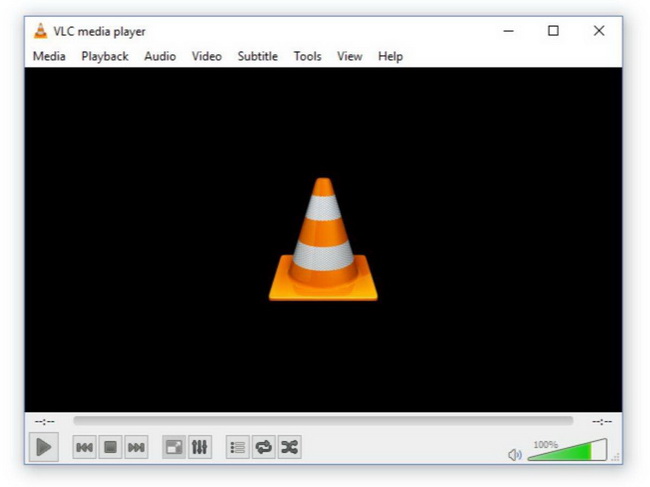
Developed by VideoLAN project, VLC is a free and open-source media player. Beyond that, VLC can also be a media transfer tool, allowing you to transfer media files wirelessly between two devices. If you happen to be a VLC user, then this method is simply the best for you. Follow the steps below to add MP4 to iPad with VLC wirelessly.
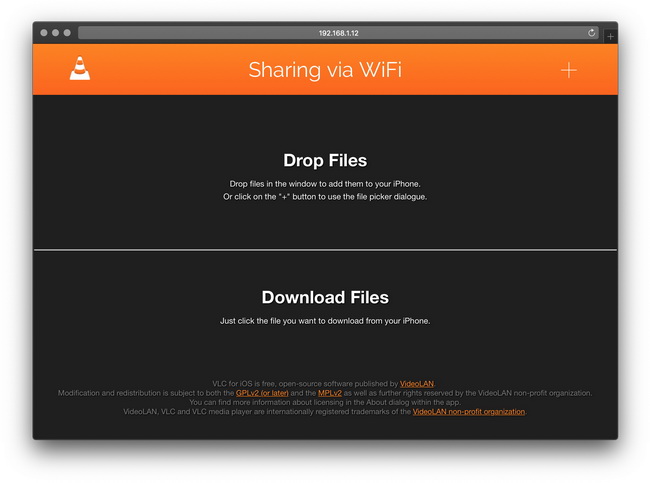
Step 1: Copy IP address of VLC
Open VLC on your computer, and click the icon in the upper left corner. Then, enable Sharing via Wi-Fi option and copy the IP address.
Step 2: Upload MP4 to VLC
Open a browser and paste the IP address to the address bar, where you can upload MP4 videos by clicking the clicking the Plus icon in the upper right corner or directly drag-and-drop.
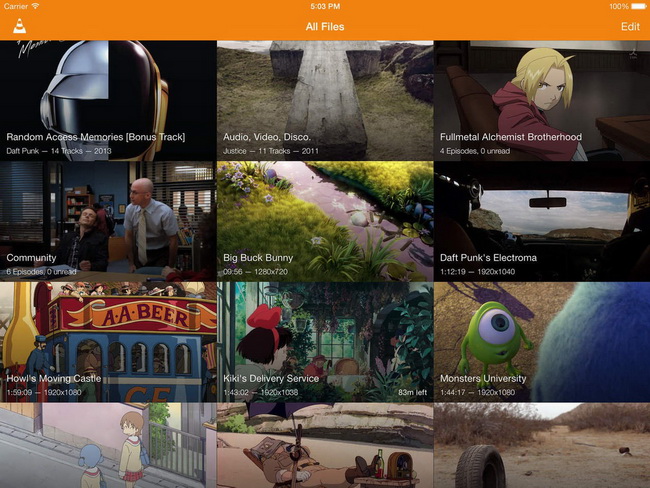
Step 3: Download MP4 from VLC to iPad
By default, the transferred MP4 videos will be saved in VLC app on your iPad. You can also click the Share icon and export them to the Photos app.
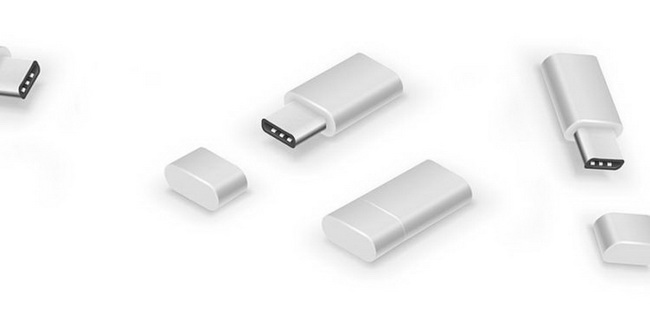
Part 4: How to Transfer MP4 to iPad with a USB Stick?
With the development the popularity of USB-C, you can now find this port on all manner of devices, from external hard drives to laptops and smartphones, including iPad. This means that you can transfer MP4 to iPad with a USB-C stick or a USB-C adapter. With a USB-C adapter, you can still stay with your regular USB-A stick. Now, let’s take a look on how to add MP4 to iPad with a USB stick.
Step 1: Transfer MP4 to the USB stick
Connect your USB stick to a computer, laptop or any smartphone, and simply transfer MP4 to the USB stick.
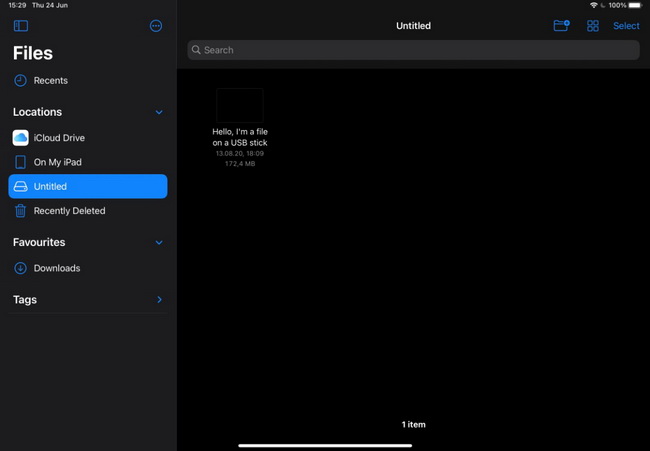
Step 2: Transfer MP4 to iPad with USB stick
Now, after transferring MP4 to iPad, connect it to your iPad. On Files app, you can find the USB stick, where you need to copy and paste it to the local drive of your iPad.
Part 5: How to Transfer MP4 from Mac/iPhone/iPod to iPad?
This part is exclusive to Apple ecological products, including Mac, iPhone, iPad and iPod. Although you can still transfer MP4 from Mac/iPhone/iPod to iPad using methods above, sometimes wired transfer isn’t convenient. In this case, the advantage of Apple ecosystem has emerged – you can transfer MP4 and other files from Mac/iPhone/iPod to your iPad wirelessly via AirDrop or iCloud. Read on the following content to learn more detailed step.
1. How to Transfer MP4 from Mac/iPhone/iPod to iPad via AirDrop?
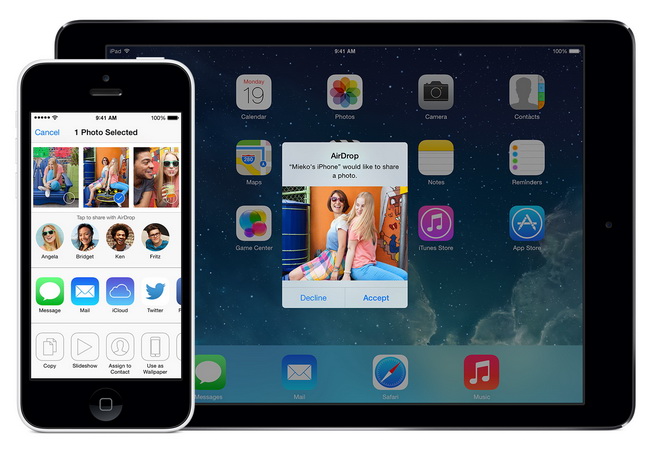
AirDrop is a feature that allows Mac and iOS devices to share files wirelessly. It is not only for photos. You can use it to transfer almost anything you can share. AirDrop uses Bluetooth to create peer-to-peer Wi-Fi network between devices, which means that you must turn on Wi-Fi and Bluetooth. Learn how to add MP4 via AirDrop below.
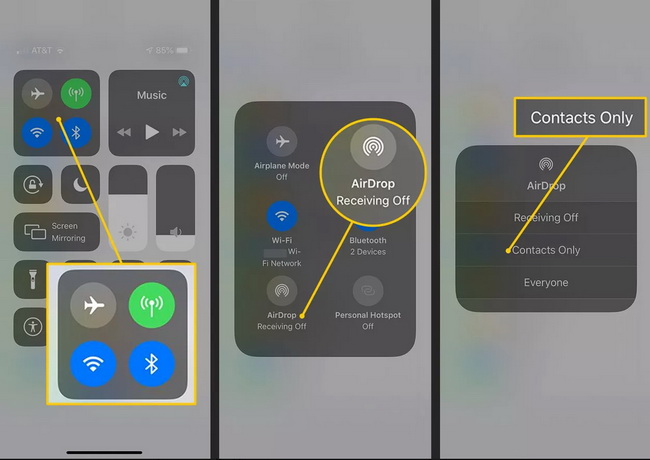
◎ Step 1: Enable AirDrop on your Mac/iPhone/iPod and iPad
Before you begin, you need to make sure that both devices are nearby and within Bluetooth and Wi-Fi range. Then, steps to enable AirDrop on your Mac and iPhone/iPod/iPad are various.
- For iPhone/iPod/iPad: Open Control Center, then press and hold the section that display airplane mode, wireless, cellular and Bluetooth to expand. On the call-out panel, turn on the AirDrop button, where you need to tap Everyone. If the receiving or sending device is in your address book, you can tap Contacts Only to restrict sending device.
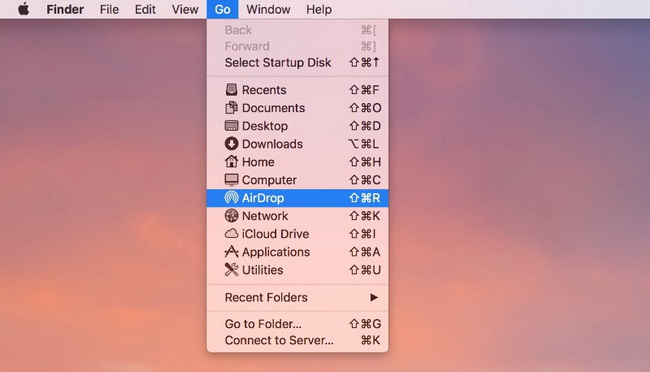
- For Mac: Open Finder, and navigate to Go > AirDrop. On the pop-up window, choose the option you chose on your iPad.
◎ Step 2: Start to add MP4 from Mac/iPhone/iPod to iPad
Choose source MP4 videos on your Mac/iPhone/iPod, then tap on the Share button and choose AirDrop option. On the call-out dialog, choose your iPad as destination device. On the pop-up window on your iPad, choose Accept to complete the transfer process.
2. How to Transfer MP4 from Mac/iPhone/iPod to iPad via iCloud?
iCloud is a cloud-based service developed by Apple for every cloud-syncing feature. Basically, you can transfer anything from Mac/iPhone/iPod to iPad via iCloud, including MP4 videos. However, Apple only offers 5GB free storage for every iCloud user. It means that if the video is larger than 5GB, you need to update the storage or give up this method. To learn how to transfer MP4 from Mac/iPhone/iPod to iPad via iCloud, he following steps can be taken.
◎ Step 1: Enable iCloud on Mac/iPhone/iPod and iPad
To get started, you need to enable iCloud on Mac/iPhone/iPod first.
- For Mac: On the top menu bar, navigate to Apple menu > System Preferences, then click Apple ID. When you sign in, iCloud is turned on automatically.
- For iPhone/iPod/iPad: Go to Settings app and sign in to your Apple ID. When you sign in, iCloud is turned on automatically.
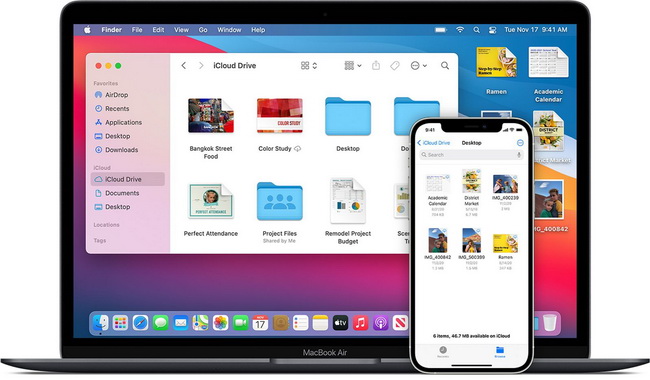
◎ Step 2: Enable iCloud Photo Library to transfer MP4 from Mac/iPhone/iPod to iPad
After enabling and entering iCloud on your Mac/iPhone/iPod and iPad, choose Photos option and switch on iCloud Photo Library. Then, you can upload and check MP4 videos on Mac/iPhone/iPod. Once MP4 videos are successfully uploaded, on your iPad, you can view MP4 videos on Photos app. Click Download button to get them transferred.
 Oct. 19, 2015 by


 Prof. Media
 Blu-ray Ripper
 Blu-ray Copy
 iOS Data Recovery
 [12/29/23] MAX Downloader V15.0.0
 10,000,000 people are using Leawo!
 All Transactions are protected!
 30-Day Money Back Guarantee!