Summary:
In this article, it has a deep discussion and provides you some of the most effective solutions to the Pandora pausing after every song issue.
For years, Pandora has been one of the most popular music streaming apps in United States. Because of the stable performance of the app and the large music library, Pandora has captured millions of users across the country. However, even the most perfect app has issues, and Pandora is no exception to that. Many Pandora users have experienced the passing problem while they are listening to Pandora Music. Sometimes the playback pauses after every song even all the settings indicate otherwise. So in this article, we're going to have a deep discussion on that problem, and provide you some of the most effective solutions to the Pandora pausing after every song issue.
Part 1: Why Pandora Pauses after Every Song?
Although the Pandora pausing problem is a common issue, there is no certain conclusion for the cause of this phenomenon. The reason for Pandora to keep pausing after every song could be different from user to user. But to sum up, there are indeed some of the reasons that are most likely to be the cause. Here are some the most possible causes for this problem.
- 1. System settings
Sometimes the Pandora pausing issue is not caused by the app itself, but some system settings of your smart phone. Some settings like the power saving mode could affect a lot of apps on your phone including the Pandora app.
- 2. Pandora app settings
Pandora provides various features for users to customize the playback experience. Some of the settings might cause the Pandora pausing issue. If that is the case, simply tweak the settings of Pandora and the playback should get back to normal.
- 3. App glitches
Apps have glitches and bugs, and that is true to almost all Android an iOS apps including Pandora. Sometimes the Pandora pausing issue is not caused by some settings but some glitches and bugs off the app. If that is the case, then you might have to reinstall the app to get rid of the problem.
Part 2: How to Solve Problem - Pandora Pauses after Every Song
Now that we know some of the most possible reasons for the Pandora pausing issues, let’s see exactly how you can solve the problem with some simple tricks.
1. Turn off power saving mode
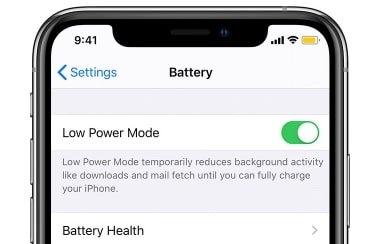
The power saving mode is a feature on both Android and iOS devices to save the battery by disabling some functions in certain apps. If your Pandora app keeps pausing songs, it could be caused by the power saving mode. To turn off the power saving mode on iOS, go to “Settings” > “Battery” and switch off “Low Power Mode”. For Android, go to “Settings” > “Device Maintenance” > “Battery”.
2. Turn off high quality audio
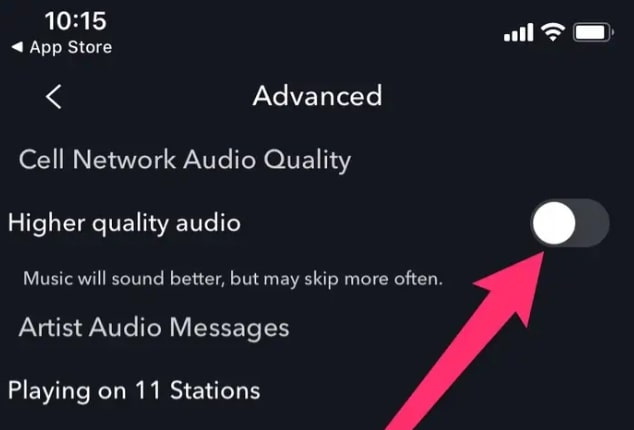
High quality audio is an optional feature in Pandora to make sure that you get a better sound quality when listening to every song. The explanation text under the option implies that this feature could affect your listening experience by kipping more often. And the pausing issue could be caused during the skipping process. So to avoid the Pandora pausing problem, go to “Profile”, then “Advanced”, find the “Higher quality audio” option and switch it off.
3. Reinstall Pandora
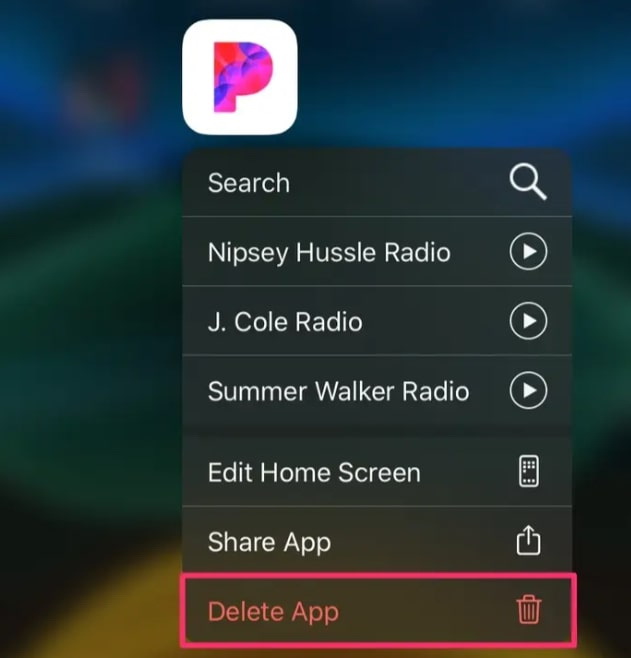
It has become a common sense that reinstallation solves most application glitches and bugs. If you believe that your Pandora pausing issues isn’t caused by any wrong settings, then uninstall and then install Pandora again from AppStore might be a good solution to consider.
Part 3: Pandora Alternative - Apple Music
As you can see from the solutions above, it is not rocket science to solve the Pandora pausing problem. However, it could be annoying to have the problem very often and to solve it by various tweaks every time it shows up. if you don't want to experience this kind of problem with your music app, then considering an alternative app to Pandora might be a good idea. If you happen to be an iOS user, then is probably a great choice to use the official Apple Music instead of Pandora so that you won't have to experience this kind of problem anymore.
Apple Music is the official music app developed by Apple. It has great compatibility to all Apple devices including iPhone, iPad, and Mac computer. with simply an iCloud account, you can synchronize your music library and playlists across all Apple devices. Besides that, Apple Music can also provide a much better audio quality and more available songs comparing to Pandora. In addition, you can also watch music videos in Apple Music. So our opinion is, if you don't have a specific obsession with the Pandora app, using Apple Music might be a good way to avoid the Pandora pausing issue.
Part 4: Comparison between Pandora and Apple Music
Although both Pandora and Apple Music are excellent music apps, there are still a lot of differences between the two. If you are not sure which one is the best music player app for yourself, then have a look at the comparison table below, and you might be able to make the decision easier.
| Features | Pandora | Apple Music |
| iOS Support | √ | √ |
| Android Support | √ | √ |
| Windows Support | √ | × |
| Mac Support | × | √ |
| Available Songs | 40M | 60M |
| Algorithmic Radio | √ | √ |
| Offline Download | √ | √ |
| Top Audio Quality | 64kbs AAC+/128kbs AAC | 256 kbps AAC |
| iCloud synchronizing | × | √ |
| Siri integration | × | √ |
| Airplay Support | × | √ |
| iTunes Parental Controls | × | √ |
| Subscription Fee | $4.99 – 9.99 / M | $9.99 / M |
By comparison, we can see that Apple Music does not only have a better compatibility for iOS devices, but also feature many iCloud advantages and can provide a better audio quality. So, if you don't want to experience the Pandora pausing issue ever again, switching your music app to Apple Music might be a great idea, especially if you are already an iOS user.
External Tip: How to Convert Downloaded Apple Music Songs to MP3
In the tips above, we talked about how to solve the Pandora pausing after every song problem. Besides that, we also recommend that you use Apple Music instead of Pandora to enjoy your favorite music if you don't want the passing problem to appear again. It seems to be a good idea to use Apple Music because is more user-friendly to iOS users, it has a fair price tag, and it can provide a better user experience. However, there is one problem about Apple Music that could bother some listeners. And that is the DRM protection on the music files from Apple Music.
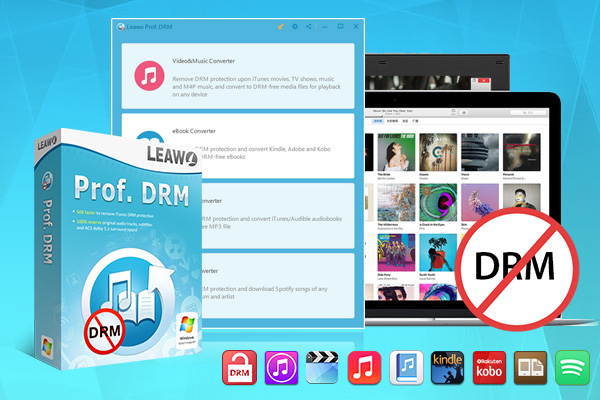
The DRM protection is a digital technique used to protect the Copyright of song creators and publishers on Apple Music. most songs in Apple Music are protected by the DRM. As a result, after the songs getting downloaded to your local computer or cell phone, they would be saved in a particular format which cannot be played by other devices that is not licensed to use this song. In order to play the songs downloaded in Apple Music, or use the songs for other purposes, you need a DRM removal application like Leawo Prof. DRM.
-
Leawo Prof. DRM
- Convert iTunes DRM-protected M4V movie and TV show to DRM-Free MP4
- Remove DRM from M4B, AA, AAX files and convert any Audible AA, AAX file to MP3, even without iTunes authorization
- Convert iTunes DRM-Protected M4P and non-DRM iTunes M4A Music to MP3
- Remove DRM-protection on Spotify music and convert to Universal audio format for enjoying music offline on any devices
- Convert DRM-protected eBook from Kindle, Kobo, Adobe to DRM-free epub, mobi, azw3, txt, etc., format
If you want to open DRM protected files, Leawo Prof. DRM is your best bet. Leawo Prof. DRM is a professional DRM removal application available on both Windows and Mac. The program can not only remove the DRM on your songs downloaded from Apple Music and turn them into regular MP3 files, but also process all kinds of DRM protected videos, podcasts, eBooks and other digital items by removing the DRM protection and converting them to universal file formats.
If you're wondering how to remove the DRM protection on your songs downloaded from Apple Music with Leawo Prof. DRM, then here is a simple users’ guide for your reference.
△ Step 1: Download and launch Leawo Prof. DRM
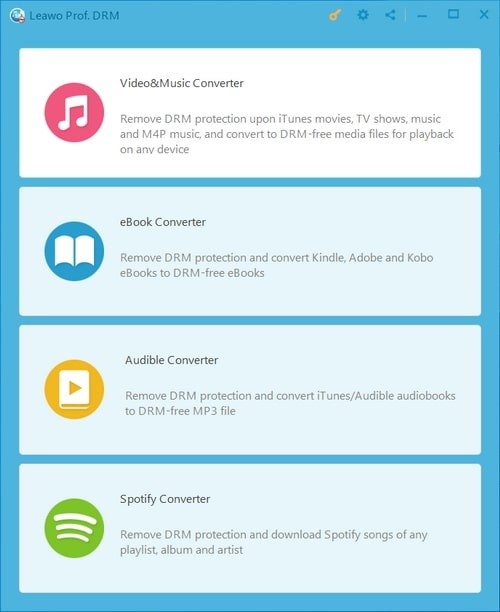
Download and install Leawo Prof. DRM on your computer and launch it. On the home page of the program, click on the “Video & Music Converter” entrance to enter the function module where you can remove the DRM of your songs downloaded from Apple Music.
△ Step 2: Import the songs and edit
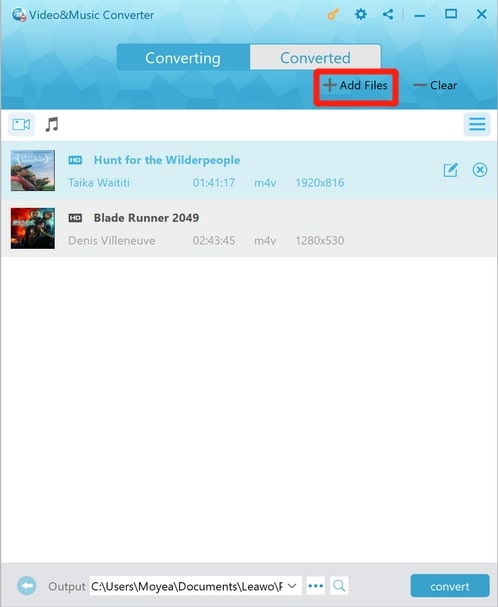
To import the original songs, simply click on the “Add Files” button. You can also drag the songs from your iTunes library to the center of the program.
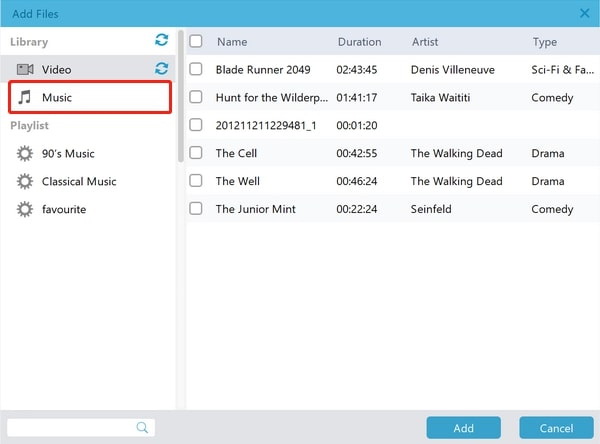
After clicking the “Add Files” button, find the songs that you want to convert in the “Music” tab, select them and then click the “Add” button to confirm importing.
△ Step 3: Customize the format
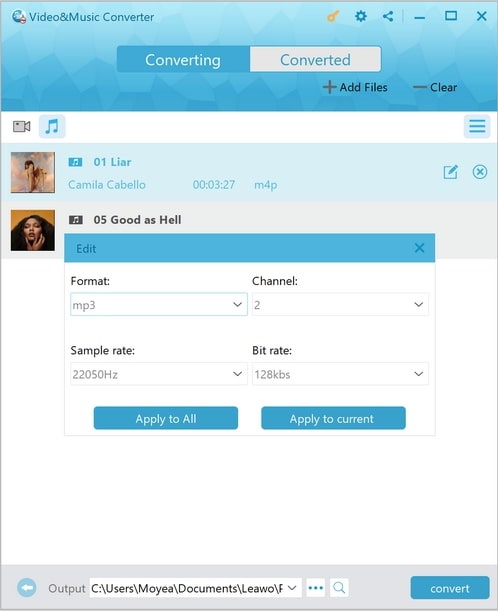
This step is optional. After importing the songs, you can click on the “Edit” button on it to customize the format parameters. You can change the format, channel, sample rate and bit rate. After changing the parameters, you can choose to apply to all or apply to current file only by clicking the corresponding button.
△ Step 4: Start converting
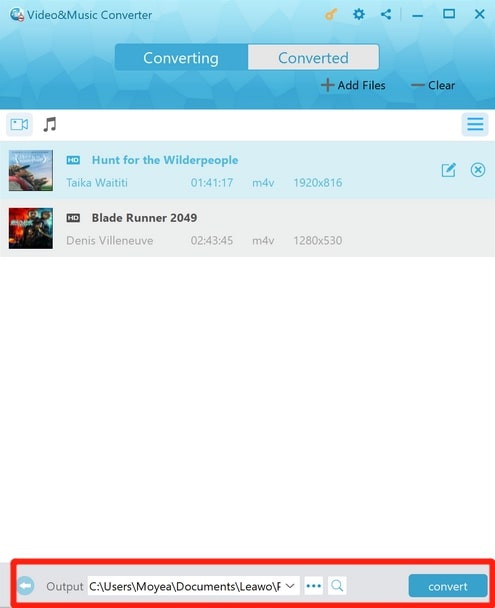
After the songs get imported, you can set an output directory in the “Output” box at the bottom and click on the “Convert” button beside it to start converting the video to a regular MP3 audio file.
Now we have a good look at how to convert an Apple Music downloaded song to a non-DRM-protected, regular MP3 audio file. By using Apple Music and Leawo Prof. DRM, I’m sure you won’t be bothered by the Pandora pausing issue anymore and can finally have a good time with all your favorite songs anywhere you like without getting interrupted.

