Last updated on 2021-12-09, by
How to Take A Screenshot on Windows PC?
Nowadays, computers have become an indispensable tool. In order to communicate more efficiently and quickly, sometimes you may have the urgent need to take a screenshot on your computer to share information with others. Whether you are chatting with your friends or writing a how-to article, screenshots often speak more than words. But for some Windows users, they may be confused about how to take a screenshot on Windows computer. In fact, there are many ways, some of which are even pre-installed in Windows. This tutorial will introduce 4 methods to take screenshots on Windows PC.
Part 1: How to Take A Screenshot on Windows PC Using Windows Hotkeys?
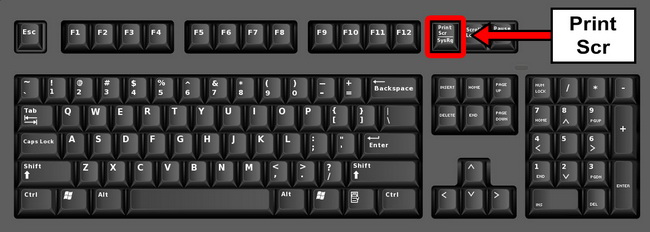
To take a screenshot on Windows PC, the first and most straightforward way is to make full use of the screenshot hotkeys. In almost all versions of Windows, you can take a screenshot with the PrtScn key, which is usually located in the top-right of the keyboard, and next to the F12 key. On some keyboard, especially some Windows laptops, you may need to press it together with the Fn key. Below are some hotkey combinations to take a screenshot on Windows PC.
- Only PrtScn key: Capture the entire screen to clipboard.
- Alt + PrtScn keys: Capture just one window. You need to highlight the desired window before press the hotkeys. Similarly, the screenshot is only saved to clipboard.
- Windows + PrtScn keys: Capture the entire screen, and save the image to C:\Users\Pictures\Screenshots by default.
If you want to save the screenshot from clipboard, it is suggested to paste it to Paint, and then press Ctrl + S to save the screenshot to local folder.
Part 2: How to Take A Screenshot on Windows PC Using Leawo Screen Recorder?
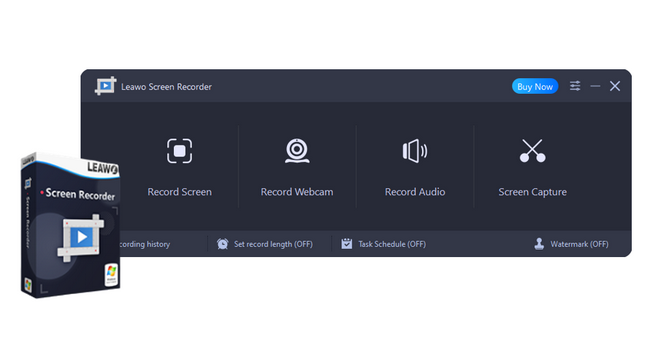
If you are not satisfied with the default hotkeys to take screenshots on Windows, there are many third-party screenshot tools worth considering, which often come with additional features. Here Leawo Screen Recorder will be recommended, which is designed as a multifunctional screen recorder. Apart from taking screenshots on computer, it can also record computer screen, record audio from computer and record webcam. What’s more, users can edit screenshots with various painting tools, including brush, text, blur, line, ellipse, and more. The following will introduce how to take a screenshot on Windows PC with Leawo Screen Recorder.
Step 1: Download Leawo Screen Recorder
Click the button below to download and install Leawo Screen Recorder on your computer. After installation, launch the software.
-
Leawo Screen Recorder
- Record all activities on your computer screen as HD screencast.
- Record video from your webcam.
- Record any audio from your computer an/or microphone.
- Capture anything on your computer screen as screenshot.
- Add drawing, annotations, watermark, mouse animation, and BGM to recordings.
- Output in high quality with multiple formats selectable.
Step 2: Set output directory
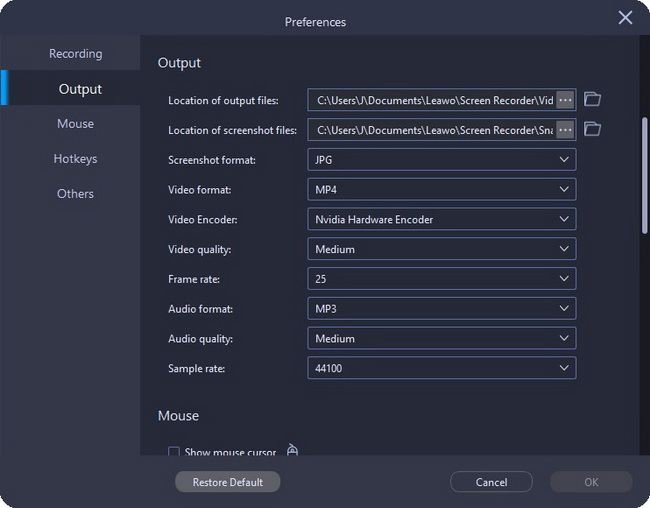
Before taking a screenshot, you can first set or confirm the output directory of screenshot files. By default, the saving path is: C:\Users\Documents\Leawo\Screen Recorder\Snapshot.
Step 3: Start to take a screenshot on Windows PC
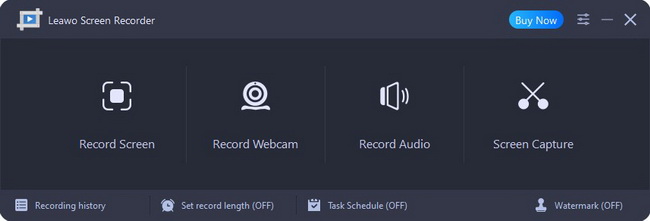
On the main interface, click Screen Capture button to start taking a screenshot. It offers you 3 modes to snap screenshots. By default, you will enter Custom mode, in which you can freely select screenshot area. Or, you can hover your mouse over a specific window to enter Auto Detection mode, and select a separated block as the screenshot area. If you want to take a screenshot of entire screen, you can click the Full screen button after selecting a screenshot area.
Step 4: Add effects to screenshot
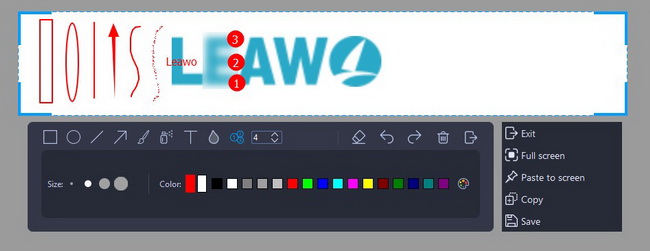
A drawing board will appear near the screenshot area, you can add effects to your screenshot with various tools provided, including rectangle, ellipse, line, arrow, brush, air brush, text, blur, and callout. After editing, you can click Copy button to save the image to clipboard, or click the Save button to save the image to the output directory you set just now.
Part 3: How to Take A Screenshot on Windows PC Using Windows Snipping Tool?
The Snipping Tool has been launched since Windows Vista, and still exists in Windows 11. Although Snip & Sketch will finally replace Snipping Tool on Windows, it is still the mainstream screenshot tool on Windows 10, 8, 7, and Vista. As a native tool on Windows, Snipping Tool can help you freeze screen and edit the screenshot as you like.
Step 1: Open Snipping Tool
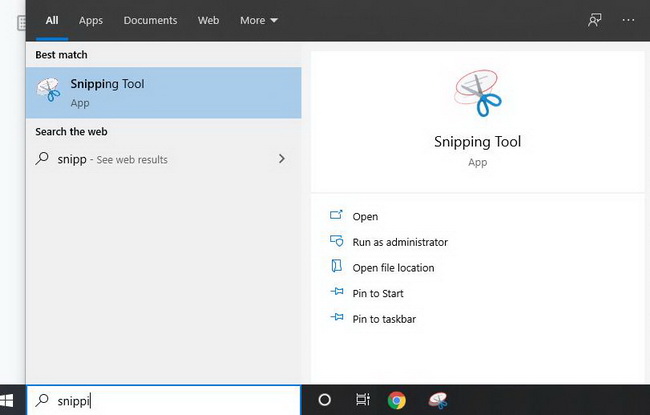
Go to the search box in the bottom-left corner. Then, type “Snipping Tool”, and select the first result.
Step 2: Configure related settings before taking screenshots
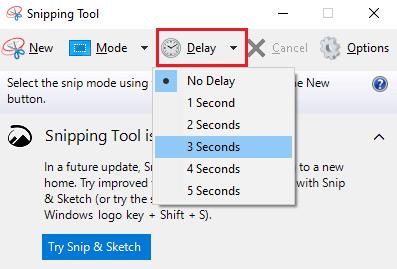
If you want to set a delay before taking a screenshot, click Delay next to the Mode option, and you can set countdown from 1 to 5 seconds. Moreover, you can set more advanced parameters by clicking the Options button, including Ink Color, Show screen overlay, etc.
Step 3: Start to take a screenshot on Windows computer
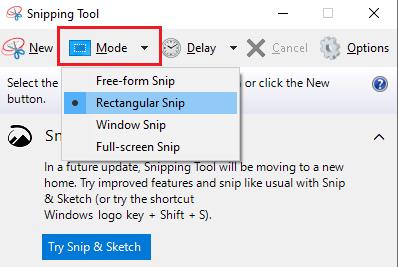
Click the drop-down button next to the Mode option, and you can choose a screenshot mode from the list, including Free-form Snip, Rectangular Snip, Window Snip, and Full-screen Snip.
Step 4: Edit and save screenshot
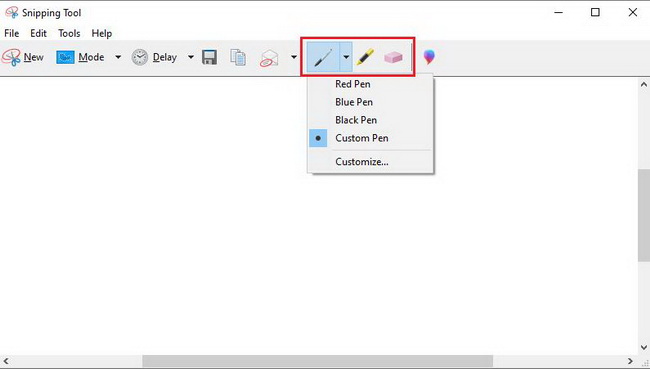
The Snipping Tool offers pen and highlighter to edit and annotate the screenshot. After snipping, you can save the screenshot to PNG, JPG or GIF.
Part 4: How to Take A Screenshot on Windows PC Using Snip & Sketch?
Compared to the classic Snipping Tool, Snip & Sketch is easier to access and annotate, which also provides more powerful screenshot options. The detailed steps on how to take a screenshot on Windows computer using Snip & Sketch will be introduced below.
- Step 1: Open the Snip & Sketch app. To activate this app, press Windows + Shift + S on your keyboard. Then, your screen will be grayed out and a widget will show up at the top of the screen.
- Step 2: The widget buttons from left to right are: Rectangular Snip, Freeform Snip, Windows Snip, Full Screen Snip, and Close Snip. Choose a mode to take a screenshot on Windows computer.
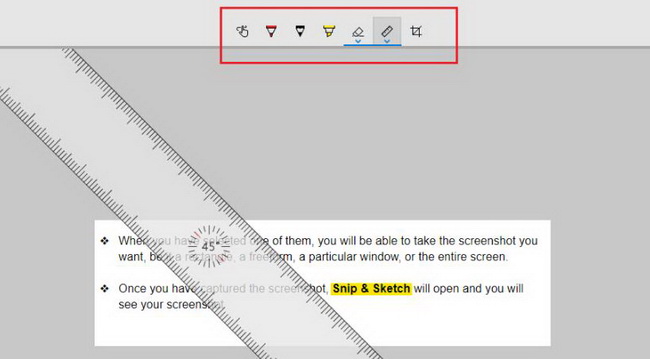
- Step 3: Once you have captured the screenshot, you will be led to the editing panel, where you can use ballpoint pen, pencil, highlighter to annotate on the screenshot. Plus, you can also use eraser or ruler if needed.
- Step 4: After editing, three buttons are provided in the top-right corner to Save, Copy, or Share the screenshot.


 Try for Free
 Try for Free

