PDF files are widely used in all kinds of fields because they are easy to view and edit. The PDF files even allow viewers to make signatures with no efforts. A PDF file looks just the way like it were printed, and the file can be shared among different readers to view and edit, so it is a convenient way for PDF readers to share ideas directly on the file. PDF files can be viewed on different devices, such as PCs, smartphones and tablets. For the users of iPhone, iPad or iPod touch, they need to install the PDF reader apps on their devices first, and then they can view the files. If you have some PDF files stored on your personal computer, you be wondering how to sync them from PC to your iPad. Therefore, the post below will show you how to transfer PDFs to iPad.
Part 1: How to Transfer PDFs to iPad with iTunes?
iTunes is a powerful program to transfer PDF files to iPad. Using it, you can transfer a collection of PDF file to iPhone at a time. Follow the steps below to use iTunes to copy PDF files to iPhone.
Steps:
- Run iTunes, and go to Edit >> Preferences >> Devices >> Prevent iPods, iPhones and iPads from Syncing Automatically.
- Plug iPad into computer via the USB cable. The software will recognize your iPad and shows the icon of it at the upper right corner.
- Click File >> Add File to Library at the upper left corner, and then select the PDF files from your computer.
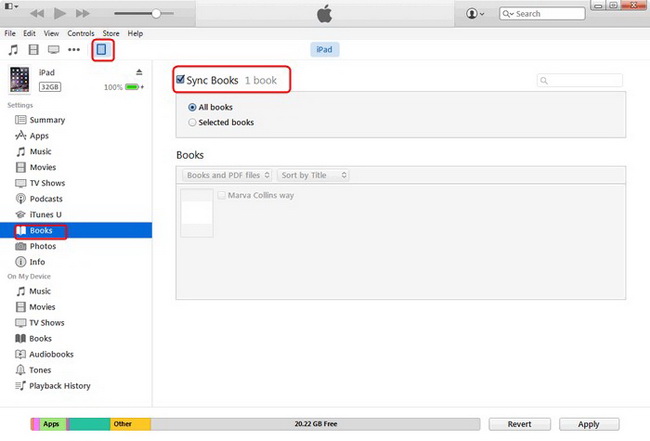
- After adding the PDF files into library, you need to click the icon of your iPad, and choose "Books" in the summary panel. Then check "Sync from" and choose the PDF files in the window.
- iTunes will start syncing the PDF files into your iPad. After that, you will find the PDF files in the iBooks app on your iPad.
Part 2: How to Transfer PDFs to iPad Without iTunes?
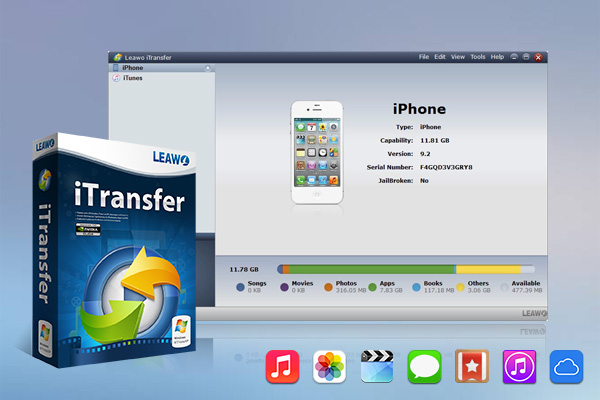
Besides iTunes, you can also seek help from a third-party program to transfer PDFs to iPad. For example, Leawo iTransfer, is professional for users to sync PDF to iPad, which is used for transferring files among iOS devices, iTunes and PCs without the sync of iTunes. And it makes the transfer of iOS devices easy to be done. Various kinds of files like music, videos and apps can be transferred among iOS devices, iTunes and PC with the software. The following guidance will show you how to transfer PDF files to iPad, and you are allowed to free download Leawo iTransfer to have a try. Note that the trial version has limited transfer times.
Step 1. Download Leawo iTransfer
Choose a version below according to your computer system, then download Leawo iTransfer and install it on your computer.
-
Leawo iTransfer
- Transfer files among iOS devices, iTunes and PCs with ease.
- 6x faster than iTunes
- Transfer up to 14 kinds of data and files without iTunes.
- Support the latest iOS devices like iPhone 12, iPhone 12 Pro, etc.
- Play back, view, and delete data and files on iOS devices.
- Support Windows & Mac OS
Step 2. Connect your iPad to computer
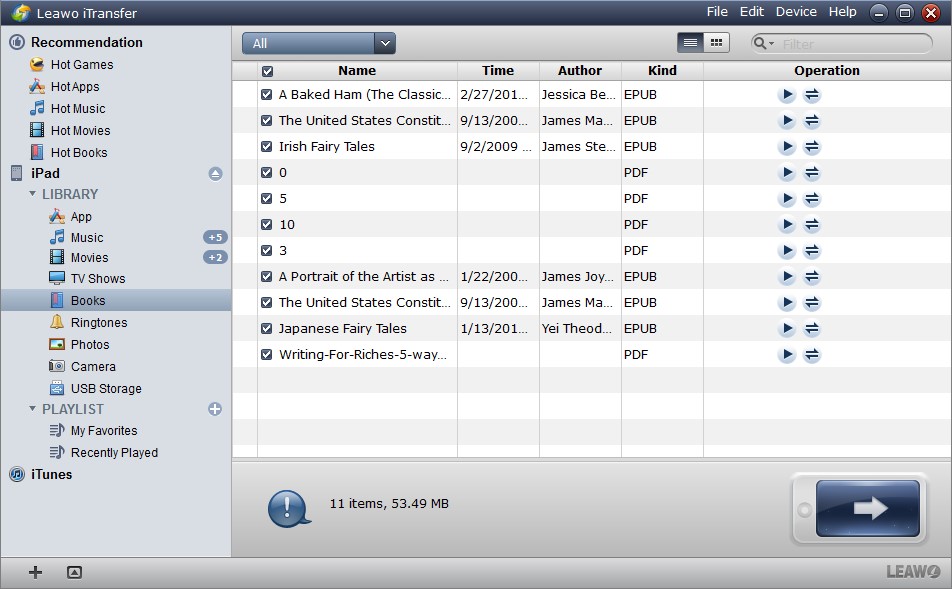
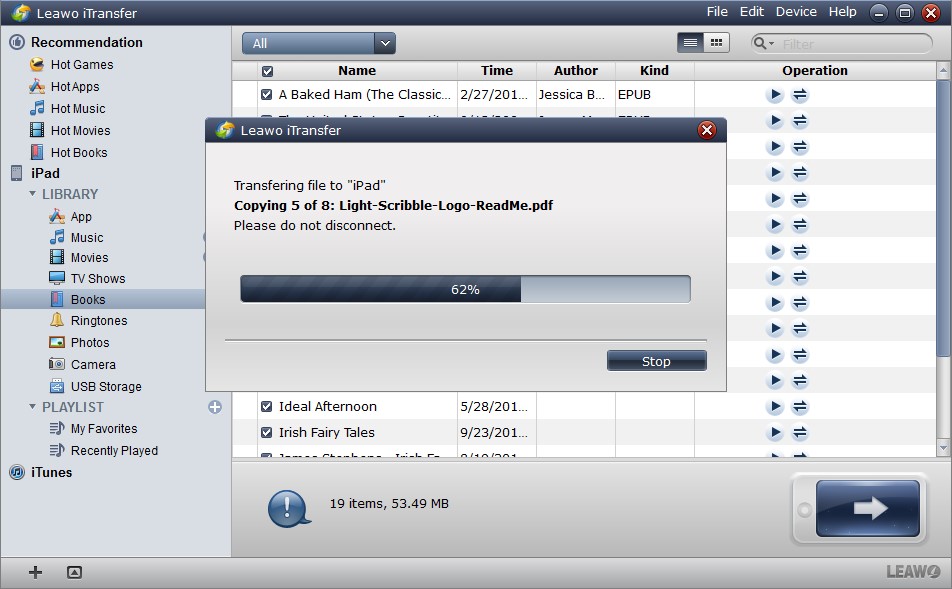
Start Leawo iTransfer on your computer, and connect iPad to computer with the USB cable. The software will automatically detect the libraries of the iPad, and shows the libraries in the left sidebar.
Step 3. Add PDF files from computer to iPad
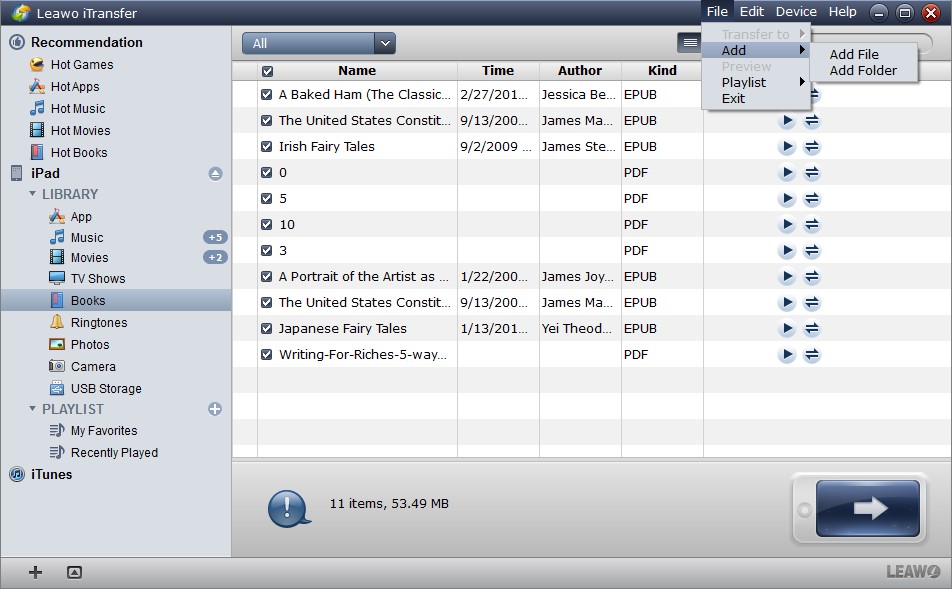
Click "Books" in the sidebar, and then the contents will be shown in the right part of the window. Click File >> Add >> Add File/Add Folder at the upper right corner of the window, and select the PDF files from computer.
Step 4. Start transferring PDFs to iPad
The software will start the transfer immediately, and the progress bar in the pop-up dialog will notice the percentage of the transfer process. Leawo iTransfer will finish the transfer of the PDF files in seconds, when the transfer is done, you will get the PDF files in your iPad.
If you are not using iBooks on iPad, you are still able to find various kinds of PDF reader apps in the App Store, and you can use the apps to read PDF files with no efforts.
Part 3: How to Transfer PDFs to iPad via AirDrop on Mac?
AirDrop is a unique function under Apple's iOS, iPadOS and macOS systems. It is used to share files between multiple devices. What you need to do is drag the PDF files to another iOS device which has been set with another account to perform one-to-one file transfer (similar to wireless network transfer). If you prefer to transfer different files wirelessly, then you can make full use of AirDrop transfer function. However, AirDrop can only be applied to transfer files between different iOS devices only if you have two different iOS accounts. By the way, it is also limited in the transfer amount. It is quite convenient to transfer less number of PDF files instead of batch files at the same time. But sometimes you should be patient in handling with AirDrop not working issues as well. If you are interested in how to transfer PDFs to iPad via AirDrop, here are the steps you can follow.
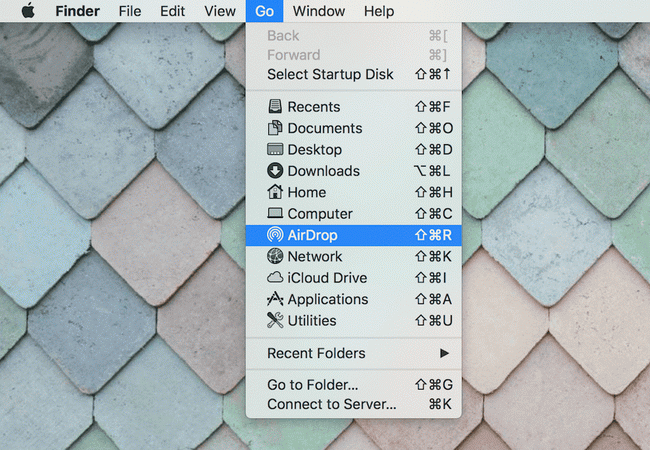
Step 1: First things first, open your iPhone, and turn on AirDrop. Usually, you only need to activate Wi-Fi connection button and Bluetooth button and make sure your iPad and iPhone is working under the same Wi-Fi network. If you try to transfer PDFs from Mac to iPad, then you should go to Finder and click on AirDrop.
Step 2: Locate the PDF files on your iPhone or Mac, then select the PDFs you prefer to transfer to iPad.
Step 3: Choose the preferred PDF and click Share option or drag the PDF file to the AirDrop screen on your computer. Then select the iPad you would like to transfer to, then the PDF would be transferred immediately.
Part 4: How to Transfer PDFs to iPad via iCloud?
You can also try to transfer PDFs to iPad with iCloud storage. As the default cloud storage service, iCloud allows users to transfer and sync the iOS data free among different devices. But the storage has the size limit which is up to 5GB for free. While, if you prefer to transfer other files from other third-party apps, then iCloud would be able to handle with that. If users would like to transfer PDFs to iPad, then they only need to turn on iCloud on their iPad and other devices, and enter the same Apple ID, then users will be able to merge iCloud data with the ones on iPad. Then, how to transfer PDF to iPad with iCloud, you can refer to the following steps.
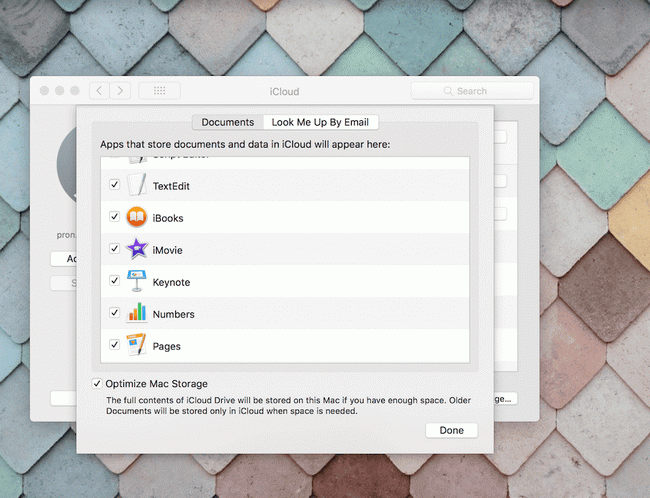
Step 1: If you prefer to transfer PDFs on Mac, then go to System Preferences >> iCloud to choose iCloud drive option. Then all iCloud data would appear on the screen.
Step 2: In Finder, please find iCloud drive and open this program.
Step 3: Go to iCloud drive and locate the PDFs you would like to transfer to iPad, then simply drag the PDFs in there.
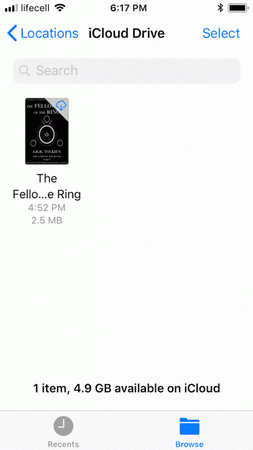
Step 4: Go to iCloud on your iPad and log in with the same account. Then you can find the PDF transferred from your computer. If you try to transfer PDFs from iPhone to iPad, the steps would be similar.
Part 5: 3 Tips on Using PDFs on iPad
If you are not familiar with PDFs on iPad, then the following 3 tips on using PDFs on iPad would be your helpful hand. Please refer to the following tips for details.
△ 1. How to Mark on PDFs on iPad
In order to mark up on PDFs on iPad, you had better download a third-party PDF tool for conveniences. Here PDF Expert could be the one you can refer to. Here are the detailed steps to mark on PDFs on iPad.
Step 1: Download PDF Expert app on your iPad.
Step 2: Open the PDF on your iPad, you can tap on the More option to choose the Copy to PDF Export. Then the PDF could be read on this app.
Step 3: Enter the PDF Export main page, at the top of the app, you can find the tab interface. Here you can choose the Markup icon to start marking notes on your PDF. Once you are done, you can click Done option to save the marks.
△ 2. How to Print PDFs on iPad
If you would like to print PDFs on iPad, you can follow the steps below to complete the printing task.
Steps:
- Prepare a portable mobile printer and connect it to your iPad.
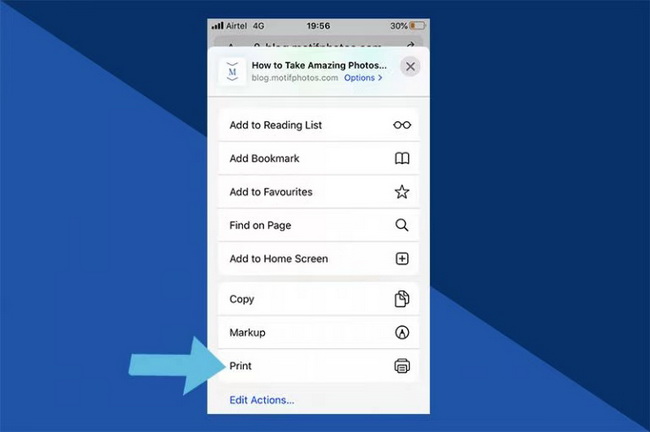
- If you would like to print some PDFs on webpage, then you can simply click the Share button on the Safari, then choose Print option. The PDF printing task would be ready.
- Make sure the printer has been connected to your iPad, then the PDF would be printed out immediately.
△ 3. How to Delete a PDF on iPad
It is easy to delete a PDF on your iPad. Here you may have several PDF reader apps on your iPad. Actually the steps would be similar. Here let’s set iPad’s Books app as the example to show your PDFs.
Steps:
- Open Books app on your iPad.
- Go to Library tab and then you can find all the PDF files or books on your iPad.
- Locate the PDF files you would like to delete, then tap the three dots below the PDF, and click Remove option. Finally, confirm the PDF you would like to delete.

