With the rapid development of the Internet, people are getting used to the shift from local hard disk storage to cloud storage. In addition to being able to store files and applications for backup, storage, and sharing, many cloud providers also provide cloud-based video streaming functions that enable you to play stored video files directly online. Amazon Cloud Drive is a secure online storage service for your photos, videos, and files. Every Amazon customer gets 5 GB of free storage. Currently, Amazon Cloud Drive supports multiple video formats including: MP4, AVI, MTS, WMV, HEVC, HEIF, OGG, MPG, Flash, ASF. However, Amazon Cloud Drive does not support DVD files. Therefore, if you want to upload DVD movies to Amazon Cloud Drive, you will need to rip the DVD movies to videos in formats supported by Amazon Cloud Drive, then uploading the movies to Amazon Cloud Drive.
This article will introduce readers to three excellent DVD ripping software tools and how to use them. Finally, I will also give you the specific steps to upload DVD movies to Amazon Cloud Drive.
Part 1: How to convert DVD to video with Leawo DVD Ripper
Leawo DVD Ripper is a DVD conversion software tool known for its versatility. As one of the best DVD ripper software tools, Leawo DVD Ripper can easily convert DVD to videos in up to 180 formats, regardless of which regions the DVD belongs to and which movie company the DVD comes from. In addition, even if the DVD discs are protected by the latest protection technology, with the advanced disc protection removal technology, Leawo DVD Ripper can decrypt these DVD discs without any loss of quality. Being an ISO conversion tool, Leawo DVD Ripper can also convert ISO files to videos. In addition to converting DVDs to videos, Leawo DVD Ripper can extract audios from DVDs.
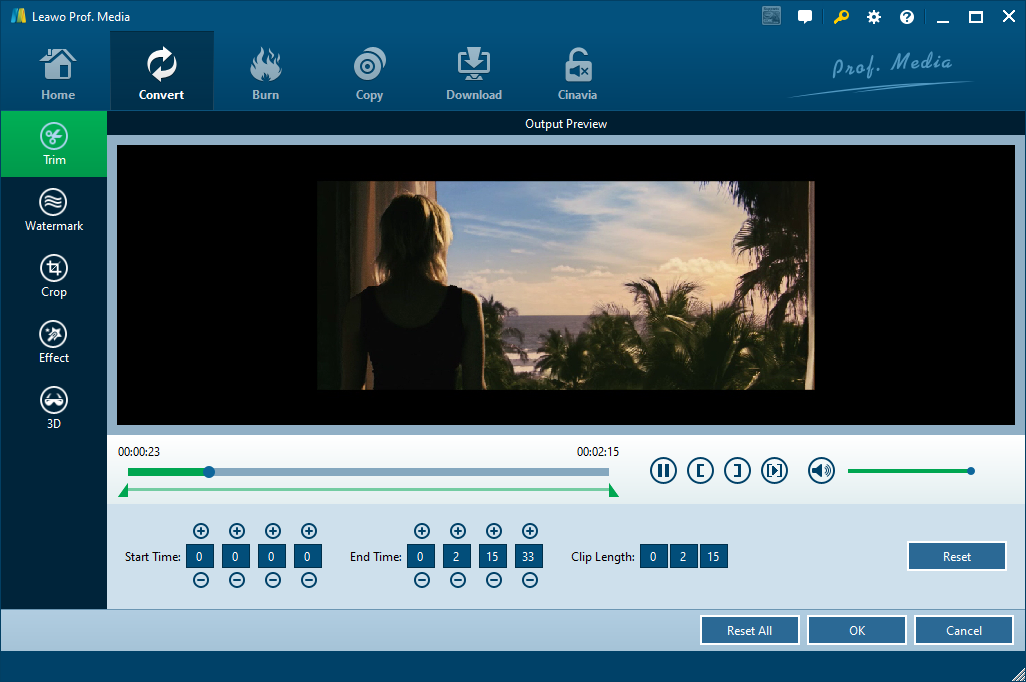
Leawo DVD Ripper is more than just a DVD to video/audio converter. It can also be seen as a DVD player, DVD editor and 3D movie creator. On the one hand, Leawo DVD Ripper has a built-in player that can play DVD movies directly; on the other hand, it can edit DVD movies by loading DVD movies into Leawo DVD Ripper, including: Trimming the video length and adding video watermarks, cropping video size and adjusting video effects. Moreover, Leawo DVD Ripper can also create 3D movies from source 2D DVD movies.
The next section will show you how to convert DVD to video using the Leawo DVD Ripper:
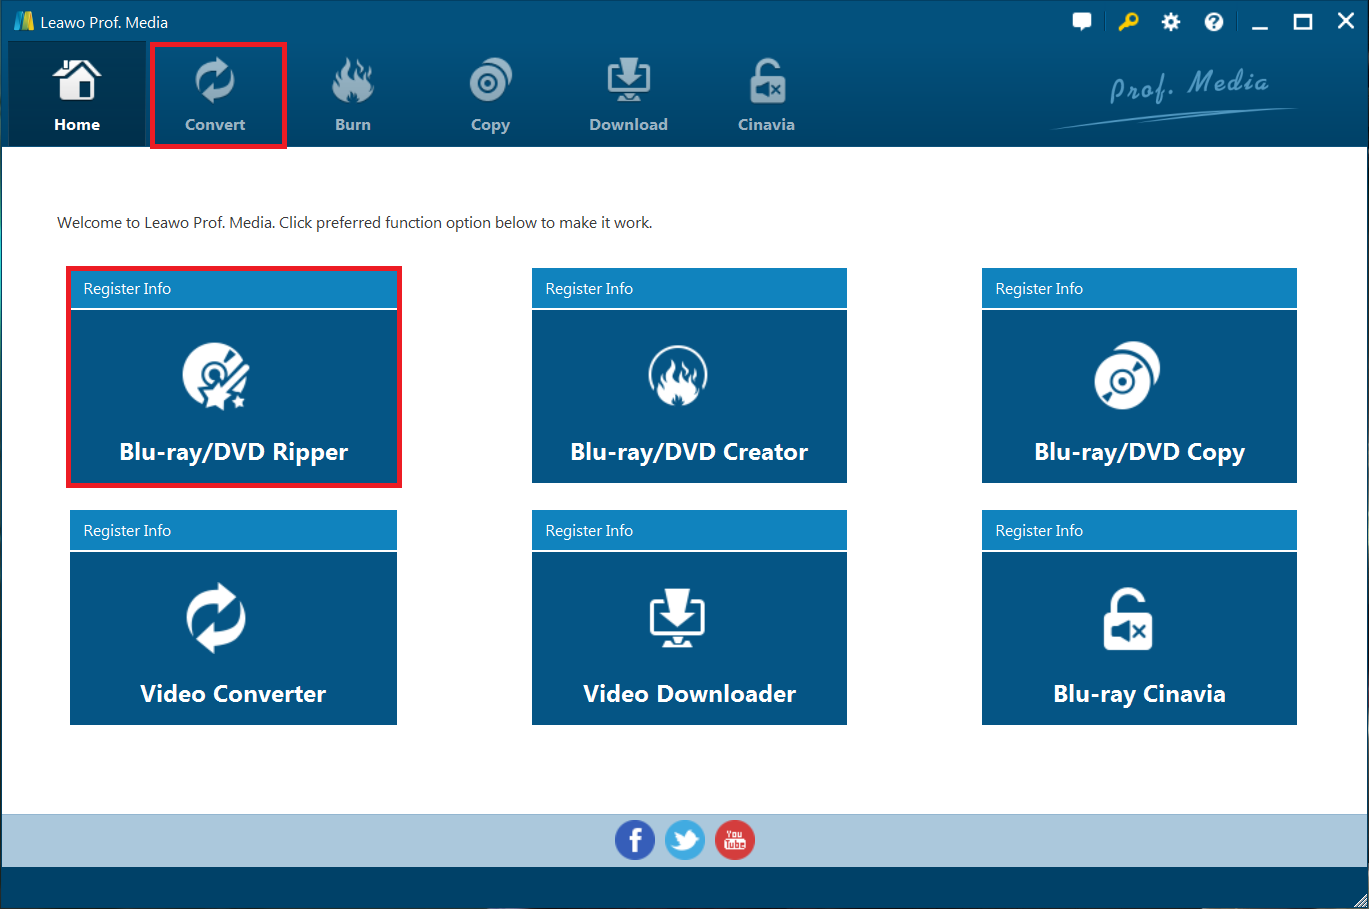
Step 1: Through the link given in the previous pictures, we download and install Leawo Prof. Media on the computer. Then run it. In the main interface of Leawo Prof. Media, we click on the Blu-ray/DVD Ripper button or click on the Convert tab to go to the function page of Leawo DVD Ripper.
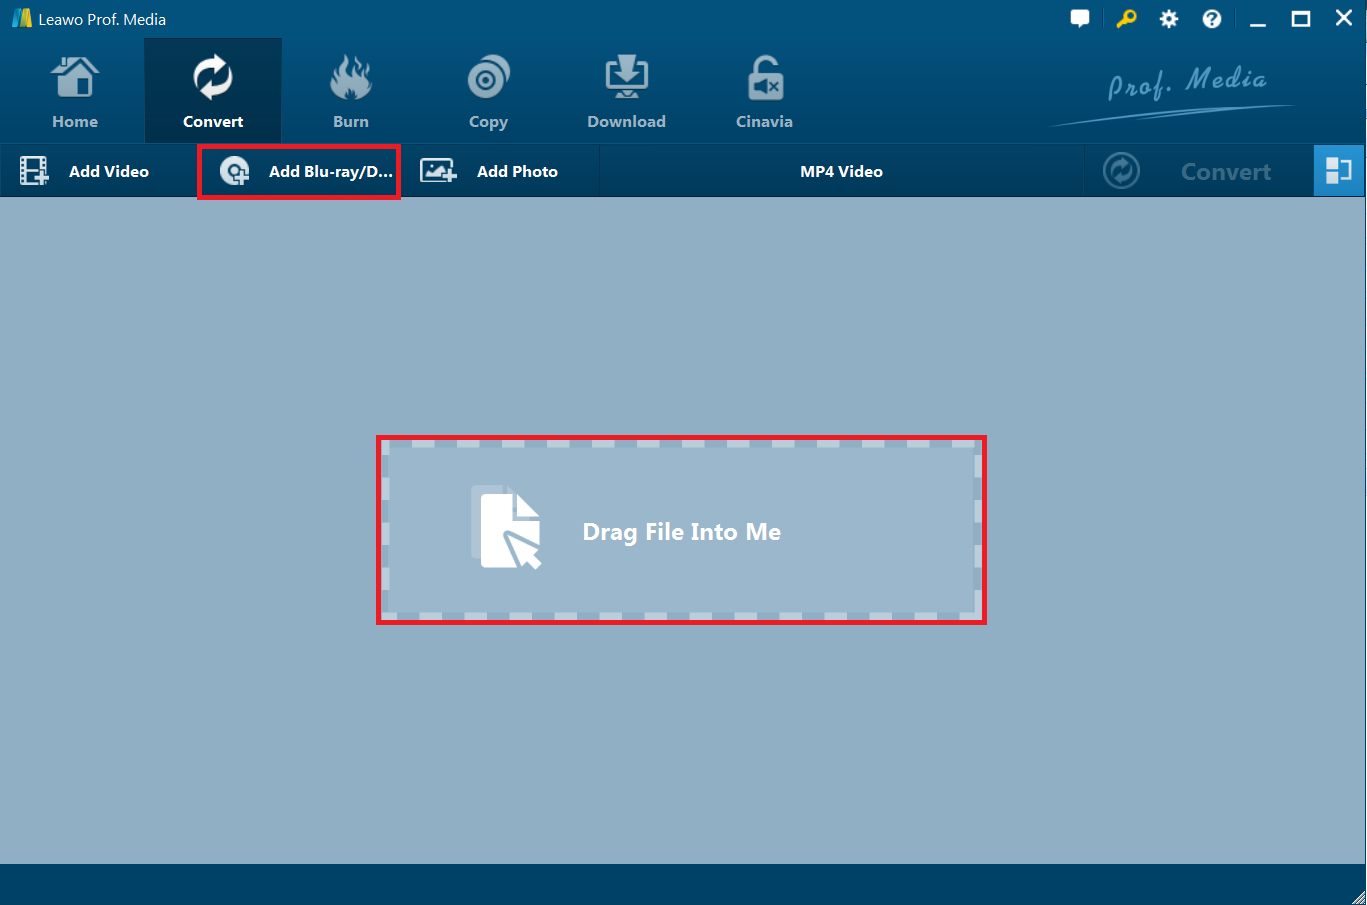
Step 2: On the feature page of Leawo DVD Ripper, we click the Add Blu-ray/DVD button and import the DVD file into Leawo DVD Ripper. Alternatively, we can also drag and drop source DVD file into the converting panel.
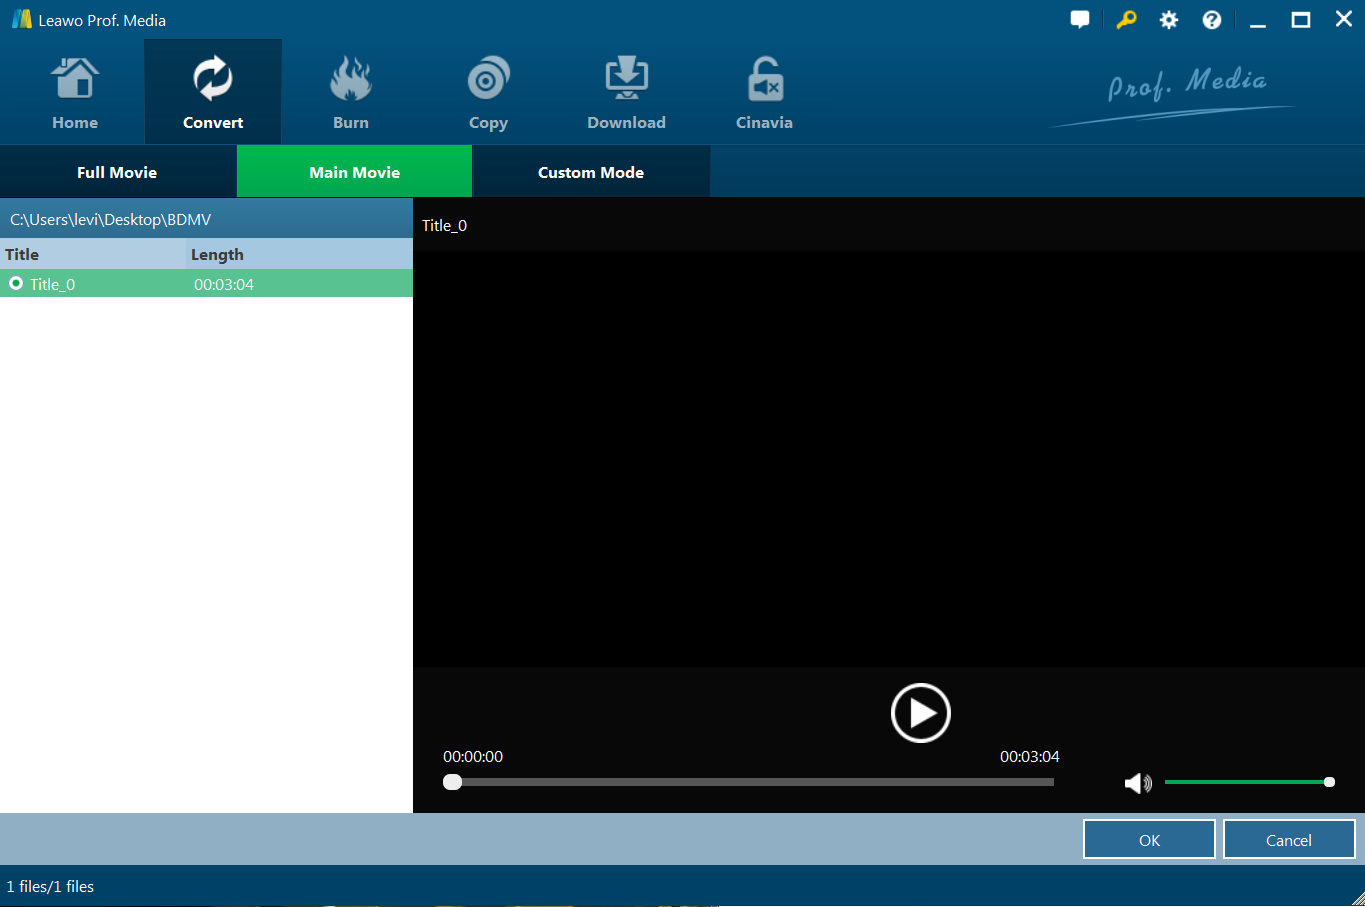
Step 3: Leawo DVD Ripper offers three options for users to import DVD movies: Full Movie, Main Movie and Custom Mode. Full Movie allows you to import all titles. Main Movie only imports the longest title by default and Custom Mode allows you to freely choose titles for importing. After selecting mode and titles, we click the OK button to go to the next step.
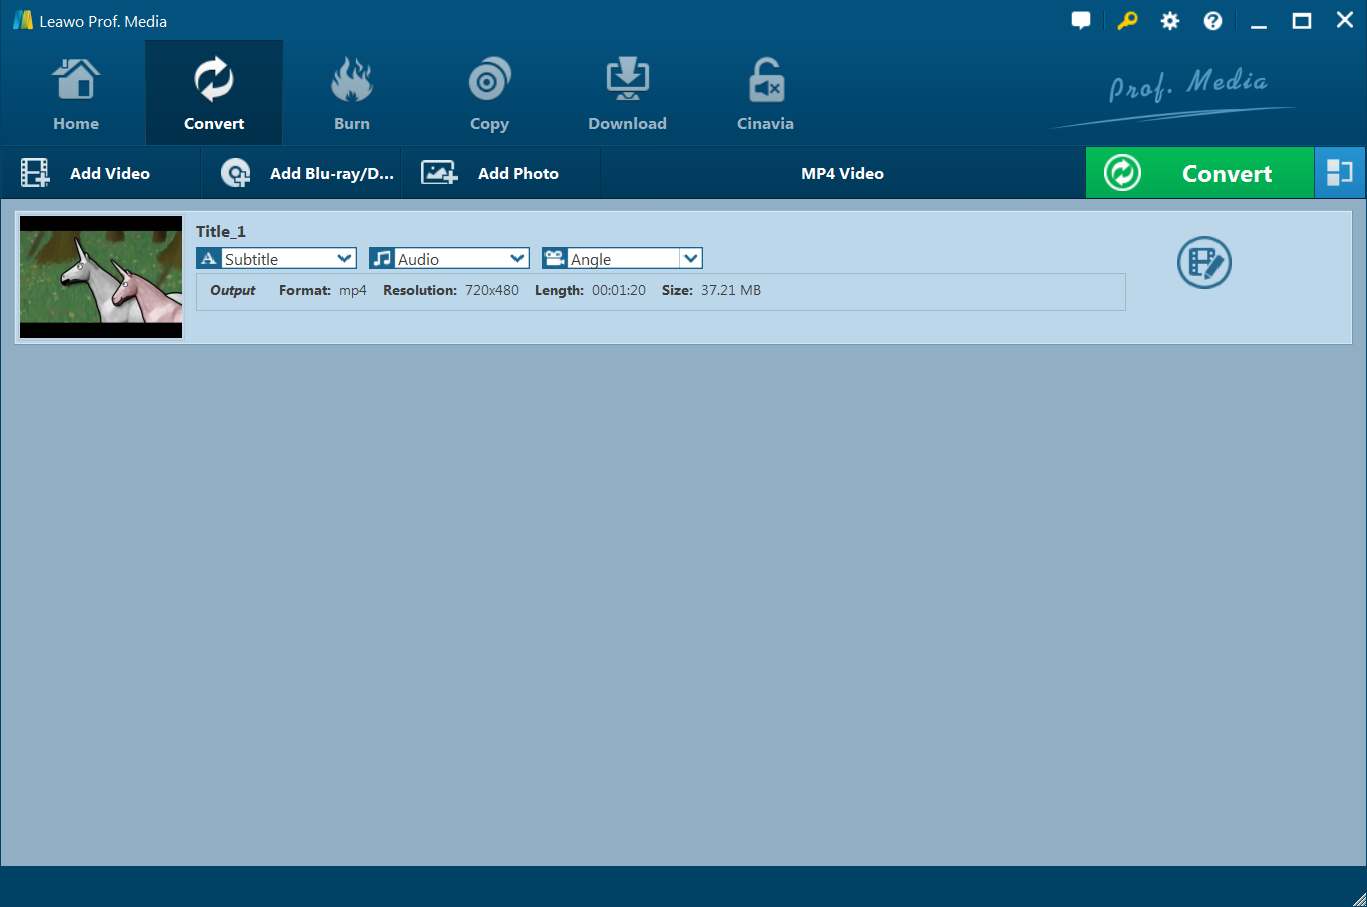
Step 4: In Subtitle and Audio drop-down menus, we can select one of the subtitles and audio tracks. If there are multiple angles in the DVD movie, we can also choose an angle in Angle drop-down menu. Just click the movie and we can preview it.
If you want to edit the movie, click the edit button on the right of the Audio drop-down menu and you will be taken to the movie's edit page. Here you can trim movie length, add movie watermark, crop movie size, adjust movie effect, etc.
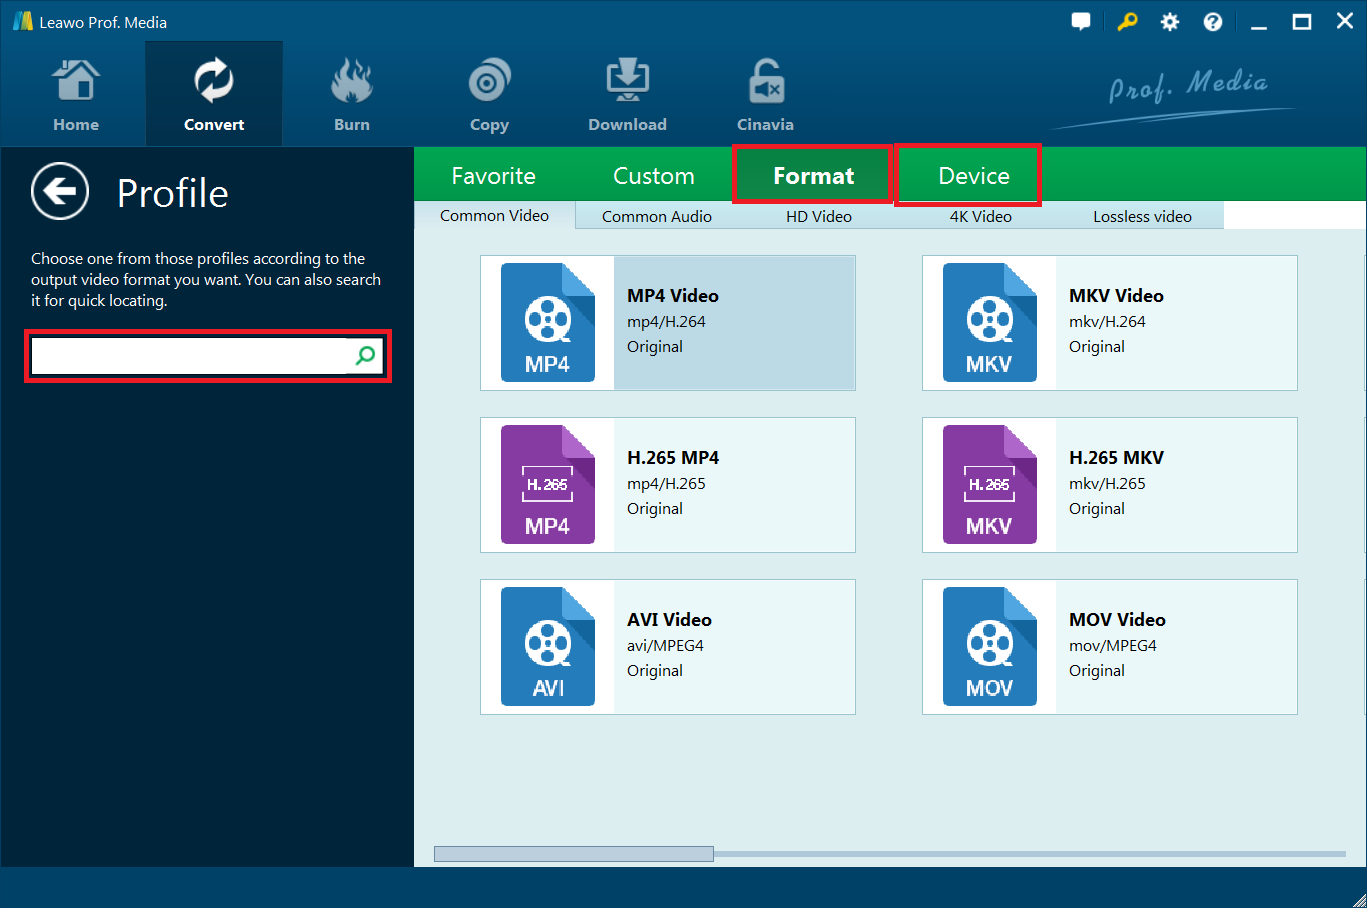
Step 5: On the left side of the green Convert button, there is a drop-down box named MP4 Video by default, click it. At this time, a small panel will pop up. If you need to change the format of the output video, you can click the Change button. At this point, you will be taken to the profile panel. Here you can choose the format of the output video, including: MKV, AVI.4K MKV and more.
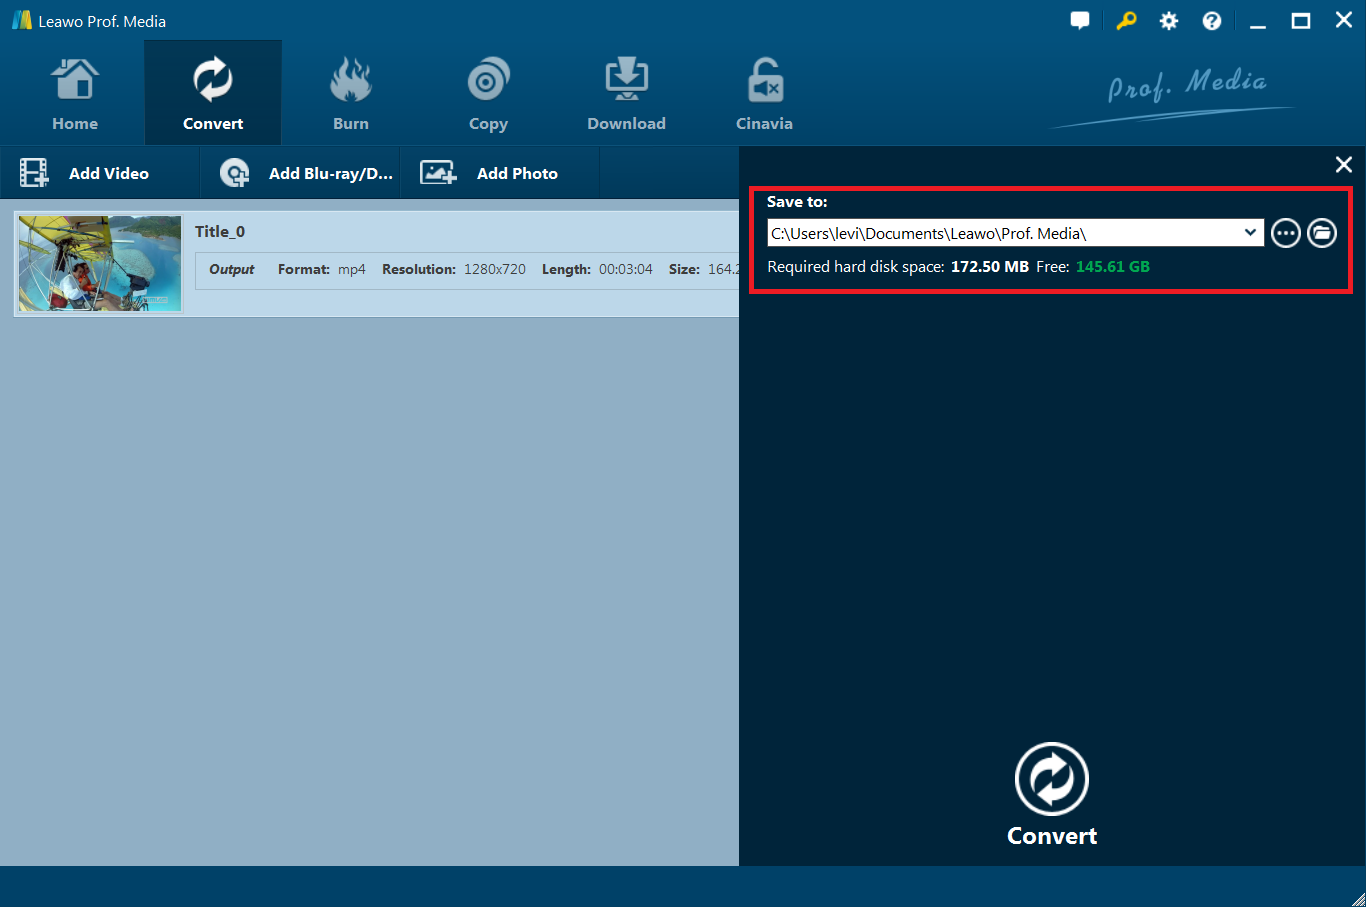
Step 6: After profile settings, you will be returned to the conversion panel. After clicking the green Convert button, a sidebar will pop up. In this sidebar, you need to set a location to save the output file under the Save to option. Finally, click the round Convert button and Leawo DVD Ripper will start to convert DVD to video.
Part 2: How to convert DVD to video with MakeMKV
As a one-click solution, MakeMKV can easily convert DVDs into MKV videos. And, the real advantage of MakeMKV is that the MKV video it creates is lossless and can be played by common video players without any obstacles. In addition, when converting DVD to MKV video, MakeMKV can save all the information in the DVD to MKV video, including: subtitles, audio tracks, chapters and so on. However, although MakeMKV is free, it can only handle unprotected DVD discs and can only convert DVDs to MKV. Here are the specific steps to convert DVD to MKV video using MakeMKV:
Step 1: Download MakeMKV from the Internet and install it on your computer. Put the DVD disc into your computer's CD-ROM and start MakeMKV.
Step 2: Click on Open DVD disk button after the program detects the DVD disc to allow MakeMKV to load the content in the disc to the program.
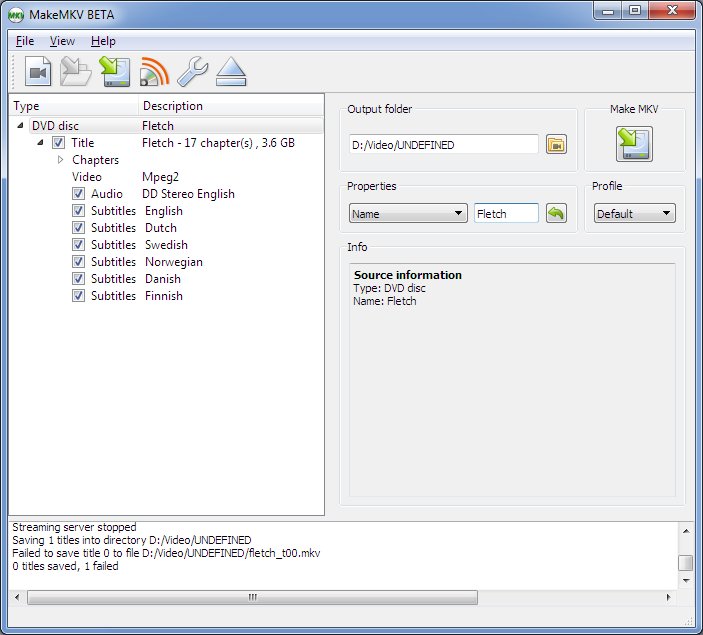
Step 3: On the left side of the MakeMKV interface, you can select the title in the DVD disc you want to rip and subtitles, audio tracks. On the right side of the MakeMKV interface, you can set the storage location of the output video in the Output folder option. Finally, click on the Make MKV button to command MakeMKV to start converting the DVD to MKV.
Part 3: How to convert DVD to video with VidCoder
Using Handbrake as its encoding engine, VidCoder is an open source DVD ripping and video transcoding application for Windows. VidCoder is multi-threaded and can rip most DVDs and convert them to a variety of popular formats, including MP4, MKV, MPEG-4 and more. Although VidCoder only supports Windows system, it is completely free. In addition, VidCoder can set the video's subtitle and audio track before converting the DVD to video. If the DVD movie has multiple angles, VidCoder can also choose a specific angle for the output video. VidCoder also can preview the video in a timely manner. However, VidCoder cannot convert DVDs protected by technology, like CSS. Here's how to convert a DVD movie to video using VidCoder:
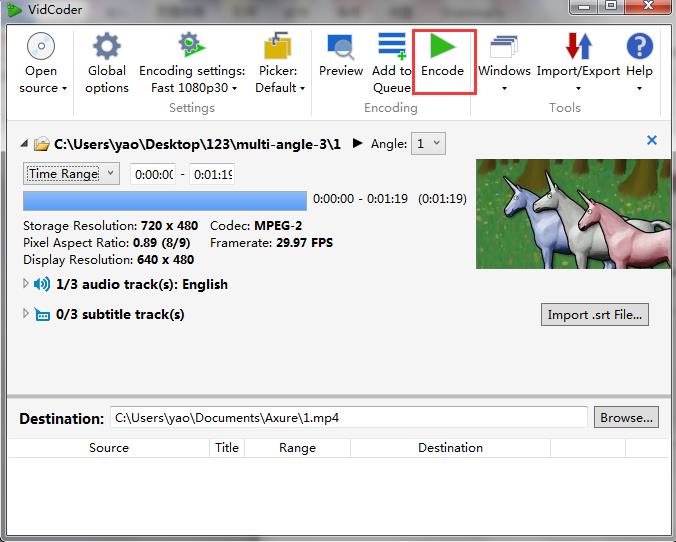
Step 1: Download and install VidCoder from the Internet to your computer. Run VidCoder.
Step 2: Click the Open source drop-down menu in the main interface of VidCoder, continue to select Open DVD/Blu-ray Folder... option, then you can import the DVD file into VidCoder. Alternatively, you can drag the DVD file directly into the window of VidCoder.
Step 3: After importing the DVD file, you can select the chapter in the DVD. Then you can set the subtitle and audio track of the output video file. If the DVD movie is from multiple angles, you can choose one of the angles. Finally, at the bottom of the interface of VidCoder, you can set the location where the output video is saved.
Step 4: After all the settings are completed, click on the Encode button to start converting the DVD movie into video.
Part 4: How to upload DVD movies to Amazon Cloud Drive
By using Leawo DVD Ripper, I successfully converted my DVD movie into a video in MPG format. Next, I will upload the MPG video to Amazon Cloud Drive. Here are the specific steps:
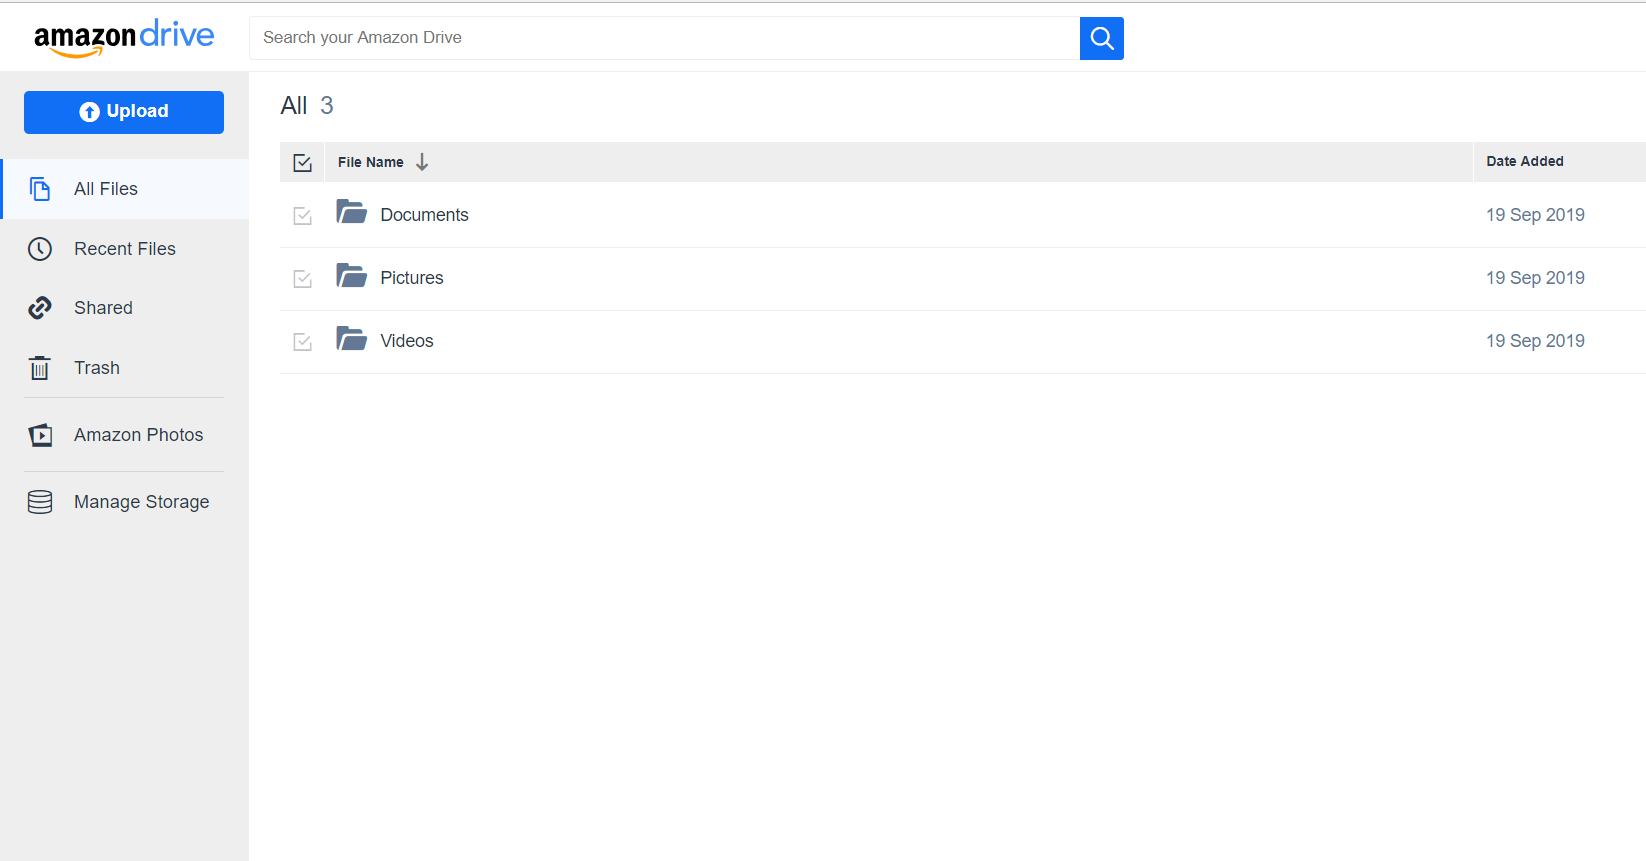
Step 1: Before uploading DVD movies to Amazon Cloud Drive, you need to sign up for an Amazon account, then log in to Amazon Cloud Drive.
Step 2: Clicking the Upload button in the upper left corner of the main interface of Amazon Cloud Drive, and then click the File button, you can select the video files you want to upload on your computer hard drive.
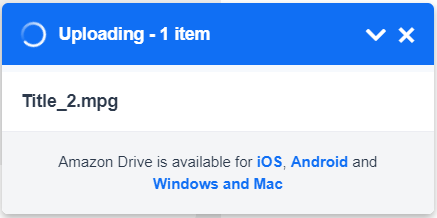
Step 3: After selecting the video files, click the OK button. Then, Amazon Cloud Drive will prompt you to choose where to save the uploaded file. You can select an existing folder or create a new folder. The video file is then automatically uploaded from your computer to Amazon Cloud Drive.
Uploading DVD movies to Amazon Cloud Drive, you can not only truly access your data anytime and anywhere, whether you're at work or on the road, but also save space on your computer's hard drive. In addition, you can watch your uploaded videos online anytime, anywhere via Amazon Cloud Drive. This article provides readers with a perfect way to upload DVD movies to Amazon Cloud Drive and introduces three DVD conversion software tools and how to use them. If you are facing the same problem, use this method to upload your DVD movie to Amazon Cloud Drive!

