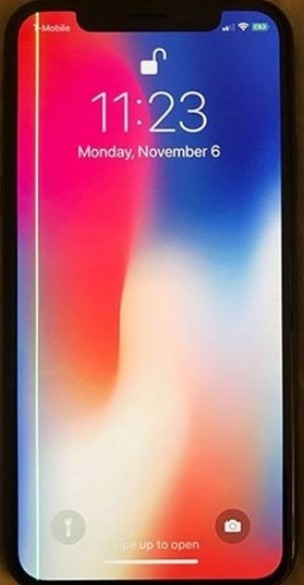
It is a common issue that your iPhone shows vertical white lines. If you are confused about this problem, you can read this guidance. I will show you the reasons that cause this problem and what to do when this error occurs. Thus, you can get rid of the heart dropping moment smoothly.
Part 1: What Causes iPhone Screen White with Vertical Lines
There are many causes of white vertical lines on your iPhone. Here I would like to list some common ones for you to refer to.
1. iPhone lines on screen vertical white can appear if the flex cables of your iPhone are not connected well. This bad connection is one of the most common reasons for this issue.
2. iPhone screen white with vertical lines can also be caused by Electro Static Discharge (ESD).
3. When the display IC of the screen is broken, vertical white lines on iPhone may also show up.
4. If your iPhone device is dropped on a hard surface by accident, it can also result in the white vertical lines on iPhone.
5. Water damage is also a common reason for the appearance of iPhone 6 lines on screen vertical white, which can occur when you drop your iPhone in water.
6. When you see iPhone 6 screen white with vertical lines, maybe the LCD cable connection is loose.
You can check your iPhone with the reasons shown above one by one to determine why your iPhone displays white vertical lines on screen.
Part 2: 3 Ways to Fix White Lines on iPhone X/8/7/6/5
When the issue of black and white vertical lines on iPhone 5/X/8/7/6 occurs, you can try the three methods that I will show you in the following contents.
2.1 Force Restart to Fix White Vertical Lines on iPhone
As for iPhone 8/7/6/5 or iPhone X lines on screen vertical white, you can try to restart your iPhone to get rid of this issue properly.
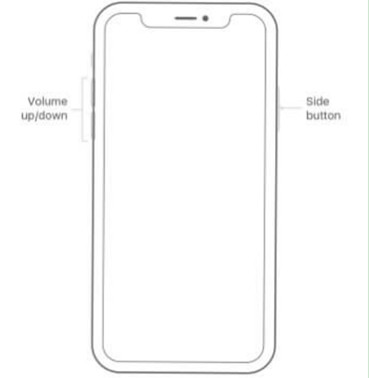
For iPhone X
1) You need to press the side button and volume button. After that, you need to hold them until you see the slider.
2) Drag the slider and turn off iPhone device.
3) Then you need to press and hold the side button again to wait for the appearance of the Apple logo to start your iPhone X.
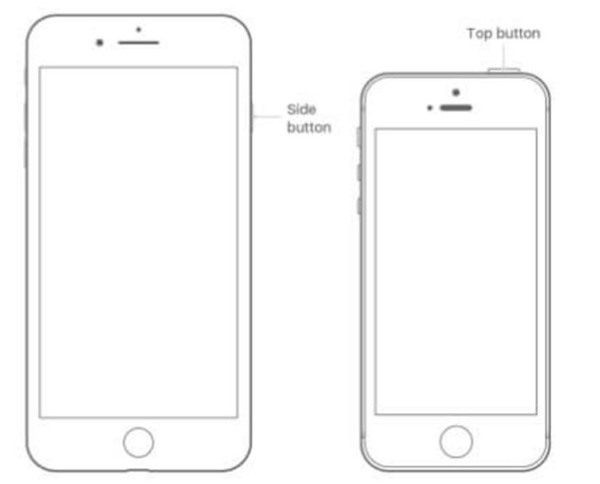
For iPhone 8 or Earlier
1) You need to press and hold the top or side button until you see the slider.
2) Drag the slider from left to the right side to turn off your iPhone.
3) Press and hold the top or side button until you see the Apple logo on the screen.
Only with a few presses, you can restart your iPhone successfully. You can try whether this solution can help you out of the issue.
2.2 Reset to Fix White Vertical Lines on iPhone
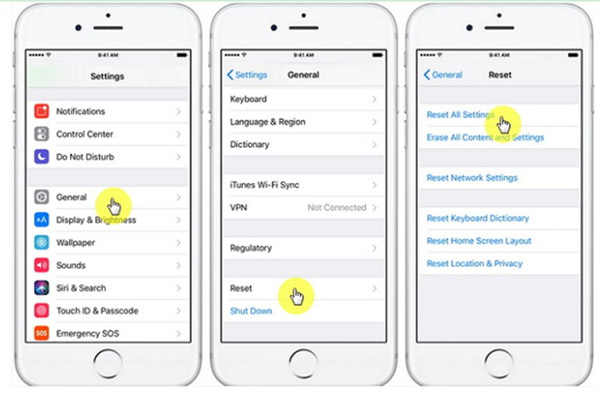
The vertical white line on iPhone X or earlier models can also be fixed by resetting. Refer to the steps shown below and you can make it perfectly.
1) Run Settings app and then click on the “General” tab.
2) Choose “Reset” option in the interface and then click on “Erase All Content and Settings”.
3) A dialogue may prompt to ask you to enter your Apple ID to use the credentials and you need to offer the confirmation.
4) Wait until your iPhone is erased completely.
All your iPhone data will be erased in this process. If you want to find your iPhone data back after the erase, you need to find a way to back up your iPhone beforehand.
2.3 Restore to Fix White Vertical Lines on iPhone
Restoring is also a good way to fix white vertical lines on iPhone 5 and other models. Now let’s begin to see the detailed steps to get this work done.
1) Opening iTunes latest version on computer and then connect iPhone with computer via the original cable.
2) When your iPhone icon is shown in the interface, you need to tap on “Preferences > Devices” to ensure “Prevent iPods, iPhones, and iPads from syncing automatically” option.
3) Click on your iPhone icon and then find the “Summary” panel under the menu of “Settings”.
4) Find the tab of “Restore iPhone” to click on and confirm the restoring procedure.
5) Wait for your iPhone to get erased via iTunes. Thus, the latest iOS version will be installed on iPhone.
When you see iPhone X/8/7/6/5 or iPhone 3G white screen with vertical lines, you can choose one method shown in this part to help you to fix it. If you are worried about the data loss in the fixing process, you can continue to read this guidance to know how to avoid this problem with the help of Leawo iTransfer.
Part 3: Fixing iPhone Lines on Screen Vertical White without Data Loss
If you want to fix iPhone X/8/7/6/ or iPhone 5 vertical white lines on screen without data loss, you can make use a good transfer tool to help you. Here I would like to recommend you take advantage of Leawo iTransfer. This program is powerful in its multiple transfer features. It can transfer files among computers, iDevices, and iTunes without any difficulty at all. It can cope with the transfer of 12 kinds of files like contacts, music, notes, etc. perfectly. This part will take photos for instance to show you how to back up file from iPhone to computer.
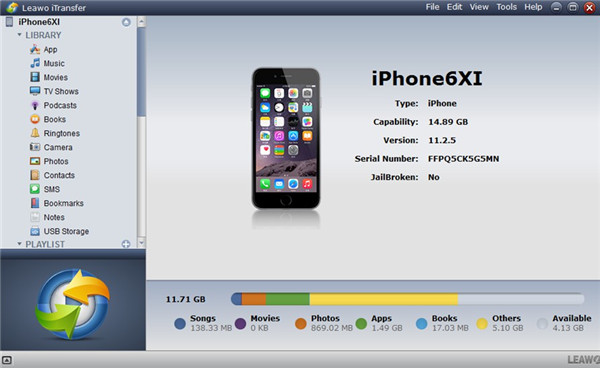
Step 1. Start Leawo iTransfer and Insert iPhone
Run the program on computer and the insert iPhone into computer with matched USB cord. Leawo iTransfer will recognize your iPhone and display its icon in the top left corner of the interface.
Step 2. Check iPhone Files
Click on the iPhone device icon and then hit on “Photos” tab under the menu of “LIBRARY” to see all images on your iPhone in the right part of the screen.
Step 3. Select Files to Transfer
Select the images that you would like to back up and then click on the transfer button at the bottom right corner of the screen. In the panel that shows up, you need to hit on “Transfer to> My Computer”. You can also right click on one image that you have chosen to call out the transfer menu.
Step 4. Choose Folder and Transfer Files
Tick “Save to folder” in the next panel and then click on the “Change” button to set one suitable directory for the exported iPhone images. In the end, you can click on “Transfer Now” to begin to back up files from iPhone to computer immediately. You only need to wait for a few seconds for the end of the transfer process. Thus, your iPhone pictures will be available on computer.
You can use the steps shown above to back up other files from iPhone to computer easily. This only calls for several clicks to make it, which is quite easy for you to handle. When you encounter transfer issues, this software will do you much help in daily life.
Bonus Tip: How to Protect Your iPhone from White Lines on Screen
It is sensible to pay attention to some aspects to avoid the issue of iPhone white lines on screen. I hope the following small tips may do you some help.
1. Pay attention not to drop your iPhone onto hard surface or into water. This can damage your iPhone screen directly.
2. You’d better not use your iPhone for a comparatively long period of time at a time, which will cause your iPhone to be quite hot, resulting in screen white lines.
3. It is not sensible for you to run multiple apps on iPhone at the same time, for some apps may get unresponsive to cause white vertical lines on the screen.
4. You should note the system bugs and update your iOS system according to the official prompt. You can check the system info regularly and then update system online or via iTunes.
5. You’d better not put your iPhone on your bed or in a chair to avoid the screen damage due to the pressure when someone sits or lies down on it.
6. Do not put your iPhone with keys or various cards together, which may cause damage to the iPhone screen in the long run.
7. You’d better clean your iPhone screen with soft detergent regularly and use stickers to protect your iPhone screen in daily life.
This tutorial may help you a lot when you encounter iPhone white vertical lines on the screen. You can choose one way to get rid of this issue and backup iPhone data to computer before you begin to fix this error. It is more important to protect from the happening of this error with some useful tips.

