"I have some precious photos and would like to burn photos to DVD disc so I could send a DVD photo slideshow to my grandpa to let him enjoy these photos on his old DVD player. I have no idea on how to burn photos to DVD. My friend told me that I need to use a DVD photo slideshow maker to burn photo to DVD. Is that true? What kind of photo to DVD maker software should I use for burning photos to DVD? Any advice would be highly appreciated."
Questions on burning photos to DVD have been brought up so many times. Actually, there's no standard answer to these questions, as photo slideshows made with different photo slideshow maker software may be in different formats. And DVD photo slideshow makers differ in format compatibility. However, in this post, you will learn the basic and most popular DVD photo slideshow maker solutions for both Mac and Windows operating systems. It offers detailed tutorial on how to burn photos to DVD on Mac/PC with different DVD photo slideshow maker software.
About Burning Photos to DVD
Taking photos with digital camera or smartphones has been extremely popular nowadays. You could view these wonderful photos on your digital camera, smartphones, computer, upload to blog, or make photo slideshows to share online as you like. And sometimes, you may even want to burn photo to DVD disc or burn photo slides to DVD disc for multiple uses.
There are various cases in which you need to burn photos to DVD disc: easy to transer photos, play back photos on DVD players or TV, keep photos safe, make photo slideshow sharing easier, gather and save every memorable moments, etc.
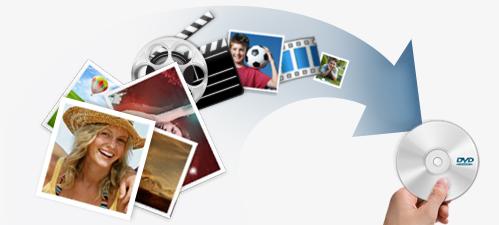
Many people might think it is really a hard rock to burn photos to DVD or burn phto slides to DVD. Actually, burning photos to DVD disc on Mac/PC is not a hard task at all if only you get the right tool and operate in the right way, so is burning photo slides to DVD disc. What you need to do is firstly make sure what you want to make (whether you want to include disc menu, get some editing effects like transitions between pictures, add text description, insert favorite song as background music, etc.), and then decide which DVD photo slideshow maker you need to adopt. However, no matter what you want to get, the following things are must-have:
- Source photo slideshows (or photos with which you could create a photo slideshow before burning to DVD) on computer;
- Computer with DVD disc recorder drive (in case you want to burn slides to DVD disc directly);
- Blank writable DVD disc;
- DVD photo slideshow maker software to convert and burn photo slides to DVD and burn photos to DVD;
- Enough hard drive space;
Burn Slideshow to DVD on Windows DVD Maker
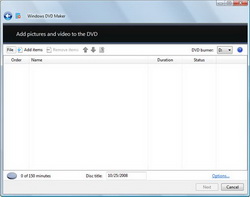
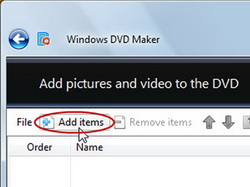
Windows DVD Maker is a wonderful DVD making software tool you can use to make DVDs for watching on a computer or on a TV using a regular DVD player. The quickest way to make a DVD is to add pictures and videos in Windows DVD Maker, and then burn your DVD. If you want to get creative, you can customize the DVD menu style and text before you burn the DVD. However, it should be noted that Windows DVD Maker is included in Windows Vista and Windows 7. It has been removed as of Windows 8. Therefore, if you use Windows 8 or other Windows operating systems, you need to skip to the Part 4: All-in-one Photo to DVD Maker for professional and practical DVD photo slideshow making solution.
Note:
- To set the DVD video options like DVD playback settings, DVD aspect ratio (16:9 or 4:3), DVD video format (NTSC or PAL), DVD burner speed, etc., you need to click the "Options" button after you importing source photo slideshow into Windows DVD Maker.
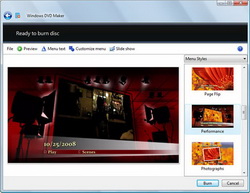
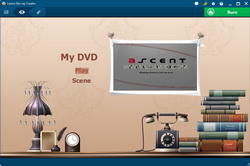
- DVD Maker offers these menu options: Menu Text, Customize Menu, Slide Show, and Menus Styles. You could customize these menu options as you like;
- You could save Windows DVD Maker project onto hard drive for future use;
- After Windows DVD Maker finished burning photo slideshow to DVD, you could make another copy of the current DVD, remove the burned DVD, insert a new recordable DVD, and then click Make another copy of this DVD
Files Types & Discs Supported By Windows DVD Maker
Video Files |
'.asf', '.avi', '.dvr-ms', '.m1v', '.mp2', '.mp2v', '.mpe', '.mpeg', '.mpg', '.mpv2', '.wm', and '.wmv' |
Audio Files |
'.aif', '.aifc', '.aiff', '.asf', '.au', '.mp2', '.mp3', '.mpa', '.snd', '.wav', and '.wma'. |
Image Files |
'.bmp', '.dib', '.emf', '.gif', '.jfif', '.jpe', '.jpeg', '.jpg', '.png', '.tif', '.tiff', and '.wmf'. dvd |
DVD discs |
dvd+r, dvd+rw, dvd-r, dvd-rw and dvd-rom |
Burn Photo Slideshow to DVD on Mac with iDVD
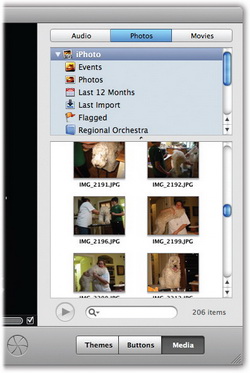
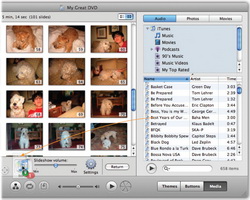
Comparable to Windows DVD Maker, iDVD allows users to burn QuickTime Movies, MP3 music, and digital photos to a DVD that was then played on a commercial DVD player. Currently, iDVD was discontinued by Apple Inc. since OS X 10.7 Lion, and not available on the Mac App Store with all of the other iLife apps. It was, however, still available in the boxed copy of iLife '11 until iLife '13. So, to use iDVD to burn photo slideshow to DVD on Mac, you need firstly check whether your Mac computer has an iDVD or not. If you don’t have an iDVD, you could get and install iDVD from an iLife Installer Disk.
All-in-one DVD Slideshow Maker for Mac/PC
Windows DVD Maker and Apple iDVD could both help you burn photos to DVD easily. However, their disadvantages are quite obvious. They are not available in all computers and you have to take a lot of time and energy, even dollar, to get them installed and work. So, is there an easier and more convenient solution to burn photos to DVD on Mac and PC? Of course, that is Leawo DVD Photo Slideshow Maker.
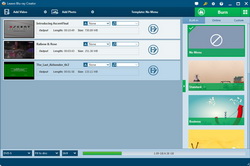
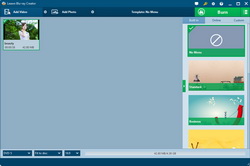
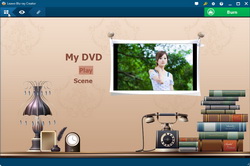
Leawo DVD Slideshow Maker, formally known as Leawo DVD Creator, is a professional photo to DVD maker program that offers easy but effective solutions for you to burn photo to DVD and convert photo slides to DVD disc, folder and/or ISO image file, no matter which formats your photo slideshow is saved in. What's more, it allows you to directly create photo slideshows from your personal photos and then burn created photo slideshow to DVD freely. (Leawo offers DVD Photo Slideshow Maker for Mac to help Mac users easily create and burn photo slideshow to DVD on Mac). You could refer to the below detailed guide to learn how to burn photo to DVD with Leawo DVD Photo Slideshow Maker.
How to Burn Photo Slides to DVD with Leawo DVD Slideshow Maker - From Slideshow
Download and install this DVD photo slideshow maker on your computer beforehand. Other things you need to prepare for burning photo slides to DVD include:
- Source photo slideshows.
- Computer with DVD recorder drive.
- Blank writable DVD disc.
- Enough hard drive space.
How to Burn Photos to DVD Photo Slideshow Directly with Leawo DVD Photo Slideshow Maker - From Photos
With Leawo DVD Photo Slideshow Maker, you could not only directly burn photo slides to DVD, but also directly burn photo to DVD as well. You don't need to get a photo slideshow before burning to DVD. What you need are source photos and Leawo DVD Photo Slideshow Maker. Follow the below steps to learn how.
Note:
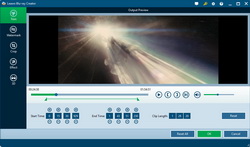
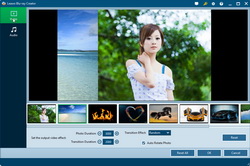
- During editing photo slideshow, you could adjust photo order, insert extra photos, /delete/remove photos, set the output video effect, add a background music, set audio effect, etc.
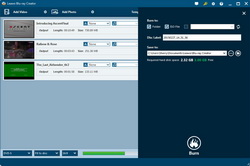
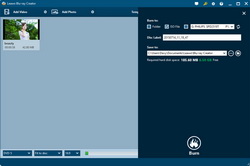
- To burn photo slideshow to DVD disc, you need insert a blank writable DVD disc into the DVD recorder drive first;
- You could click the wheel icon on the top-right corner and then select "Burn" tab to set output DVD video format (Mac users open the Preferences option on the menu bar to access the Burn settings).

