Last updated on 2023-05-09, by
How to Take a Partial Screenshot on Windows/Mac/Chromebook?
More often than not, you might need to take a partial screenshot on your computer for various occasions, for instance, online tutorials and webinars, or maybe you simply want to share what you see. So how to take a partial screenshot and what screen capture tool to use? This blog is your best guide. You will find how to take a partial screenshot Windows/mac/Chromebook with the most useful tools. Just don't miss out.
Outline
You may also be interested in:
Part 1: How to Take Partial Screenshot on Windows?
Still Googling "partial screenshot Windows?" Look no further, this part will teach you how to make Windows partial screenshot in different ways. Just check them out.
1.Take Partial Screenshot Windows with Leawo Screen Recorder
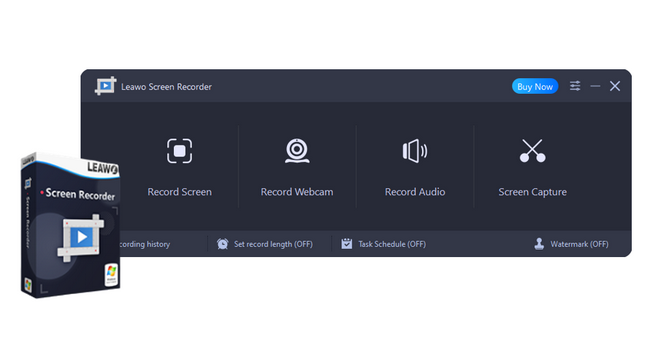
The first and also the best method to try is using Leawo Screen Recorder, a multifunctional screen recorder that allows you to capture everything on your computer easily. Here's how to take a partial screenshot on Windows with Leawo Screen Recorder.
△Step 1. Download Leawo Screen Recorder
Free download Leawo Screen Recorder and install it on your PC.
-
Leawo Screen Recorder
- Record all activities on your computer screen as HD screencast.
- Record video from your webcam.
- Record any audio from your computer an/or microphone.
- Capture anything on your computer screen as screenshot.
- Add drawing, annotations, watermark, mouse animation, and BGM to recordings.
- Output in high quality with multiple formats selectable.
△Step 2. Set output preferences
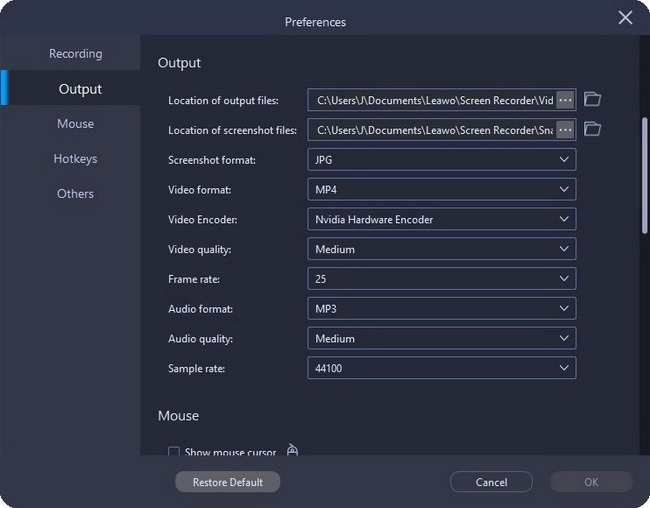
Launch Leawo Screen Recorder. Click the Three-bar icon in the top right. Choose Settings > Output to set the output preferences. You can adjust the screenshot format, video format, video encoder, frame rate, sample rate, output directory, etc. here.
△Step 3. Take a Partial Screenshot Windows
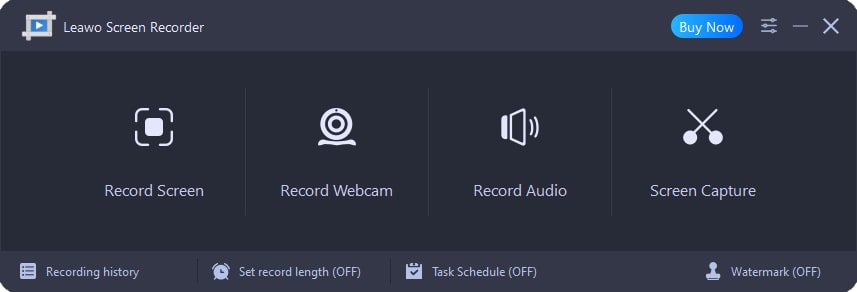
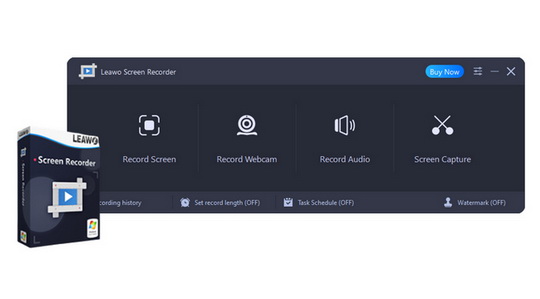
Go to the main interface. Click on the "Screen Capture" button to enter the mode. You can use the default Custom mode to take a partial screenshot or hover your mouse over a specific window to use the Auto Detection mode and select a separate window as the screenshot area. You can also take a full screenshot with the Full-screen mode.
△Step 4. Edit a Partial Screenshot Windows
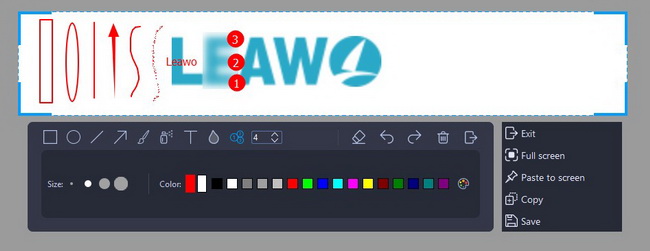
If you want to edit the partial screenshot, just use Leawo Screen Recorder's built-in editing tools, including effects like rectangle, ellipse, line, arrow, brush, airbrush, text, blur, callout, and more.
2.Take Partial Screenshot Windows with the Snipping Tool
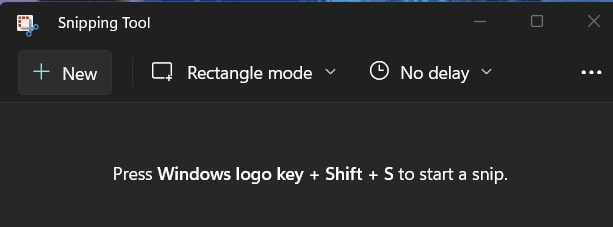
Preinstalled on Windows since the days of Windows Vista, the Snipping Tool is a handy choice to take a partial/full screenshot on Windows. So how to take a partial screenshot on Windows? Here are the steps.
Step 1: Go to the Windows taskbar like this: Start Menu > Programs > Windows Accessories.
Step 2: Click on the "Rectangular mode" to take a partial screenshot Windows. Select the area you want to capture.
Step 3: Click on the Save icon to save the image as a PNG file or click on the Copy icon to place the image on the clipboard.
That's it. You can also share the partial screenshot with the Send icon. To edit the partial screenshot, just use the Highlighter, and Eraser tools in the Paint 3D app.
3.Take Partial Screenshot Windows with Snip & Sketch Tool
For Windows 10 and newer versions, the Snipping Tool has been replaced by the Snip & Sketch app, which can be accessed easily from the Start menu. So how to take a partial screenshot on Windows with it? Just check out the steps below.
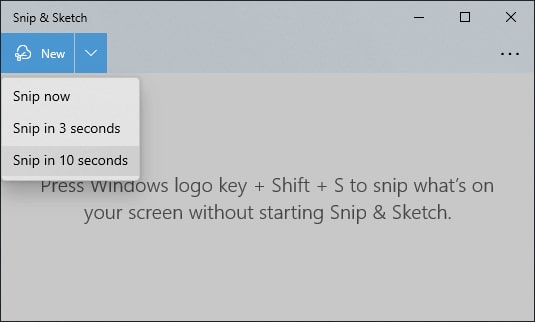
Step 1: Launch the Snip & Sketch app on your Windows. Click on the New button to open a dropdown menu.
Step 2: Select the rectangular snip from the toolbar. Your cursor will change to a crosshair and you can take a partial screenshot Windows precisely.
Step 3: The screenshot will be copied to the clipboard. You need to paste it to another application to view, save or edit the image.
The Snip & Sketch tool also allows you to capture a free-form snip, window snip, or full-screen snip. You can also use Snip & Sketch's convenient keyboard shortcut: Windows + Shift + S to take a partial screenshot on Windows.
4.Take Partial Screenshot Windows with the PrintScreen Key
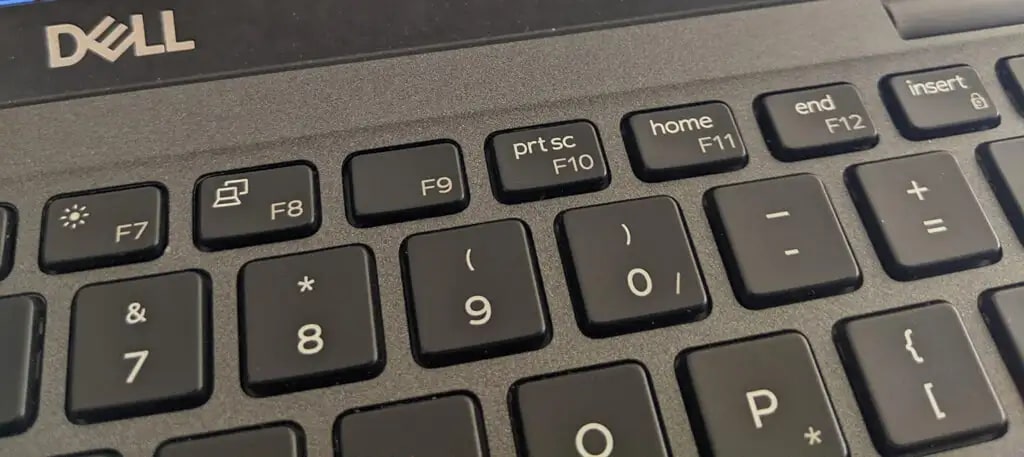
The PrintScreen Key is another easy way to take a screenshot on Windows. However, the key won't let you take a partial screenshot Windows directly but just the full screen. You will need to edit or crop the image with an app like Paint or Photoshop afterward. So how to use it? It's super straightforward just follow the steps below.
Step 1: Open the screen you want to take a partial screenshot on Windows.
Step 2: Press the PrintScreen Key to take a full screenshot. Press Alt + PrintScreen to take a screenshot of the active window.
Step 3: Paste the screenshot on the editing app and crop it to your preferred size.
That's how to take a partial screenshot on Windows with the workaround of the PrintScreen key. Just make sure you have an editing app to edit the screenshot to a partial image.
Part 2: How to Take Partial Screenshot on Mac?
Now you know how to take a partial screenshot Windows. So what about macOS? It's easy. In this part, you can find multiple methods to take a partial screenshot Mac. Just read on.
1.Take Partial Screenshot Mac with Leawo Screen Recorder
When it comes to taking a partial screenshot on Mac, Leawo Screen Recorder remains the go-to choice, which can help you capture your computer activities with the best output quality. You can not only take an HD screenshot but also record videos and yourself from your webcam on Mac with it. From conferences to gaming clips to online tutorials, Leawo Screen Recorder can help you record them all easily.
Moreover, Leawo Screen Recorder comes with multiple advanced features. You can edit the partial screenshot with its editing tools, for example, you may annotate or add a highlight to the screenshot, add a watermark to copyright your content, etc. In addition, the recorder is excellent in video and audio recording, which lets you add audio narration or schedule video recording with ease.
So how to take a partial screenshot Mac with Leawo Screen Recorder? It's the same as on Windows. Just follow the steps on how to take a partial screenshot Windows introduced above and that's it.
2.Take Partial Screenshot Mac with Screen Capture Keys
While Microsoft has hotkeys that let you take a partial screenshot Windows, macOS is the same. You can take a partial/full screenshot or make a video/audio recording with key combos. Here's how to take a partial screenshot on Mac in simple steps.
Step 1: Open the screen you want to take a partial screenshot.
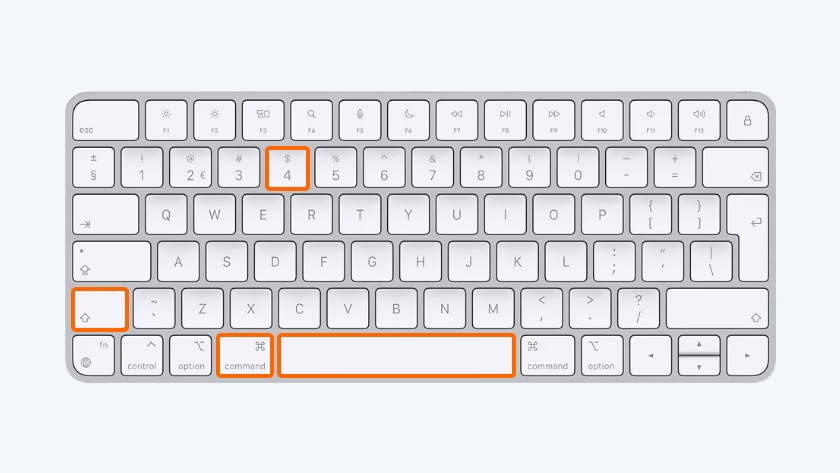
Step 2: Press Command + Shift + 4, and your cursor will become a crosshair.
Step 3: Now hold the cursor and drag the crosshair to select the area you want to capture.
Step 4: To capture a specific window on Mac, just press the Spacebar after you press Command + Shift + 4, then the current active window will be captured.
To take a screenshot of the entire screen on Mac, simply press Command + Shift + 3. The screenshot will be automatically saved to your desktop as PNG files. Alternatively, you can press Command + Shift + 5 to enter the screen capture/recording toolbar. You can select the mode for screen capture and recording here more specifically.
Part 3: How to Take a Partial Screenshot on Chromebook?
Chromebook devices have become increasingly popular these days, which is convenient for users who hope to pack all things on the go. Want to know how to take a partial screenshot on Chromebook? This part will teach you how to make it.
1.Take Partial Screenshot with the Screenshot Key
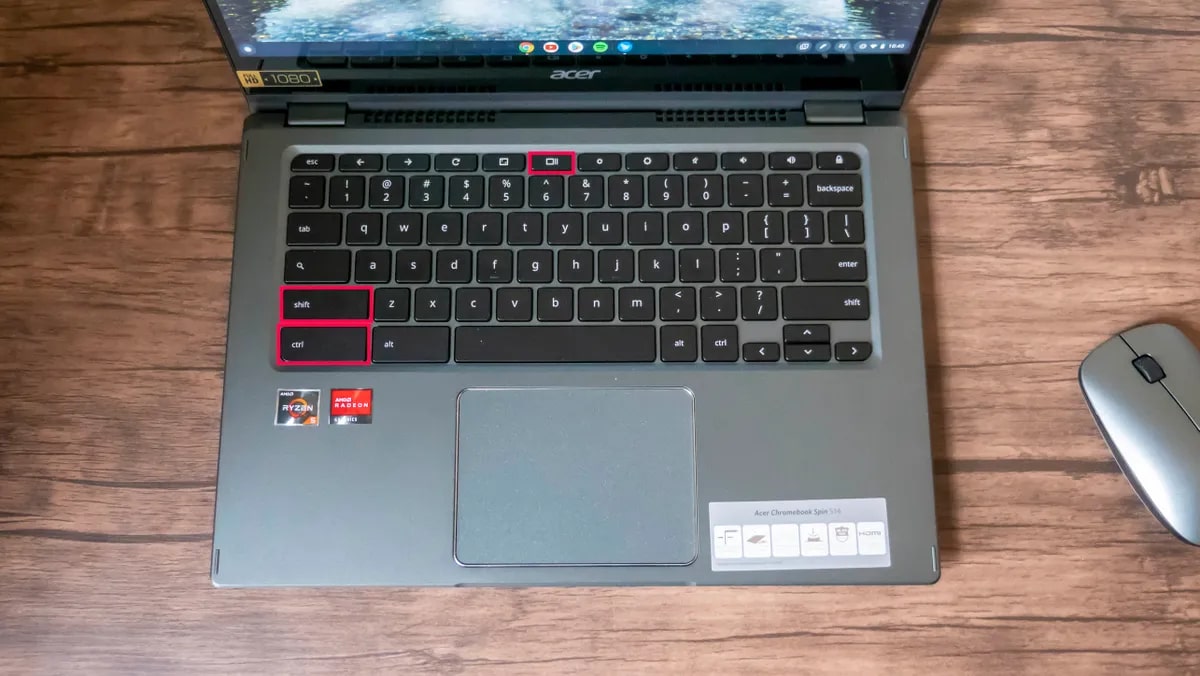
Some Chromebooks have the Screenshot key available, which allows you to take a screenshot of the entire/partial screen directly. But if your Chrome Chromebook doesn't have a Screenshot key, just check out the next part.
2.Take Partial Screenshot with Shortcuts
Just like you can take a partial screenshot Windows, Chromebook also allows you to take a partial screenshot with shortcuts. Here's how.
Step 1: Press Shift + Ctrl + Show Windows.
Step 2: Click and drag to select the portion of the screen you want to capture.
Step 3: Paste the screenshot to another app to view and edit it.
Your screenshots and recordings will be saved to your "Downloads" folder. You can also access more screenshot/recording features once you press Shift + Ctrl + Show Windows. For instance, you can change the location by selecting the Settings icon > Folder to choose an output location, then all your screenshots and recording will be added to this folder.
3.Take Partial Screenshot on Tablets
For those who want to take a screenshot on Chromebook tablets, you can follow the steps below.
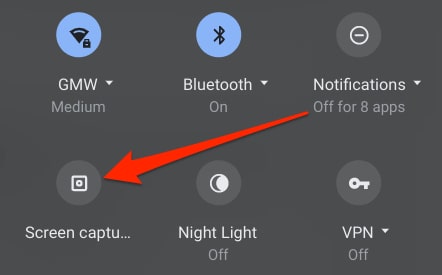
Step 1: Press and hold the Power button.
Step 2: Select Screen Capture or select Time > Screen Capture.
Step 3: Now you can take a partial screenshot on Chromebook.
End Note
This blog has introduced specific guides for how to take a partial screenshot on Windows/Mac/Chromebook. While hotkeys are easy to use, Leawo Screen Recorder can be a much better solution because you can take screenshots and make screen recordings with the best output quality. It's so much more comprehensive than native tools and you can edit your screenshots with advanced features. Not so sure about it? Just check it out yourself!


 Try for Free
 Try for Free

