Last updated on 2021-09-08, by
How to Register a Number with iMessage
Question 1: “How do I register my number with iMessage? I just switched SIM cards while in Europe. Now my new number doesn’t seem to register with iMessage on iPhone 6. How to register a number with iMessage? Have you got any idea of this? Please help me.” By Duplodave2 on Apple Communities.
Question 2: “number is not registered with iMessage on Mac. After upgrading from one Mac Book Pro to another Mac Book Pros - my iMessage is no longer sending/receiving everyone's messages. It says the number is not registered with iMessage. I don't receive certain group texts as well. Everything works great on my iPhone. Mail-OTHER, Mac OS X (10.7.5), Operating system is 10.10.2” by dianafromroswell on Apple Communities.
If you have used iMessage quite often, these questions might not be unfamiliar to you. Sometimes when we switch to another number or change to another iPhone, there might happen “not registered number” note on your iPhone screen when you try to make use of iMessage. And in other cases, we might need to register a number with iMessage on Mac computer for smooth iMessage texting. Registering a number with iMessage might be a tough task for some people. Hence, here in this page, we would like to introduce you solutions on how to register a number with iMessage on Mac and iPhone/iPad respectively. Please check the below content to learn how to do these in detail.
Part 1: Why do we need to register a number with iMessage
Before we learn how to register a number with iMessage on Mac and iPhone and other iOS devices, we might firstly need to make it clear why we need to register a number with iMessage. Sometimes, due to various reasons or causes, you might get a note saying “your number is not registered with iMessage”. These causes might include:
1. You just upgraded your Mac computer operating system. For example, you just upgraded to the latest Mac OS, the 10.14 macOS Mojave.
2. You just updated your iOS devices to the latest iOS version, e.g. iOS 12.3.
3. You have paired your iOS devices to Mac computer, or other devices. In case, just correctly pair your Mac computer to your iOS device.
4. You already can't send some text messages from your computer. Check the Message tool on your Mac computer.
5. You have set up iMessage incorrectly on your Mac computer or iOS devices. In such case, you could head to “Settings > Messages” on your iPhone, iPad, and iPod and tap the button next to iMessage to turn iMessage off on your iPhone or iPad. Next, hold the power button down until you see ‘Slide to Power Off’ and slide your finger across the bar to turn off your iPhone or iPad. Turn your device back on, head back to “Settings > Messages” tab, and turn iMessage back on. This would be time-consuming.
6. Your device or Mac computer has a poor network connection status. In such case, you could reset your network connection to fix this error by going to “Settings -> General -> Reset> Reset Network Settings” option.
There might be other reasons that might cause “number not registered with iMessage” note. Once you have learned the reasons, you could easily get to the answers. Then, how to register a number with iMessage on Mac or iPhone? Check the below content.
Part 2: How to register/remove a number with iMessage on iPhone
Let’s check the below steps to learn how to register and remove a number with iMessage on iPhone. You could follow these steps so as to add your number with iMessage for sending iMessages to your friends or family members that use iMessage as well.
1. On your iPhone devices, make sure your iPhone is well connected to the Internet.
2. Open the taps “Settings > Messages” on your iPhone to tap the button next to iMessage to turn iMessage on. You might need to wait a moment for iMessage to activate.
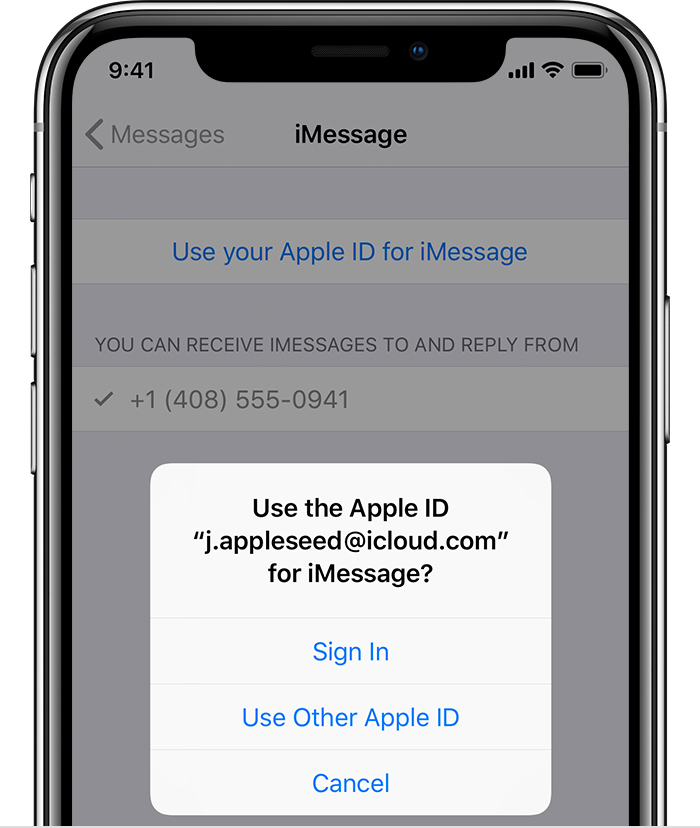
3. Open “Send & Receive” option. If you see “Use your Apple ID for iMessage,” tap it and then click the “Sign in” button on the popup window. Then, sign in with the same Apple ID that you use on your Mac, iPad, and iPod touch.
4. In the "You can receive iMessages" section, make sure that your phone number and Apple ID are selected.
5. Go to “Settings > FaceTime” option to open the "You can be reached at" section to select your phone number and Apple ID.
Then, on your other iOS devices (iPad and iPod), you could now turn on the phone number that you just set up. The detailed steps would be described in the following part.
Then, sometimes you might want to remove a number from iMessage on your iPhone, what can you do? Follow the below steps to remove a number from iMessage:
1. On your iPhone, successively open “Settings > Messages > Send & Receive” option. Select your Apple ID and tap “Sign Out” option. Then go to “Settings > FaceTime” to select your Apple ID and click the “Sign Out” option.
2. If the phone number that you want to remove belongs to an iPhone that you can't access, change your Apple ID password. This removes all phone numbers from your iPad, iPod touch, and Mac. Calls or messages for the removed numbers won't appear on those devices anymore.
Part 3: How to turn registered/added number on or off on Mac/iPad
Through the above part, you have learned how to register a number with iMessage on iPhone. Then, how to register a number with iMessage on Mac? Actually, after registering a number with iMessage on iPhone, you only need to turn on number on Mac computer for registering a number with iMessage on Mac. Check the below steps to learn how to turn registered number on or off on Mac computer.
1. On your Mac computer, open Messages app. If asked, sign in with the Apple ID that you're using with Messages on your iPhone.
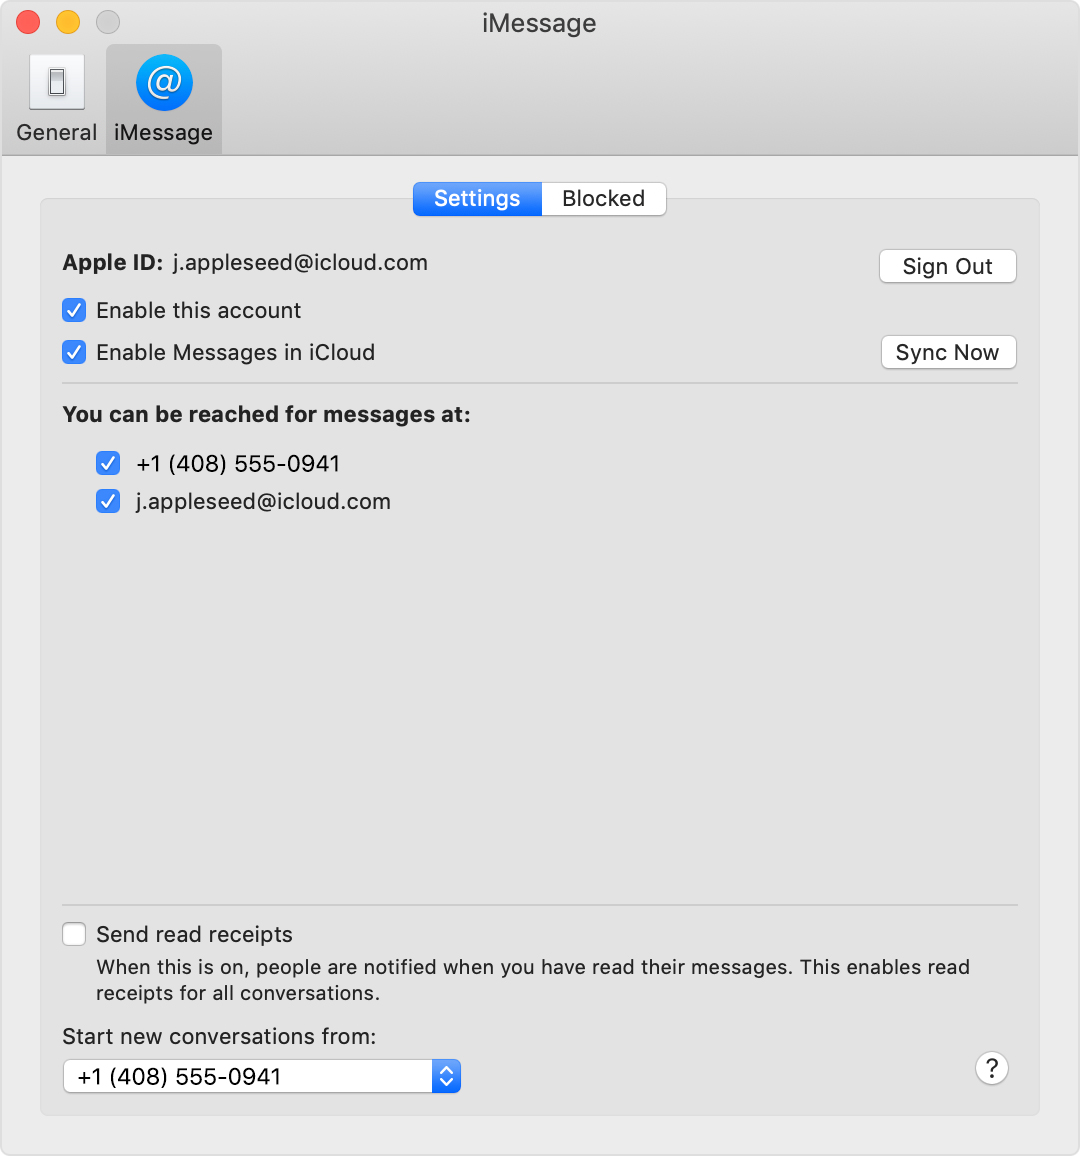
2. Choose “Messages > Preferences” option, then click “Accounts” and select your iMessage account.
3. To turn on your phone number, select it and your Apple ID in the list. If you don't see your phone number, get help with your settings or contact Apple Support. To turn off your phone number, deselect it in the list.
4. If you want recipients to see your phone number and not your Apple ID, select your phone number from the “Start new conversations from” or ”Start new calls from” pop-up menu.
Once you have set a phone number on iPhone, you could now freely turn on or off this number with iMessage on iPad and iPod devices.
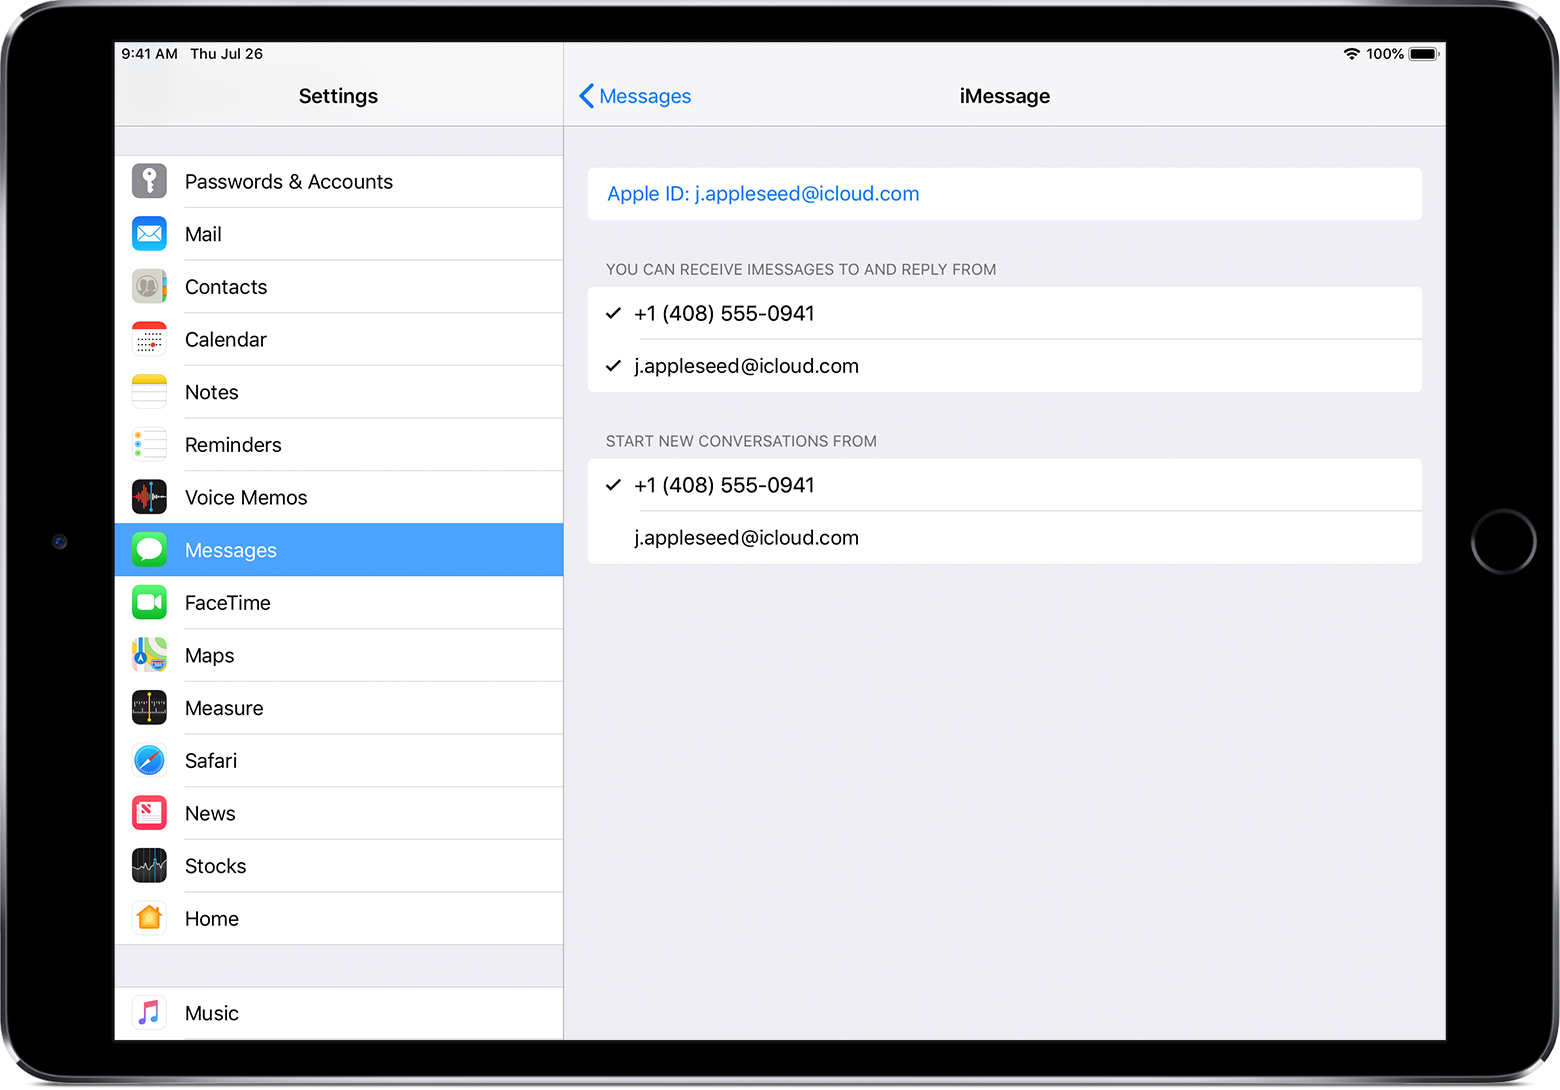
1. For Messages, open “Settings > Messages” option and make sure that iMessage is on. If asked, sign in with the Apple ID you're using with Messages and FaceTime on your iPhone. Then tap Send & Receive.
2. To turn on your phone number, select it and your Apple ID in the “You can be reached” section. If you don't see your phone number, get help with your settings or contact Apple Support.
3. To turn off your phone number, uncheck it.
Now, you have successfully turned on or off phone number on your Mac and iPad/iPod devices. You could freely make use of this free messaging service now.
Bonus: How to back up iMessage with iOS Data Recovery
We all know that similar to other data and files like videos, photos, notes, common text messages, reminders, etc. on iPhone, iMessages on iPhone might be easily deleted or lost due to mis-operation. And meanwhile, sometimes you need to make a backup of your iMessage files from your iOS devices. Then, how to back up iMessage files from your iPhone or other iOS devices?
Leawo iOS Data Recovery could be your best helper. As a practical iOS data recovery and backup tool, Leawo iOS Data Recovery is a program that helps you restore and back up data and files for iOS devices. It could back up up to 14 types of data and files for you, including videos, pictures, music, notes, messages, call history, iMessage, etc. It could help you not only back up iMessages to computer from iPhone, but also restore deleted or lost iMessage files from iOS devices to computer directly.
The below steps would show you how to back up iMessages with Leawo iOS Data Recovery. You need to firstly download and install Leawo iOS Data Recovery on your computer.
Step 1: Choose your iPhone
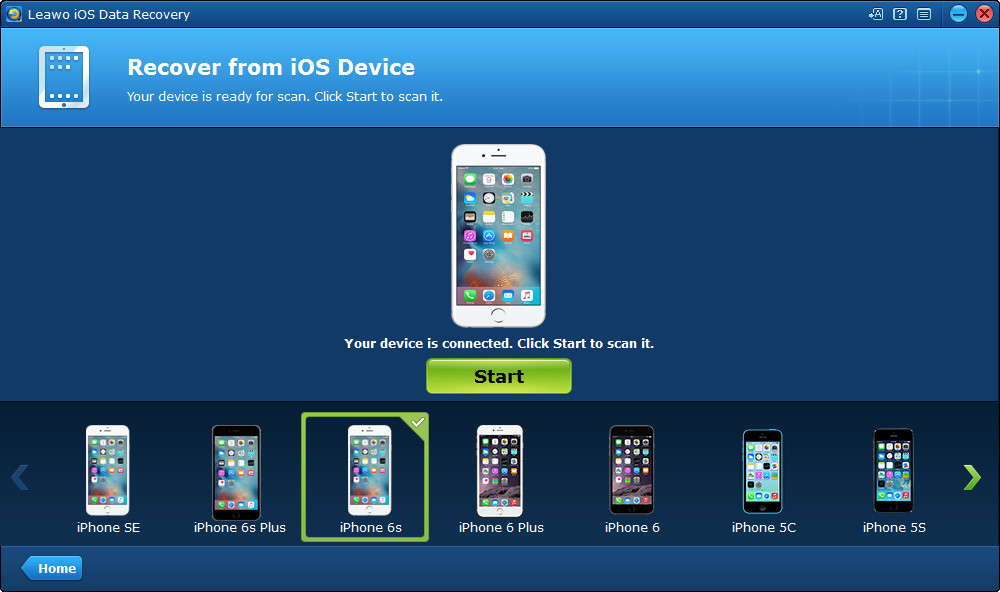
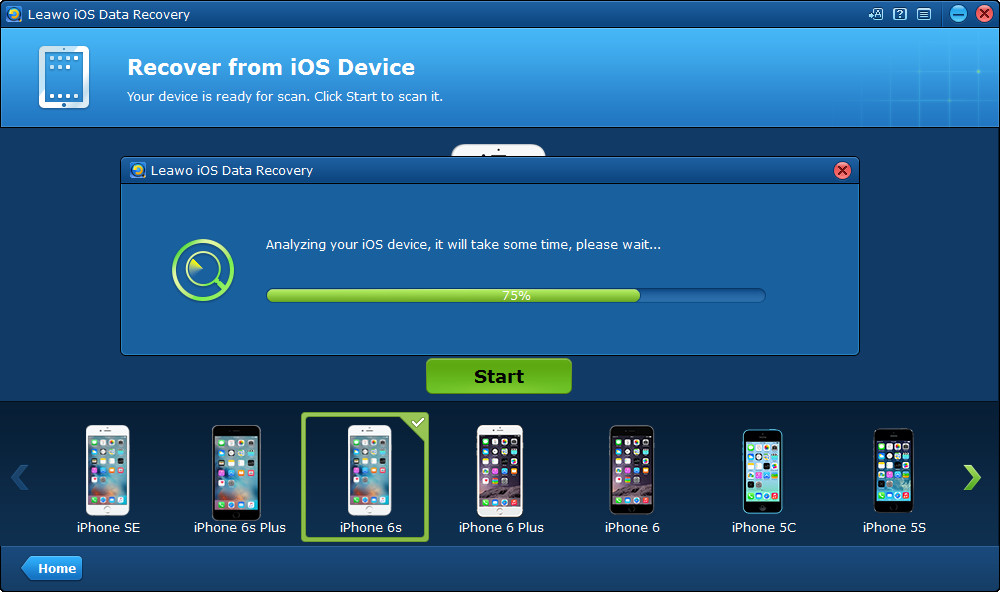
Connect your iPhone to computer and then launch Leawo iOS Data Recovery. Click “Recover from iOS Device” module. Your iPhone will be detected by this program. Click your iPhone icon and then click the “Start” button.
Step 2 Start to scan your iPhone
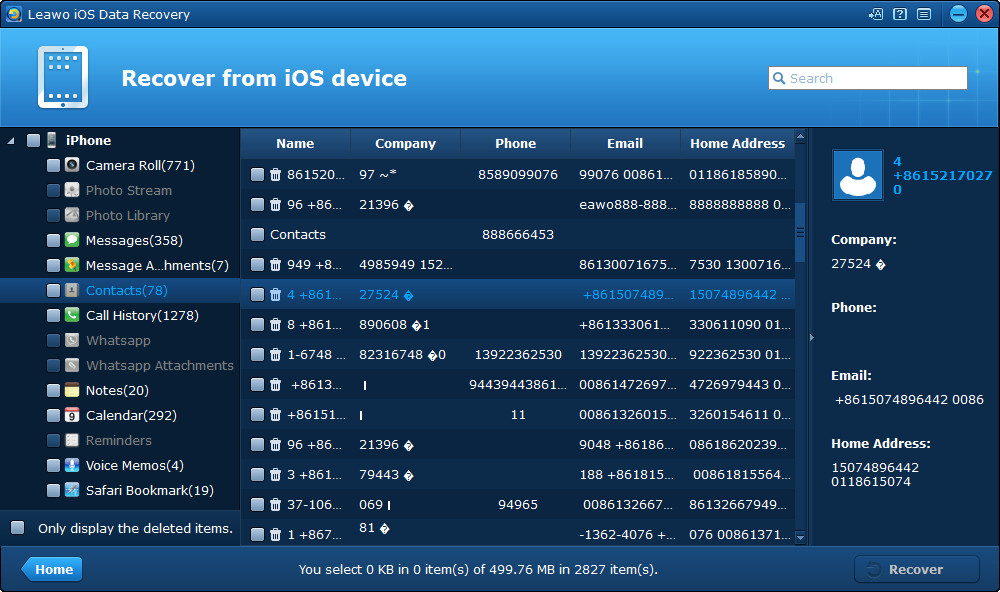
Leawo iOS Data Recovery would then start to scan your iPhone device. And then all data and files including lost ones and existing ones will be displayed in different categories.
Step 3 Preview and choose iMessage files to back up or restore
On the left panel, open “Messages” tabs to preview messages you want to back up or restore, and then check those message files for backup or restoring.
Step 4 Back up iMessages to computer
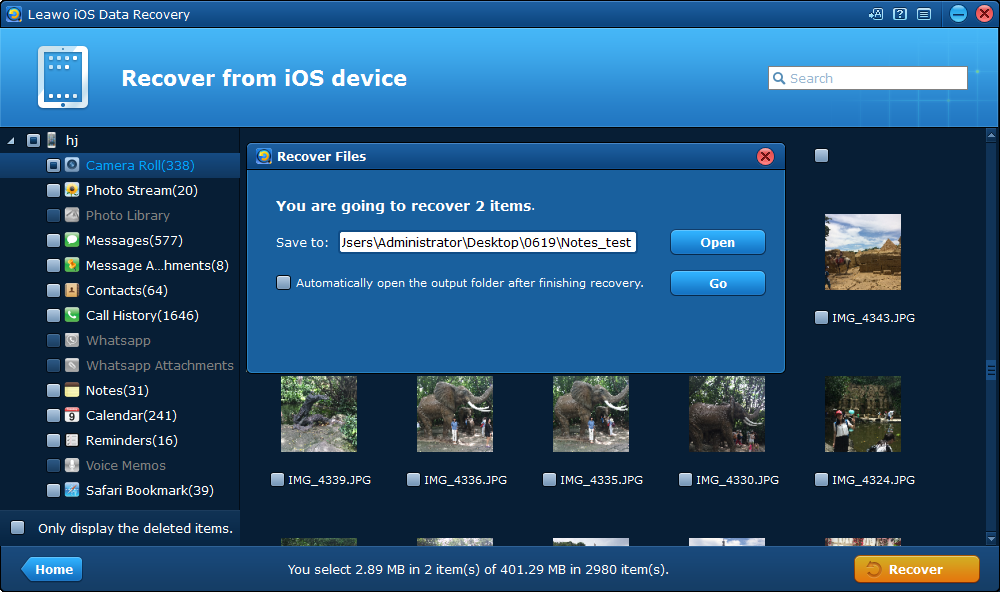
Click the bottom right “Recover” button, and then on the popup “Recover Files” panel set output directory to save iMessage files to computer. Then click “Go” button.
Actually, Leawo iOS Data Recovery could not only help you back up iMessage and other files from iPhone to computer, but also recover data and files from iTunes, and retrieve data and files from iCloud to help you get deleted or lost data and files back.


 Try for Free
 Try for Free

