Last updated on 2020-09-28, by
How to Convert MP4 to Final Cut Pro on Mac
“I got some MP4 video files on my MacBook and I tried to import them to Final Cut Pro but I failed. This is unusual because Final Cut Pro is supposed to support MP4 files. Any idea what went wrong and could’ve possibly caused the problem?”
As unlikely as it sounds, but you might not be familiar with MP4 format as you think you are. This could happen to a lot of people when they have MP4 files and want to import MP4 into Final Cut Pro. But the thing is MP4 files could be compressed with different codecs like XviD/DivX, MPEG-4 and H.264, etc. And different codecs can cause compatibility problems. So, if you want to make sure that the MP4 files you got can be 100% imported to Final Cut Pro, then you are going to need to do something about the MP4 file. The most direct solution to this problem is to convert MP4 to a new format compatible with Final Cut Pro or convert MP4 with a new codec using a MP4 to Final Cut Pro converter. This post would show you how to import MP4 into Final Cut Pro by solving the compatibility problem caused by codec with MP4 to Final Cut Pro converter. You can convert MPEG to Final Cut Pro as well.
- Part 1: Convert MP4 to Final Cut Pro with Leawo Video Conterter For Mac
- Part 2: Convert MP4 to Final Cut Pro with Handbrake
- Part 3: Convert MP4 to Final Cut Pro with Clone2Go Free Video Converter
- Part 4: Convert MP4 to Final Cut Pro with FileZigZag
- Part 5: Convert MP4 to Final Cut Pro with Convert. Files
- Part 6: Convert MP4 to Final Cut Pro with ClipConverter
Part 1: Convert MP4 to Final Cut Pro with Leawo Video Conterter For Mac
In most cases, MP4 video file is compatible with Final Cut Pro. But sometimes, due to the codec issue or other reasons, Final Cut Pro might not work with some MP4 files. Such being the case, we need to convert MP4 to Final Cut Pro compatible format like MOV, DV, etc. To do that, we need a professional MP4 to Final Cut Pro converter. Here we look at Leawo Video Converter for Mac. As the program interface is user-friendly, Leawo Video Converter for Mac is easy to use for it does not require any software expertise to operate. In addition to converting video files from one format to another formats such as Common Video (MP4, H.265 MP4, MKV, H.265 MKV, MOV, etc.), HD Video (HD MP4, HD AVI, HD TS, HD VOB, etc.), and 4K Video (4K MP4 and 4K MKV), Leawo Video Converter for Mac allows users to extract audio content off video files and then save it into various audio formats such as AAC, AC3, WAV, MP3, WMA, FLAC, etc.
Download and install the right version of Leawo Video Converter on your computer, and follow the guide below to convert MP4 to Final Cut Pro with the help of Leawo Video Converter. Please note that the method of converting MP4 to Final Cut Pro on Mac is nearly the same as that on Windows, so here we take Mac version as an example, and Windows users can follow the suit to convert MP4 to Final Cut Pro on Windows.
Step 1. Import Source MP4 Video Files
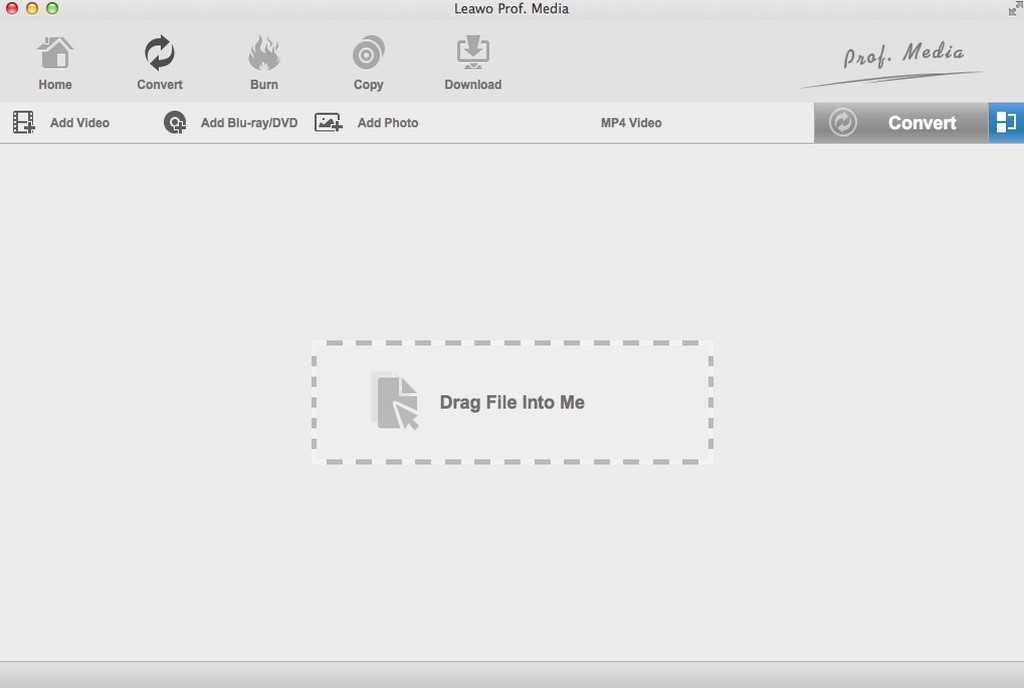
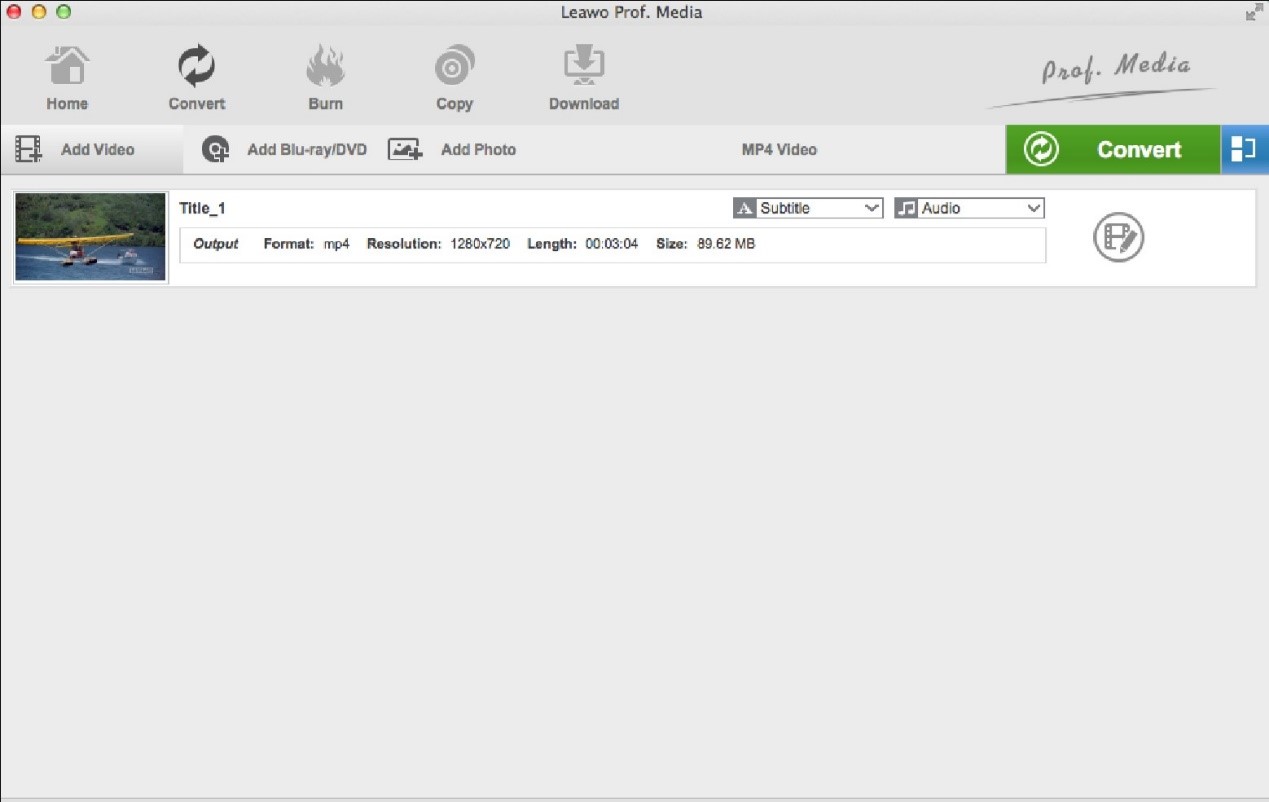
Launch Leawo Video Converter for Mac, go to the “Convert” tab, and click “Add Video” button on the sub-menu to load your source MP4 video files. Alternatively, you can directly drag and drop source MP4 video files into the program interface.
Step 2. Choose MOV or DV as Output Format
Click the drop-down box named “MP4 Video” by default next to the “Add Photo” button. On the drop-down list, select “Change” option.
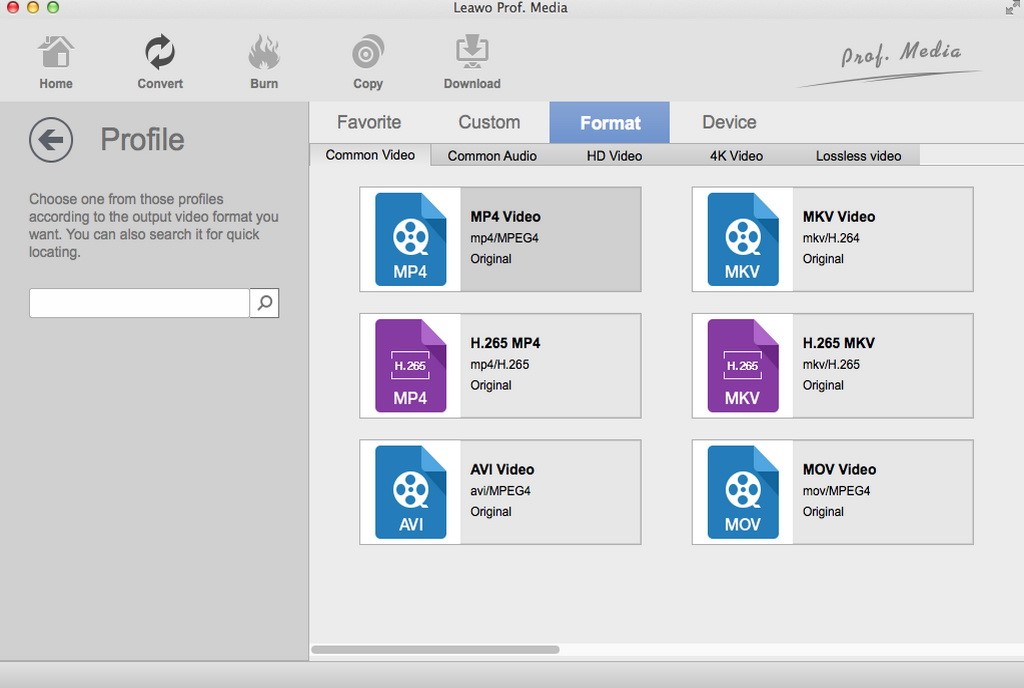
Then on the popup Profile window, select “MOV” or “DV” as the output video format from “Format > Common Video” column as output format for converting MP4 to Final Cut Pro. Please note that once you change the output format, the name of the drop-down box will change as well.
Note: If you need, you could click the “Edit” button on the drop-down profile setting box to adjust video and audio parameters like Video Codec, Quality, Video Size, Bit Rate, Frame Rate, Aspect Ratio, and Audio Codec, Audio Quality, Bit Rate, Sample Rate, and Channels.
Step 3. Convert MP4 to Final Cut Pro
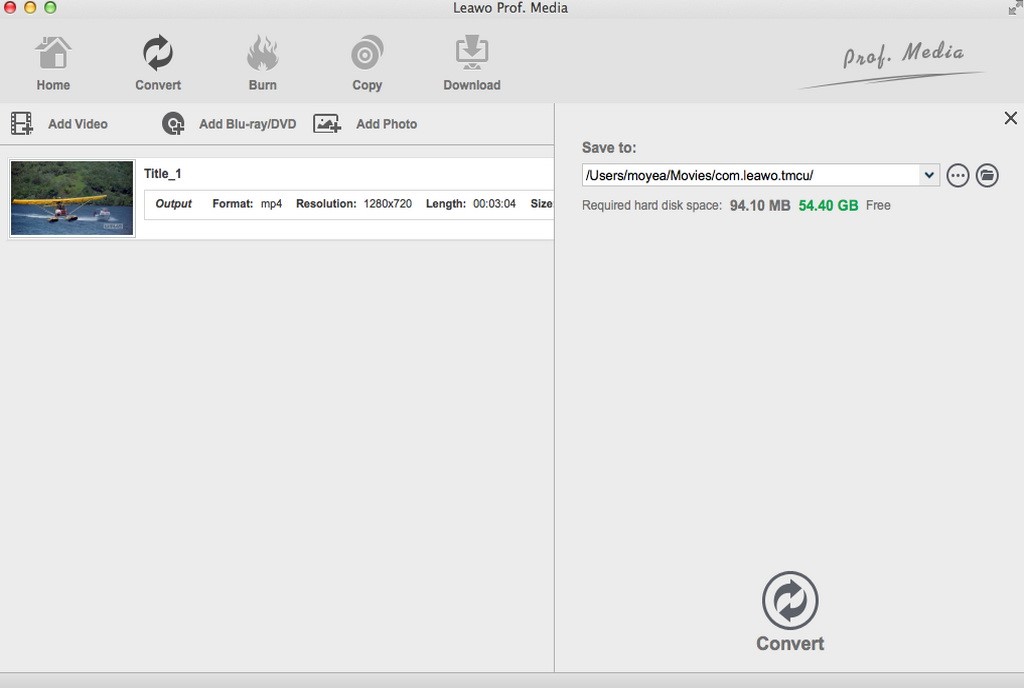
Click the big green “Convert” button on the sub-menu bar next to the format setting drop-down box. Then, on the popup sidebar, set output directory. After setting output directory, click the “Convert” button right below. Leawo Video Converter for Mac would start to convert MP4 video to Final Cut Pro immediately.
Note: This video converter is also equipped with various video editing features and parameter adjuster to let you personalize output files, such as video trimming, video watermarking, video cropping, video effecting, turning 2D video into 3D video, and removing video noise.
Part 2: Convert MP4 to Final Cut Pro with Handbrake
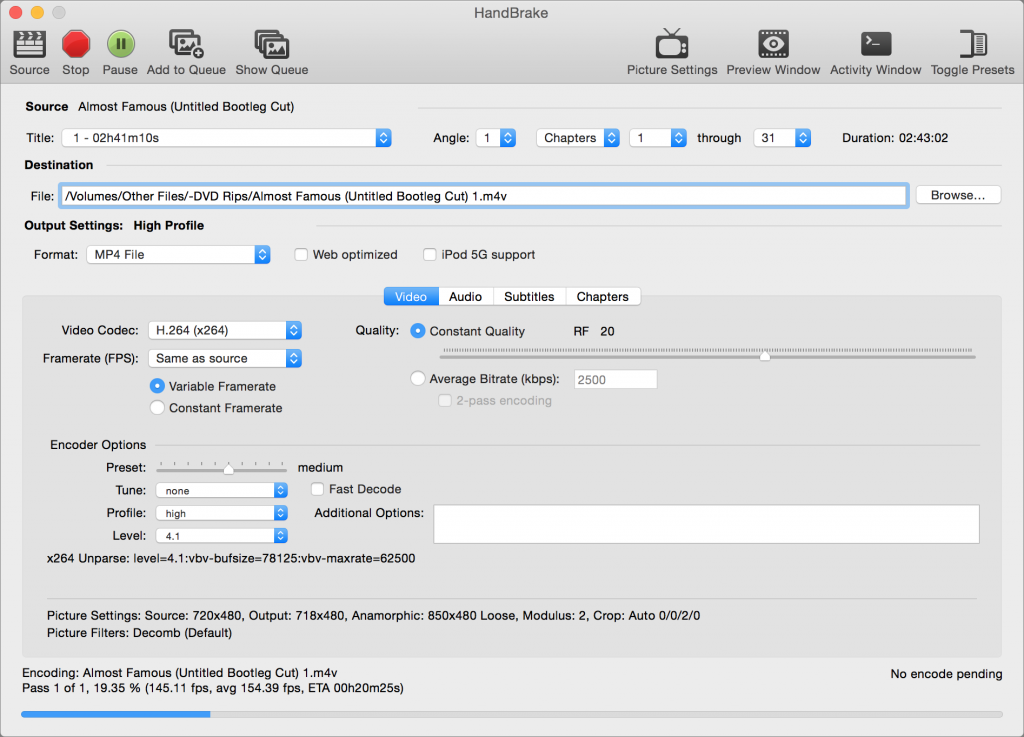
While Leawo Video Converter for Mac is an obviously great option for heavy video converting tasks, you still have another option if you just convert videos occasionally. There’s a great free video converting software program named Handbrake. It’s a compact, efficient and powerful program that can let Final Cut Pro import MP4. It’s got some practical features like device presets as well as some limitations like it only supports two output formats:MP4 and MKV. Nevertheless, it’s still a great converter to let Final Cut Pro import MP4. Check out the guide of using Handbrake to convert MP4 to Final Cut Pro video below.
Step 1: Import MP4 into Handbrake
Launch Handbrake on your Mac, and then click “Open Source” in the menu bar to choose and import source MP4 video file into Handbrake.
Step 2: Set MP4 as Output Format and Change Codec
Open the "Format" drop-down menu and select MP4 as output format, and then you need to change codec to let it compatible with Final Cut Pro.
Step 3: Start to Convert MP4 to Final Cut Pro
Before MP4 to Final Cut Pro conversion process, you can choose the output directory to contain converted video file. Click “Start Encode” button at the top of the window to convert the source MP4 video into Final Cut Pro MP4.
Part 3: Convert MP4 to Final Cut Pro with Clone2Go Free Video Converter
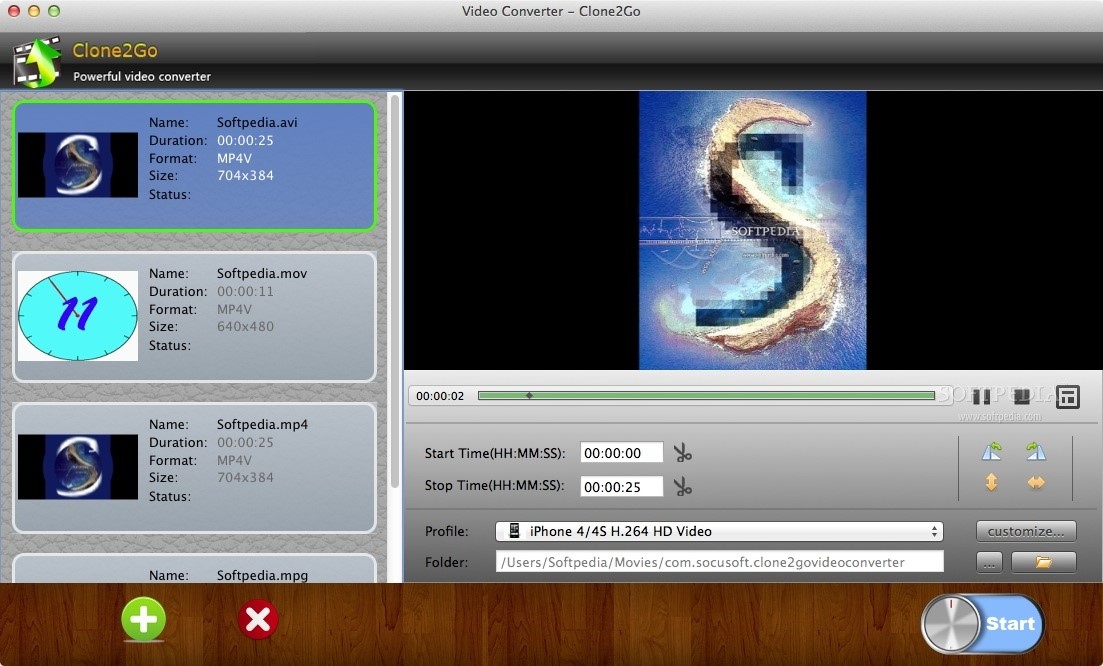
Thirdly, you can try Clone2Go Free Video Converter to convert MP4 to Final Cut Pro. As a professional video conversion freeware tool, this free video converter is able to convert a variety of video formats at fast conversion speed with high output quality, and it allows you to convert video files at a batch, trim the video length and customize the output profile as well.
Step 1. Add Source MP4 Video File
Kick off Clone2Go Free Video Converter after installation, and click “Add Video” button at the top left sub-menu to choose and add source MP4 video file. Alternatively, you can click "File -> Add Video Files..." to load source MP4 video file.
Step 2. Set MOV as Output Video Format
Extend the "Profile" category to select MOV as output video format in order to convert MP4 to Final Cut Pro. If you want to customize the output video, you can click the "Video Options" and "Audio Options" buttons below the "Profile" category. There you can set video resolution, frame rate, bit rate, video codec, etc.
Step 3. Set Output Directory
Click the "Options" button on the main interface. In the "General" tab, you can specify the folder for the output file.
Step 4. Start to Convert MP4 to Final Cut Pro
After all the steps above, click the "Start Encode" button to start to convert MP4 to Final Cut Pro.
Part 4: Convert MP4 to Final Cut Pro with FileZigZag
The fourth one is an online solution with the help of FileZigZag, which supports thousands of types of unit conversions, making it easy for users to reach a one-stop shop without having to jump from one location to another. Here we convert MP4 to Final Cut Pro with FileZigZag.
Step 1. Import Source MP4 Video File into FileZigZag
The interface of the web page is very simple. The first bar is for you to import file. Here, we choose to import the pre-prepared MP4 video file.
Step 2. Choose MOV as Output Video Format
Click the drop-down box under “Convert to”, and you need to select MOV as the output video format in order to convert MP4 to Final Cut Pro.
Step 3. Input Your Email Address and Start to Convert
In the third bar, you need to input your email address, and then click “Convert” in the fourth bar. After a while, the converted result will be sent to your email box. That’s it, and you will get converted result in Final Cut Pro video format.
Part 5: Convert MP4 to Final Cut Pro with Convert. Files
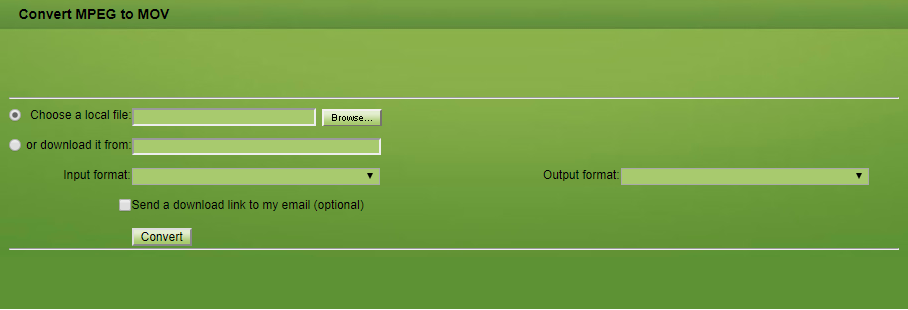
Convertfiles.com is an online application that you can use to convert files from MP4 to Final Cut Pro video format. Using this online video converter, you can be assured that your data is safe and that no their party can gain access. Please note that this free online video converter can process files no more than 250 MB size. If your video file is larger than 250 MB, please choose other video converters.
Step 1. Add Source MP4 File
Hit “Browse” button to choose and upload local MP4 file. Alternatively, you can enter a link if your MP4 video file can be found online.
Step 2. Set MOV as Output Format
Choose and set MOV as the output video format in the Output format drop-down list.
Step 3. Start to Convert MP4 to Final Cut Pro MOV
Click “Convert” button to convert MP4 to Final Cut Pro MOV. After that, a download link will pop up on the screen of your device for you to download converted video file in MOV format. Alternatively, you can choose to send the converted result to your mail box.
Part 6: Convert MP4 to Final Cut Pro with ClipConverter
ClipConverter allows you not only to convert video files, but also to download video files online. It supports YouTube (HD, 720p, 1080p, 4K), Vimeo, Facebook Video and many more. You can upload your local video file for converting or just paste the URL of your source video. Check out toconvert MP4 to Final Cut Pro online with ClipConverter.
Step 1. Add Source MP4 File
If you have URL, paste URL of your source MP4 file. Instead, you can upload your local MP4 file.
Step 2. Choose MOV Output
Select MOV format and then choose the quality (720p, 1080p, 2k, 4k) for the conversion.
Step 3. Start to Convert MP4 to Final Cut Pro MOV
Click “Start” to begin conversion process. After a while, you can download the converted file in MOV format.


 Try for Free
 Try for Free

