With the assistance of Apple Pay, purchases become quite convenient nowadays, which can be used both online via websites and supported applications. There are various ways you can make use of this feature. In this tutorial, you will learn on how to pay someone with Apple Pay on your iPhone and Apple Watch. You can also find out the method to send a request for payment and how to accept & cancel payment according to your need.
Outline
- Part 1: Brief Introduction of Apple Pay
- Part 2: How to Pay Someone with Apple Pay on iPhone?
- Part 3: How to Pay Someone with Apple Pay on Apple Watch?
- Part 4: How to Send a Request for Payment?
- Part 5: How to Accept and Cancel Payment?
- Part 6: How to Back Up Transaction History on iMessages with Leawo iTransfer?
Part 1: Brief Introduction of Apple Pay
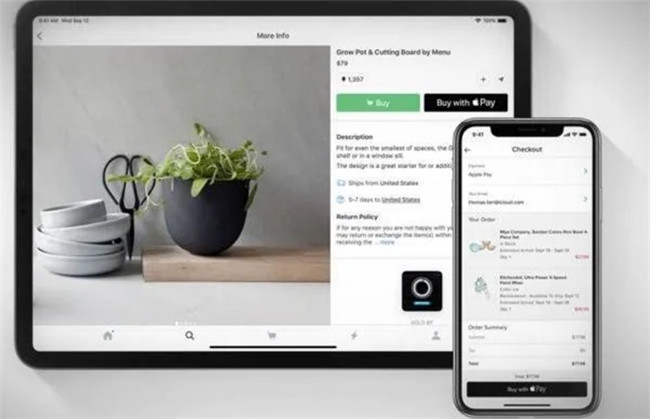
Apple Pay is a famous mobile payment and digital wallet service developed by Apple Company. It is first just available in America, but now it can be used all around the world. Users can take advantage of this feature to buy products in person, through apps, or via the web on iPhone, iPad, Apple Watch, and even Mac computer. You can purchase goods via a contactless-capable point-of-sale terminal and two-factor authentication in stores. As for more detailed introduction of Apple Pay, you can click here to get to know clearly.
Part 2: How to Pay Someone with Apple Pay on iPhone?
After we know the meaning of Apple Pay, you may also desire to know the method on how to pay someone with Apple Pay on iPhone. The person-to-person payments on iPhone can be handled via Messages app on your iPhone. The steps are as follows.
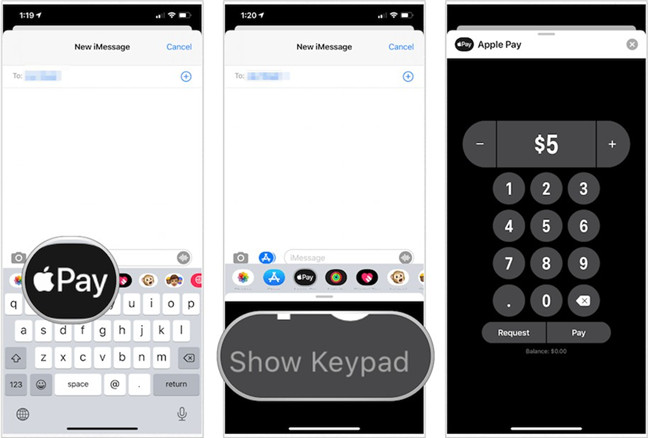
Step 1: On your iPhone, first you need to click on the Messages app and then start a new conversation with the one you desire to pay. Alternatively, you can choose an existing one with the person you want to pay.
Step 2: Hit on the Apple Pay button on the interface. If you fail to see the button, you can navigate to the bottom of your Message screen to click on the Application button and then select the button of Apple Pay to hit on.
Step 3: After that, you need to select the amount to pay someone. If necessary, you can click the button of “Show Keyboard” to choose the payment amount.
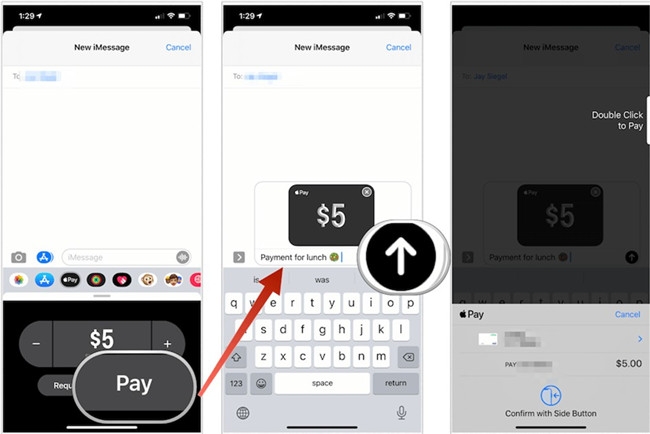
Step 4: After you set the payment amount well, you need to click on “Pay” button and add a comment to this payment.
Step 5: Finally, you need to hit on the upward arrow to send your comment. You can also change your payment method if available. Finally, you need to confirm the payment with your Face ID, Touch ID, or your passcode to finish the payment.
Note
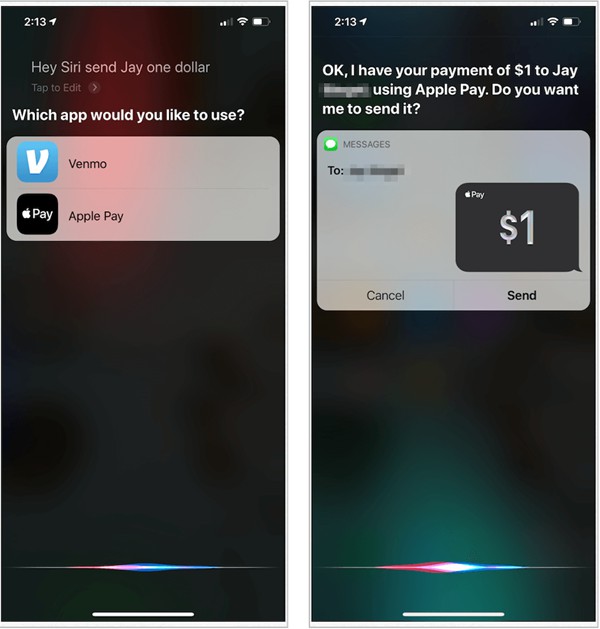
You can also pay someone on your iPhone with Siri via the Apple Pay feature. For instance, you can say, “Hello Siri, send Jim $4.” After that, you can choose the payment method and follow the on-screen steps to finish the procedure to pay the person.
Part 3: How to Pay Someone with Apple Pay on Apple Watch?
To fix how to pay someone with Apple Pay on Apple Watch is also a piece of cake. You can refer to the steps shown below to help you make it easily.
Steps:
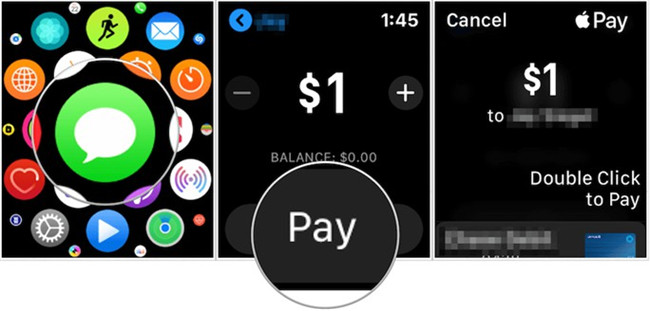
- Navigate to the Messages app on your Apple Watch and then open a new conversation or click on one existing one.
- Drag down and click on the button of Apple Pay to choose the payment amount you desire to send to the person.
- Hit on the “Pay” button after you set the payment amount and then you can review or cancel the payment based on your needs.
- Drag down and you will be able to choose another payment method. You can also directly send the money to the person by double-clicking the side button.
Part 4: How to Send a Request for Payment?
In some cases, you need to ask someone to pay you the money. Here I would like to show you how to send a request for payment to someone who owes you money.
On your iPhone
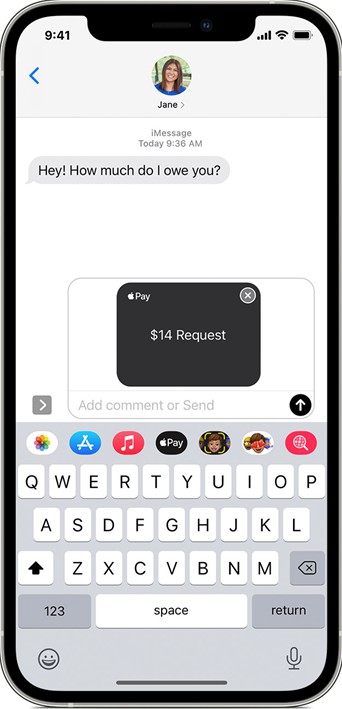
Step 1: You need to launch the Messages app on iPhone and then fire up a new conversation to open an existing one.
Step 2: Hit on the Apple Pay button. If you fail to see it, you can click on the Apple Store button to find it and tap on.
Step 3: Enter the amount you desire to request someone to pay and then hit on the Request button.
Step 4: Finally, you can hit on the upward arrow button to send your request to the person.
On your Apple Watch
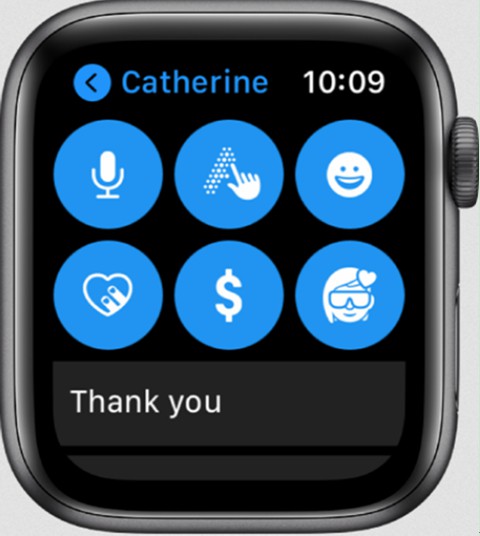
Step 1: You need to launch your Messages app on Apple Watch and select a conversation.
Step 2: Click on the button of Apple Pay icon with a “$” on it and then enter the money amount you desire to request.
Step 3: Swipe on the Pay button and then find the “Request” button to tap to send the money request to the person.
Part 5: How to Accept and Cancel Payment?
When someone sends you money on your iPhone and Apple Watch, do you know how to accept and cancel it? Read on this part and you will obtain the measures simply.
On your iPhone
Step 1: Find the Wallet app on your iPhone to click to open it and then hit on your Apple Cash card.
Step 2: Find the more button with three dots to tap, and then choose the option of Automatically Accept Payments or Manually Accept Payments to hit on.
- If you choose Automatically Accept Payments, your iPhone will receive the money that sent from someone automatically.
- If you choose Manually Accept Payments, the Accept button will appear in the message when a person sends you money. You are allowed to accept the money within seven days.
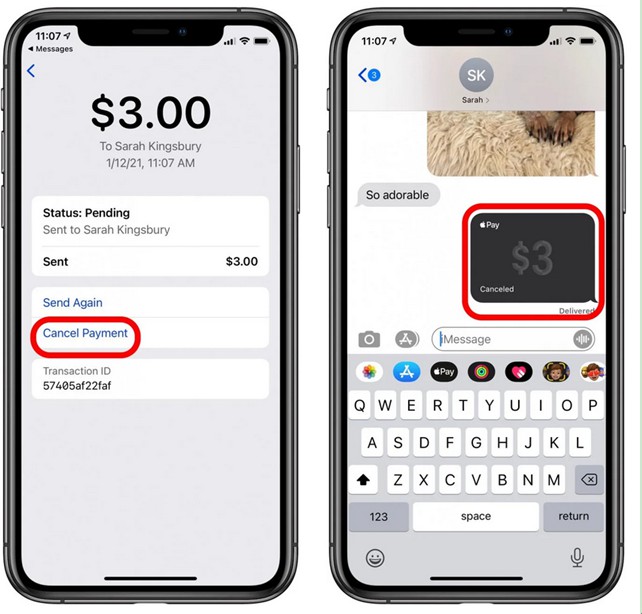
Step 3: To cancel payment, you need to go to “Wallet app> Apple Cash card” to find the payment under the tab of “Latest Transactions”. Hit on the payment and then click on the payment once again. In the end, you need to hit on “Cancel Payment”.
On your Apple Watch
Step 1: You need to first go to the Apple Watch app on iPhone and then drag down to click on “Wallet & Apple Pay> Apple Cash card”.
Step 2: Afterwards, you can refer to the second and third steps on your iPhone in the above to fix how to accept and cancel payment on Apple Watch.
Part 6: How to Back Up Transaction History on iMessages with Leawo iTransfer?
Since it is quite useful and convenient to apply Apple Pay to make purchases, there may be lots of transactions on your Apple devices. Some transaction history are fairly essential to you and you can not lose them. In order to protect these important transaction history, you can back up them on your iMessages app with a trustworthy program. Here I highly recommend you make use of Leawo iTransfer to assist you to make it. You can apply this tool to transfer iMessages transaction history to computer at ease. It can also help you to transfer other 11 kinds of files like photos from iPhone to computer. With Leawo iTransfer, the transfer tasks among iDevices, computers and iTunes becomes quite simple. The following step-by-step instruction will tell you how to use this great software to back up transaction history on iMessages with Leawo iTransfer smoothly.
Step 1: Download and install Software
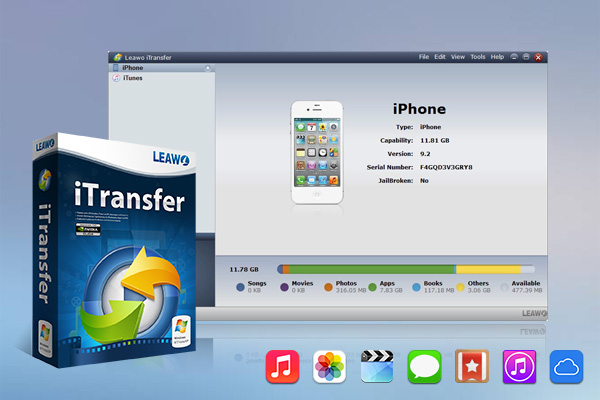
Download and install Leawo iTransfer from its official website on your computer.
-
Leawo iTransfer
- Transfer files among iOS devices, iTunes and PCs with ease.
- 6x faster than iTunes
- Transfer up to 14 kinds of data and files without iTunes.
- Support the latest iOS devices like iPhone 12, iPhone 12 Pro, etc.
- Play back, view, and delete data and files on iOS devices.
- Support Windows & Mac OS
Step 2: Open Leawo iTransfer and Select “SMS”
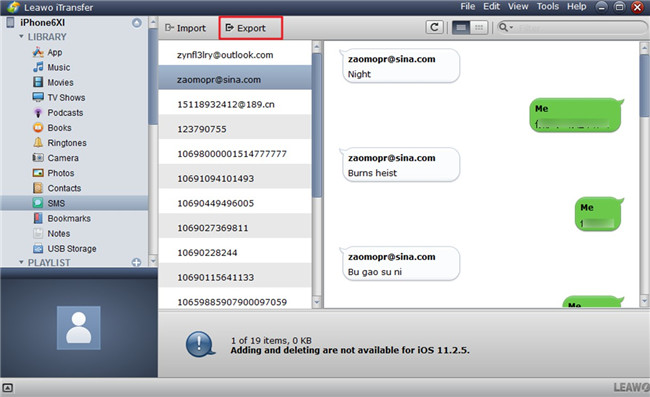
Launch Leawo iTransfer and connect your iPhone with computer with a proper USB cable. The main interface of Leawo iTransfer will show your iPhone info. After that, you can hit on your iDevice icon and navigate to the menu of “LIBRARY> SMS” in the left side of the interface to check all messages on your iDevice including your transaction history.
Step 3: Choose Transaction History and Tap “Export”
Find the transaction history in your iMessages app and choose them from the right side of the interface. After that, you need to hit on the “Export” button at the top middle of the panel.
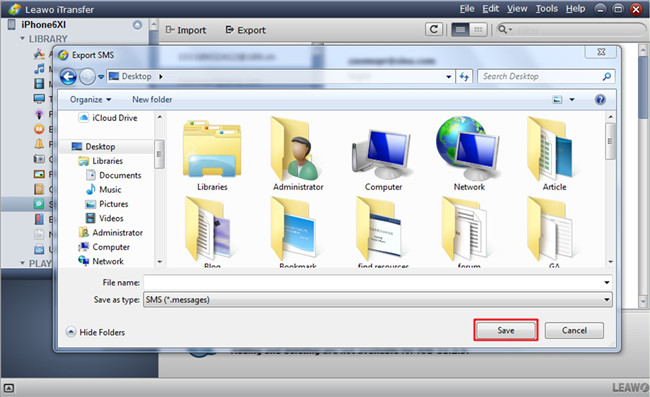
Step 4: Choose Output Folder and Click “Save”
The pop-up panel will allow you to choose a computer local folder to save the transaction history on iMessages app from your iDevice. You need to name the file and choose “SMS (*.messages)” from “Save as types”. Finally, you can click “Save” to export your iDevice transaction history to your computer immediately. Wait for a while, your iDevice transaction history will be available on your computer. You can transfer the transaction history back to your iDevice in case you need. For example, when your iDevice messages including the transaction history are deleted by mistake, you can go to your computer to import iMessages to your iDevice for using at ease.

