“Is DVDStlyer safe to use? I would like to burn some DVD discs and need a DVD author software tool. Some of my friends recommended me use DVDStyler, but I have no idea of what it is and how to author a DVD with DVDStyler. Could anyone please tell me what DVDStyler is and whether or not it is worth trying? Thanks in advance.”
Many people would like to create DVD discs from their favorite movies or holiday videos. The problem is that there seems to be quite few DVD authoring software tools out there for them to use. DVDStyler is one of the few options that people could convert and burn videos to DVD discs for free. What is DVDStyler? How can you author a DVD with DVDStyler? Well, in this DVDStyler review, we would like to show some detailed information to let you get what DVDStyler is and how DVDStyler works.
Part 1: DVDSyler Tutorial - How to Use DVDStyler
As one of the few free DVD burner software tools, DVDStyler has been widely accepted and used for authoring DVD content. It allows not only burning of video files on DVD that can be played practically on any standalone DVD player, but also creation of individually designed DVD menus. It is Open Source Software and is completely free.
Firstly, let’s see how DVDStyler works. The below guide will show you how to use DVDStyler to author a DVD in detail. This tutorial describes the steps necessary to creating a DVD using DVDStyler.
Create a new project
- Select a “Create a new project” in the welcome dialog.
- Enter the disc label (it will be displayed only on computer).
- Select capacity of your DVD: 4.7 GB (Single Layer DVD) or 8.5 GB (Double Layer DVD).
- Choose the video format: NTSC is recommended for North American countries and Japan, PAL for all other.
- After this click "OK".
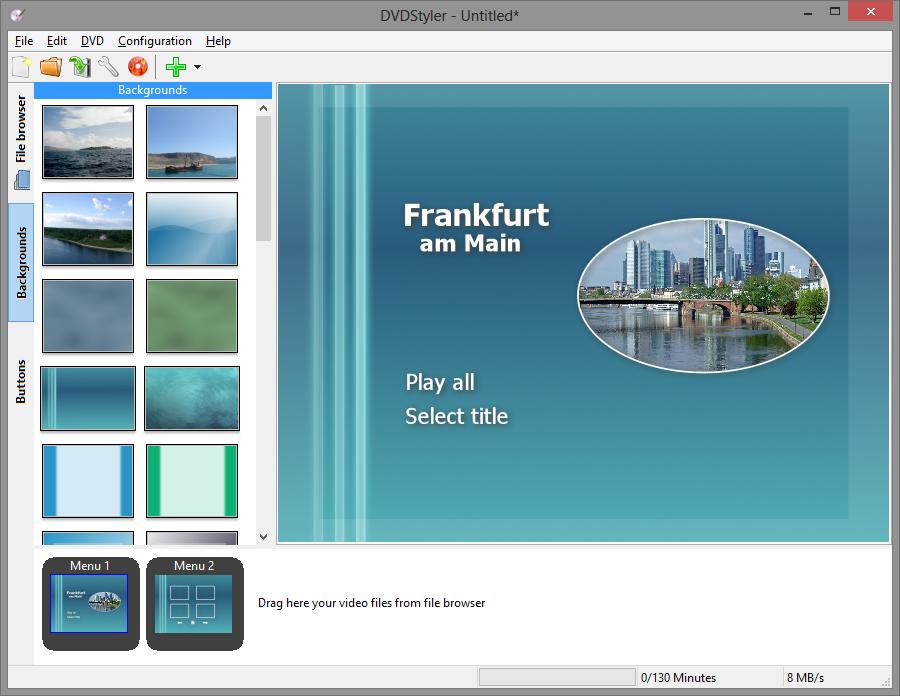
- Finally you can enter a title for DVD menu and select a template.
Add movie clips
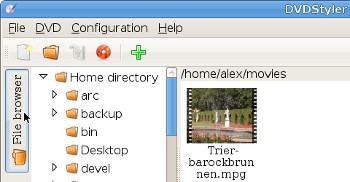
- Click on the “File Browser” tab on the left side of the program window.
- Navigate-to and highlight the directory that contains your movie clips. An icon for each clip will be displayed at the right of directory tree.
- Drag the desired movie clips (left-click, hold, and drag) onto the Titleset Manager at the bottom of the program window.
- You can also add movie clips using file dialog or by dragging from any file manager like Windows Explorer.
- Available space on DVD is displayed in the status line at the bottom of application window.
On one single layer DVD (4.7 GB) can be stored up to 126 minutes of video in good quality (Video bitrate over 4.5 MB/s). If you selected “Auto” as video quality in new-project dialog, it is also possible to put more than 126 minutes but quality of video will be automatically reduced.
Design a DVD menu (optional)
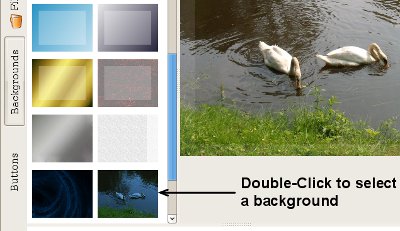
- Click the "Backgrounds" tab on the left side of the program window and select a DVD menu background image by double-clicking on an image in the "Backgrounds" panel.
- You can also select your own background image for DVD menu: click the "File browser" tab, open directory that contains your image file and select the image by double-click.
- Add a menu title: right-click on Menu Editor, select "Add", "Text" and enter the title. With the provided handles, re-position the text as desired. Font and size of title can be changed in text properties dialog, which is accessible by double-click on text.
- Click on the "Buttons" tab on the left-hand edge of the program window and insert a button by dragging (left-click, hold, and drag) a button into the Menu Editor.
- Edit the button properties (action, title, color, font, etc) by double clicking on the button in the Menu Editor and changing appropriate properties. When finished, click "OK" to return to the Menu Editor.
Save the project
A DVD has now been configured. Click on the save button to save the project.
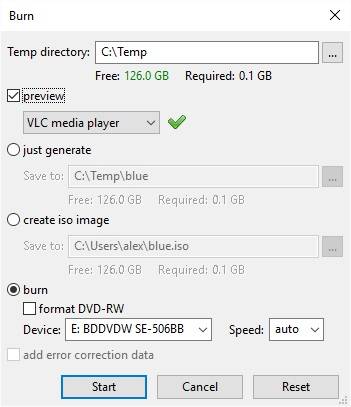
- Click on burn button.
- If you want to preview the finished DVD before burning, please select the box "preview".
- Insert an empty disc and select a corresponding drive. Then click "Start" to start burning.
- If you selected "preview", a preview will be started after creating of DVD (but before burning).
Then, you only need to wait for the burning process to complete. You need to note that the DVD creation process can take several hours.
Part 2: Review of the DVDSyler
DVDStyler is a cross-platform free DVD authoring application for the creation of professional-looking DVDs. With DVDStyler, you could:
- Create and burn DVD video with interactive menus
- Design your own DVD menu or select one from the list of ready to use menu templates
- Create photo slideshow
- Add multiple subtitle and audio tracks
- Support of AVI, MOV, MP4, MPEG, OGG, WMV and other file formats
- Support of MPEG-2, MPEG-4, DivX, Xvid, MP2, MP3, AC-3 and other audio and video formats
- Support of multi-core processor
- Use MPEG and VOB files without reencoding, see FAQ
- Put files with different audio/video format on one DVD (support of titleset)
- User-friendly interface with support of drag & drop
- Flexible menu creation on the basis of scalable vector graphic
- Import of image file for background
- Place buttons, text, images and other graphic objects anywhere on the menu screen
- Change the font/color and other parameters of buttons and graphic objects
- Scale any button or graphic object
- Copy any menu object or whole menu
- Customize navigation using DVD scripting
It’s a wonderful and free DVD creator tool that could help you easily create a DVD disc. However, it also has its own disadvantages as well, listed below:
- Menu Buttons: Whilst the inbuilt buttons for the menu are great, it would be nice to have more of them for some extra choice when creating menus.
- Burning Speed: Whilst it is very easy to create a DVD in DVDStyler, it sometimes can be a little slow in rendering and burning the DVD.
- Simplicity: This one is both a pro and a con depending on who the user is. The ease of use makes this software very beginner friendly. However, for more advanced users, DVDStyler may not have enough options to satisfy. Perhaps adding some advanced options later could be a way to remedy this.
- Audio Options: DVDStyler is restricted to only two audio format options, something very much in contrast to the video compatibility which is very extensive indeed. Adding in other audio formats could be a great way to improve the software in future iterations.
- Installation: DVDStyler comes with ad support that offers to install a toolbar during the installation process.
As a free DVD burning software, it seems that we should have no other requirements on it. However, to fulfill our needs, we still need some DVDStyler alternatives.
Part 3. More Professional DVD Burning Software - Leawo DVD Creator
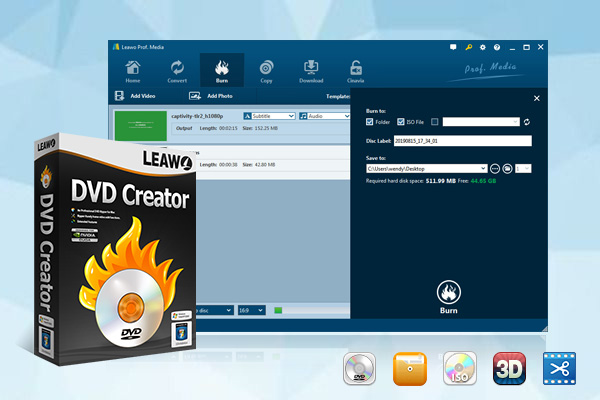
Leawo DVD Creator is the best DVDStyler alternative that could do anything DVDStyler can do and can’t do for you. This DVDStyler alternative could burn all sorts of videos into DVD like MP4 to DVD, WMV to DVD, MKV to DVD, FLV to DVD, etc. with preferred disc menu and practical video editor features. With Leawo DVD Creator, you could convert and burn video files to DVD disc, folder and/or ISO image files in either NTSC or PAL video mode. What’s more, you could even use Leawo DVD Creator to convert and burn photos to DVD slideshow so that you could better share your memorable moments with your friends, which is not supported by DVDStyler. You could create DVD-9 or DVD-5 content as you like.
Download and install this DVDStyler alternative on your computer. Get source video files ready and insert a blank writable DVD disc into the DVD recorder drive. Then, follow the below guide to learn how to convert and burn video to DVD with Leawo DVD Creator.
-
Leawo DVD Creator
☉ Convert videos like MP4, AVI, MKV to DVD format fast.
☉ Create DVD-5, DVD-9 disc, folder or ISO image without quality loss.
☉ 1-click operation to create photo slideshows and burn to DVD.
☉ Easily editable effects, 2D to 3D conversion support.
☉ Built-in menu templates and edit disc menu with personal preferences.
☉ Built-in menu templates and edit disc menu with personal preferences.
Note: Leawo DVD Creator is a module in Leawo Prof. Media.
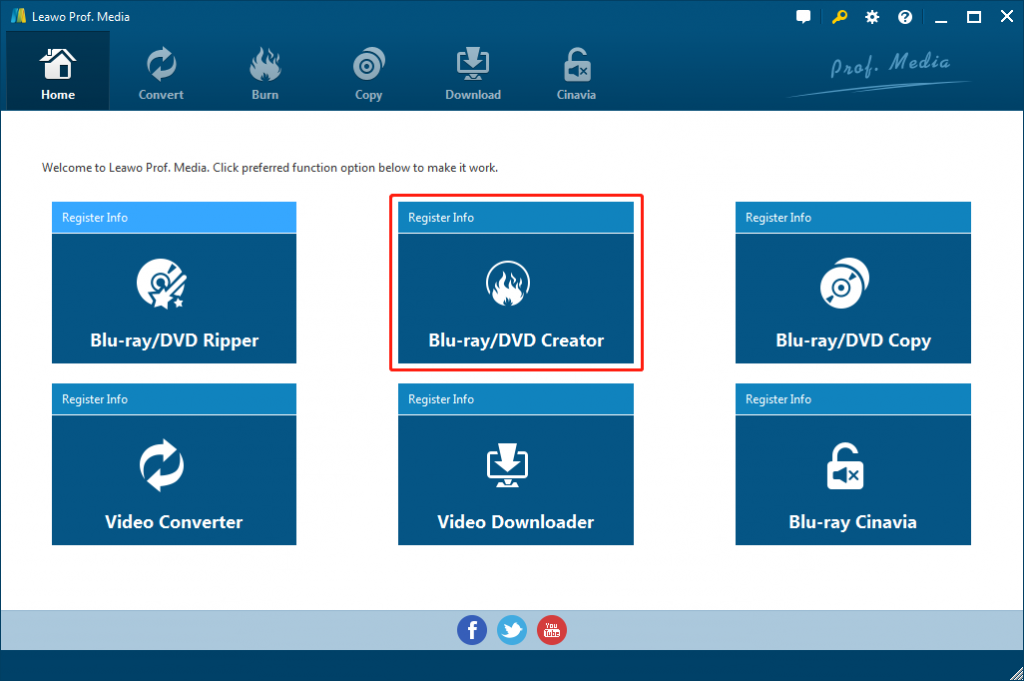
Step 1: Enter DVD Creator module.
Open Prof. Media, and then click the “Blu-ray/DVD Creator” tab or the “Burn” menu to enter the DVD Creator module.
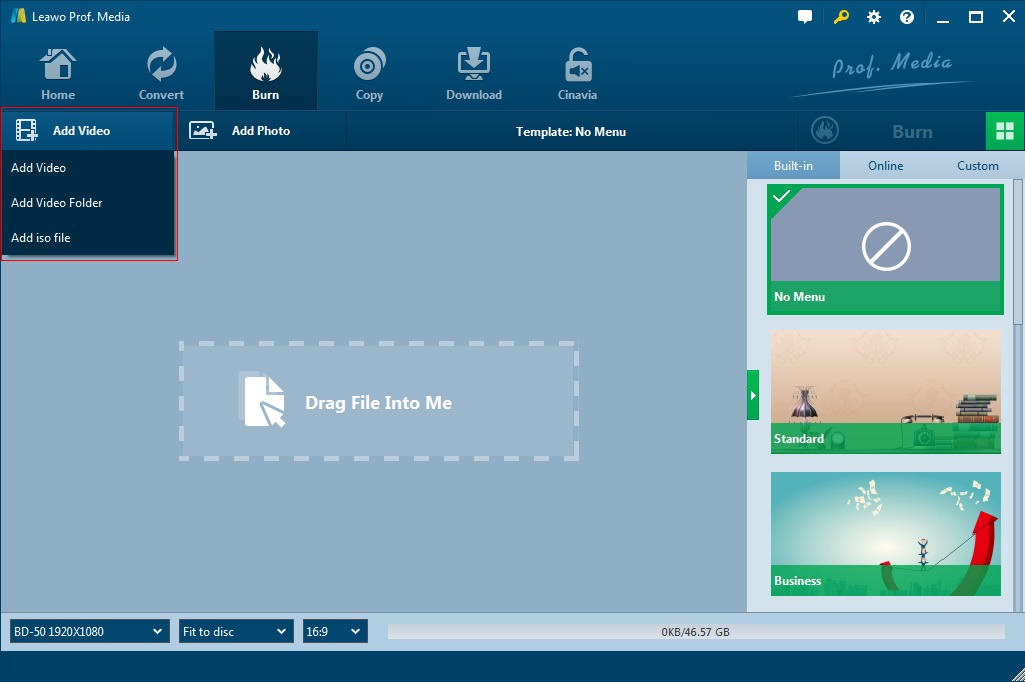
Step 2: Add Source Video Files
To add source video to the program, directly drag and drop the source video file to the interface or select “Add Video” to select a single video or multiple videos or even a video folder from your computer.
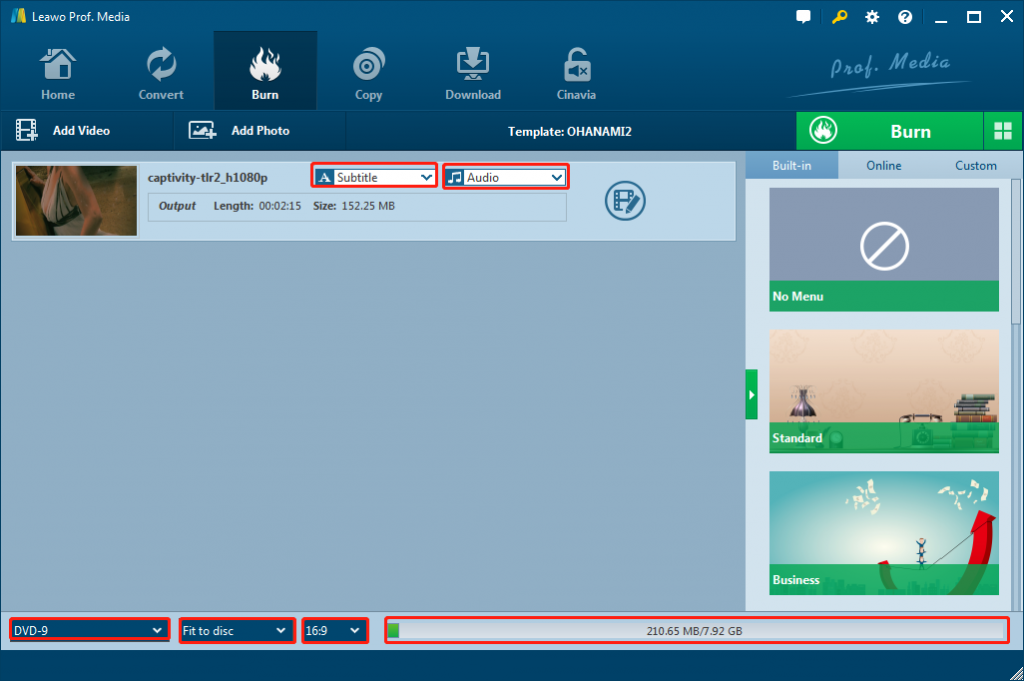
Step 3: Output Settings
After loading source video files, choose disc type from DVD-9 and DVD-5, and choose the video aspect ratio from 4:3 and 16:9. Set quality to "Fit to disc" to best fit the video. Select subtitles and audio tracks according to your needs.
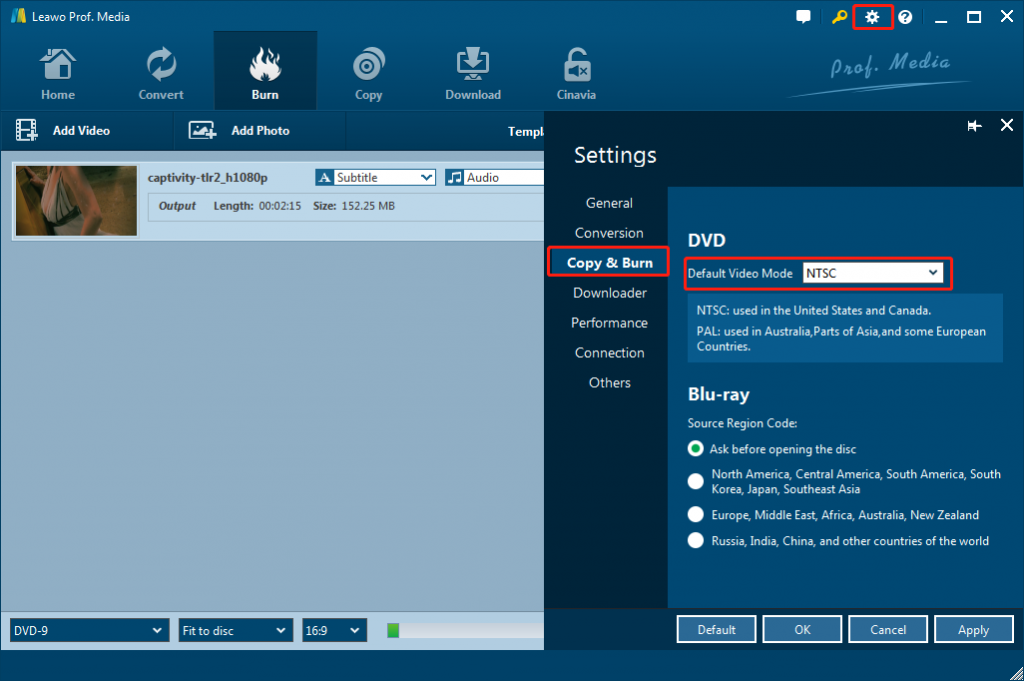
And you can go to “Settings” panel to choose the Burning Engine and Default video mode. Click the wheel icon on the top-right corner, and then click “Copy & Burn” tab to select these. You could choose either NTSC or PAL as output DVD video mode.
Step 4. Burning Settings
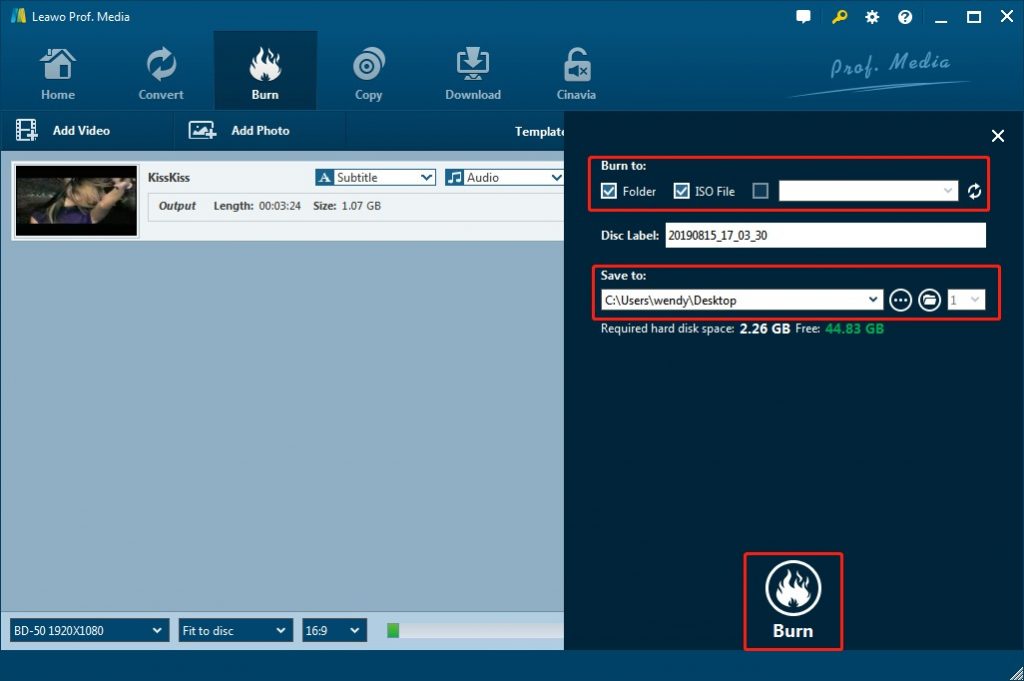
Click on the green “Burn” button on the main interface to call out a sidebar. Under the “Burn to” option, you could choose to output DVD folder, DVD ISO image file and/or DVD disc drive as target. Rename the label of the output file on the Disc Label box. Set the directory for the output file under Save to Option by clicking Browse button "…".
And after that, click the “Burn” button at the bottom to start converting and burning video to DVD disc, folder or ISO file.
With Leawo DVD Creator, you could also add disc menu for output DVD or even design disc menu, edit videos before burning to DVD, create 3D movies, etc.
Part 4. DVDStyler vs. DVD Flick vs. Leawo DVD Creator
The below table makes a detailed comparison between DVDStyler vs. DVD Flick vs. Leawo DVD Creator to let you know their differences and similarities.
|
|
Leawo DVD Creator |
DVDStyler |
DVD Flick |
|
Burn videos to DVD disc |
Yes |
Yes |
Yes |
|
Burn videos to DVD folder |
Yes |
No |
No |
|
Burn videos to DVD ISO file |
Yes |
Yes |
No |
|
Burn photos to DVD |
Yes |
No |
No |
|
Edit videos before burning |
Yes. Trim, crop, add 3D, add watermark, adjust effect, etc. |
No |
No |
|
Add disc menu |
Yes |
Yes |
No |
|
Design disc menu |
Yes |
Yes |
No |
|
Edit photo slideshows |
Yes |
No |
No |
|
2D to 3D DVD burning |
Yes |
No |
No |
|
Select subtitles and audio tracks |
Yes |
Yes |
Yes |
|
Add external subtitles |
Yes |
Yes |
No |
|
Play back loaded videos |
Yes |
No |
No |
|
Take screenshots |
Yes |
No |
No |
|
Set output DVD video mode |
Yes |
Yes |
No |
|
Availability |
Windows, Mac |
Windows |
Windows |
You could clear see that Leawo DVD Creator offers you many more wonderful features with better DVD burning fun.

