AVCHD videos are usually saved in the MTS or M2TS video format. The poor compatibility of both formats makes it hard for us to watch the AVCHD videos with mainstream media player programs, or transfer the videos to popular multimedia devices. Because of the same reason, it is almost impossible to import your AVCHD videos to iTunes. However, if you have an AVCHD to iTunes converter program installed on your Mac computer, you may be able to convert the AVCHD videos to an iTunes compatible format first, and then import your camcorder recorded M2TS/MTS videos to iTunes for managing, or sync them to iPhone, iPad or iPod for anytime anywhere enjoyment. In case you don’t know what are the programs you can use to convert and import AVCHD files to iTunes on Mac, today we will introduce some of the best choices for the task, so that you can easily convert your AVCHD videos and import them to iTunes with your Mac computer.
Part 1: Convert AVCHD File to iTunes with Leawo Video Converter for Mac
Speaking of video converters that are capable of converting AVCHD videos to iTunes, Leawo Video Converter for Mac is definitely worth to be recommended at the first place. As a processional media converter program, Leawo Video Converter is widely considered one of the best tools for all kinds of media converting tasks on Mac.
Leawo Video Converter for Mac is a multi-functional media converter program with powerful video converting ability and a user-friendly software interface. Thanks to the advanced video converting technology, Leawo Video Converter for Mac can not only convert more than 180 kinds of video formats, but also offer a 6 times higher converting speed and keep the best output quality in the final result at the same time. With a practical built-in video editor module, Leawo Video Converter for Mac can even offer a very customized video output so that the converted video could be customized just the way you like.
To make the video converting work easier and more enjoyable, Leawo Video Converter has developed a clean and straightforward user interface. In order to give you a better understanding on how this video converter program works, we have prepared a detailed guide on how to convert AVCHD videos to an iTunes compatible format with Leawo Video Converter for Mac. Take a look at the following guide and I’m sure you will convert your AVCHD videos with ease.
Step 1: Import source AVCHD video
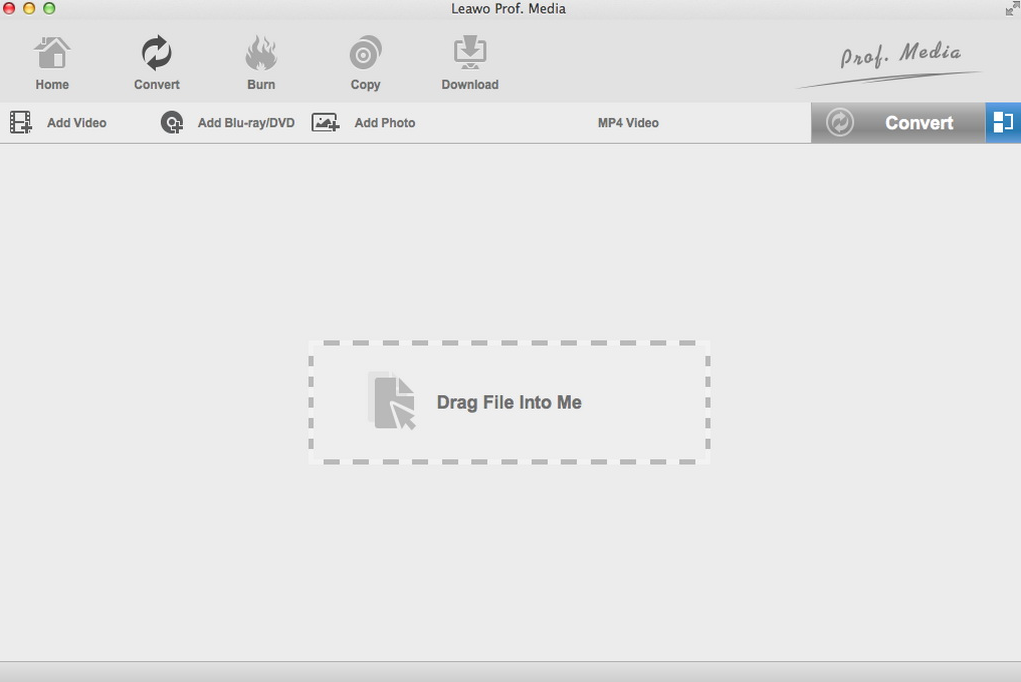
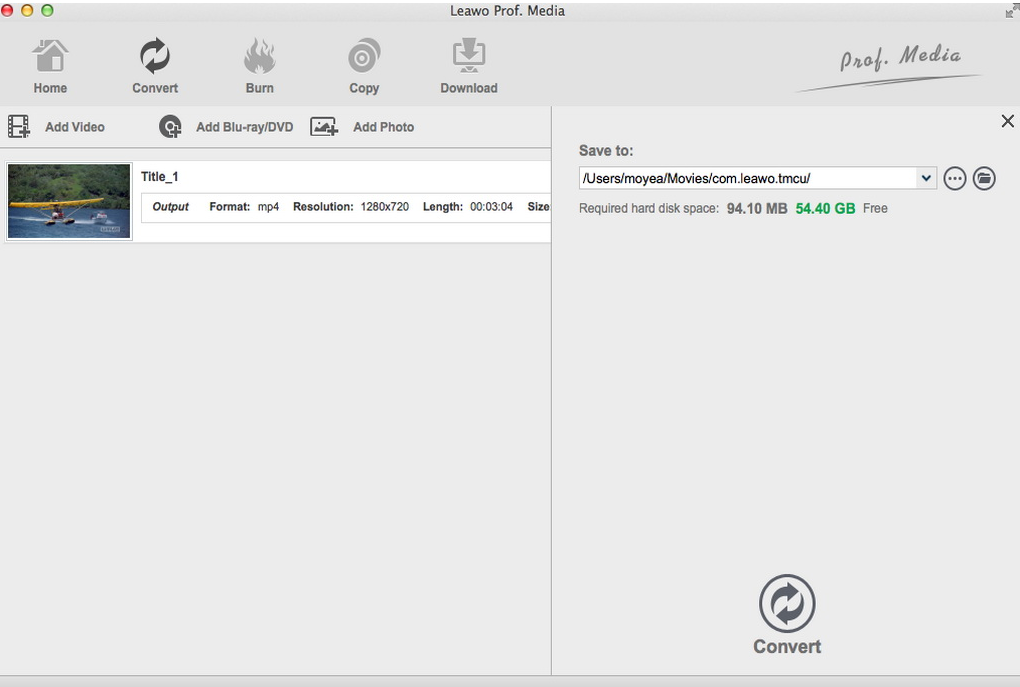
Download, install and launch Leawo Video Converter for Mac on your Mac computer. On the main interface, you can see an “Add Video” button at the upper left corner. Click on the button and locate your source AVCHD file to import it into the program. You can also directly drag and drop the file into frame on the main interface to import it.
Step 2: Set output format
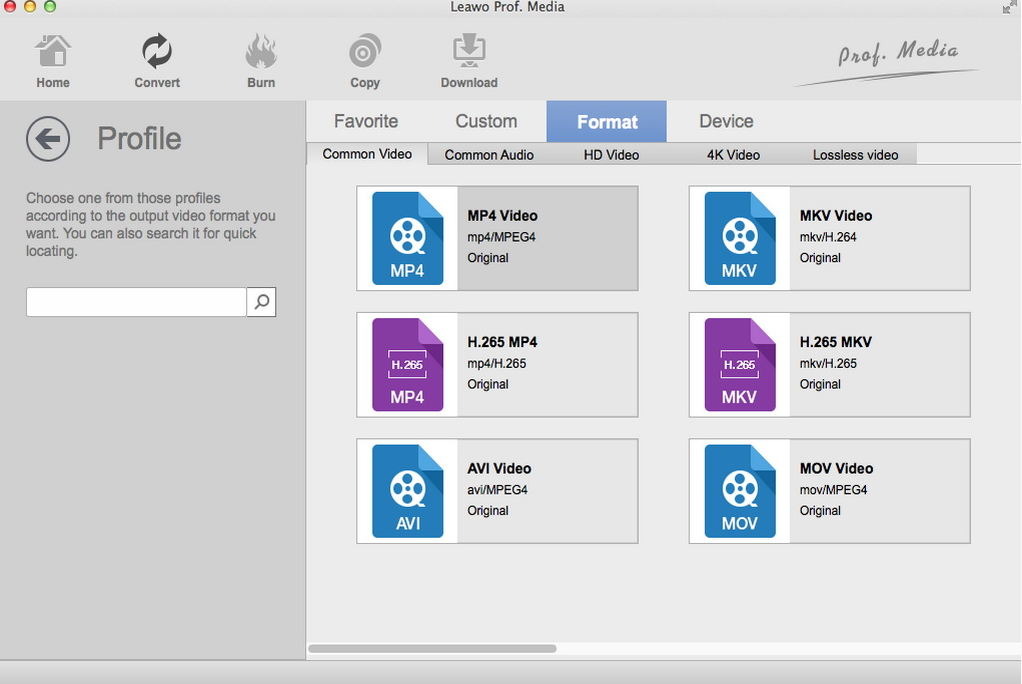
According to Apple, iTunes supports any video format that works with QuickTime and files purchased or downloaded from iTunes store, which means if your video files have an .mov, .m4v, or .mp4 file extension, you should be able to import it to iTunes. Since Leawo Video Converter for Mac has set “MP4 Video” as default, you can directly use the default setting as the output format. If you want to change the output format, just click on the “MP4 Video” area, choose “Change”, and find a target format form the pop-out format selection window.
Step 3: Further editing
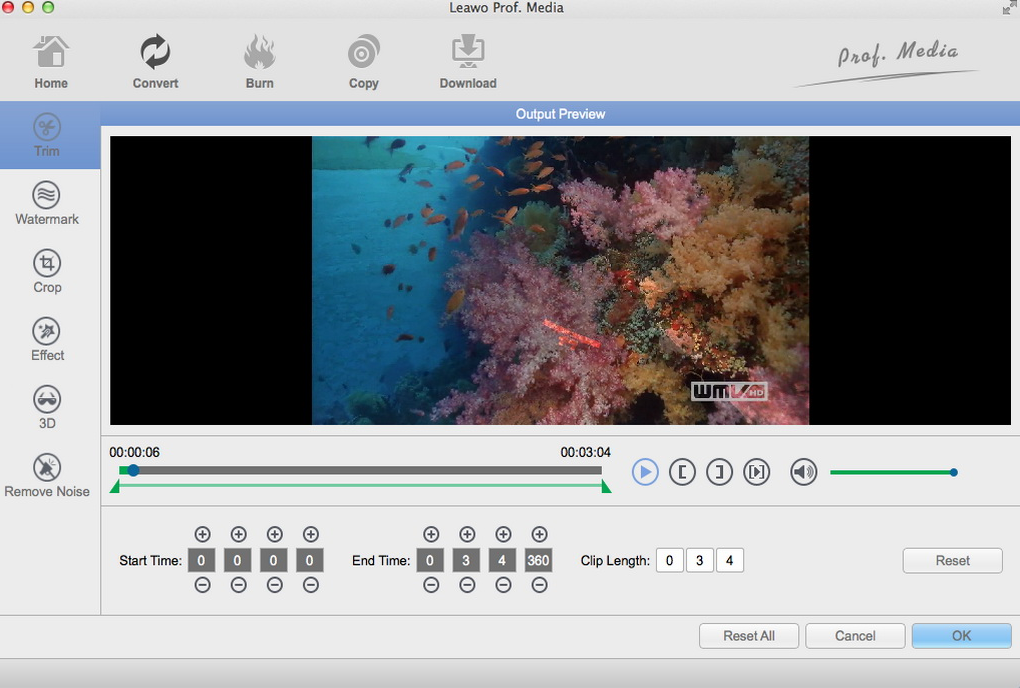
You can do some further editing to your video before you start the conversion task. By clicking the “Edit” icon next to your imported video item, you can call out the video editing panel, where you can do various kind of editing to the video including trimming, cropping, adding watermark to video, adjusting video parameters, adding 3D effects to video, and removing noise. When you are done editing, click “OK” to confirm and go back to the main interface.
Step 4: Start converting
Finally, click the green “Convert” button to call out the convert settings panel. On the panel, you need to designate an output directory, and then click the “Convert” icon to start converting your video.
Part 2: Convert AVCHD File to iTunes with Oxelon Media Converter
Oxelon Media Converter features a user-friendly interface design, and can provide an incredibly high conversion speed. Like most of other video converter programs, Oxelon Media Converter can convert multiple files simultaneously, and it supports loads of media formats. One of the only drawbacks of Oxelon Media Converter is that you need to install extra plug-ins separately for some formats, and the program opens up the developer website upon exit. Although the feature can be disabled manually, some users still find it troubling. But if you can put up with that, Oxelon Media Converter could be a nice tool for you to convert AVCHD videos to iTunes. Here is how to convert AVCHD videos to iTunes with Oxelon Media Converter before you can import the videos to iTunes.
Step 1: Download, install Oxelon Media Converter and launch it.
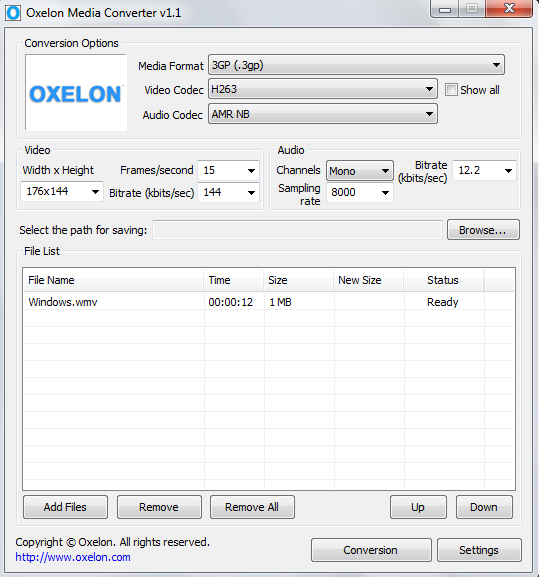
Step 2: You can drag your source AVCHD video file from its original folder to the program interface to import it, or click the “Add Files” button to import the video.
Step 3: Click the “Media Format” drop down box to set an output format. You can also specify the video and audio codec with the corresponding dropdown buttons. Detailed video and audio settings are in the sections below.
Step 4: Set a target output folder by clicking the “Browse” next to the “Select the path for saving” box. And then click the “Conversion” button to start the converting task.
Part 3: Convert AVCHD File to iTunes with Windows Live Movie Maker
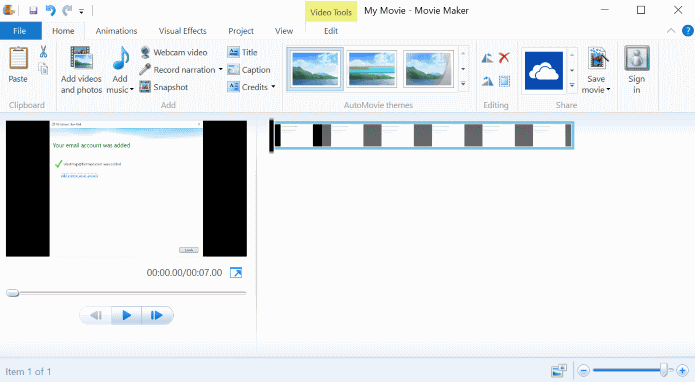
For Windows users, Windows Live Movie Maker might be a good choice for simple video converting and editing tasks as its easier to acquire and seems to be a lot safer than third-party programs. In fact, if you don’t need all of the advanced customization options and only want to convert your video in the shortest amount of time, Windows Live Movie Maker indeed is a good choice. Windows Live Movie Maker is an upgraded version of Windows Movie Maker. Like their names, the actual function of these two programs are also very identical. Although Windows Live Movie Maker is mainly used to edit videos or make slideshows, it can also sometimes be used as a simple video converter when you are not too demanding on the converting quality. Here is a simple guide showing you how to convert AVCHD to iTunes compatible formats with Windows Live Movie Maker.
Step 1: Launch Windows Live Movie Maker. In the toolbar, click on the “Add videos and photos” button and select your AVCHD video to import.
Step 2: You can do some editing to your video using different function modules that Windows Live Movie Maker provides. When you feel like you are ready to start converting your video, click the “Save movie” button in the toolbar to call out the format selection menu.
Step 3: The format selection menu includes all of the available formats and device presets that Windows Live Movie Maker provides. Choose one that you need, and the conversion can be started immediately.
Part 4: Convert AVCHD File to iTunes with FileZigZag
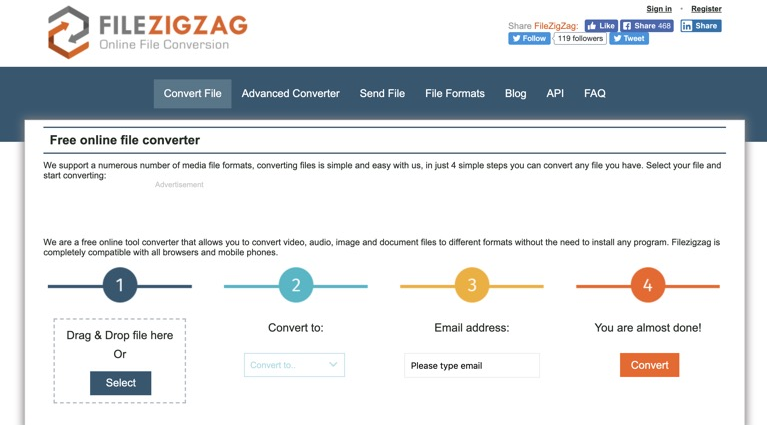
Unlike any of the professional video converter programs introduced above, FileZigZag is an online video converter tool that can get your AVCHD video converted to an iTunes compatible format without having to install any additional program. What’s more, with FileZigZag, you can convert not only AVCHD videos, but also other files like documents, archive files and images online easily. FileZigZag provides a straightforward user interface with a clean 4-step guide. Follow the step-by-step guide on the webpage and you should be able to convert your files pretty easy. Here are some details.
Step 1: Visit the FileZigZag official website. To upload your source AVCHD video file, click the “Select” button to locate it or drag the file and drop it into the box.
Step 2: Set an output format using the dropdown box under the “Step 2” icon.
Step 3: This website requires your Email for conversion tasks. To proceed, you have to enter your Email address in the box under the “Step 3” icon.
Step 4: Click the “Convert” button to start the conversion task. You can download the converted file after the conversion’s done.
Part 5: Import AVCHD File to iTunes
After converting AVCHD to iTunes compatible formats, the last step is to import the converted video to iTunes. Since the AVCHD video has already been converted to a format that can be accepted by iTunes, you can now easily import the video by following the guide below.
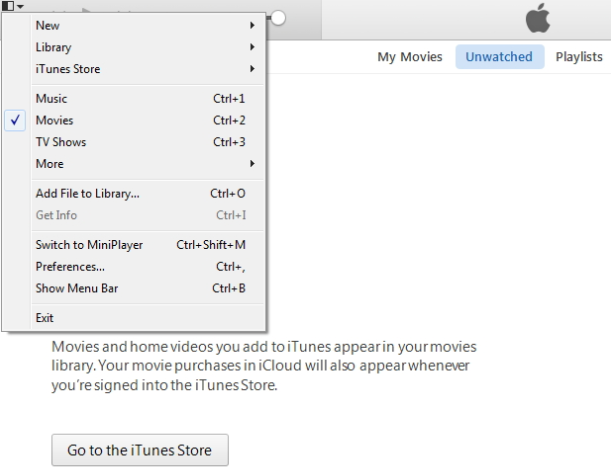
Step 1: Launch iTunes. On the main interface, click the drop-down list on the top left corner, and choose “Add File to Library” to pop up a file selecting panel.
Step 2: On the panel, you need to go to the output directory that you set to contain the converted file, and choose the file for importing;
Step 3: Once you select your file you should now see your newly imported file in your iTunes library.

