QuickTime is a practical framework working on Apples’ multimedia devices. With the QuickTime framework and the QuickTime Player, Mac computers can easily have a great video playback performance with QuickTime movies like MOV. However, despite having great compatibility and stability on Mac computers, the QuickTime movies sometimes have some playback problems on other systems or platforms like Windows or Android phones. So, when you need to play a QuickTime movie on there platforms or systems, you usually have to convert the QuickTime movies from its original format to a more compatible video format like WMV. Without a proper tool, the QuickTime to WMV converting process could be tricky. So, in order to let you do the QuickTime to WMV converting work effortlessly, today we are going to introduce you 5 different solutions to convert QuickTime movies to WMV videos.
- Solution 1: Convert QuickTime Movie to WMV with Leawo Video Converter
- Solution 2: Convert QuickTime Movie to WMV with Miro Video Converter
- Solution 3: Convert QuickTime Movie to WMV with MPEG Streamclip
- Solution 4: Convert QuickTime Movie to WMV with FileZigZag
- Solution 5: Convert QuickTime Movie to WMV with KeepVid
Solution 1: Convert QuickTime Movie to WMV with Leawo Video Converter
In order to convert your QuickTime movies to WMV, the first thing you need to prepare is a great video converter tool. Among all of the video converter programs on the internet, Leawo Video Converter is definitely one of the most recommendable choices for you to convert your QuickTime movies to WMV videos.
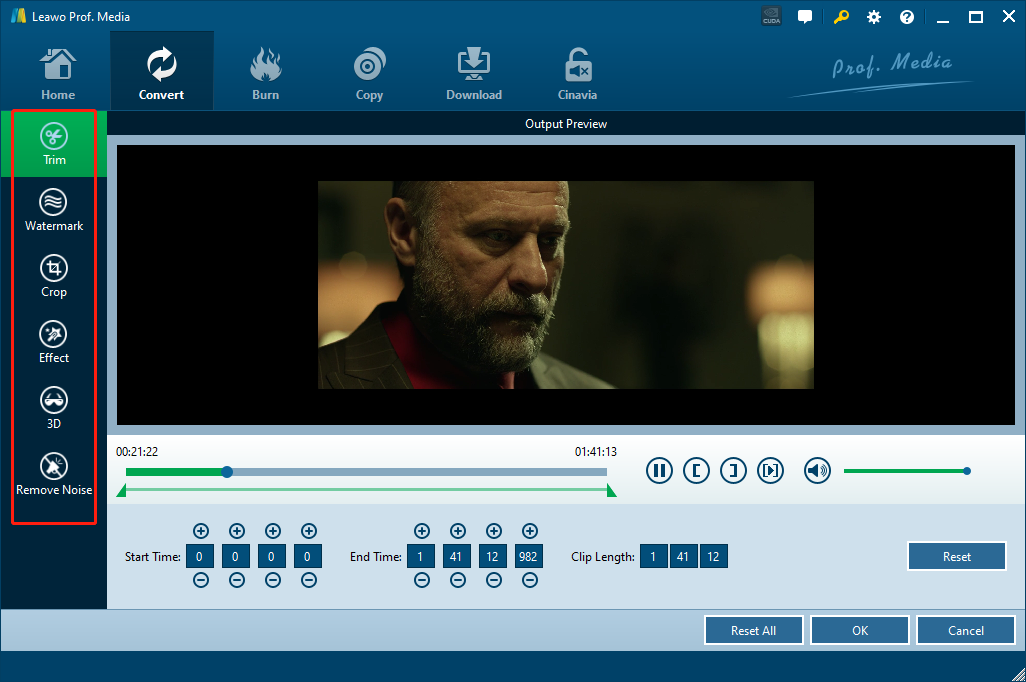
As one of the most professional media converter programs, Leawo Video Converter is capable of convert more than 180 kinds of video and audio file from one format to another with its advanced video processing technology. What’s more, the program can also keep a 6 times higher speed comparing to the industrial average level, and keep the original quality in the output file at the same time. In addition, Leawo Video Converter also has a very convenient video editor module built in, making it easy for you to do all kinds of video editing operations like trimming, cropping, adding watermark to video, adjusting video parameters, turning 2D video to 3D and removing background novice from video. With all of these functions and features, it’s safe to say that Leawo Video Converter is no doubt one of the best and most powerful video converter programs that you can use to get your QuickTime movies converted to WMV video files.
In terms of ease of use, Leawo Video Converter also has a great performance. The program has an excellent software design, making it easy for anyone to convert QuickTime movies to WMV with a very short amount of time. If you are planning on using Leawo Video Converter to convert your QuickTime movies to WMV, then take a look at the following guide, I’m sure it will help.
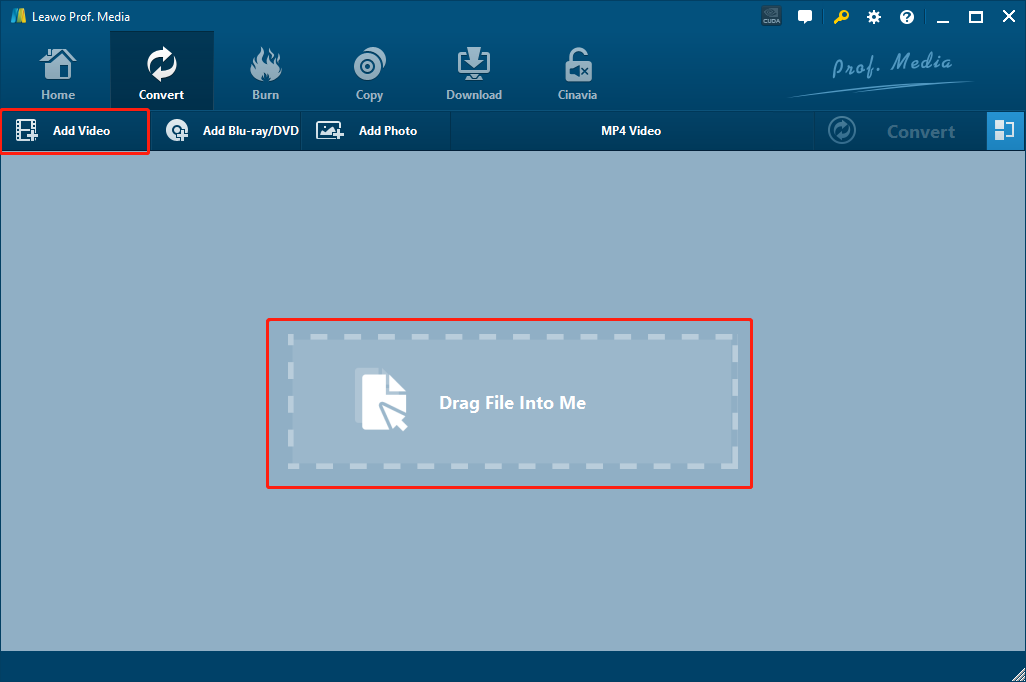
Step 1: Download, install and launch Leawo Video Converter. To import your source QuickTime movie, just drag and drop the file to the center of the main interface. You can also click the “Add Video” button at the upper left corner to import your video.
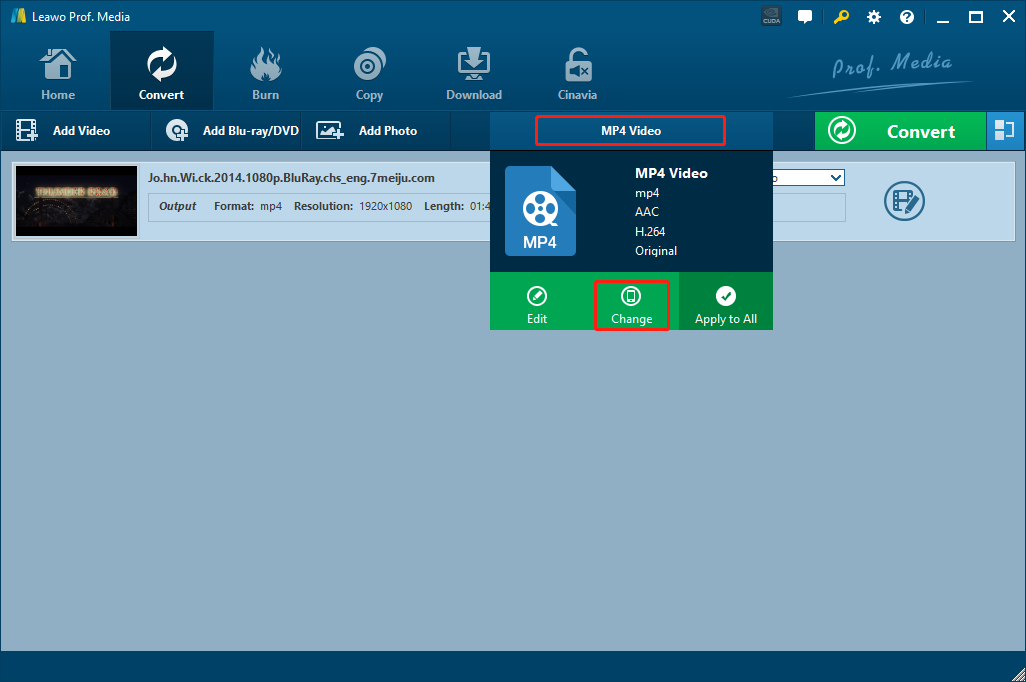
Step 2: The “MP4 Video” is the default output video in Leawo Video Converter. To convert your QuickTime video to WMV, you need to change the “MP4 Video” to “WMV Video”. To do that, simply click on the “MP4 Video” area next to the green “Convert” button, then choose “Change” to go to the format selection window, where you can find and select the “WMV Video”.
Step 3: As mentioned above, Leawo Video Converter provides various kinds of further editing options for you to customize your video performance. You can click the “edit” icon on the right to do some further editing. Once you are done with editing, click the “OK” button at the lower right corner to confirm and go back to the main interface.
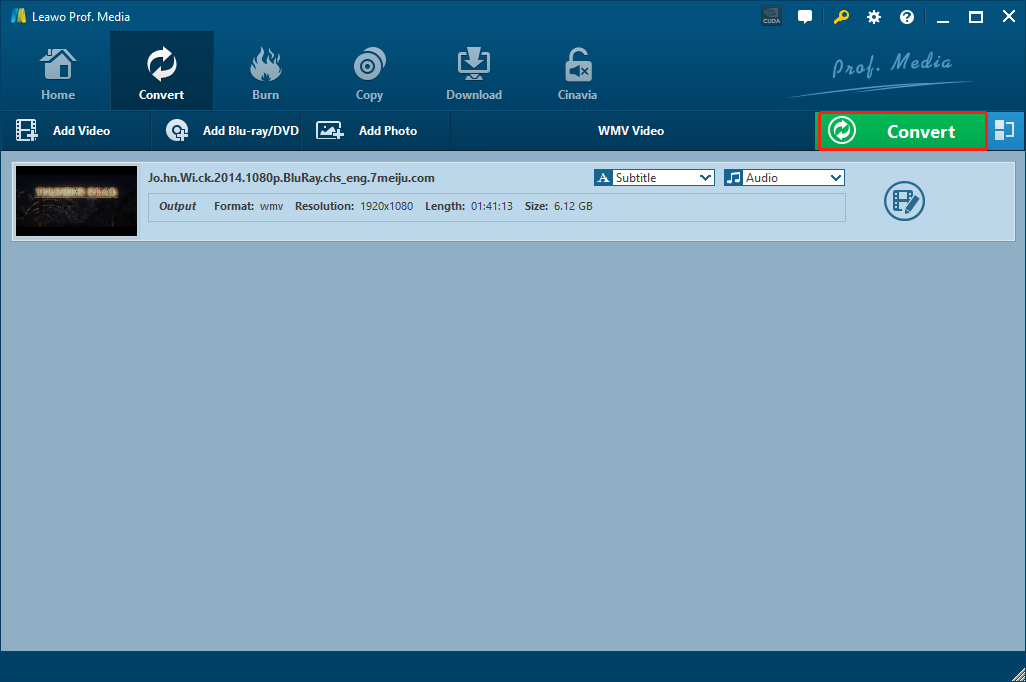
Step 4: When you are ready to start the conversion, click the green “Convert” button, select an output directory and click the “Convert” icon below to start converting your video from QuickTime to WMV.
Solution 2: Convert QuickTime Movie to WMV with Miro Video Converter
Although Leawo Video Converter is already good enough for the QuickTime to WMV converting task, there are still some other recommendations for you in case you need more options. Miro Video Converter is a very handy tool for most of the common video conversion tasks including QuickTime to WMV. The program has a nice user interface, supports a large variety of media formats and provides a quite good video converting speed. With Miro Video Converter installed on your computer, you can easily convert your videos from its original format to either another specific format, or a preset profile for your device. If you want to try use Miro Video Converter for your QuickTime to WMV conversion task, here is a brief guide for your reference.
Step 1: Download and install Miro Video Converter on your PC.
Step 2: Launch the program, then drag the source video file and drop it into the program interface to import it.
Step 3: After the file is imported, click the “Format” dropdown button in the “Convert to” section to select “WMV” as your output format for the conversion task.
Step 4: Finally, click the “Convert Now” button at the bottom to start the converting task immediately.
Solution 3: Convert QuickTime Movie to WMV with MPEG Streamclip
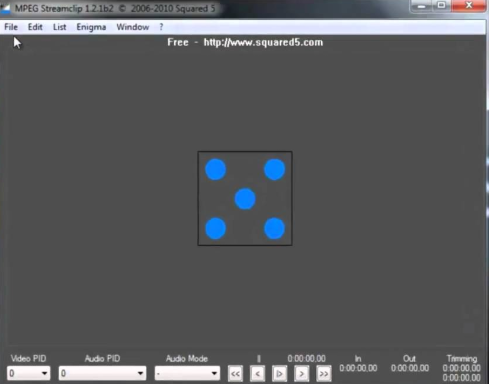
Another tool that you can use to convert your QuickTime movies to WMV is MPEG Streamclip. As an all-inclusive multimedia solution kit, MPEG Streamclip integrates video converter, video player, video downloader and video editor all into one program. Like Leawo Video Converter, MPEG Streamclip can also cut, trim and join your video files in a simple way. However, one of the few drawbacks of the program is that, with all of these functions packed, it’s really hard for the software design to be user-friendly. If you are new to the program, it might take you a while to figure out how to start converting QuickTime to WMV with MPEG Streamclip. If you want to use MPEG Streamclip to convert your QuickTime movies to WMV but don’t know how, I believe the following guide can help you figure out.
Step 1: Launch MPEG Streamclip and drag your source QuickTime file into the program.
Step 2: When the file is imported, click “File”, and find the target export option in the drop-down menu. Once you click on that, a new settings window will be brought out, where you can change advanced parameters for the conversion task. When you’re done adjusting, click “OK” to confirm.
Step 3: In the newly popped out window, set an output directory and click “Save”. Then the converting task you are should be started right away.
Solution 4: Convert QuickTime Movie to WMV with FileZigZag
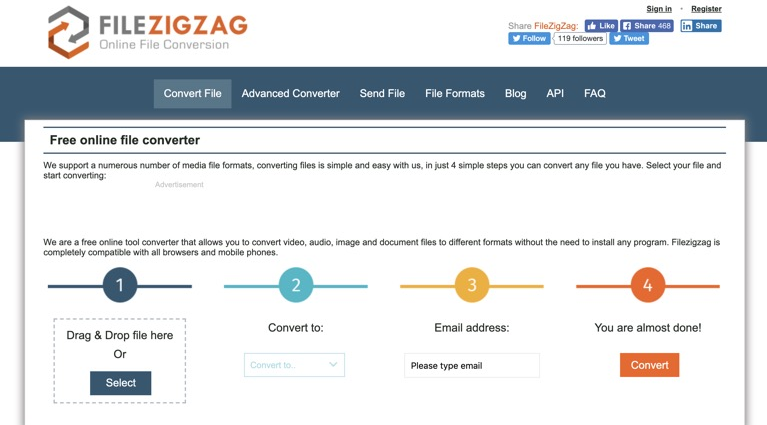
In the above we have introduced some professional video converter programs for you to convert QuickTime to WMV. if you want to do the conversion with an online converter tool, you can try and use another converter called FileZigZag. FileZigZag is a useful free online file converter tool. With FileZigZag, you can convert not only QuickTime to WMV, but also other files like documents, archive files and images online easily. FileZigZag provides a straightforward user interface with a clean 4-step guide. Follow the step-by-step guide on the webpage and you should be able to convert your files pretty easy. In case you are wondering, here is how FileZigZag works.
Step 1: Go to the FileZigZag official site. To upload your source QuickTime file, click the “Select” button to locate it or drag the file and drop it into the box.
Step 2: Set “WMV” as output format using the dropdown box under the “Step 2” icon.
Step 3: This website requires your Email for conversion tasks. To proceed, you have to enter your Email address in the box under the “Step 3” icon.
Step 4: Click the “Convert” button to start the conversion task. You can download the converted file after the conversion’s done.
Solution 5: Convert QuickTime Movie to WMV with KeepVid
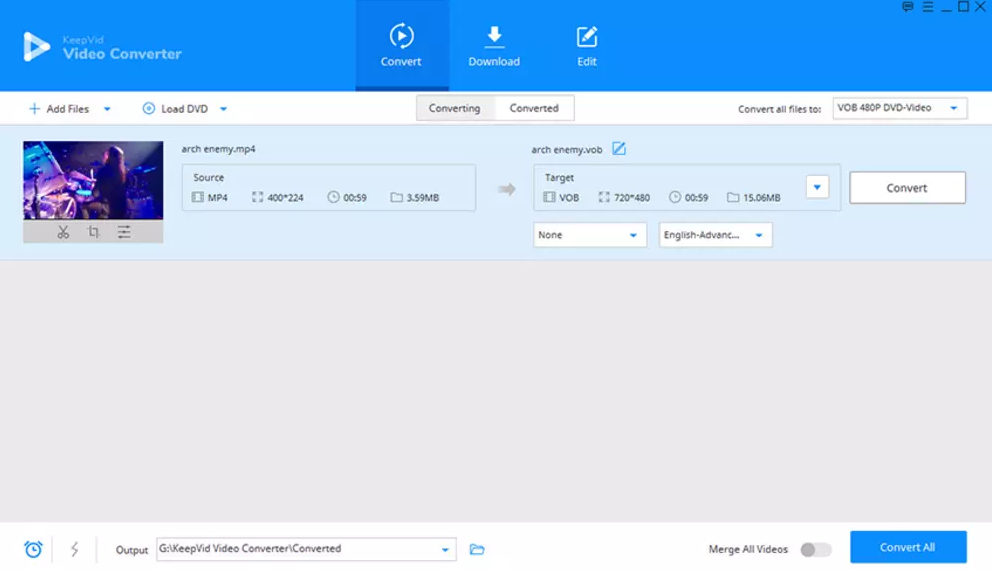
The last QuickTime to WMV converter approach in today’s article is KeepVid. Keepvid is a dedicated video converting program which also includes an online video converter tool. But since the online converter tool only supports a very limited number of video and audio formats, when you have the needs to convert QuickTime to WMV, you still need to download the program for the conversion. However, the KeepVid Video Converter program also is simple and easy to operate. Here is a brief guide showing you how to convert a QuickTime video to WMV with the KeepVid Video Converter.
Step 1: Download and launch KeepVid Video Converter. To import your source video, just click the “Add Files” button and select the video that you need to convert.
Step 2: When the video is imported, you can change the output format by clicking the format element in the “Target” area.
Step 3: Finally, set an output folder in the “Output” box below, and then click the “Convert” button at the right side of the video item. If you have more than one video imported, you can click the “Convert All” button to convert them in batch.

