Whenever things go wrong on your smart device, you can always reset and start over again, and this applies to the iTunes library as well. When you encounter glitches on iTunes or find your iTunes becomes messed up and unmanageable after you have been using it for a while, you can reset it to make it back to normal. So how will iTunes reset library on Windows and Mac? Check out this article to learn more!
Part 1: How Will iTunes Reset Library on Windows?
Whether you want to clear unwanted items from the iTunes library or change your Apple ID to start afresh, you can always manually remove those items or reset the iTunes library. So how will iTunes reset library on Windows? If you are not so sure how to do it, just follow the steps below.
Step 1. Shut down your iTunes on Windows PC before reset.
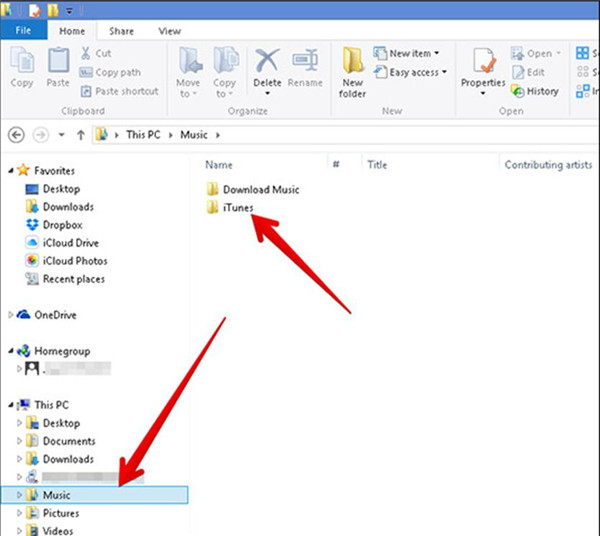
Step 2. Launch Windows Explorer, choose Music > iTunes folder.
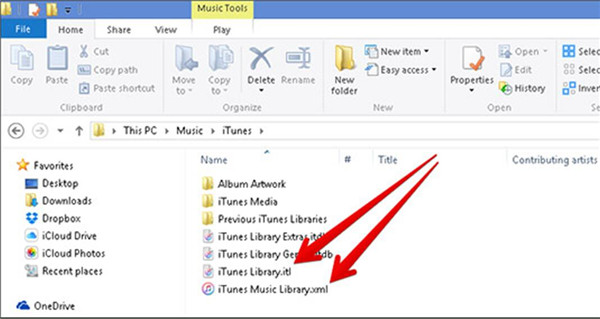
Step 3. You will see two files: iTunes Library. itl and iTunes Music Library.xml. Delete both files from your computer and that's it.
Note:
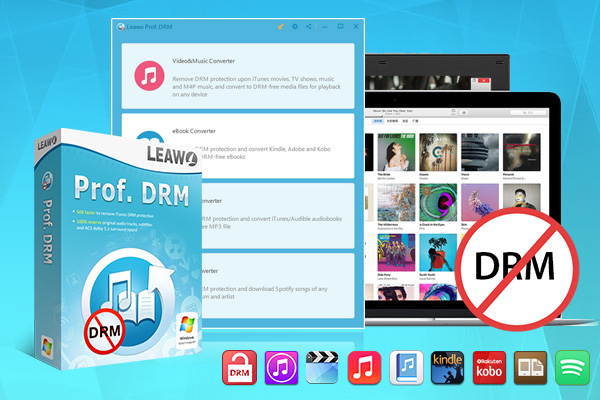
- Please note that your iTunes Music library will be reverted to factory default after reset, which means you will lose all your listening history like playlist, ratings, lists, etc. Your downloaded music files will be removed as well. If you want to keep your iTunes music for offline playback, it's better to df download them with Leawo Prof. DRM, a professional DRM(Digital Rights Management) removal that can help you remove DRM from iTunes M4P music and save them as local MP3 files.
Part 2: How Will iTunes Reset Library on Mac?
For Mac users, you can reset your iTunes library completely as well. How does iTunes reset library on Mac? Just check out the steps below. Before everything else, please shut down iTunes on your Mac.
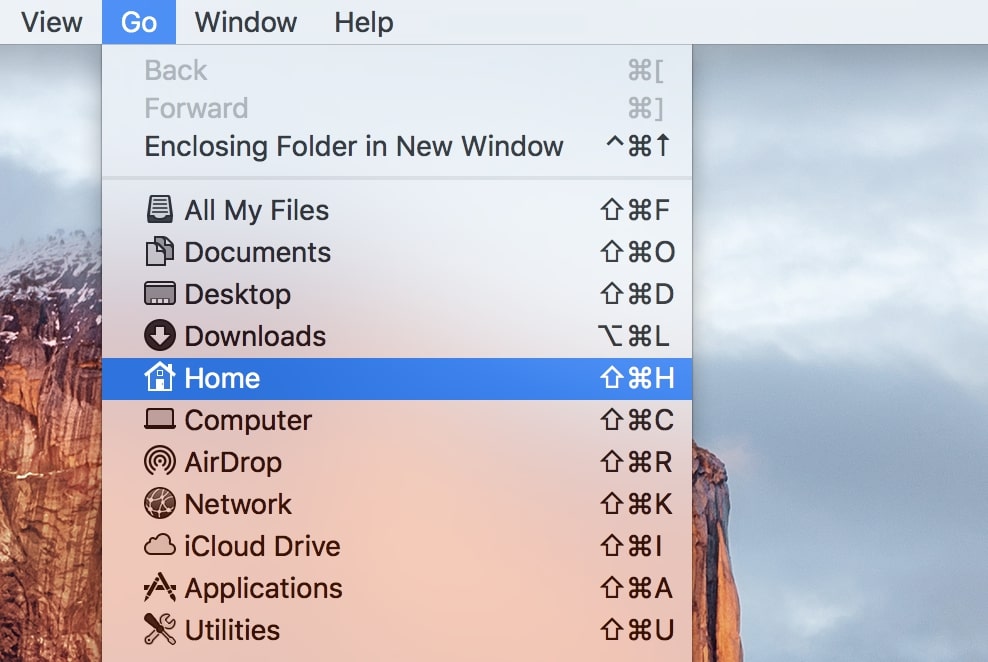
Step 1. Click on "Go" in the menu on top and choose "Home." If you use Mac OS X, just launch Finder on Mac.
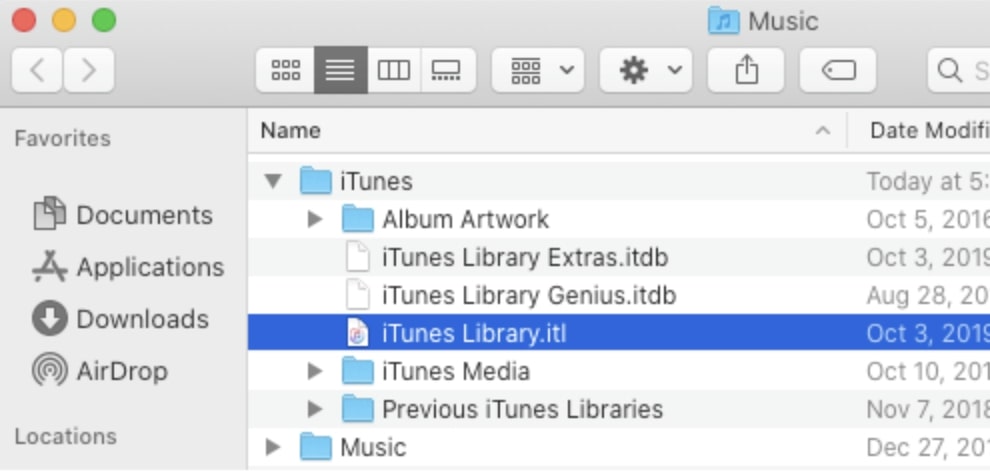
Step 2. Click and browse the "Music" folder, choose the "iTunes" folder. Alternatively, you can click on the "Music" in the sidebar in the Finder and go to the "iTunes" folder.
Step 3. Delete these two files: iTunes Library.itl and iTunes Music Library.xml from the iTunes folder.
Part 3: How Will iTunes Reset Library - Sort Out Messed Up Library
When your songs didn't match well in iTunes, just reset your iCloud Music to sort out the messed-up music library. First of all, you will need to create a new library on iTunes. It's the safest way to handle your files. You will have less risk of losing your files because the method won't remove any of your songs from iTunes.
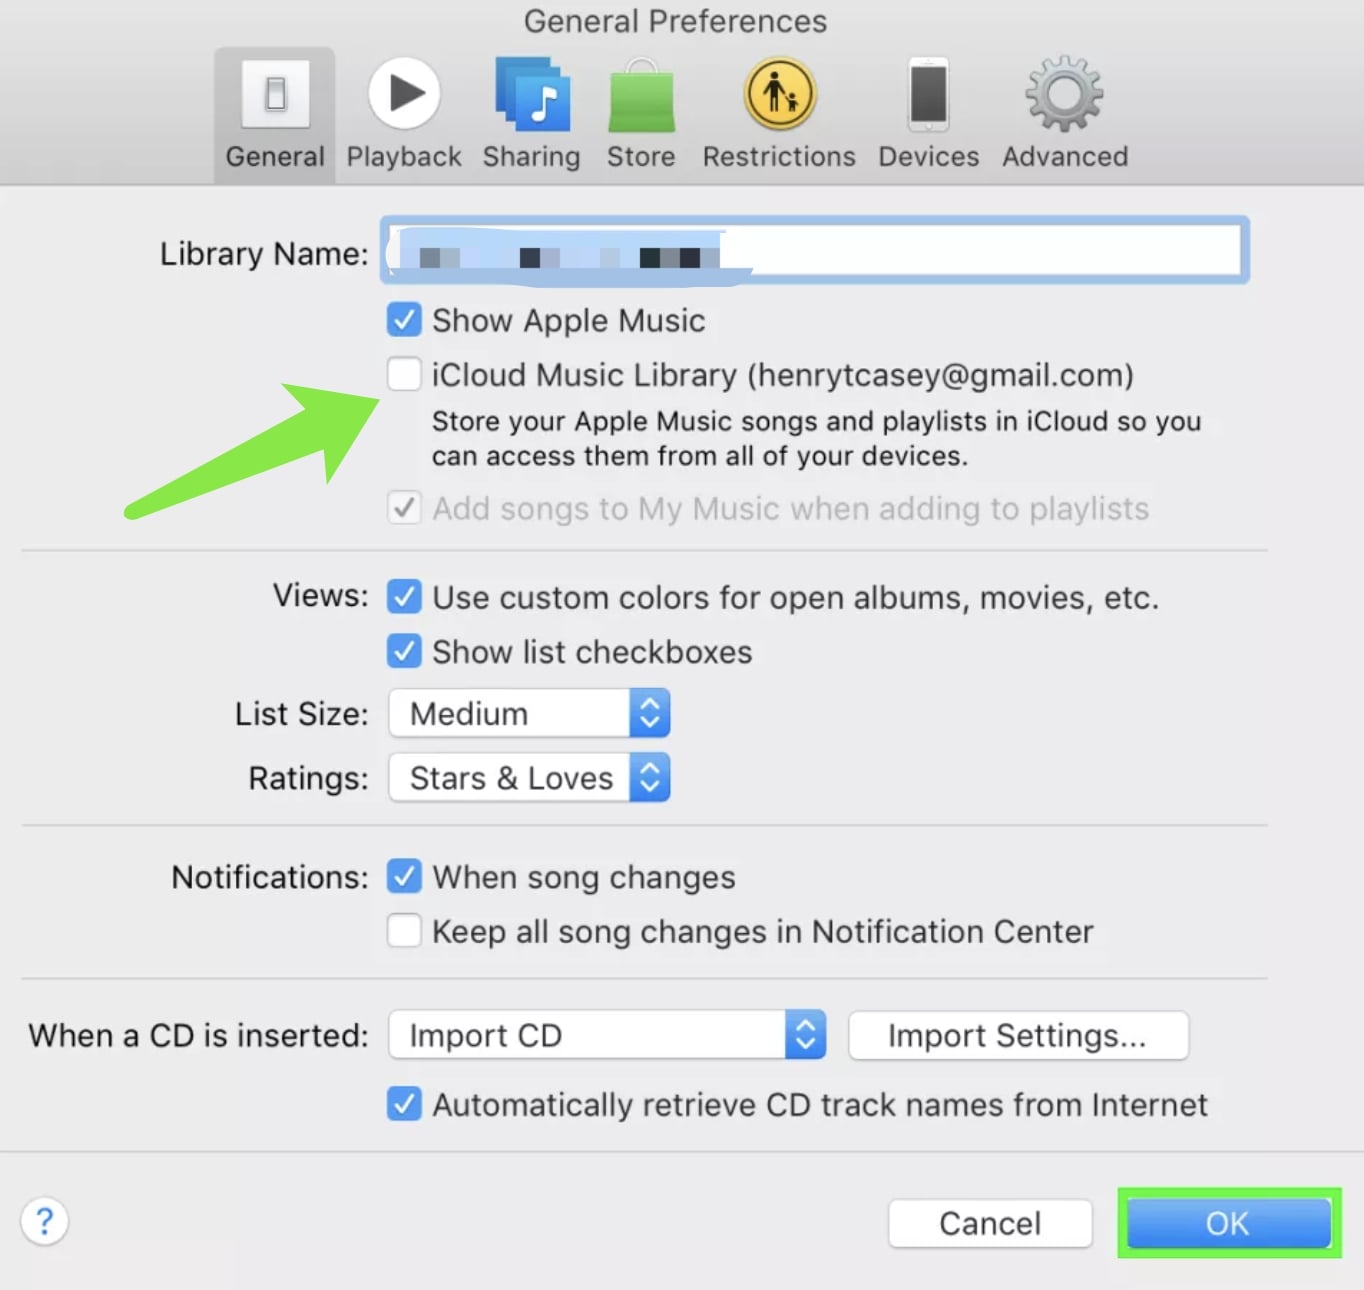
Step 1. Launch iTunes, go to the menu on top, click on iTunes > Preferences and uncheck the box of "iCloud Music Library." Click "OK" and done.
Step 2. Click iTunes > Quit iTunes. Hold down Option and launch iTunes. Click the "Create Library" in the pop-up box. Name it and save it.
Step 3. Go to iTunes > Preferences, check the box of "iCloud Music Library." Click Ok to proceed.
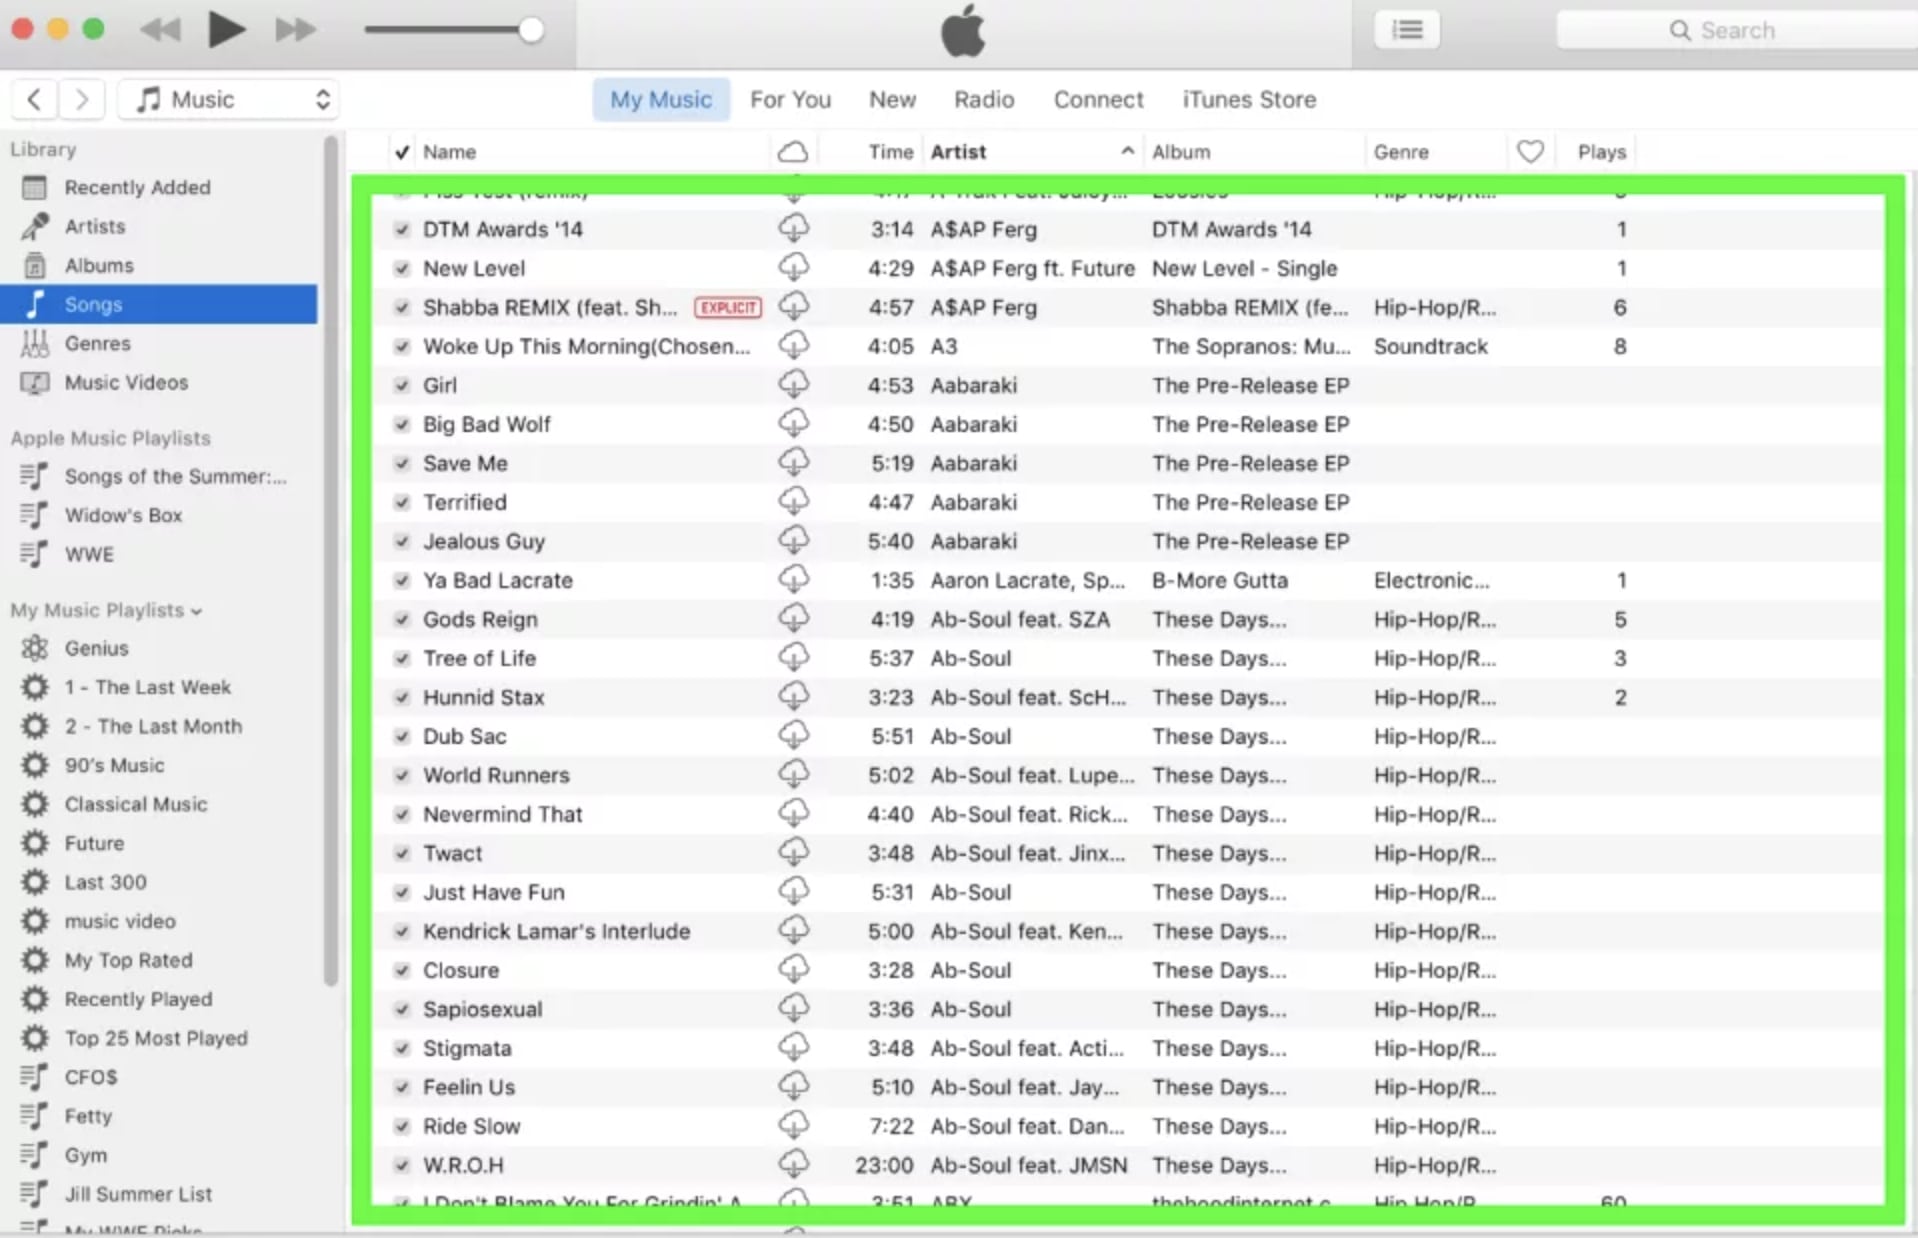
Step 4. Now your iCloud Music library will load. Click Songs in the left menu. Go to Edit > Select All, press DELETE, and delete them all.
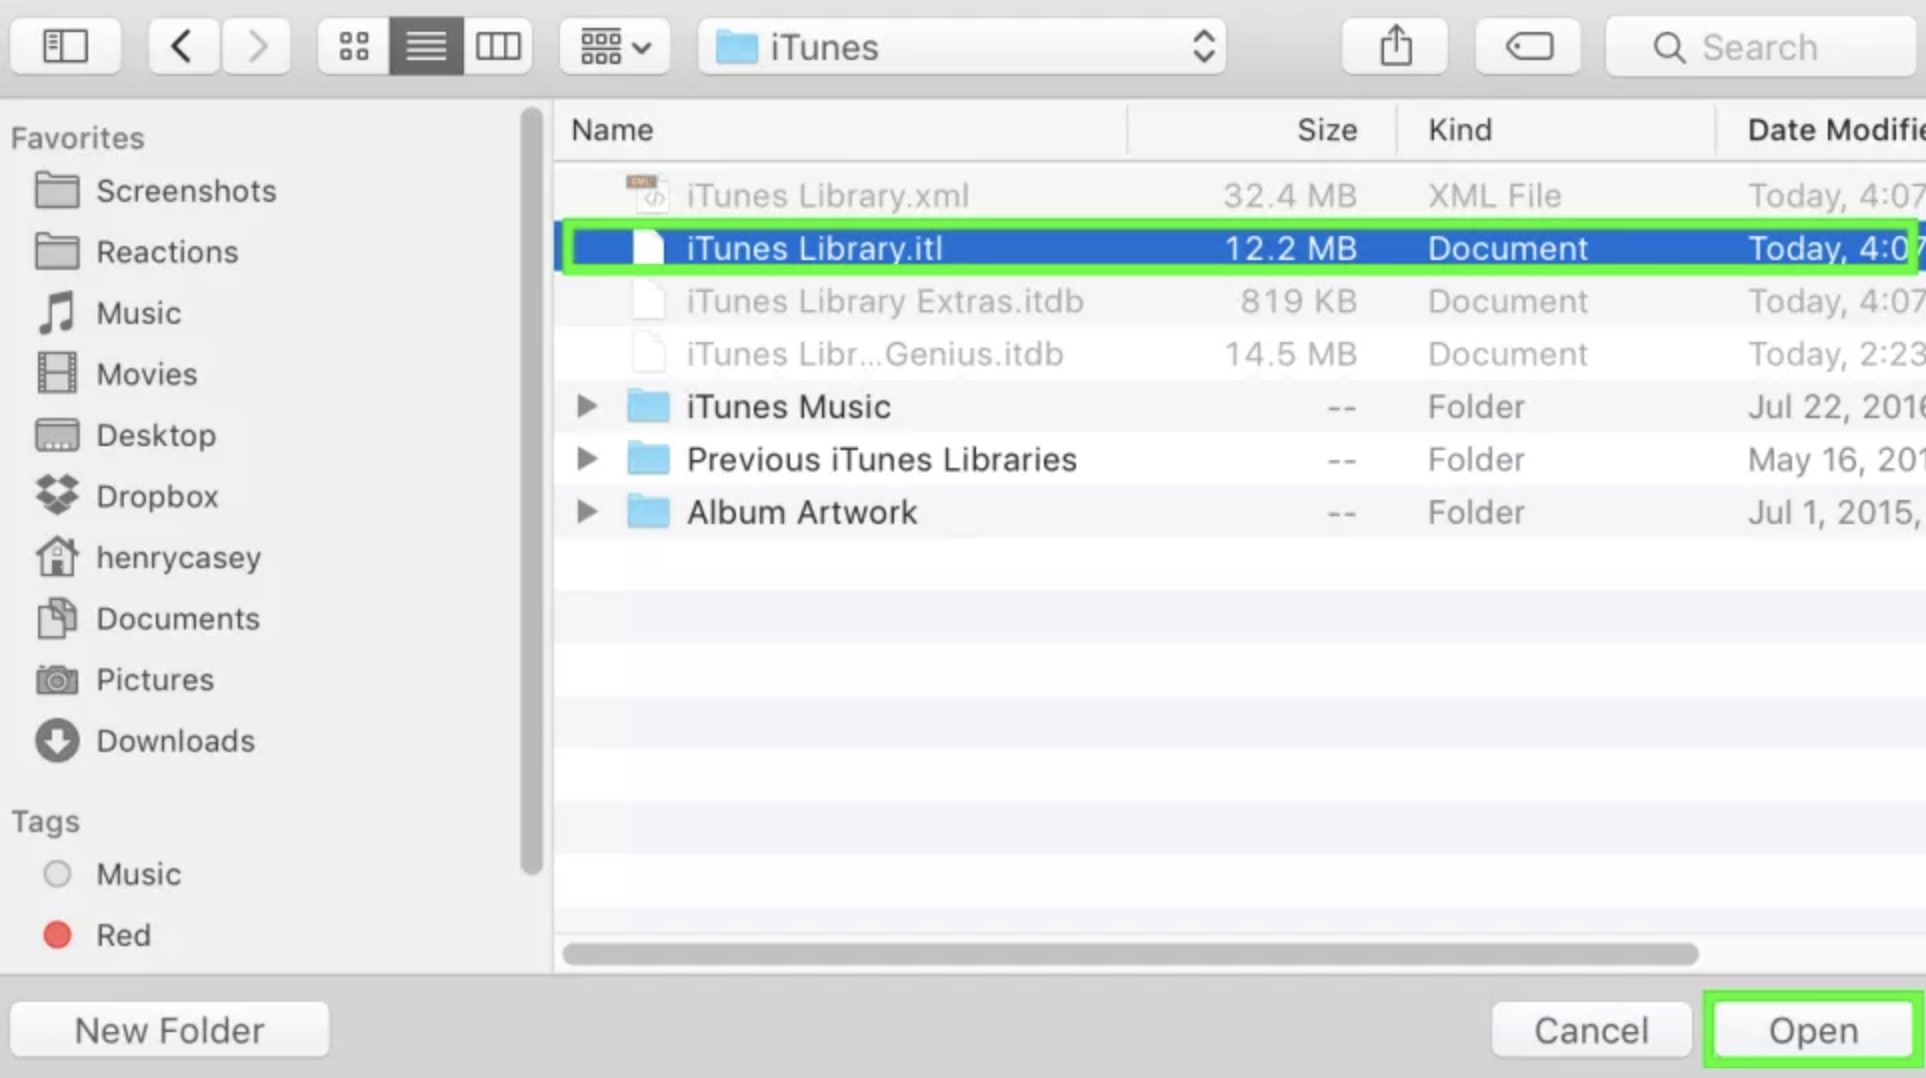
Step 5. Quit iTunes and hold the Option key when launching iTunes. Click the "Choose Library" in the pop-up box.
Step 6. You will be directed to the previous iTunes library. Choose "iTunes Library.itl " and click "Open."
Step 7. Go to iTunes > Preference, check the box "iCloud Music Library" this time, and click OK.
The spinning gear in the upper right will show the progress of your uploading of the iTunes library. Once it's done, your songs should be matched well in your iCloud Music Library.
Part 4: How to Add iTunes Library?
With the steps above you see how iTunes reset library on Windows and Mac, as well as the way to sort out the messed up iTunes library. What about the other way around -- how to add music files to your iTunes library? You can import your media files, for instance, your purchased album and video on the computer to the iTunes library easily.
You can add media to iTunes directly with the steps below. Here's how to do it.
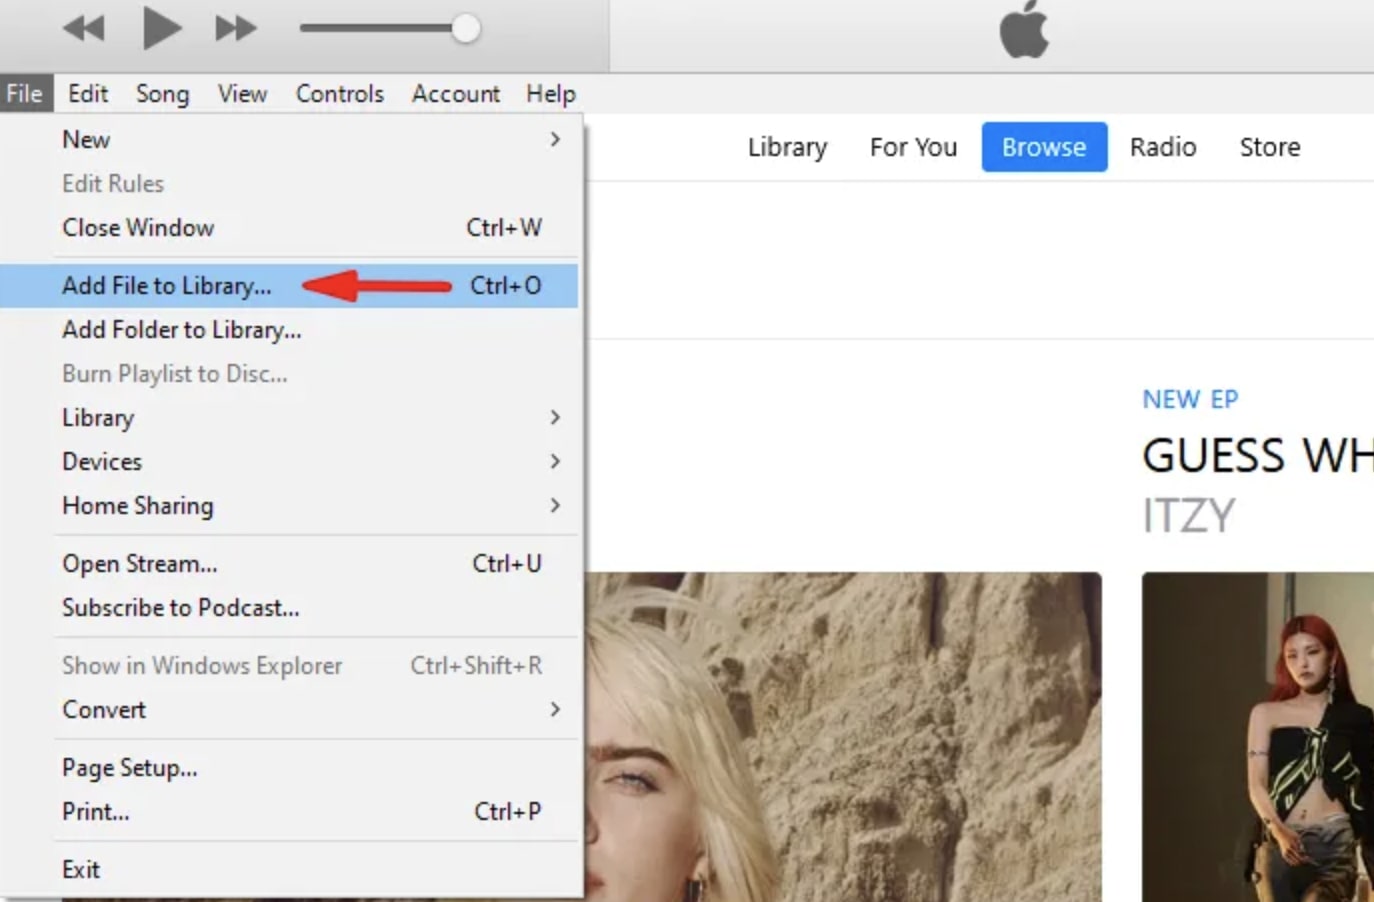
Step 1. Launch iTunes. Go to File > Add File to library or Add Folder to the library.
Step 2. Browse the file and folder, select files or folder, and click "Open."
Alternatively, you can drag and drop the media file or folder from the desktop to iTunes to import them to your iTunes library.
You can also copy the item to the iTunes folder when importing it to the iTunes library. Just follow the steps here.
Step 1. Launch iTunes, go to Edit > Preference, and choose "Advanced."
Step 2. Checkbox the "Copy files to iTunes Media folder when adding to library"
Next time when you add items to the library, iTunes will make a copy of the file in the iTunes folder while you can have the original files in the current location.
Please note that you can not add copyright-protected WMA or WMV files to iTunes. When you add unprotected WMA files to iTunes, you will need to have Windows Media Player Series 9 or later installed to support the playback, and iTunes will make a copy of the file and add it to the library.
Part 5: How to Move iTunes Library to Another Computer?
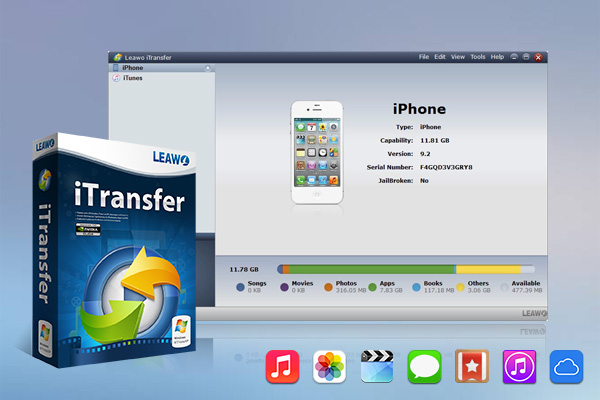
When iTunes reset library, all your files would be wiped out completely. So if you want to keep certain files you can back them up with a third-party app before they are gone. If you've got multiple computers, you can simply move/back up the entire iTunes library to another computer easily and quickly with Leawo iTransfer, a useful app that can help you transfer files between iOS devices, iTunes, and computers. Leawo iTransfer is a practical tool that can help you backup up to 14 kinds of data and files without iTunes.

-
Leawo iTransfer
- Transfer files among iOS devices, iTunes and PCs with ease.
- 6x faster than iTunes
- Transfer up to 14 kinds of data and files without iTunes.
- Support the latest iOS devices like iPhone 12, iPhone 12 Pro, etc.
- Play back, view, and delete data and files on iOS devices.
- Support Windows & Mac OS
With Leawo iTransfer, you can back up any kind of data like TV shows, apps, music, contacts, bookmarks, etc. from iOS devices to iTunes library or back up iTunes library to another computer. If you want to transfer files between your iPhone and computer, the app can also help you with it. Leawo iTransfer is the best backup tool when you have iTunes errors of all sorts, for instance, iTunes error 4013, and have to back up your files on iOS devices.
Designed with a user-friendly interface, iTransfer looks simple and clean and it's no brainer for anyone to use! Want to know how to use it? Check out the steps below to see how to move the iTunes library to the computer with Leawo iTransfer! Before everything else, you will need to download Leawo iTransfer from the links above.
◎Step 1. Launch Leawo iTransfer
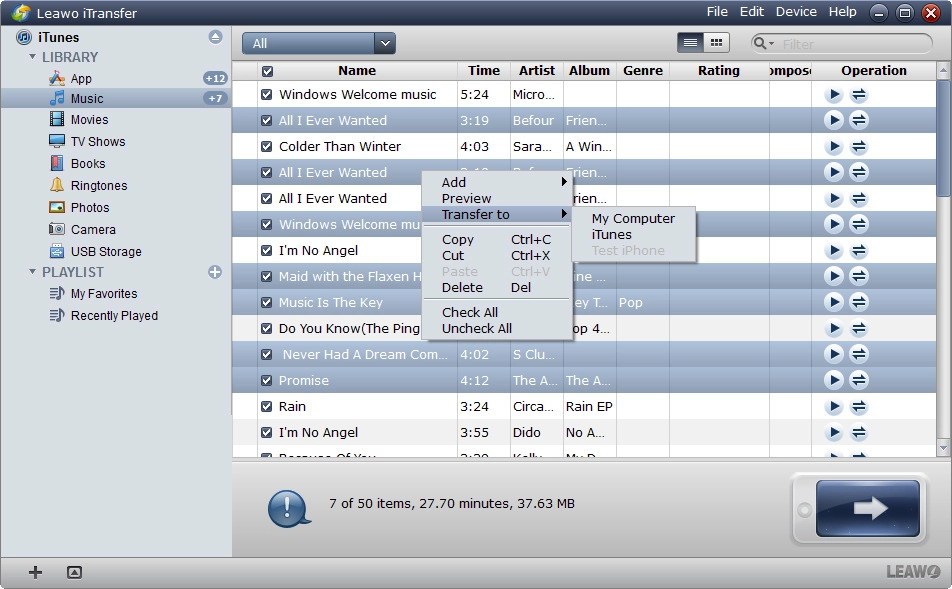
Connect your phone to the computer with the USB lightning cable. Launch Leawo iTransfer and it will automatically detect the device and load the library on the left panel.
◎Step 2. Choose content to move
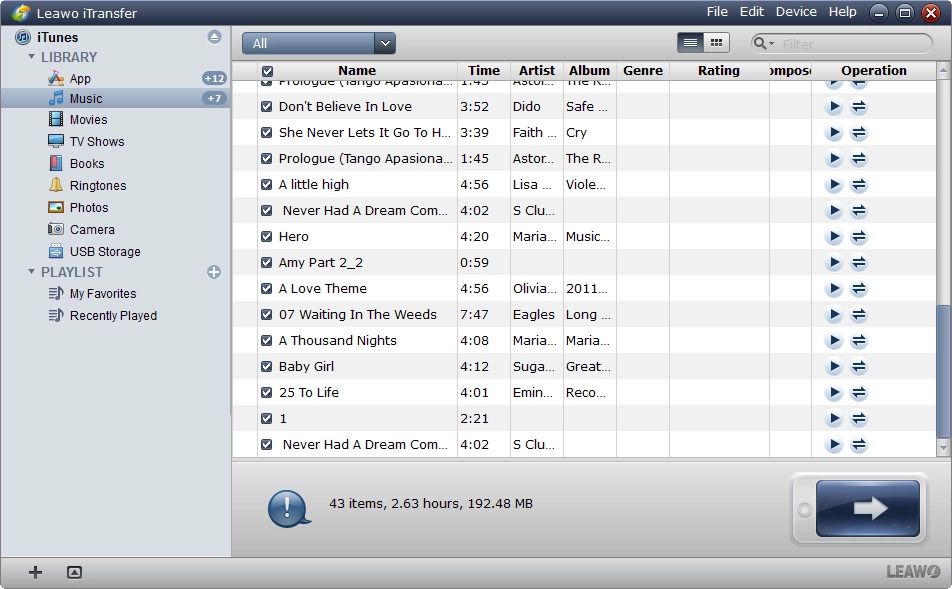
Go to iTunes > Library, for instance, choose "Music" to display all the music files. Select songs you want to copy and right-click on them, choose "Transfer Now > My Computer" to transfer music.
◎Step 3. Set destination folder
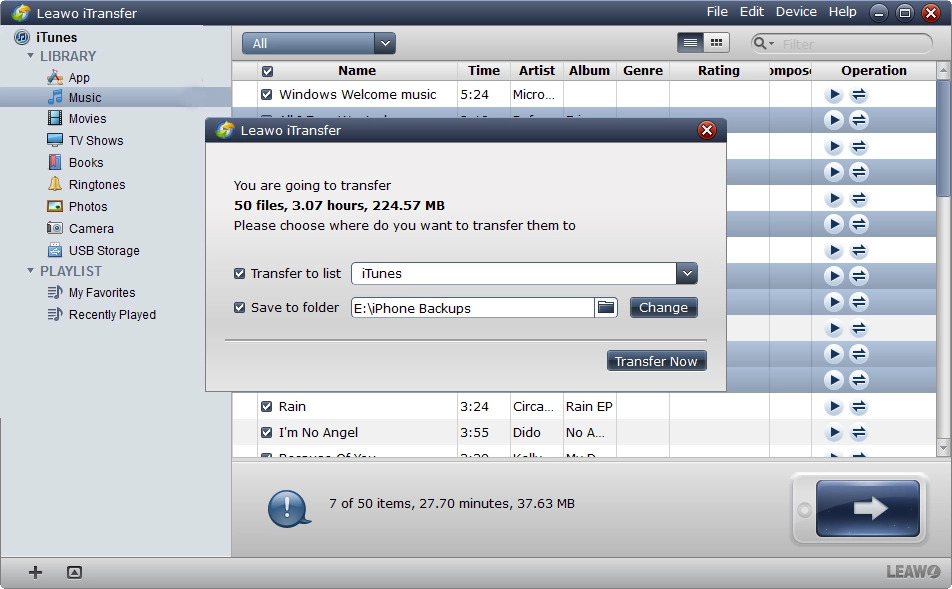
In the prompt popup, click "Change the destination folder if necessary. Click "Transfer Now" to start transferring.
That's it! The transfer is as fast as lightning. Within a few moments, your iTunes files will be ready in the destination folder.
When it comes to iTunes music, you can go for Leawo Prof. DRM, the best iTunes music downloader for help. All the music files you downloaded will be gone when iTunes reset library, so it's better to back them up as well. Many users will choose the iCloud library to back up music, it's doable, just make sure you've got enough storage. Besides that, please mind that you can't access these files if you cancel the subscription to iTunes.

-
Leawo Prof. DRM
- Convert iTunes DRM-protected M4V movie and TV show to DRM-Free MP4
- Remove DRM from M4B, AA, AAX files and convert any Audible AA, AAX file to MP3, even without iTunes authorization
- Convert iTunes DRM-Protected M4P and non-DRM iTunes M4A Music to MP3
- Remove DRM-protection on Spotify music and convert to Universal audio format for enjoying music offline on any devices
- Convert DRM-protected eBook from Kindle, Kobo, Adobe to DRM-free epub, mobi, azw3, txt, etc., format
These days you can't transfer your iTunes music to other devices because the DRM(Digital Right Management) has prevented you from doing so. Digital rights management is the access control technology that restricts the use, modification, and distribution of copyrighted work. If you want to transfer your iTunes music as local files to another computer for backup, try Leawo Prof. DRM. With Leawo Prof. DRM, you can successfully remove the copyright protection on iTunes music and convert them to local MP3 files. The app is also the best way to keep your iTunes music offline forever.
The music downloader works for Spotify as well. Just check out the top 10 Spotify playlists for work and see it yourself! Besides that, Leawo Prof. DRM can remove all the DRM protection on almost all the digital content online, such as video, ebook, and audiobooks. You can read Kindle books without Kindle after you successfully remove DRM with Leawo Prof. DRM.
The Bottom Line
With the complete guide above, now you know how iTunes reset library on Windows and Mac. You can also add or remove media from the iTunes library with those easy steps above. Resetting your iTunes library to factory default is a viable solution when you run into iTunes errors of all sorts. Please mind that reset means reverting your iTunes completely so all your listening history and music files will be gone forever. However, you can back up your iTunes library with iTransfer and move it to other devices to keep it safe. For the iTunes music, simply download them with Leawo Prof. DRM and you can keep them forever!


 Try for Free
 Try for Free

