Last updated on 2020-07-23, by
How to Import PPS to QuickTime?
PowerPoint slideshow is something that we always need in both our lives and our works. Having a PowerPoint slideshow makes it easier for us to do presentations, preserve precious memories and share our thoughts. The most common way to present a PowerPoint presentation file is to play the slideshow frame by frame. However, sometimes importing the slideshow to a media player like QuickTime would give you a totally different experience and easier control over the presenting process. To import a slideshow file in PPS format to QuickTime, you have to first convert the PPS file to a video file, and then import the video file to QuickTime. It may sound a little complicated, but as long as you have a decent program to do the conversion job, importing PPS to QuickTime is nothing hard at all. So in the following, we will talk about the details on how to import a PPS file into QuickTime Player in the easiest way.
Part 1: What is PPS?
Before we get into our topic, let’s know the PPS file a little bit better. If you have been dealing with PowerPoint files a lot in your life or work, you might be familiar with the PPT file extension. A PPT file is a regular Microsoft PowerPoint Presentation file. By opening a PPT file, you can directly do modifications to the presentation file or start the presentation by playing the slideshow. A PPS file, on the other hand, is identical to a PPT file, but provides a more direct way for you to do the presentation. Instead of entering the editing mode, opening a PPS file will directly bring you the presentation mode so that you don’t have to manually activate it by clicking the button.
PPS files are useful in conferences, meetings or parties as it can skip the editing mode and directly start playing. By converting a PPS to a video file and importing it to QuickTime, it would be even easier to present it smoothly and naturally. In the following we will talk about how exactly you can convert a PPS file to a video and import it to QuickTime.
Part 2: Import PPS to QuickTime with Microsoft PowerPoint
The easiest way as well as the most efficient way to convert a PPS file to a video before importing it to QuickTime, is to use the native video output support in Microsoft PowerPoint. Not known by many people, Microsoft actually gives you the option to directly save your PowerPoint file in a form of video, and all of the operations can be done within the PowerPoint program itself, without the help of any third-party tool. By directly save your PPS as a video file, you can easily import the video file to QuickTime afterwards. Here is how to save a PPS slideshow file as a video in Microsoft PowerPoint and import PPS to QuickTime.
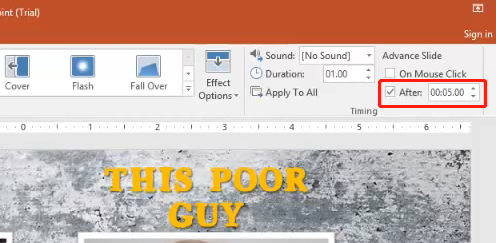
Step 1: Open your slideshow file and go to the editing mode. Under the “Transitions” tab, find the “Advance Slide” section, and then check the checkbox next to “After”. In the “After” parameter, input a time according to how many seconds you want each of your slide to be presented before it slides away.
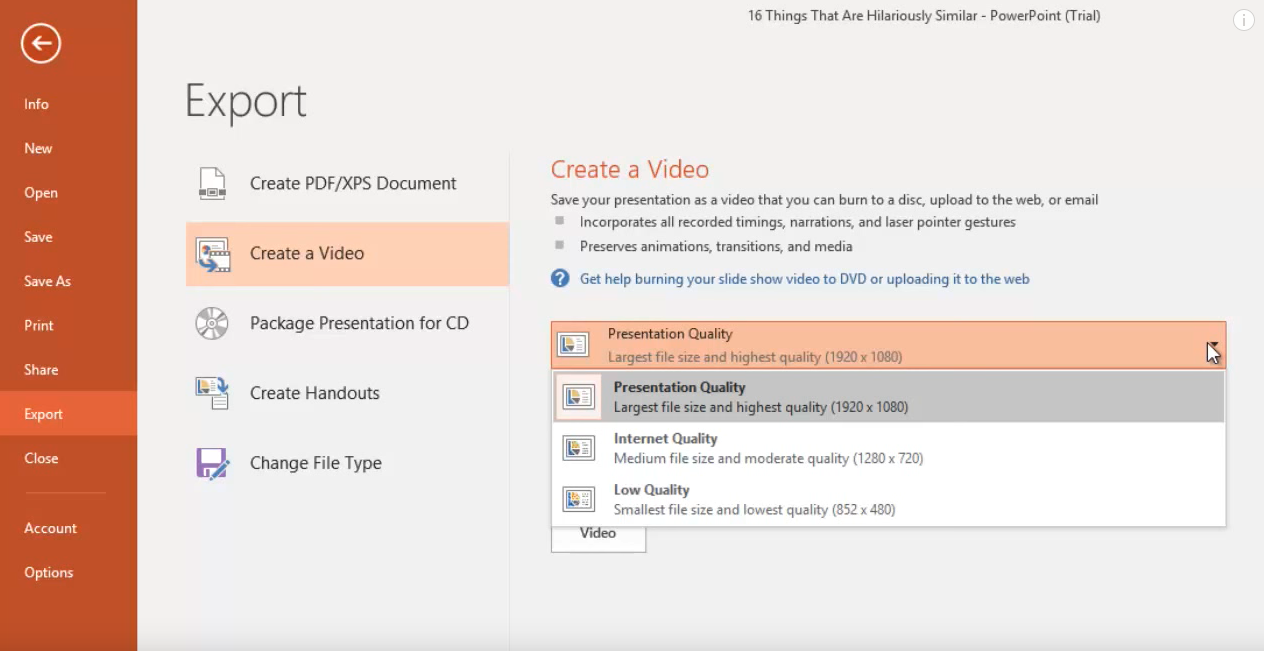
Step 2: Click “File”, then navigate to “Export”, choose “Create a Video”. On the right of the window, you can choose quality for your output video. You can choose according to your actual needs. Then click the “Save Video” button below.
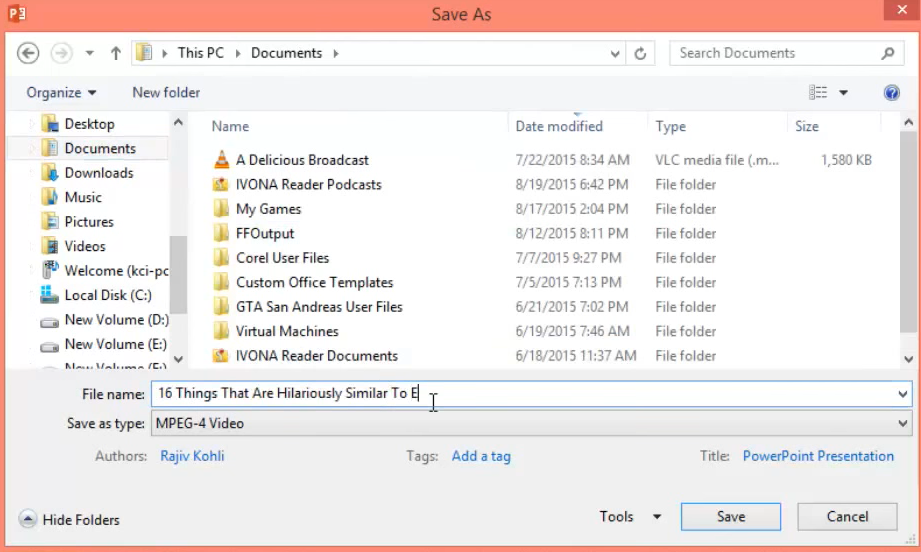
Step 3: In the pop-out window, choose an output path and video format, name your output video and click “Save” to start converting. After the file is converted, you can then launch your QuickTime, and import the converted video like any other regular video file.
Part 3: Import PPS to QuickTime with Leawo PPT to Video Pro
Converting your PPS file to a video within Microsoft PowerPoint is easy. However, for simplicity, you have to give up many customization options that could potentially make your video more beautiful, attractive or compatible. In order to have more customization options and more output settings, it’s suggested that you use a professional PowerPoint to video converter program to convert your PPS file. If you need a recommendation, then I would gladly introduce you Leawo PPT to Video Pro because it’s my personal favorite PowerPoint to video converter program.
Comparing to Microsoft PowerPoint, Leawo PPT to Video Pro is much powerful in functionalities. Not only can Leawo PPT to Video Pro convert your PPS file to any video format you want, it can also keep all of the elements in the original presentation file no matter how complicated it is. What’s more, you can even insert an additional background music or record real-time narration before the conversion, so that you can directly upload PowerPoint to YouTube or share it on any other channels without any further editing operations. Besides that, some small features like adding watermark to PPT or video parameter adjustments are also very helpful sometimes. In order to make a video from your PPS file with Leawo PPT to Video Pro, just follow the guide below.
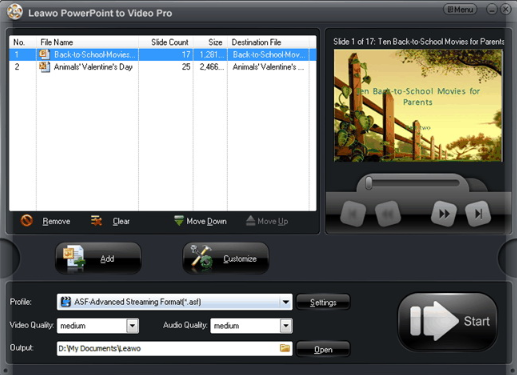
Step 1: Launch Leawo PPT to Video Pro. To import your original PPS file, click the “Add” button and find the file in its folder.
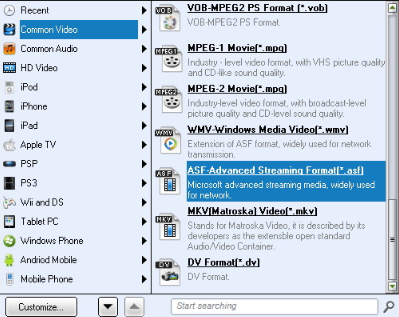
Step 2: Choose an appropriate output video format from the "Profile" box. There are a lot of predefined profiles for you to choose from so that the output video could perfectly fit your target device or platform
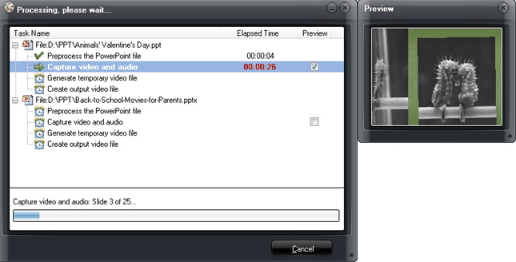
Step 3: You can click the “Settings” button to do further settings to your video’s parameters. When you are ready to convert, set an output directory in the “Output” box and click the big “Start” button. While the file is being converted, you can have a preview window on the right, and you can also cancel the task anytime you want. After the conversion, you can launch QuickTime, and then import the converted video file like other regular videos.
Part 4: Import PPS to QuickTime with Leawo PPT to DVD Pro
Converting PPS files to a video is a great way to import PPS to QuickTime. However, to give the converted PPS file better portability, it would be even better if you directly convert the PPS to a DVD file, burn it to a DVD disc and carry it to wherever you need it. By converting the PPS file to DVD, you can not only import the PPS to QuickTime easily, but also play it with a DVD player and have a better presenting experience. What’s more, if you are using a nicely designed PPS to DVD converter, you can even design a DVD menu for your PPS and make the presentation more customizable and attractive.
For the PPS to DVD converter program, I’d like to recommend Leawo PPT to DVD Pro. As a professional PPT to DVD burning program, Leawo PPT to DVD Pro can burn your PPT or PPS presentation files to a Blu-ray or DVD disc with all of the original elements preserved. With Leawo PPT to DVD Pro, not only do you have the choice to either burn the DVD with One Slide One Chapter mode or One Animation One Chapter mode, you can also use the DVD menu templates to create a DVD menu for your PPT file. In order to burn your PPS file to DVD and then import it to QuickTime, just take a look at the following guide.
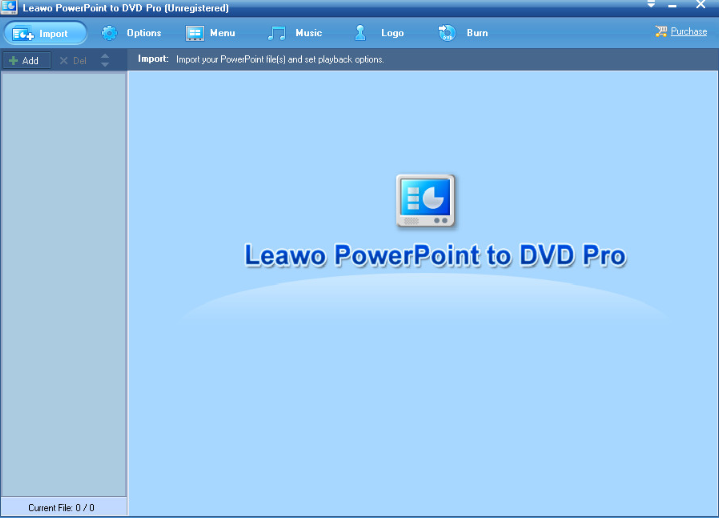
Step 1: Launch Leawo PPT to DVD Pro, and click the “Import” button to import your PPS file. Or you can also click the “Add” button to add more files.
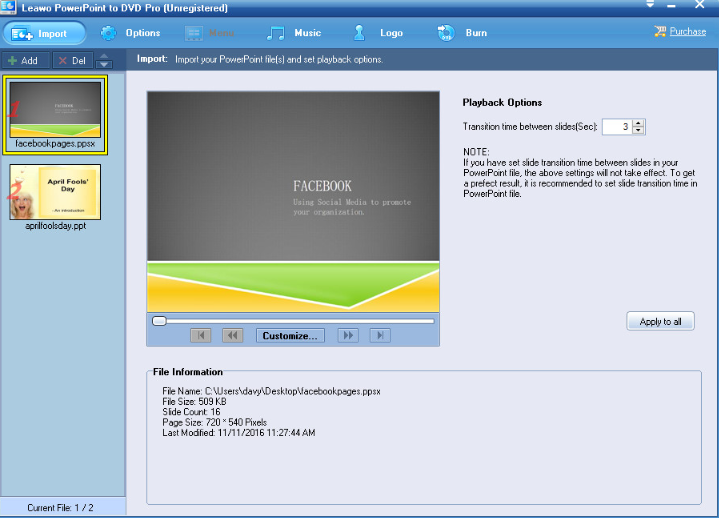
Step 2: Once the files are imported, you can adjust the playback options in the “Playback Options” section. At the left of the playback options section there is a preview window, where you can have a preview of your converted DVD. You can click the “Customize” button at the bottom of the window to access more customization options.
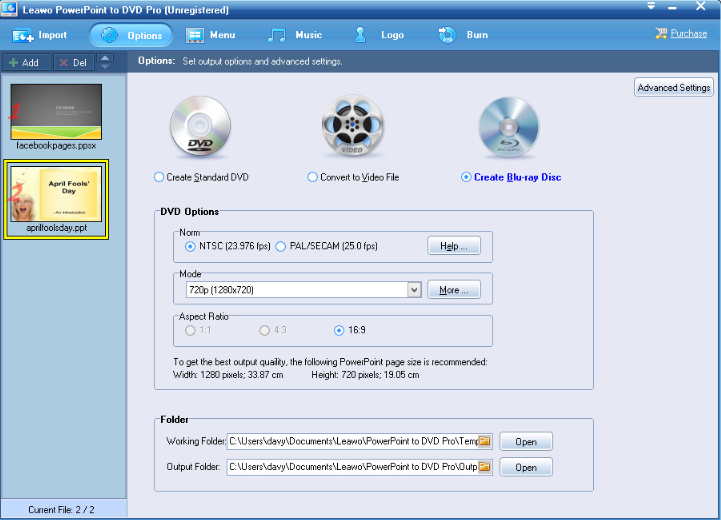
Step 3: By clicking the “Options” button in the toolbar, you can set burning options for your output DVD. You can also design a menu by clicking the “Menu” button in the toolbar, or add music and logo by clicking the corresponding buttons.
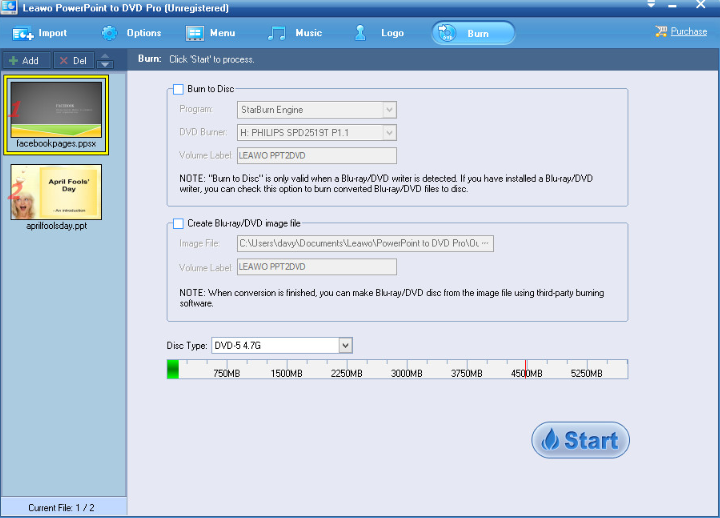
Step 4: Finally, click “Burn” into toolbar, set burning parameters and then click the “Start” button to start burning your PPS file to DVD for QuickTime importing.
Part 5: Import PPS to QuickTime with online converters
In the above we introduced some programs that you can use to convert your PPS file to video or DVD so that you can import them to QuickTime. Actually, there are also some online tools that allow you to convert PowerPoint online without any additional programs installed. With an online PPT converter, you can quickly convert your PPS file to a QuickTime compatible video file as long as the PPT isn’t very big in size. Now I’ll take Mp3care as an example to show you how to use an online converter to convert your PPS to a QuickTime compatible format for importing.
Step 1: Go to the official website of Mp3care.
Step 2: Click the “SELECT PPT FILE” button to select a file for uploading.
Step 3: Once the file is uploaded, choose a transition time from the given options, and click the “CONVERT TO VIDEO” button to start converting. Once the conversion is finished, you can then download the converted video back to your computer.


 Try for Free
 Try for Free

