Last updated on 2021-04-12, by
How to Fix AirDrop Not Working on Mac?
It is quite convenient for you to use AirDrop to share files like photos, movies, songs, etc. among almost all iOS devices. However, this feature on Mac is also temperamental just like all wireless technology. It is sometimes challenging to get your devices to “see” each other. You may have encountered the issue that your AirDrop not working on Mac. In order to troubleshoot this issue, you probably have tried various methods that end in failure. Do not be frustrated. Lucky for you to get here to know several great measures to deal with Mac AirDrop not working issue excellently. Read the guidance below to learn various tricks to clear off the issue completely.
MenuCLOSE
- Check Availability of AirDrop on Mac
- Disable Do Not Disturb to Fix AirDrop Not Working on Mac
- Reconnect Bluetooth & Wi-Fi to Fix AirDrop Not Working on Mac
- Set Mac Discoverable in AirDrop to Everyone
- Disable Block All Incoming Connections in Firewall
- Check for macOS Updates
- Reset All Bluetooth Connections
- Bonus: How to Transfer Files If AirDrop Not Working on Mac?
Method 1: Check Availability of AirDrop on Mac
Since not all Macs are able to use the feature of AirDrop, you’d better check the availability of AirDrop on your Mac when you face the issue of Mac AirDrop not working. The Mac types that support AirDrop are listed below for your reference.
- MacBook Pro from at least late 2008 (except for the late 2008, 17-inch model)
- MacBook Air from at least late 2010
- MacBook from at least late 2008 (except for the white, late 2008 model)
- iMac from at least early 2009
- Mac mini from at least mid-2010
- Mac Pro from early 2009 (specifically the model with the AirPort Extreme card) or mid-2010
- All models of the iMac Pro
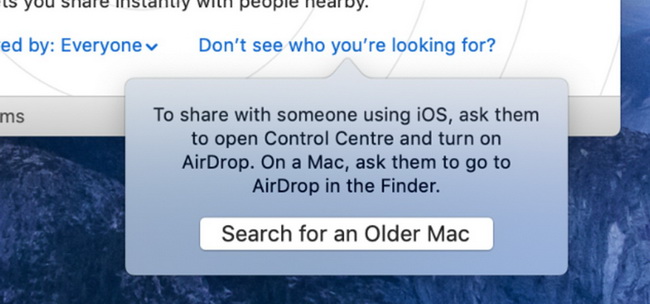
Although there are many Mac models supporting the AirDrop feature, you may also would like to send files to an older Mac that is not compatible with the latest iOS system. In this case, you need to enable the AirDrop on your Mac to search for the older Mac, especially when your Mac was produced before 2012. The brief steps are shown below to help you make it.
Step 1: First, you need to ensure that your older Mac is visible and open the AirDrop window on your older Mac to get ready for receiving files.
Step 2: On your newer Mac, navigate to the Finder and then hit on the button of “AirDrop” in the sidebar.
Step 3: On your newer Mac, navigate to the Finder and then hit on the button of “AirDrop” in the sidebar.
After that, you need to hit on the tab of “Don’t See Who You’re Looking for?” at the bottom of the interface and then hit on the button of “Search for an Older Mac”.
Method 2: Disable Do Not Disturb to Fix AirDrop Not Working on Mac
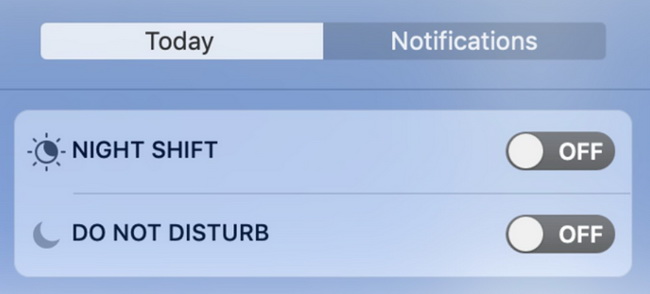
When the Mac AirDrop not working issue occurs, you can check if the Do Not Disturb mode is enabled on your Mac. If so, it will prevent your Mac from using the AirDrop feature properly, for it will make your Mac invisible to other devices. In order to disable the Do Not Disturb mode, you can click the icon of “Notification Center” at the top right corner of your screen. Hit on the “Today” button and then drag up to turn off the mode of “Do Not Disturb”.
Method 3: Reconnect Bluetooth & Wi-Fi to Fix AirDrop Not Working on Mac
You are also recommended coping with the AirDrop not working on Mac error by reconnecting Bluetooth and Wi-Fi. As for how to conduct this method to get your Mac back to normal, you can read the following instructions to assist you.
- Reconnect Bluetooth on Mac
- Reconnect Wi-Fi on Mac
Step 1: Move to menu bar to hit on the icon of Bluetooth and then click on the option of “Turn Bluetooth Off”.
Step 2: Go to the menu bar to hit on the icon of Bluetooth again and then tap on the option of “Turn Bluetooth On” to reconnect Bluetooth easily.
Step 1: Move to menu bar to hit on the icon of Wi-Fi and then click on the option of “Turn Wi-Fi Off”.
Step 2: Go to the menu bar to hit on the icon of Wi-Fi again and then tap on the option of “Turn Wi-Fi On” to reconnect Bluetooth easily.
Method 4: Set Mac Discoverable in AirDrop to Everyone
The improper discoverable settings of AirDrop on your Mac can also lead to the error of Mac AirDrop not working. Therefore, you can try to adjust the discoverable settings to get rid of the issue simply. To do this, you can check out the following content.
Steps:
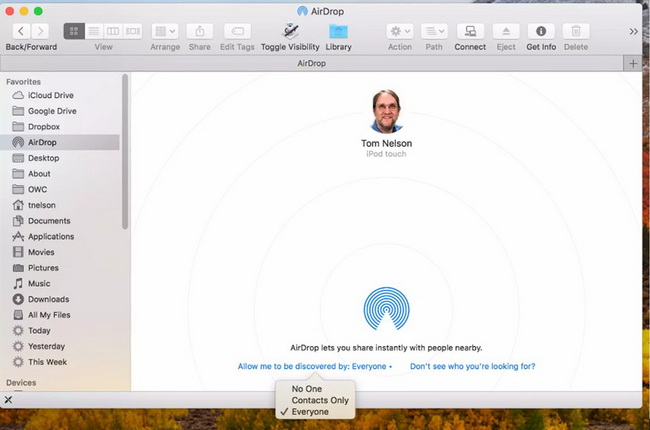
- Go to the sidebar of Finder on your Mac to choose the button of “AirDrop”. Alternatively, you can go to the menu of Finder’s Go to choose “AirDrop” option.
- Afterwards, you need to hit on the option of “Allow me to be discovered by”.
- You will see three discovery settings options shown in the drop-down menu: Everyone, Contacts, and No One.
- Choose “Everyone” as the discovery setting to fix Mac AirDrop not working.
This method can also be used to repair iPhone AirDrop not working issue. You can have a try to verify whether it can work properly after your conduct this measure.
Method 5: Disable Block All Incoming Connections in Firewall
It is also a good idea to handle AirDrop not working on Mac issue by turn off the option of “Block all incoming connections” in your firewall. To realize this goal, there is no need to stop making using of the firewall. You just need a few clicks to adjust the settings in your firewall.
Steps:
- Navigate to the Apple menu and then hit on the option of “System Preferences”.
- Click on “Security & Privacy > Firewall” tab. If your Mac firewall option is on, you can hit the lock button to turn it off at the bottom left corner of the window.
- Enter your administrator password and then navigate to the Firewall Options to uncheck the option of “Block all incoming connections”. Remember to hit on the “OK” button to save you settings and try to AirDrop with your Mac again.
Method 6: Check for macOS Updates
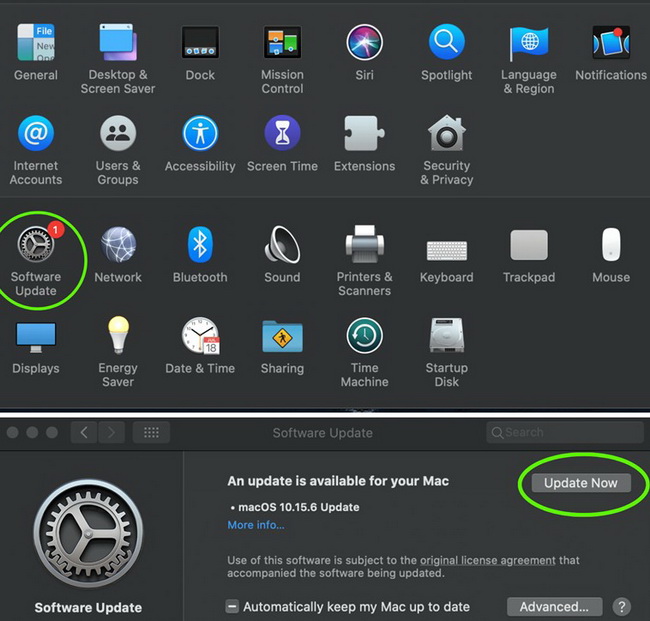
If your Mac system is too outdated, you will also face the error of AirDrop not working on Mac. Therefore, you’d better keep your Mac up to date if you desire to minimize software or system errors. If you are not using the latest version of macOS, you need to go to “System Preferences > Software Update > Update Now” to download the latest version for free and updating your Mac system. If you have something important on your Mac, you’d better back up your Mac files in case they are lost during the updating process.
Method 7: Reset All Bluetooth Connections
It is worth a try to reset all Bluetooth connections to tackle the issue of AirDrop not working on Mac. You should know that your Mac computer saves the Bluetooth connections it knows in a single file. If you remove that files, your Mac will be forced to try to connect new Bluetooth connections, which is likely to fix the issue properly. To achieve this aim, you can continue to read the following content to assist you.
Steps:
- Move to the menu bar of your Mac computer and then hit on the Bluetooth icon.
- Choose the option of “Turn Bluetooth Off”.
- Launch the Finder window and then choose “Go> Go to Folder” option to click on in the menu bar.
- Type or paste the following lines and then click on the Enter key on your keyboard: /Library/Preferences/
- Navigate to the file of “com.apple.Bluetooth.plist” and then remove it with the Delete key.
- Now you can try to switch on Bluetooth feature again to see if your Mac can use AirDrop normally.
Bonus: How to Transfer Files If AirDrop Not Working on Mac?
If you can not fix Mac AirDrop not working with all the solutions provided in the above and you desire to transfer files right away, you can resort to Leawo iTransfer for assistance. This tool is able to transfer various files among iTunes, iOS devices, and Mac computers at ease. Here I would like to take how to transfer movies from iPhone to Mac for instance to explain the way to use this program with just a few clicks.
Step 1. Download Leawo iTransferg
Go to the official website of Leawo iTransfer and then download the Mac version of it to install on your computer for preparation.
-
Leawo iTransfer
- Transfer files among iOS devices, iTunes and PCs with ease.
- 6x faster than iTunes
- Transfer up to 14 kinds of data and files without iTunes.
- Support the latest iOS devices like iPhone 12, iPhone 12 Pro, etc.
- Play back, view, and delete data and files on iOS devices.
- Support Windows & Mac OS
Step 2. Connect iPhone to Computer and Run Leawo iTransfer
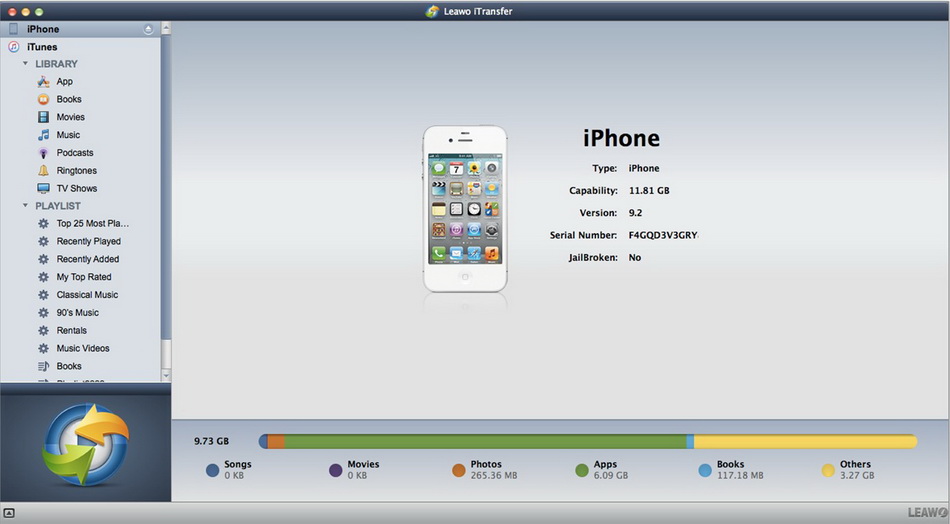
Kick off Leawo iTransfer on your computer and then pug your iPhone into your Mac computer with a proper USB cord. The tool will recognize and show your iPhone info in the interface in detail.
Step 3. Choose Movies to Transfer
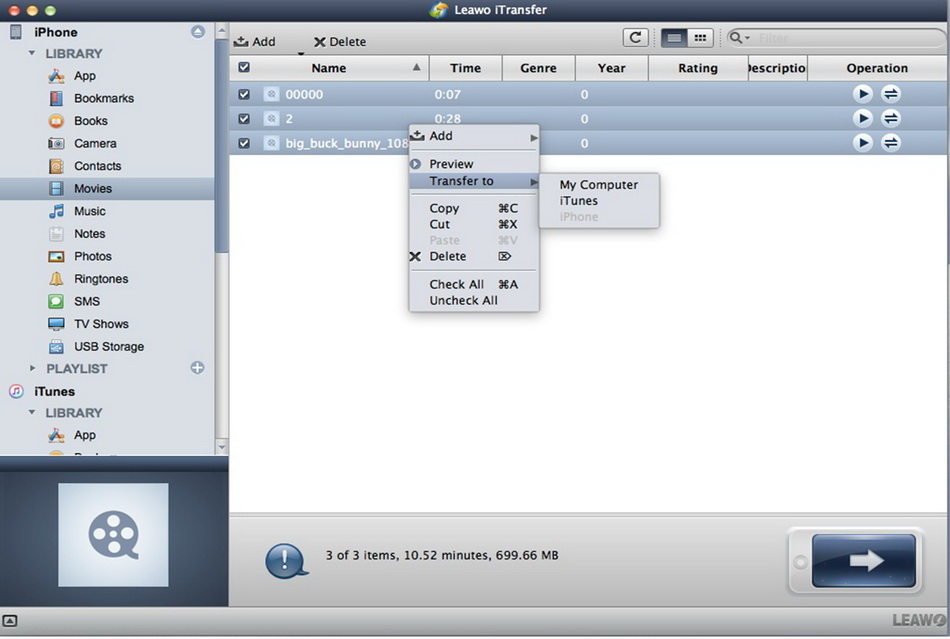
Hit on your iPhone icon and then navigate to “LIBRARY> Movies” tab in the left column. All your iPhone videos will be shown in the right part of the interface. Choose the videos you desire to transfer to Mac and then hit on the transfer button at the bottom right corner of the window. Afterwards, hit on “Transfer to > My Computer” from the pop-up menu.
Step 4. Set Output Directory and Transfer to Computer
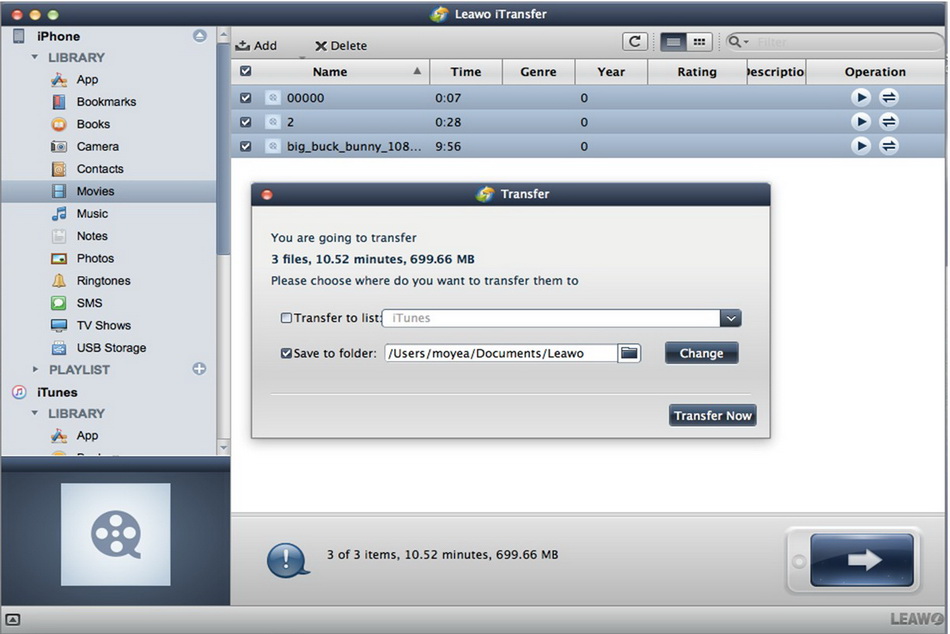
In the panel that shows up, you need to check the option of “Save to folder” and click on the “Change” button to choose a suitable folder to store the iPhone videos transferred to your Mac computer. In the end, hit on the “Transfer Now” button to initiate the process to transfer videos from iPhone to Mac. In a couple of seconds, your iPhone videos will be accessible on your Mac computer local folder.
You can also use the “Add” button to transfer movies from Mac to your iPhone for enjoying the videos when you are on the go. Leawo iTransfer is really a wonderful alternative of AirDrop. You will be satisfied with this tool once you use it for transferring files for a time.


 Try for Free
 Try for Free

