Last updated on 2020-12-07, by
How to Digitize and Upload Your DVD Collections to Cloud
“What’s the best solution to upload DVD to cloud service? I have quite a few DVD discs of my favorite movies, and one of them just got broken. I spent quite a lot of dollars to purchase these DVD discs. Therefore every disc is much precious to me. I’m planning to digitize these DVD discs onto Google Cloud. Then I don’t need to worry about the DVD disc damage. However, I don’t know what to do. How can I digitize DVD discs to cloud service? What is the best DVD to cloud digitizer tool? Please help me with this.”
DVD has once been the dominant in home theatre system after defeating VHS. However, with the development of home entertainment system, DVD players have been gradually disappearing in most markets and cloud services have been rising recently years. Cloud services enable you to stream movies at your choice anytime you want on laptops, iPhone, iPad, Android phones and tablets, HDTVs. Your DVD collections would be much safer by uploading to cloud services. If you are looking for solutions to help you digitize and upload DVD collections to cloud services, this guide would be helpful. We will show you how to digitize your DVD collections, and then upload digitized DVD movies to cloud services.
Menu
Part 1: Digitize your DVD with Best DVD Converter - Leawo DVD Ripper
To digitize and upload DVD movies to cloud services, you need firstly digitize and convert DVD movies to digital video files. A professional DVD to cloud converter is required for you to convert DVD to cloud videos.
Leawo DVD Ripper is the right DVD to cloud converter tool you should get. As a professional DVD ripping software tool, Leawo DVD Ripper could convert DVD to video and extract audio off DVD movies to save in 180+ formats like MP4, MPEG, WMV, MOV, MKV, FLV, RMVB, AAC, AC3, AMR, M4A, MP3, etc. for multiple media players and portable devices like Apple iOS devices (iPhone, iPad, iPod, Apple TV, etc.), Android mobile phones and tablets, Windows phones, Sony Walkman, PS4, Blackberry devices, etc. By converting DVD movies to digital video files in various formats, you could easily upload the converted DVD movies to various cloud services as you like.
The most advantageous feature of Leawo DVD Ripper is that it could decrypt both commercial CSS-DVD discs and non-commercial homemade DVD discs, and remove DVD disc region restrictions. This is quite useful since nowadays most DVD discs are commercial, copy protected from unauthorized use and playback. But you should own the use of the discs you have purchased, as long as not for business uses.
Besides, with Leawo DVD Ripper, you could even freely choose subtitles from source DVD movies for converting, edit DVD movies and create 3D movies out of 2D DVD movies. It provides great DVD to video conversion experience.
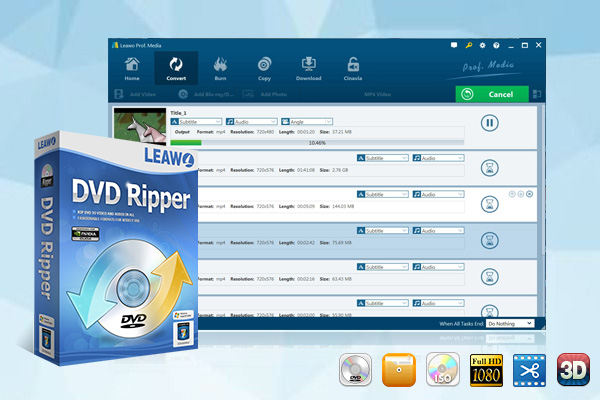
-
Leawo DVD Ripper
☉ Convert DVD to video/audio files like MKV, MP4, AVI, FLV, RMVB, etc
☉ Convert DVD to iPad, iPhone, Android devices
☉ Edit DVD video files with built-in video editor
☉ Add 3D effect with built-in 3D movie creator
☉ Selectable subtitles and audio tracks from source DVD movies for output videos
Download and install Leawo DVD Ripper on your computer. Meanwhile, get source DVD movies ready for converting. Follow the below steps to learn how to digitize and convert DVD for cloud services.
Note:
Leawo DVD Ripper is a module built into Leawo Prof. Media.
Step 1: Enter DVD Ripper module
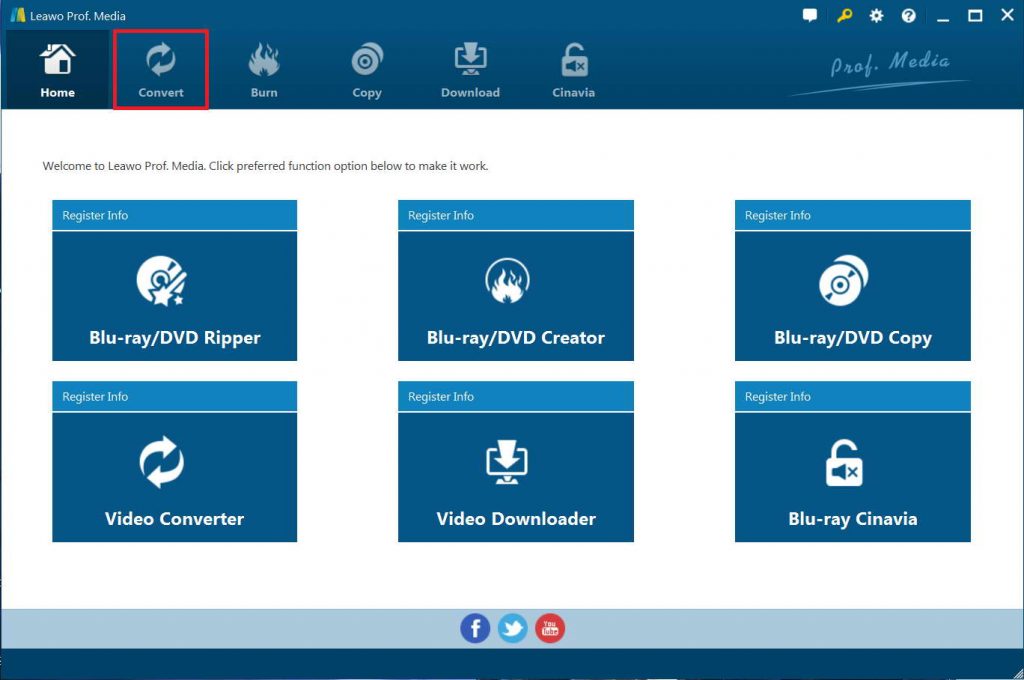
Kick off Leawo Prof. Media, and then click “Convert” button on the sub-menu to enter the “Convert” interface. You could also click the “Blu-ray/DVD Ripper” option to enter the DVD Ripper module.
Step 2: Import source DVD files
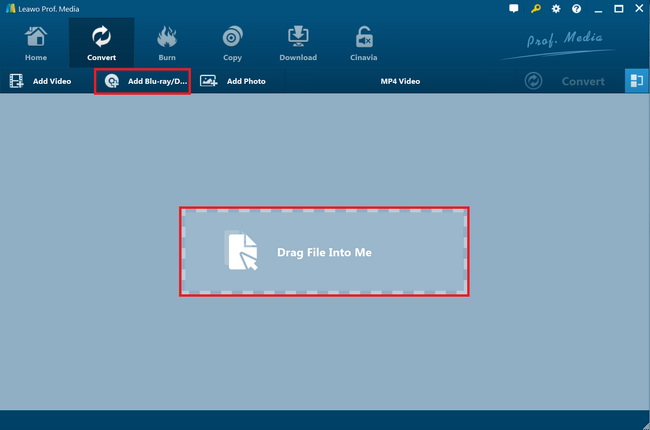
On the “Convert” interface, click “Add Blu-ray/DVD” to import DVD disc, folder, or ISO image file. To rip and convert DVD disc for cloud services, insert source DVD disc into the computer DVD drive and then choose “Add from CD-ROM” option to load it for converting.
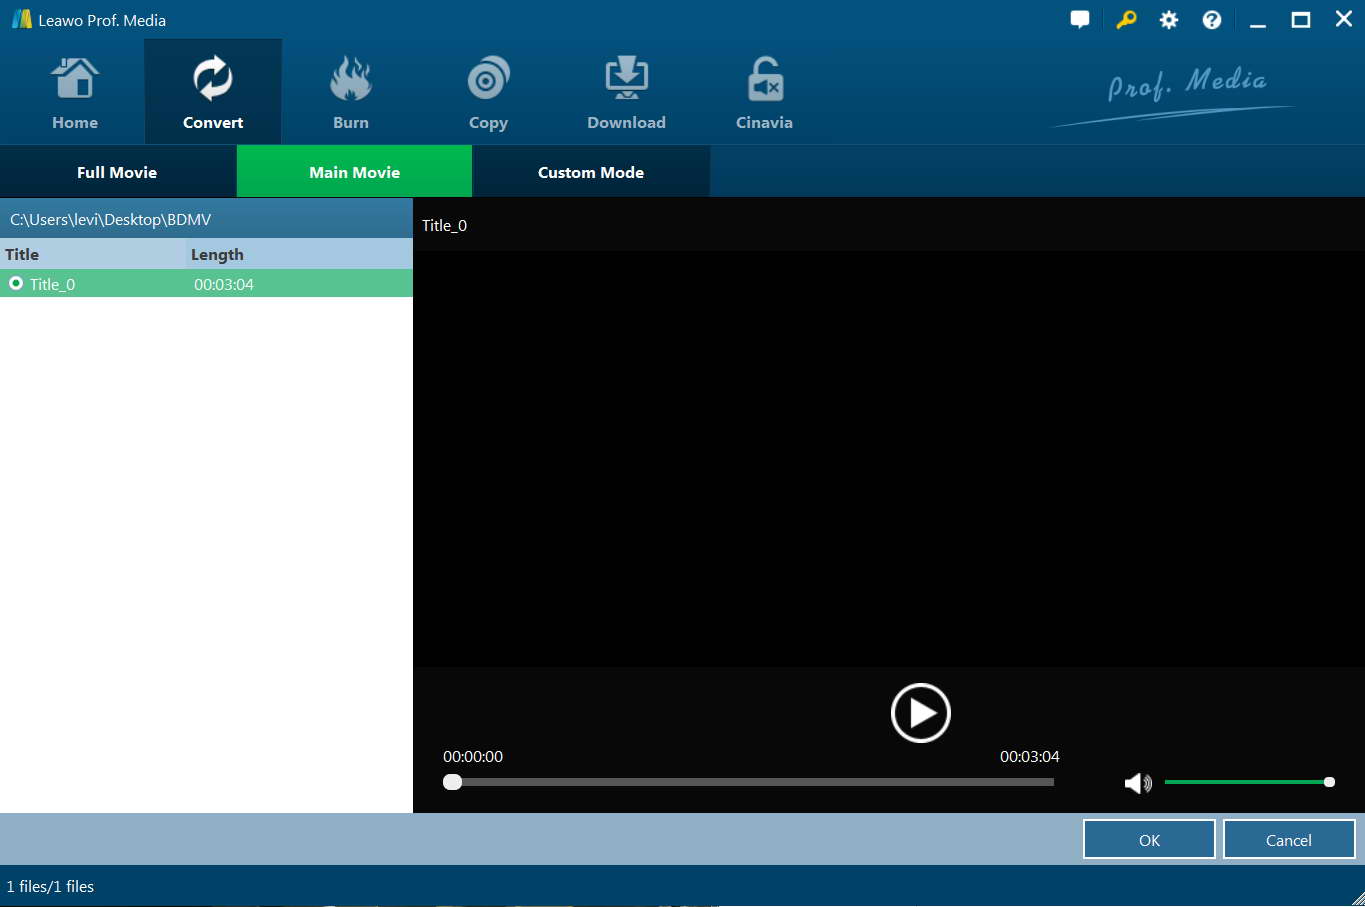
Once DVD content is selected, you will be provided three options for you to import DVD file(s): Full Movie, Main Movie and Custom Mode. Full Movie allows you to import all titles, and Main Movie only imports the longest title by default while you can freely choose titles for importing under Custom Mode. Just select the one that meets your needs.
Once source files are imported, you can preview source files via the inbuilt media player, select subtitles and audio tracks, edit source DVD files, etc.
Step 3: Choose output profile
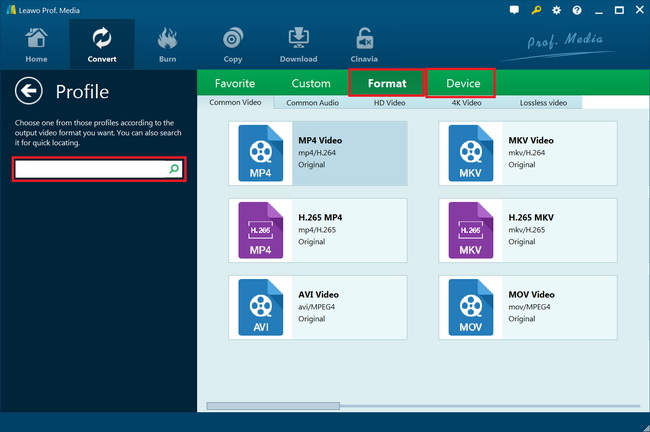
Click the box next to “Add Photo” button, and then on the drop-down panel click “Change” to enter the “Profile” panel. You can choose output profile under “Format” or “Device” group. Since you need to upload converted DVD movies to cloud services, MP4 Video is strongly recommended due to its wide popularity. Of course, you could choose others according to your needs.
Step 4: Set video and audio parameters (optional)
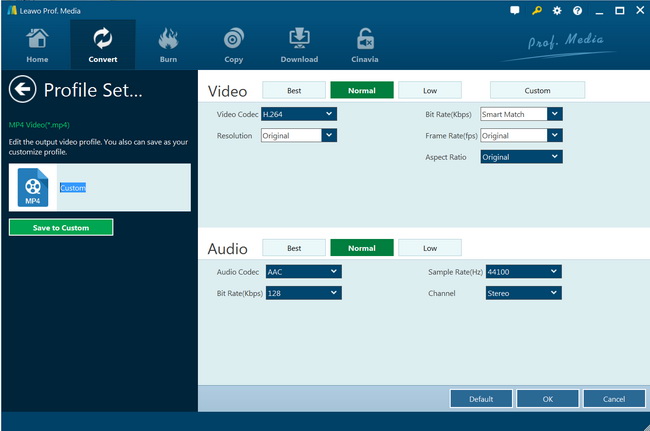
Leawo DVD Ripper allows you to change the video and audio parameters of selected profile like Video Codec, Bit Rate, Resolution, Frame Rate, Aspect Ratio, Audio Codec, Channel, Sample Rate, etc. You could enter the Profile Settings panel by clicking the same drop-down box and then clicking “Edit” option instead of “Change” option.
Step 5: Set output directory
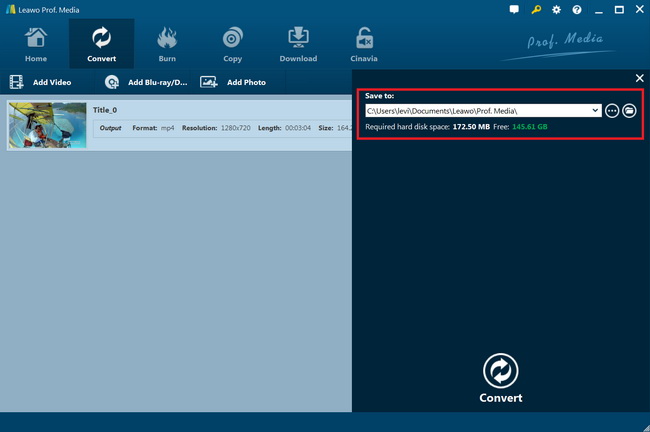
After profile settings, return to the main interface and then click the green “Convert” button to set output directory for saving the output files in the “Save to” box.
Step 6: Convert DVD to cloud service videos
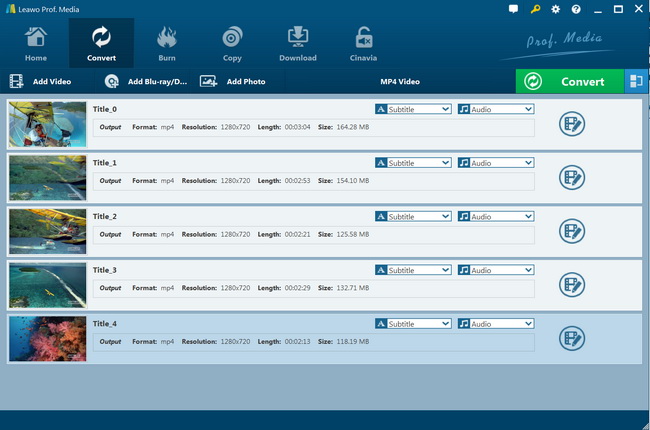
Click the “Convert” button at the bottom to start converting DVD movies to videos for cloud services.
You then only need to wait for the conversion to complete. It won’t take you long to get the results. In this way, you could actually convert DVD to MP4, AVI, MKV, iMovie, iOS devices, Microsoft devices, etc. Get Leawo DVD Ripper for Mac if you are having a Mac computer to convert DVD movies for cloud services.
Part 2: How to Upload Converted DVD to Google Cloud
After converting DVD movies to video files, now we need to upload the converted DVD movies to various cloud services. Google Cloud is one of the most popular online cloud services. Google Drive gives you 15 gigabytes (15GB) of free storage space to upload files from your computer and store them in the cloud.
You could follow the below steps to learn how to upload video files to Google Drive in detail:
- Log in your Google Drive with account and password.
- From Google Drive, locate and select the “New” button, then select “File upload“ option.
- Locate and select the file(s) you want to upload, then click “Open“ button.
- The file(s) will be uploaded to your Google Drive.
- Depending on your browser and operating system, you may be able to upload files by clicking and dragging a file from your computer into your Google Drive.
Or, Google Drive enables you to directly upload an entire folder. You could follow the below steps to learn how to upload converted DVD movie folder to Google Drive:
- Click the New button, then select "Folder upload" option.
- Locate and select the folder you want to upload, then click "OK" button.
- The folder and the files within it will be uploaded to your Google Drive.
However, you need to know that to upload folder to Google Drive, you need to access Google Drive through Google Chrome.
Part 3. How to Upload Converted DVD to Amazon Cloud
Amazon Cloud, officially Amazon Cloud Services, is a platform that offers flexible, reliable, scalable, easy-to-use and cost-effective cloud computing solutions. AWS is a comprehensive, easy to use computing platform offered Amazon. The platform is developed with a combination of infrastructure as a service (IaaS), platform as a service (PaaS) and packaged software as a service (SaaS) offerings. Amazon Cloud doesn’t accept DVDs. But after converting DVD movies to digital video files, you will be able to upload converted DVD movies to Amazon Cloud for backup.
Check the below steps to learn how to upload converted DVD movies to Amazon Cloud service in detail:
- Go to Amazon Cloud Drive website and sign in.
- Click the “Photos & Videos” tab.
- Click “Upload” button and follow onscreen instructions to transfer and upload DVD copies to Amazon Cloud from the computer, or directly drag and drop files into the window.
In this way, you could upload various media files to Amazon Cloud as long as your media files are accepted by Amazon Cloud service platform.
Part 4. Other Best Cloud Storage Services 2020
Besides Google Cloud and Amazon Cloud, there are also other online cloud storage services. Here in the below content we have collected some other best cloud storage services by 2020.
Microsoft OneDrive
OneDrive is Microsoft’s cloud storage service solution that is an obvious choice if you and your team are Windows users. There are great (but obvious) features such as easy integration with Outlook and Microsoft devices. But there are also unique features like automated backups of your PC and document scanning.
Features
- Secure file sharing
- Access expiration dates
- Accessing files on the cloud without having to download
- Offline access
- Mentions, comments, and tasks
- File folder and access controls
- Password protection
- Multi-page scanning
pCloud
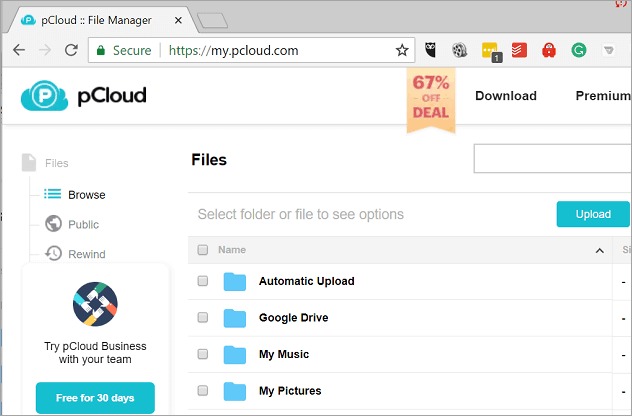
pCloud will allow you to store your files and get them accessible on all devices. Sharing and collaboration on files will be easier with pCloud. Also, private files can be encrypted and kept confidential here.
Features:
- For data security, it provides TLS/SSL encryption.
- With pCloud, file management can be done from the web, desktop, or mobiles.
- It provides multiple file-sharing options.
- For some specific period of time, it saves versions of files.
- You can back up your photos from social media like Facebook, Instagram, and Picasa.
Cons:
- It applies bandwidth limits.
Dropbox
Dropbox, a pioneer among cloud storage and syncing services, offers synced desktop folders for anywhere-access. Though it's comparatively pricey, unique tools like its Paper, Showcase, and HelloSign digital signature features distinguish Dropbox. In general, with cloud services available directly from within Apple, Google, and Microsoft's platforms, we're skeptical about the need for third-party cloud storage, since the built-in options are so simple to use and tightly integrated into the operating systems. Dropbox is still an excellent choice for online storage, however, especially for those who'd rather not put all their data eggs into the dominant tech players' baskets.
PROS
- Apps for just about every operating system
- Many integrations in Apps Center
- Supports collaboration
- Good features for Pro users
- Digital signatures
CONS
- Free version is skimpy on storage
- Expensive paid accounts


 Try for Free
 Try for Free

