If you are not clear on the photo sharing functions of iDevices, you can check out this guidance to know what is Photo Stream and how to share Photo Stream. This tutorial will tell you the detailed information of the photo sharing features and will show you how to turn on My Photo Stream on iOS, Mac and Windows respectively. This guidance will also introduce iTransfer to you to help you to share photos instead of Photo Stream. Let’s continue to read the following contents.
Part 1: Introduction to My Photo Stream
This part will show you what is Photo Stream on iPhone and other iDevices, what is iCloud photo sharing, the differences between iCloud photo library and My Photo Stream. You will also know what is shared Photo Stream and what are the limits of My Photo Stream.
1.1 What is Photo Stream
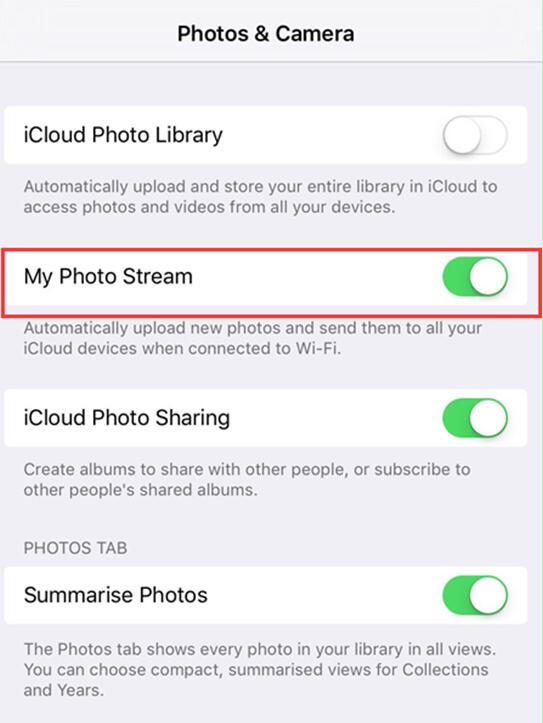
As for the question of “what is Photo Stream on iPhone and other iOS devices”, you can read the contents in this part. My Photo Stream is a function on iDevices which enables you to share the pictures you have taken recently among all the other iDevices. This feature allows you to take a picture on one iDevice and check it on the other iDevice without the trouble of copying the picture manually by yourself. When you have turned on “My Photo Stream” and then you take a picture, the picture will be uploaded to the cloud and then downloaded to the other iDevices automatically.
1.2 What is iCloud Photo Sharing
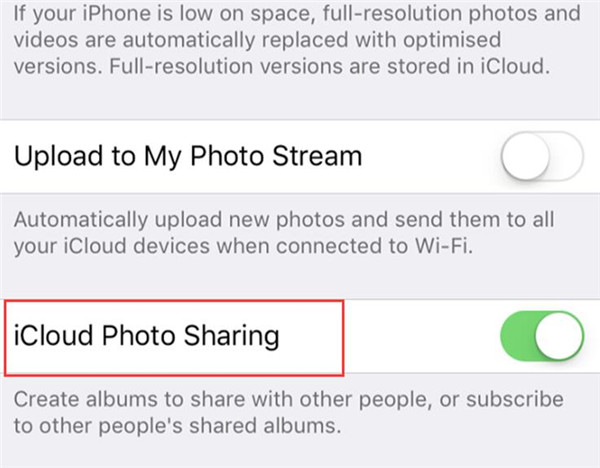
iCloud Photo Sharing is an old Photo Stream Sharing feature developed by Apple Company. You can enable this feature by the settings of iCloud in the Settings app on iDevices. It is just in the “Photos” area of the settings of iCloud, which is under the option of “My Photo Stream”. You can use Photos app to share any picture by clicking on the share icon and then selecting “iCloud Photo Sharing”.
1.3 The Differences between iCloud Photo Library and My Photo Stream
After you have known the answer to “what is Photo Stream on iPhone and other iOS devices”, let’s begin to analyze the differences between iCloud Photo Library and My Photo Stream. The two features are fairly similar. Therefore, I will break down the differences for you to understand which fits you best. You should know that both features can not offer you a complete backup. You should back up your files in case you need with other effective solutions.
iCloud Photo Library
a) It is an easy online backup of all pictures taken on iPhone or iPad, which can back up all pictures and videos to your iCloud account. You need to make sure your iPhone or iPad is connected to good Wi-Fi network when you use this feature.
b) It can perform across iPhone, iPad, Mac and iCloud.com automatically, which organizes the pictures in the order of date. The pictures can be checked on any device when the iCloud Photo Library is toggled on. You should make sure there is enough physical storage space for you to employ.
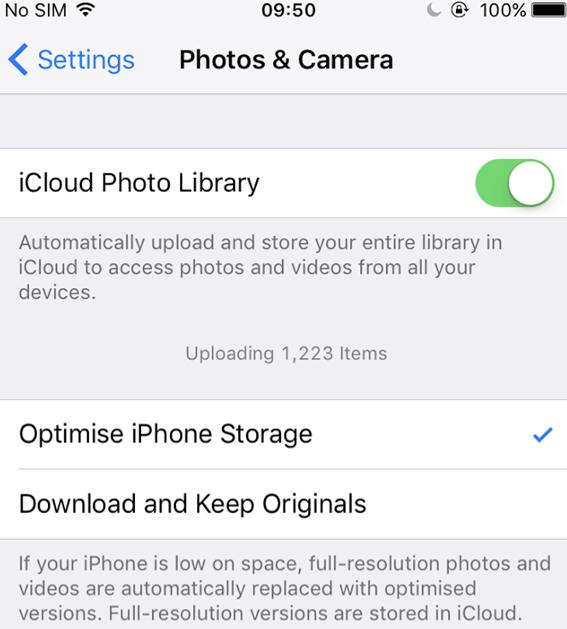
c) It can save and store all files in full resolution, which needs to be toggled on manually on iDevices. For this purpose, you need to head to “Settings > Photos & Camera > iCloud Photo Library”
My Photo Stream
a) It can sync all the pictures taken on iDevices to the folder of My Photo Stream. It can not sync the video files shot on iOS devices. The recent photos stored by it can reach 1000 or can last 30 days.
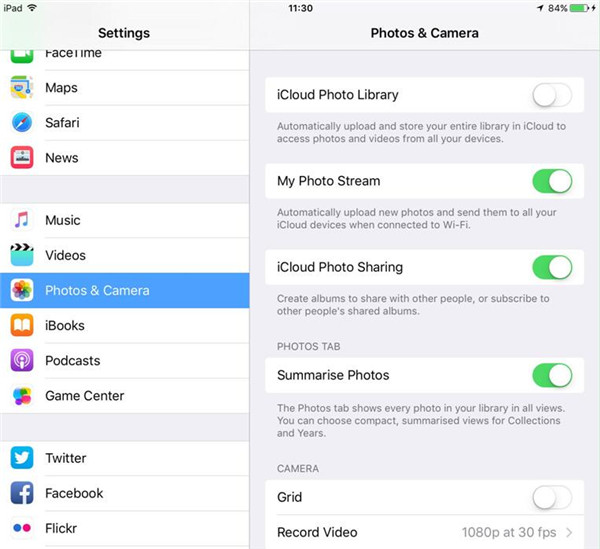
b) It does not take up the storage space of iCloud, which can sync across iPhone, iPad and Mac and iCloud.com. In order to turn on My Photo Stream, you need to navigate to “Settings > Photos & Camera > My Photo Stream”.
1.4 What is Shared Photo Stream
If you want to know “what is Shared Photo Stream”, you can check out this part in this guidance. “Shared Photo Stream” is introduced after My Photo Stream by Apple Company. It allows you to select which pictures to share to the private Photo Streams, and it will not upload every single picture taken on your iDevices to the private Photo Streams. This feature enables you to pick up your favorite or necessary pictures and select who can check out these pictures.
1.5 Limits of My Photo Stream
As you have known “What is Photo Stream on iPhone”, let’s continue to look at the limits of My Photo Stream.
a) There are limits on the uploading of My Photo Stream. The photo upload to My Photo Stream per hour should not exceed 1000. The maximum number of the photo upload to My Photo Stream per day is 10,000. The photo upload to My Photo Stream per month is limited to 25,000. If you exceed the photo upload limits, your iDevices will pause temporarily to upload photos to My Photo Stream, and a dialog will show on your iDevices. When you do not exceed the limit any more, the photo upload will resume automatically.
b) Pictures stored in My Photo Stream can exist at iCloud for 30 days. 30 days later, the older pictures will be removed from My Photo Stream.
c) On iDevices, the last 1000 items are stored in the album of My Photo Stream.
d) If you want to keep a picture on an iDevice before it is removed, you need to transfer it to your Camera Roll by choosing the picture, clicking on the share icon and selecting “Save Image”.
e) It only can manage pictures. As for the video files, you need to use other methods to help you instead of My Photo Stream.
Part 2: How to Turn On My Photo Stream on iOS, Mac and Windows
As you have known what is Photo Stream on iPhone and what is shared Photo Stream, let’s go to check out how to turn on My Photo Stream on iOS, Mac and Windows respectively.
On iOS Device
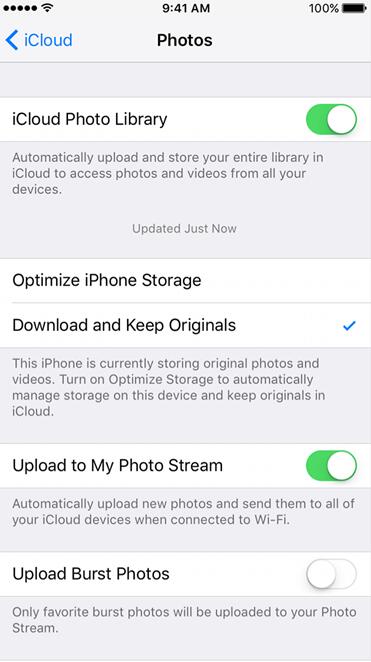
1. If your iOS device system is 10.3 or later, you can go to “Settings > [your name] > iCloud > Photos” and then click on the panel of “My Photo Stream” to enable it.
2. For the earlier systems of iOS, you need to click on “Settings > iCloud > Photos” and then tap the option of “My Photo Stream” to turn it on.
Note: The steps to solve how to turn off Photo Stream is just the same as the contents shown above. You just need to make sure “My Photo Stream” is on the off state.
On Mac
1. If your computer is Mac, you need to navigate to the Apple menu and then select “System Preferences”.
2. Afterwards, click on “iCloud > Photos” panel. Tap the “Options” button and check the empty box next to “My Photo Stream”.
3. Finally you need click on the button of “Done” to save your settings. As for how to turn off Photo Stream, you need to make sure the box next to “My Photo Stream” is empty.
On Windows PC
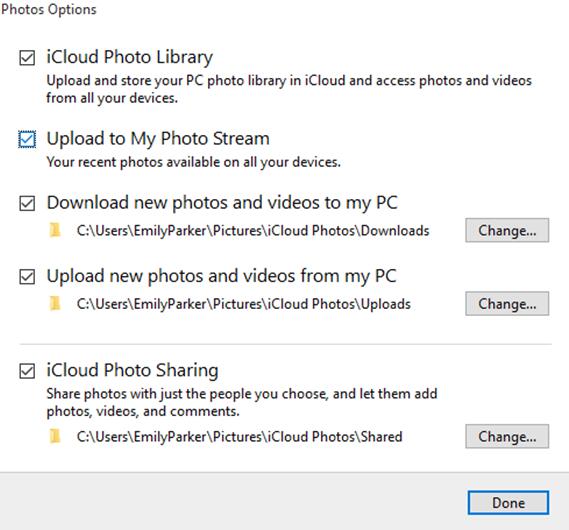
You can use “My Photo Stream” to share Photo Stream for your convenience. Now that you have known how to turn on it on iOS devices and Mac, let’s continue to check out how to make it on Windows PC.
1. First you need to download and install iCloud for Windows. Afterwards, you can run it on your Windows computer.
2. Click on “Options” button next to the panel of “Photos”. After that, check “My Photo Stream”.
3. Finally, you need to click on “Done > Apply” to save your changes to realize your goal of turning on “My Photo Stream”. If you want to know how to turn off Photo Stream, you can also refer to the steps above and make sure there is no check mark in the box next to “My Photo Stream”.
As you can see, the problems of how to turn off Photo Stream and how to turn on Photo Stream are not tough. You can refer to the steps above to help you turn on Photo Stream easily with a few clicks.
Part 3: How to Share Photos with iTransfer Instead of Photo Stream
Part 1 and Part 2 have told you what is Photo Stream and what is shared Photo Stream, and how to turn off Photo Stream and the steps to turn on Photo Stream. This part will show you how to use Leawo iTransfer to transfer photos for sharing instead of using shared Photo Stream or My Photo Stream. First you need to download and install iTransfer on your computer to begin to share photos with this 3rd-party tool. Here I would like to take iPad to computer photo transfer for instance.
Leawo iTransfer
☉ Transfer files among iOS devices, iTunes and PCs with ease.
☉ Transfer up to 14 kinds of data and files without iTunes.
☉ Support the latest iOS devices like iPhone 7, iPhone 7 Plus, etc.
☉ Play back, view, and delete data and files on iOS devices.
1. Launch iTransfer and Connect iPad to PC
Run iTransfer and then find the proper USB cable to connect iPad to computer. It will detect your iPad information automatically to prepare to share photos with iTransfer.
2. Choose Files to Transfer
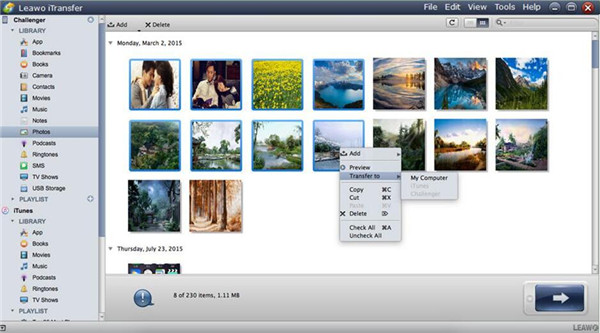
Afterwards, click on “iPad icon > LIBRARY > Photos” to continue to share photos from iPad to computer. Select the photos in the right side of the window and right-click on one picture. Choose “Transfer to > My Computer”. After that, you need to click on “Change” to set the output folder on your computer to save the photos in the next panel. Afterwards, tap “Transfer Now” to initiate the process to share photos from iPad to computer. In a few minutes, the iPad photos will be available on computer.
iTransfer is a professional tool to share photos or other 11 kinds of files among computers, iTunes and iDevices. It is quite effective to solve the transfer problems.

