“DVD Not finalized on DVD recorder: Hello, I hope someone can help. A while ago I connected my camcorder to my DVD recorder and copied my camcorder videos over to the DVD, however I did not finalize them and have since got rid of the DVD recorder I used to record to. Now I have found that I cannot watch them on another DVD player or any other device, is there a way I can finalize them or play them or retrieve the files. I cannot remember the make of my old DVD recorder. I hope someone can help.”
If you are looking for a solution for DVD not finalized on DVD recorder, this page would be helpful to you. We here would recommend you several effective solutions to help you fix DVD not finalized on DVD recorder and more effective solution to help you finalize a DVD from your camcorder videos. Just check the below content to learn more.
Part 1: Possible Reasons that Cause Unfinalized DVD
DVD recorders help use directly burn and finalize DVD discs when the camcorders are connected and a blank writable DVD disc is inserted to the DVD recorder. However, there would happen DVD not finalized on DVD recorder issues now and then.
There are quite a lot of possible reasons that cause unfinalized DVD on DVD recorder. Here we would like to name a few below:
- DVD has not enough storage: A disc will not finalize if there is not enough space left on the disc. Discs that are too full cannot be finalized.
- DVD disc is not speedy enough and not compatible with the DVD recorder: The DVD disc you are using might not be as speedy as that is compatible for use with your DVD recorder. For example some DVD recorders may be compatible with discs that are rated 8x or slower only. Consult the instruction manual of the DVD recorder for further information.
- For whatever reason you have a disc which a reading device or software is specifically saying is unfinalized.
- The finalization process was (or you suspect it was) begun on a disc and for some reason failed.
- In the case of some camcorders or DVD recorders, the disc was still in the process of having content added when for some reason the disc was removed and finalization was never attempted.
- The DVD recorder is broken for finalizing DVD. This is kind of hardware issues.
Part 2: How to Solve DVD not Finalized on DVD Recorder
Whatever the reason is, there have to be solutions to help solve DVD not finalized on DVD recorder. You could actually refer to the below solutions to see whether or not the issue could be fixed.
- Switch to another DVD disc that has enough storage and is speedy enough for data transfer and finalizing.
- Switch to another DVD recorder to check if it’s the DVD recorder hardware issue that results in DVD not finalized on DVD recorder.
- Restart your DVD recorder and reinsert the DVD disc for finalizing.
- Make sure every setting and step is correct for finalizing DVD discs on DVD recorder.
- Turn to some DVD finalizing services online or local to complete the DVD finalizing other than using DVD recorder.
- Switch to another DVD burner solution that could help you convert, burn and finalize DVD other than using DVD recorder.
Actually, the last solution has been quite widely used by most people who would like to convert, burn and finalize their video files to DVD discs, for creating either playable DVD discs or data DVD discs.
Part 3. Fix Unfinalized DVD with IsoBuster
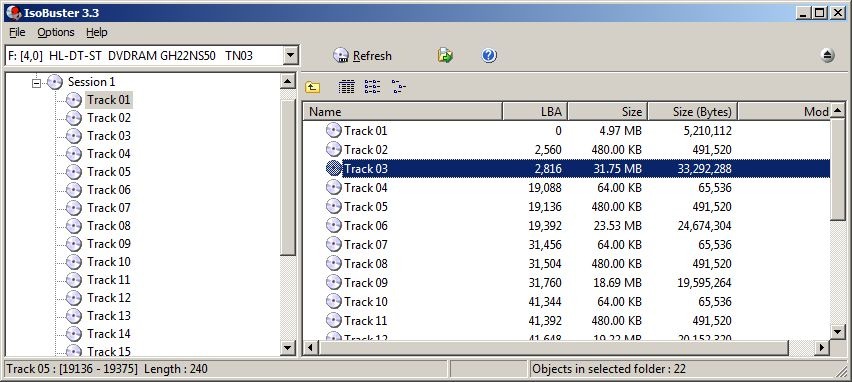
As mentioned above, you could get an DVD recorder alternative to help you fix unfinalized DVD issue. IsoBuster is a top choice for you to do this. IsoBuster is designed to help you recover data from just about anywhere, including hard drives, Flash drives, and discs. While it isn't pretty, it did prove effective in recovering usable data. It has the ability to access "deleted" data on multisession optical discs, and allows users to access disc images (including ISO, BIN and NRG) and to extract files in the same way that they would from a ZIP archive. IsoBuster is also often used by law enforcement and data forensics experts.
Follow the below steps to learn how to fix unfinalized DVD with IsoBuster in detail:
- Download and install IsoBuster on your computer.
- Start Isobuster then load the disc.
- When Isobuster has detected the files on the disc run the Find Missing Files and Folders option under the File menu.
- You will now have an entry on the left hand column of Files and folders found by their signature.
- Select that, then go to File, Files found via their signature then for a Data DVD choose Extract files found via their signature. Choose a location and let it run.
- For a Video DVD or disc choose Extract but filter only MPEG frames.
- You will now have all the files where you selected them to go.
In the case of a video DVD you may end up with files having the .VOB extension. These are the MPEG files from your disc, wrapped in the VOB container. They can then be imported into a video editing program using the “Import DVD/VR” function or can be read by most DVD burning software.
In the case of a Data DVD, the files will usually be intact and have the appropriate extension.
Part 4. Best DVD Creator to Finalize a DVD - Leawo DVD Creator
If you want to finalize a DVD, you could also try to use some professional DVD burner software tools that could help you do exactly what DVD recorders could do. Leawo DVD Creator is exactly the right DVD recorder alternative for you to use for finalizing a DVD. It is the best DVD finalizer software tool that could handle all kinds of video to DVD burning in simple clicks at high speed. It is simple to use but versatile. It could help you burn all sorts of videos into DVD like MP4 to DVD, WMV to DVD, MKV to DVD, FLV to DVD, etc. With Leawo DVD Creator, you could convert and burn video files to DVD disc, folder and/or ISO image files in either NTSC or PAL video mode.
Still, besides finalizing your video files to DVD, you could also use Leawo DVD Creator to convert and burn photos to DVD slideshow in DVD-9 or DVD-5 disc type. Besides, it enables you to select preset disc menu, design disc menu, edit video files before burning to DVD, as well as create 3D content and more.
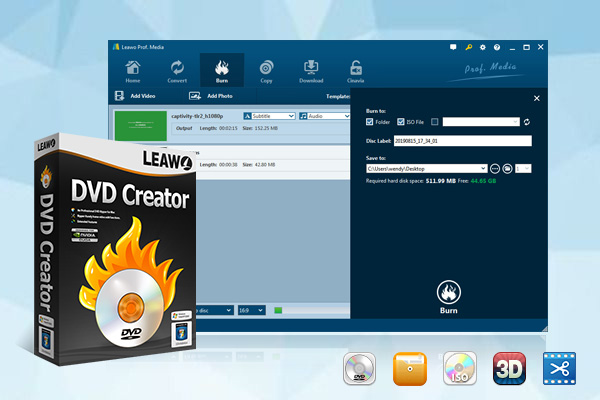
Download and install Leawo DVD Creator on your computer. Meanwhile, transfer the video files you want to finalize to DVD to your computer for finalizing. Insert a blank writable DVD disc into the DVD recorder drive.
-
Leawo DVD Creator
☉ Convert videos like MP4, AVI, MKV to DVD format fast.
☉ Create DVD-5, DVD-9 disc, folder or ISO image without quality loss.
☉ 1-click operation to create photo slideshows and burn to DVD.
☉ Easily editable effects, 2D to 3D conversion support.
☉ Built-in menu templates and edit disc menu with personal preferences.
☉ Built-in menu templates and edit disc menu with personal preferences.
Note: Leawo DVD Creator is a module in Leawo Prof. Media.
Follow the below step-by-step guide to learn how to finalize DVD with Leawo DVD Creator.
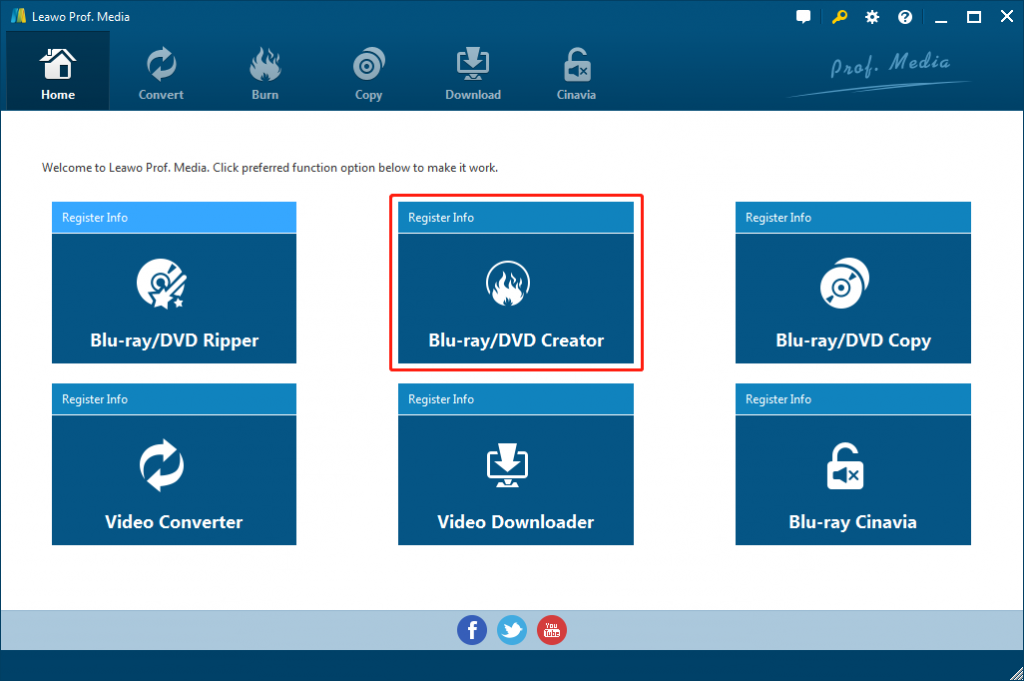
Step 1: Enter DVD Creator module.
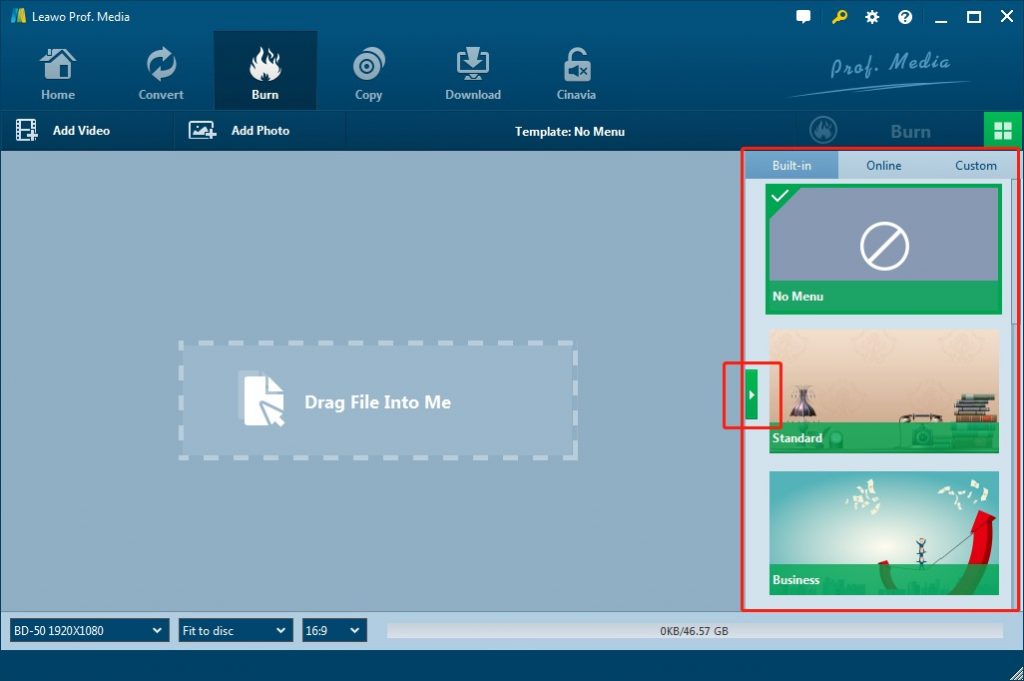
Open Prof. Media, and then click the “Blu-ray/DVD Creator” tab or the “Burn” menu to enter the DVD Creator module.
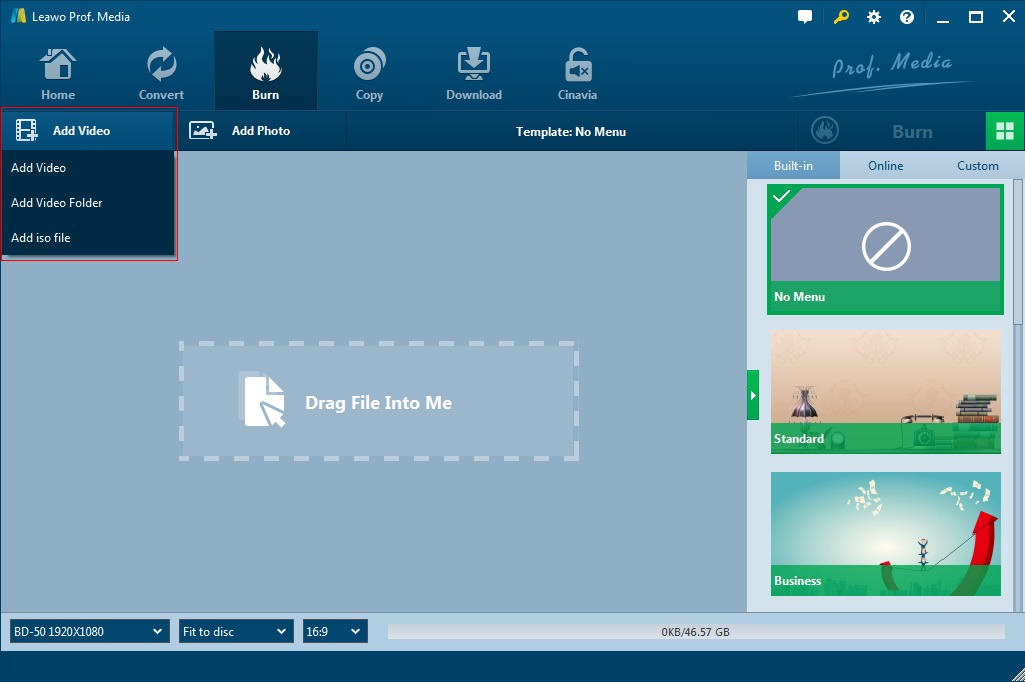
Step 2: Add Source Video Files
To add source video to the program, directly drag and drop the source video file to the interface or select “Add Video” to select a single video or multiple videos or even a video folder from your computer.
Step 3: Output Settings
Choose disc type between DVD-9, DVD-5 and choose the video aspect ratio between 4:3 and 16:9. Set quality to "Fit to disc" to best fit the video. The size of the output file will be shown on this indicator. You could also select subtitles and audio tracks here.
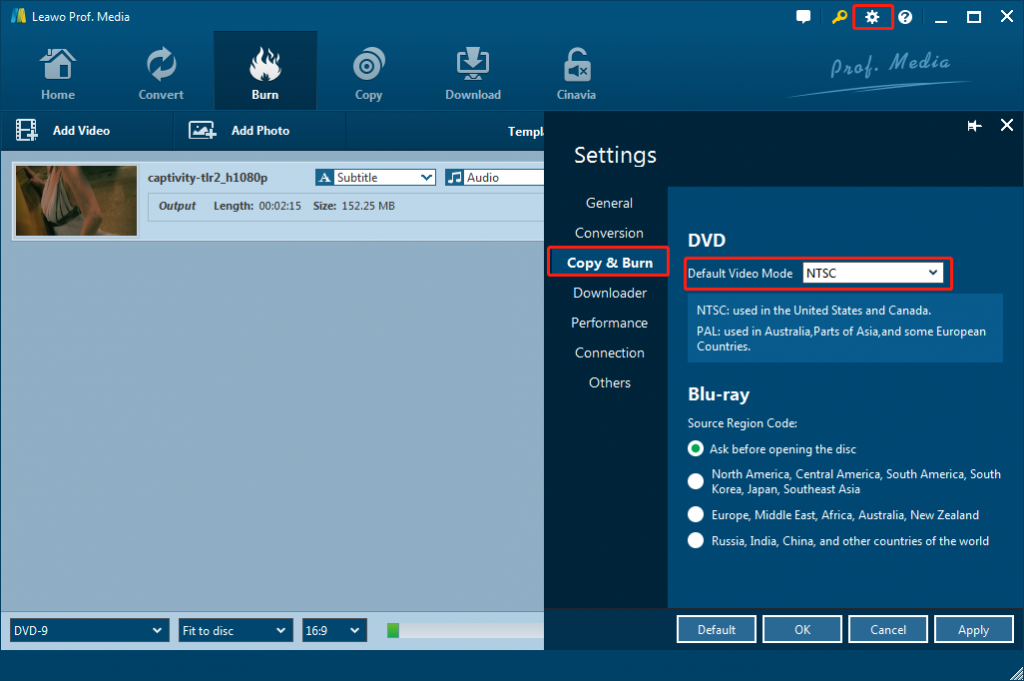
And you can go to Settings icon at the top-right corner to choose the Burning Engine and Default video mode from PAL and NTSC. Click the wheel icon on the top-right corner, and then click “Copy & Burn” tab to select these.
Step 4. Burning Settings
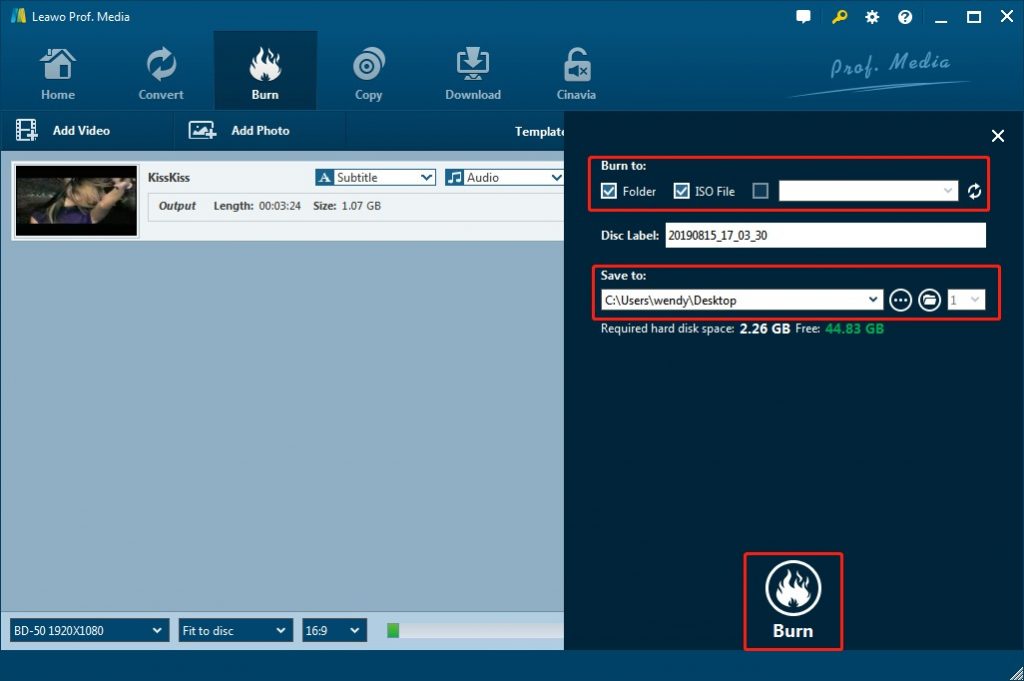
Click on the green “Burn” button on the main interface to call out a sidebar. Under the “Burn to” option, you could choose to output DVD folder, DVD ISO image file and/or DVD disc drive as target. Rename the label of the output file on the Disc Label box. Set the directory for the output file under “Save to” option by clicking Browse button "…". And then click the “Burn” button at the bottom to start converting videos to DVD disc, folder or ISO file.
Then you only need to wait for the burning process to complete. Once the burning process completes, you can now play the DVD movie on your windows or Mac freely.

