
In this digital era, we enjoy digital video files very much. However, sometimes we also need an optical disc to display movies on a bigger screen. For sure we can buy movie DVDs online or at DVD stores, but what about those videos that cannot be purchased on the market? For example. The videos we made ourselves, the family recordings or photo slideshows? Fortunately, we have an option, and that is to burn our videos to a DVD disc ourselves. There are a lot of DVD burning programs we can find on the market, and today we are going to introduce one of the best DVD burning programs, DVD Flick. What is DVD Flick? How to burn DVD using DVD Flick? Just keep reading.
Part 1: About DVD Flick
DVD Flick is an open source DVD authoring application for Windows developed by Dennis Meuwissen. As one of the best DVD burning program, DVD Flick is capable of importing audio tracks, video files and subtitles, composing a DVD video movie and burning it to a disc, or creating an ISO image for later burning.
There are up to 53 container formats that DVD Flick supports, and 42 different types of audio codecs and 72 different types of video codecs, including Windows Media formats, RealMedia, QuickTime, AVI, Flash Video and various MPEG-compliant formats. Besides dealing with videos, DVD Flick is also capable of importing four subtitle formats, such as SSA, ASS, SUB and SRT.
DVD Flick uses FFmpeg to encode DVD-Video. Although DVD Flick does not feature video editing capabilities, it can read and interpret AviSynth scripts and create simple menus. DVD Flick features direct stream copy for DVD-compliant MPEG-2 video streams only, but such a feature is not available for audio streams, meaning audio streams are always re-encoded in the process of DVD creation.
Part 2: how to burn DVD using DVD Flick
Now that we have known something about DVD Flick, let's take a look at how to use DVD Flick to make a DVD. Making a DVD using DVD Flick is not a hard thing to do, and the official website of DVD Flick has a pretty detailed instruction on how to use the program. But to make thing clearer, we have prepared a more understandable guide here with pictures. Just follow the instructions below.
Step 1: Add your video. Launch DVD Flick and click on the "Add tittle" button to locate your target video and import it.
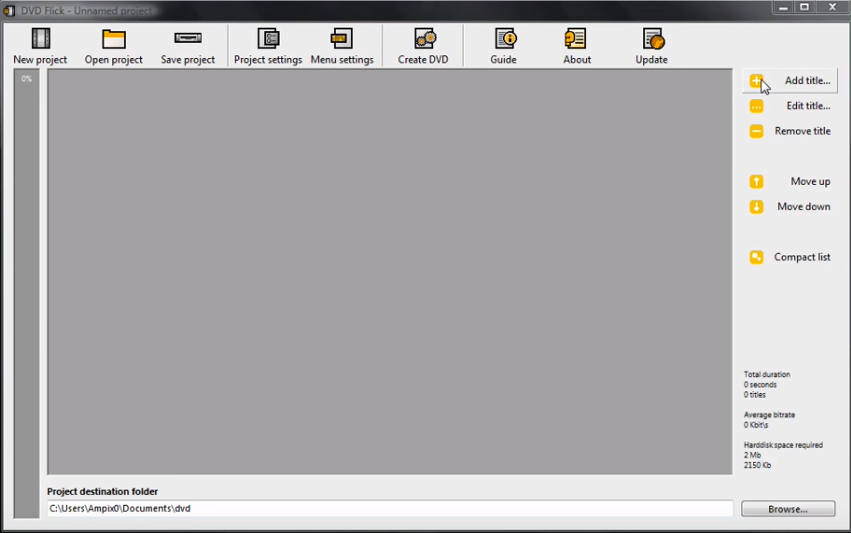
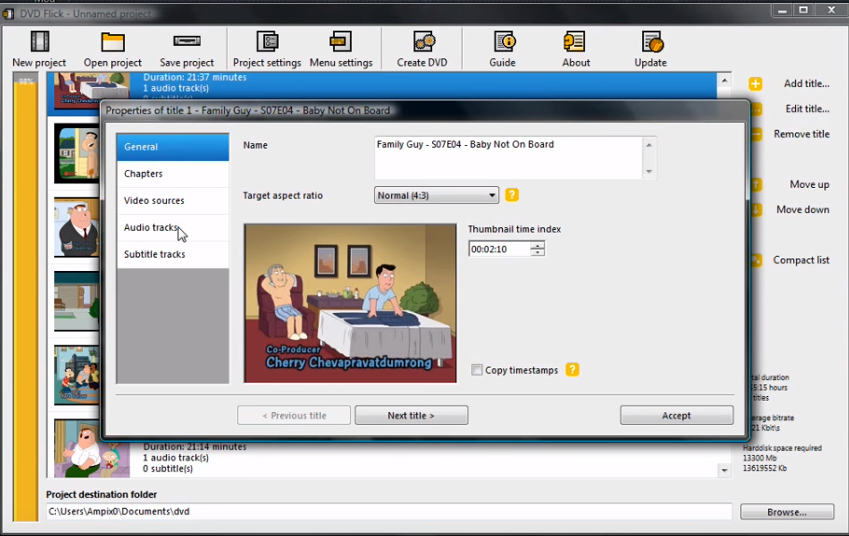
Step 2: After you have imported the video, you can see if the video you imported is too large for your DVD from the bar on the left. If it's red and full, you will have to delete some of your episodes in order to fit them into your DVD. To edit the title, click the "Edit tittle" button, and you will see all the edit you can do here.
Step 3: When you have already set up everything, click the "Accept" button. When you do, the program will start to encode the videos and burn them to your disc. The process is going to be very long, so you better be prepared.

Part 3: how to burn DVD using Leawo DVD Creator
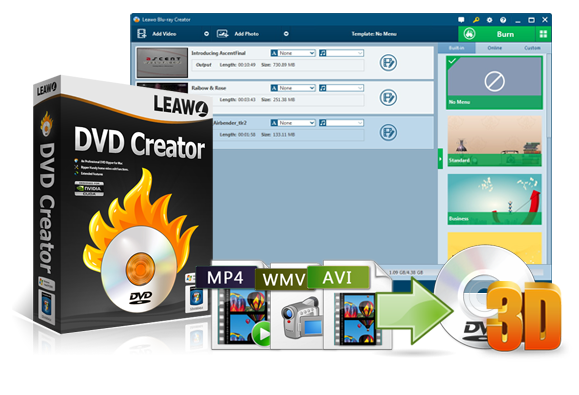
As you can see, DVD Flick has its reputations, but actually the interface and core functions of this program is not quite straightforward. If you want your DVD burning work to be easier, it's recommended that you try another DVD burning program, Leawo DVD Creator. Leawo DVD Creator is also a nice DVD burning program that provides powerful DVD burning functions and bonus features like designing DVD menu, editing video before burning and adding 3D effects to 2D videos. Let's take a look at how to use Leawo DVD Creator to make a DVD.
DVD Creator
☉ Convert videos like MP4, AVI, MKV to DVD format fast.
☉ Create DVD-5, DVD-9 disc, folder or ISO image.
☉ Burn photos to DVD content freely.
☉ Edit videos, add 3D effect, design disc menu, etc.
![]()
![]()
Leawo DVD Creator is a professional DVD authoring program that can burn all kinds of video to DVD playable format so that your video on the DVD disc can be recognized by your DVD player after the burning process. And the program is super easy to use. Now I will show you the detailed steps to Create a DVD disc from the very beginning.
Step 1: Launch DVD Creator
Download and launch Leawo DVD Creator. In the main interface, you will see some buttons, enter the "DVD Creator" Section by clicking the corresponding buton.

Step 2: Import file
You can either import videos by clicking the "Add Video" button or by dragging and dropping files to the program. After loading source video files, you could select subtitles and audio tracks from source videos, play back videos, etc. Set the output DVD disc type, quality and aspect ratio at the bottom.

Step 3: Design DVD menu
On the right there is a section for you to choose DVD menu templates. You can design DVD menu and chapters using the templates form built-in ones, or online ones. Click the eye icon to preview the template you desire, then you can edit the template like changing the text of each chapter.

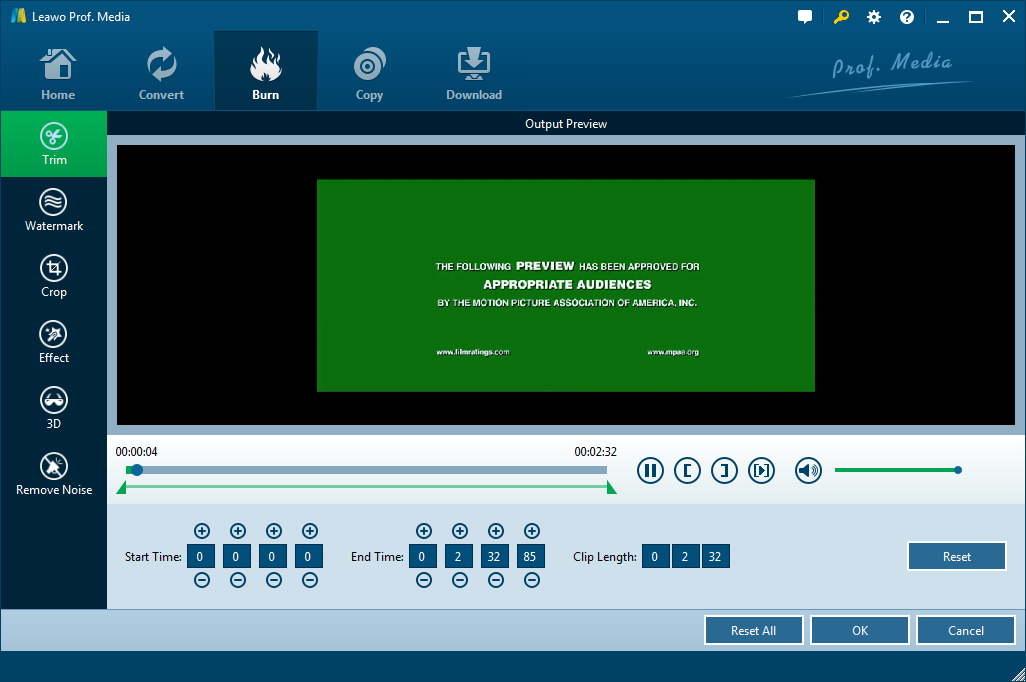
Step 4: Edit video
By selecting a video clip and clicking "Edit" icon in the loaded video title, you can access to the "Video Edit" window, where you can edit your videos by trimming, cropping, applying special effects, adding watermarks, and adding 3D movie effects.
Step 5: DVD burning settings
After setting disc menu, click the big green "Burn" button to call out the burning settings panel, on which you need to figure out Burn to, Disc Label, and Save to options. After all that, click the "Burn" icon below to start burning.

Step 6: Start to burn
After the burning settings, click the "Burn" button on the popup burning settings panel to start burning videos to DVD. This DVD Creator would immediately start its work and finish it in a few minutes.

 Oct. 26, 2018 by


 Prof. Media
 Blu-ray Ripper
 Blu-ray Copy
 iOS Data Recovery
 [12/29/23] MAX Downloader V15.0.0
 10,000,000 people are using Leawo!
 All Transactions are protected!
 30-Day Money Back Guarantee!