Last updated on 2021-07-06, by
How to Scan Documents and Photos on iPhone
Asides from some basic functions on your iPhone, like make calls, take photos and enjoy some apps. iPhone is also designed to scan documents and photos with the help of built-in apps and some third-party programs. If you have ever tried a lot of solutions to scan documents and photos on iPhone, but it doesn’t work out efficiently. In this post, some reliable ways would be introduced to solve your problem. Furthermore, you can easily store these files to anywhere you want.
MenuCLOSE
- How to Scan Documents and Photos on iPhone Using Notes App?
- How to Scan Documents and Photos on iPhone Using Files App?
- How to Scan Documents and Photos on iPhone Using Microsoft Lens App?
- How to Transfer Scanned Documents and Photos from iPhone to Computer?
- How to Enhance Quality of Scanned Documents and Photos?
Part 1: How to Scan Documents and Photos on iPhone Using Notes App?
Without any third-party software, the built-in app Notes on your iPhone can easily help you to scan documents and photos. Sometimes, you may have encountered some problems with your exterior scanners, Notes app would be your firm choice to scan your preferred files on your iPhone.
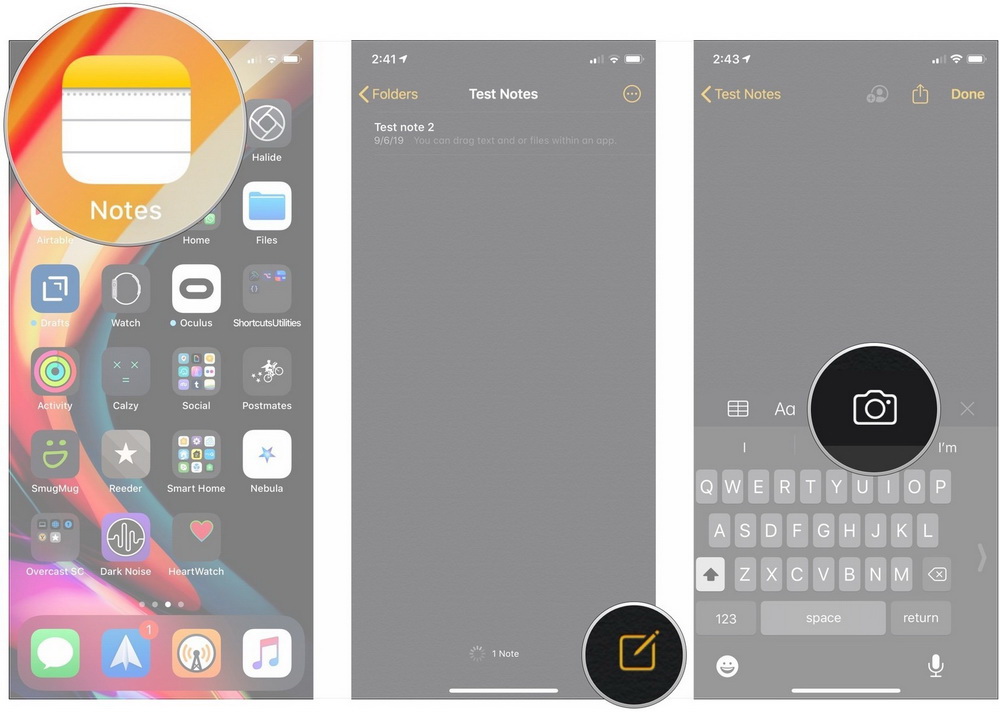
Step 1: Open Notes app on your iPhone. Create a new note by clicking the cross icon to add a new note or add a document to an existing one.
Step 2: At the bottom of the note screen, tap the camera bottom and choose Scan Documents option.
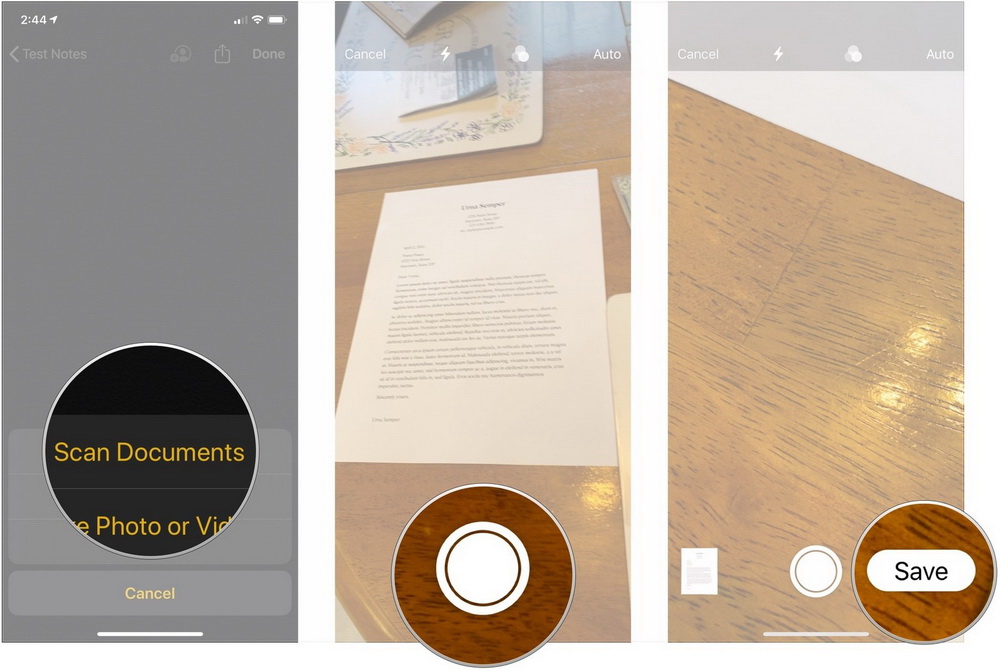
Step 3: Line up the document or other photo file you would like to scan. Then, tap shutter button of the camera. Finally, click on Save after the document has been scanned. If you want to scan more documents, you only need to repeat the above steps and finally save all the photos you scanned. When it is done, all the pages would be showed in this note.
Part 2: How to Scan Documents and Photos on iPhone Using Files App?
Besides the Note app, another embedded app on your iPhone you can refer to is the Files app which can scan documents and store the files in an easy way. Before carrying out the steps, make sure you have connected to iCloud and by the way you can get access to iCloud Drive from your iPhone and computer.
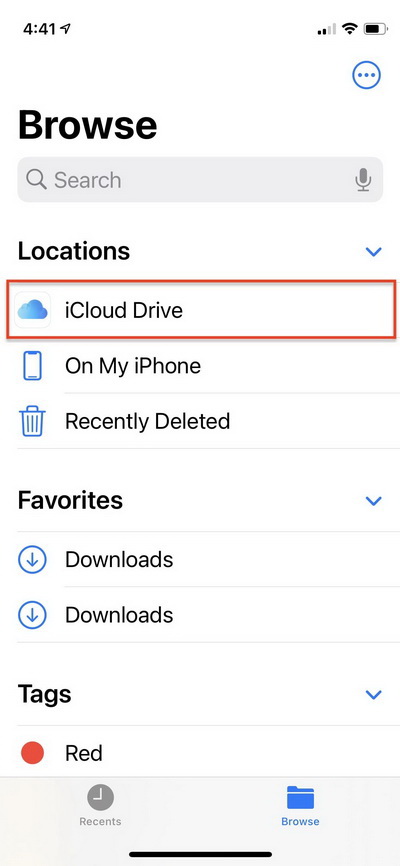
Step 1: Go to Files app on your iPhone. On the main screen, you can select the iCloud Drive as the location.
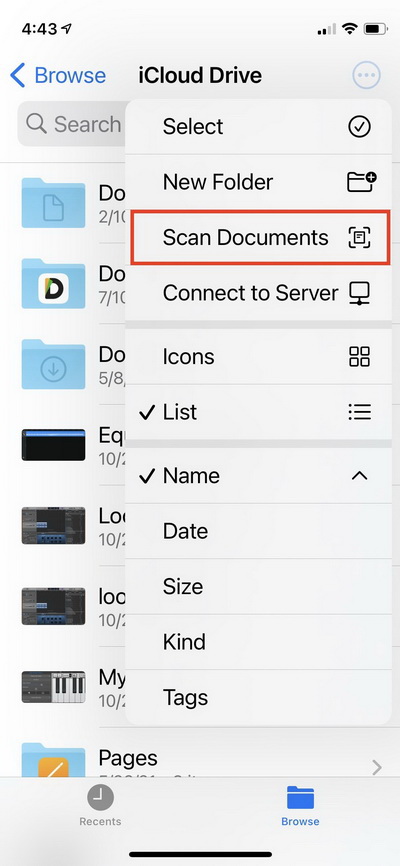
Step 2: Create a new folder by tapping the three-dot More icon on the screen and give a new name to the folder. Open the new Scan folder and then you can select Scan Documents by swiping down to tap the three-dot More button. Next, tap the camera to activate the scan.
Step 3: Line up the document you want to scan and make sure all the document has been recognized by the Camera. Finally tap the Save button to store the document which would be directly stored in the Scan folder. Once it is stored, you can further view the documents by getting access to iCloud account.
Part 3: How to Scan Documents and Photos on iPhone Using Microsoft Lens App?
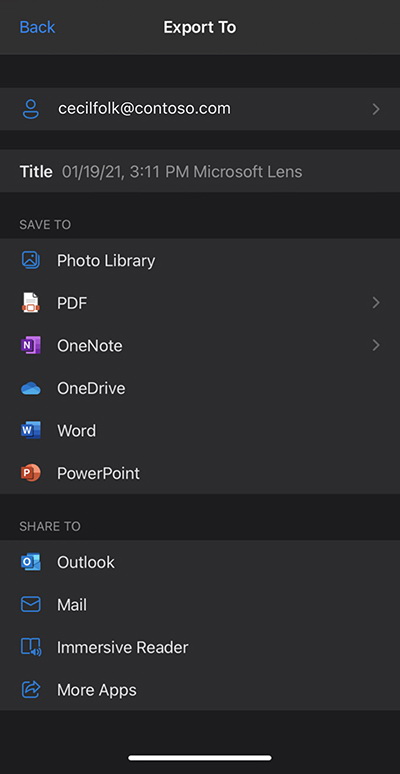
You can make full of some additional apps to scan documents and photos on your iPhone. Among various programs, Microsoft Lens app can be your excellent choice. Microsoft Lens is able to capture the document information in an efficient way. One of the most attractive points of the app is that it could detect some blurry images or document contents. All the scanned documents and photos can be added to OneDrive, Microsoft OneNote, Word or PowerPoint you prefer and, furthermore, they could be saved as the PDF files which can be sent in emails.
Step 1: Download and install Microsoft Lens on your iPhone.
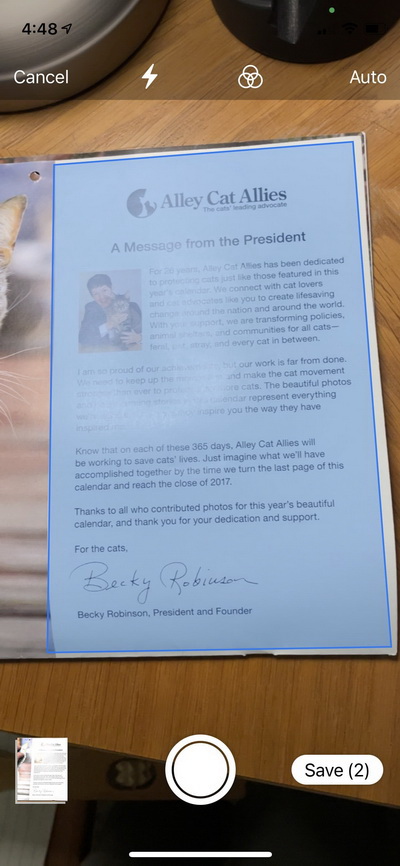
Step 2: Confirm the documents or photos you want to scan. There are various capture modes you can choose, including Whiteboard, Document, Business Card and Photo which focus on different scanning quality. Then, if you would like to scan some documents or photos, you can choose from Document and Photo mode to activate the scan. Once you determined the capture mode, you can simply press the shutter icon on the Camera to obtain the document scan information.
Step 3: Further edit the scan. When you capture the document image, you are allowed to further edit the image based on your own preferences, like applying a Filter to the image, crop, rotate and delete and so on.
Step 4: Save the scanned document to different types of formats, including PDF, Photo, OneNote, OneDrive and so on.
Part 4: How to Transfer Scanned Documents and Photos from iPhone to Computer?
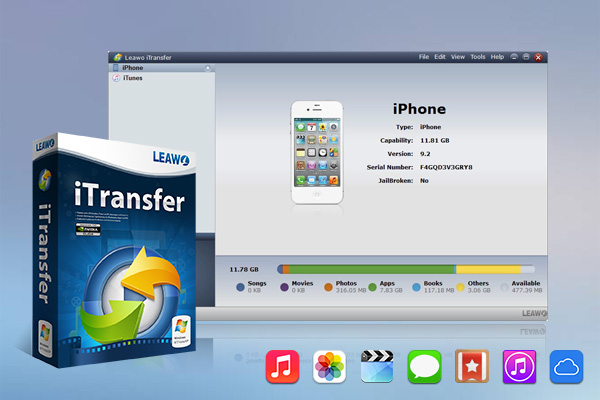
Sometimes, users’ needs would be beyond the scanning only. Furthermore, they may prefer to print these documents or photos out. In such a case, choosing one of the best photo printers would be quite necessary. Usually, people would tend to transfer the files from iPhone to computer for further printing. For some users, they also want to transfer these files from iPhone to computer for backup. In order to complete the transfer between iPhone and computer, Leawo iTransfer could be your best choice. This program enables users to transfer various kinds of files, including apps, music, movies, TV shows, eBooks, ringtones, photos, Camera Roll, contacts, text messages, bookmarks, notes, and more. With this iPhone data transfer software, you are able to fully handle your iPhone without messing up the data inside. The following guidance will show you use this iPhone data transfer software to transfer the scanned documents and photos from iPhone to computer.
Step 1. Download Leawo iTransfer
Download and install Leawo iTransfer on your computer.
-
Leawo iTransfer
- Transfer files among iOS devices, iTunes and PCs with ease.
- 6x faster than iTunes
- Transfer up to 14 kinds of data and files without iTunes.
- Support the latest iOS devices like iPhone 12, iPhone 12 Pro, etc.
- Play back, view, and delete data and files on iOS devices.
- Support Windows & Mac OS
Step 2. Connect your iPhone to computer
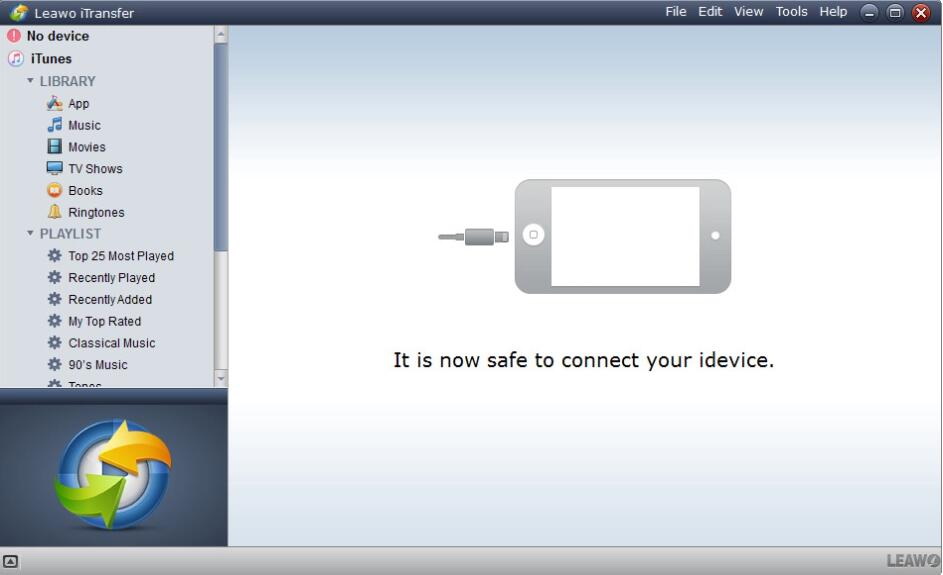
Run Leawo iTransfer and connect iPhone to computer with USB cable. The software will recognize your iPhone.
Step 3. Show the scanned documents photos on iPhone
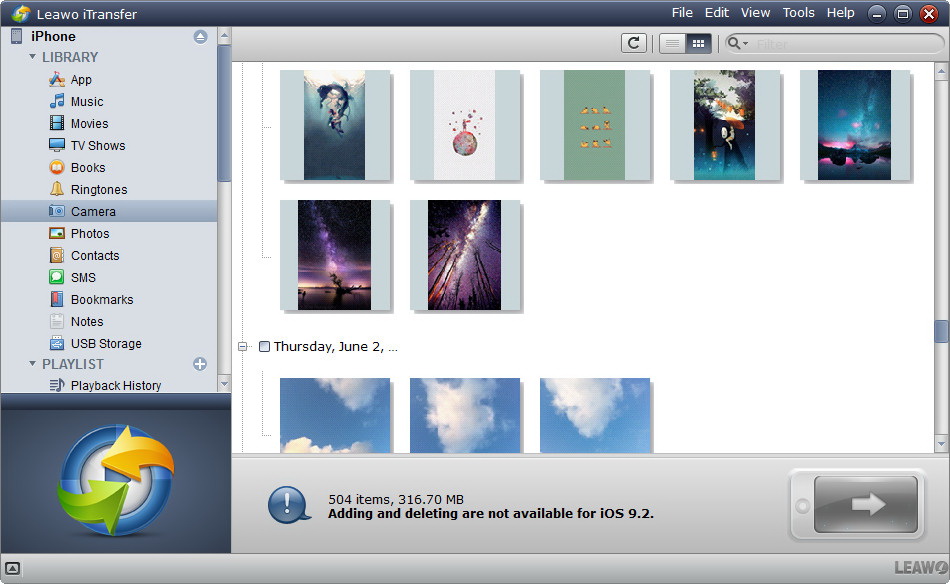
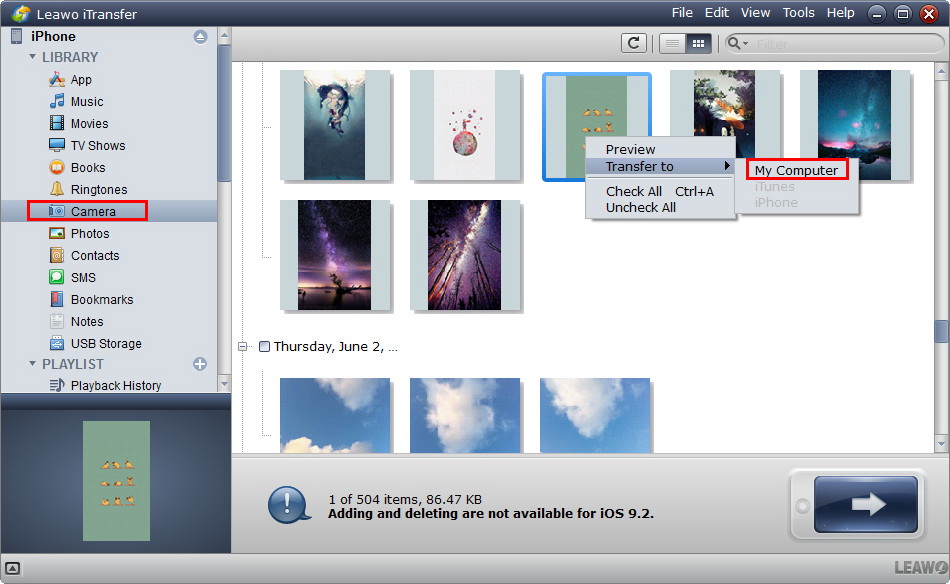
Click "Camera" in the left sidebar, and the contents will be shown in the right part of the window.
Step 4. Transfer scanned documents and photos from iPhone to computer
Choose the photos, or the Notes documents on your iPhone to transfer and right click on these files to choose Transfer to >> My Computer.
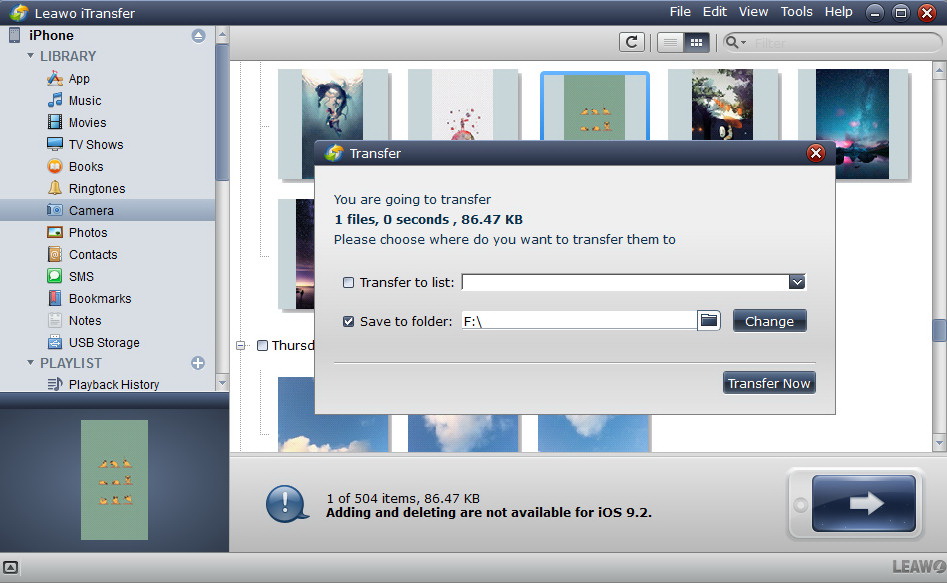
Step 5. Confirm the saving route
After choosing files, confirm the saving route, and then the software will start transferring the selected files from iPhone to computer. The progress bar in the dialog will show you the percentage of the transfer process, and when the transfer is done, you will get the scanned documents and photos in the target folder on your computer.
Part 5: How to Enhance Quality of Scanned Documents and Photos?
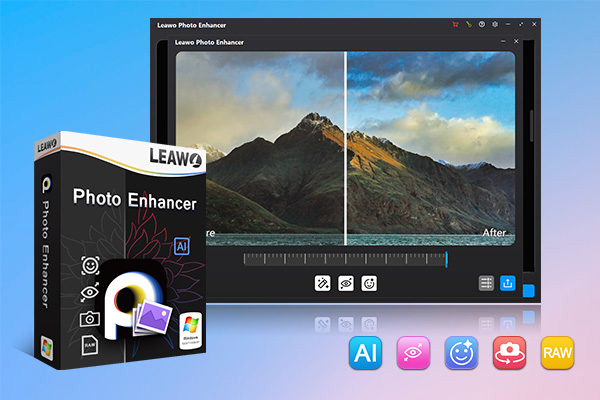
Concerning the detailed steps on scanning documents and photos, using iPhone would be easier for many users. However, if you prefer higher quality of the scanned documents and photos, you can seek help from some professional and best photo scanners, which could improve both picture quality and editing features for users. If you don’t want to spend a large sum of money on purchasing such a scanner, you can choose Leawo Photo Enhancer to improve the photo quality so as to present better scanning effects. Leawo Photo Enhancer is quite appropriate for you to use if you really desire to enhance the photo quality. This tool is powerful as an AI photo enhancer, which can optimize your pictures immediately. Its features are comprehensive, which includes enhancing images, intelligently retouching skin, removing freckles, reducing noise, enhancing eyes, adjusting lighting automatically and so on. The user-interface of this software is friendly, which can be handled quite simply.
Step 1. Download Leawo Photo Enhancer
Download and install Leawo Photo Enhancer on your computer.
-
Leawo Photo Enhancer
- Enhance portrait photos easily with advanced AI technology
- Fix photo exposure and white balance issues automatically
- Optimize photo colors and perfect photo tints
- Make photos perfectly clear with smart dehaze
- Boost photo lighting and color quality
- Process RAW and JPG files
Step 2. Import source scanned documents and photos to Leawo Photo Enhancer
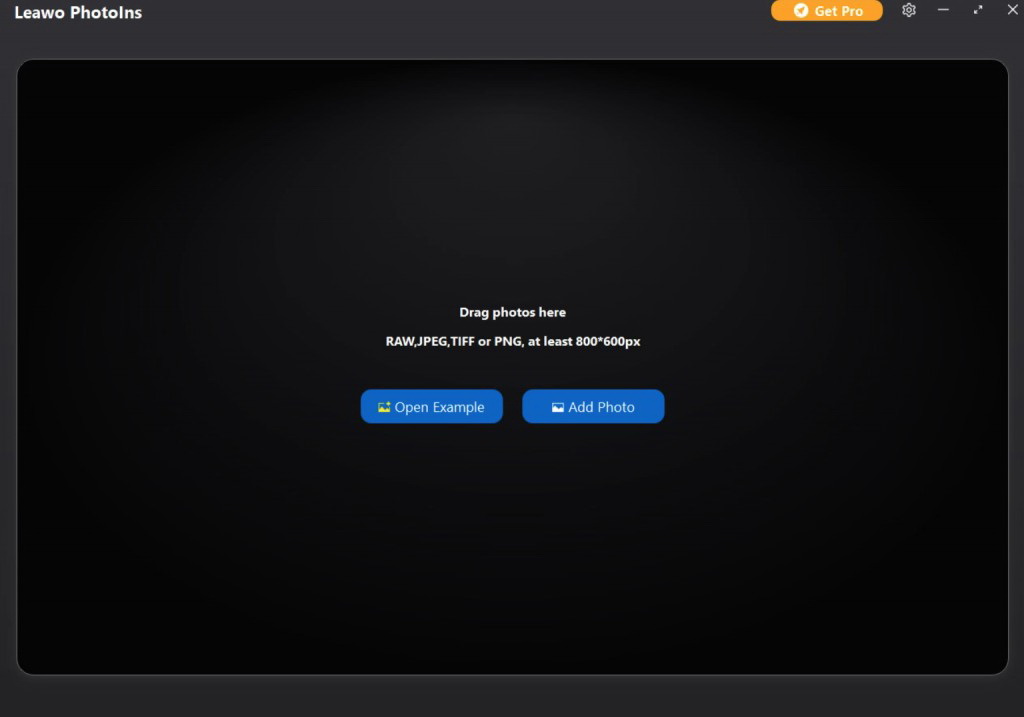
Once you have installed Leawo Photo Enhancer on your computer, then open it and import source photos you would like to enhance to this program. Enter the main interface of Leawo Photo Enhancer and you can load preferred photos into the program by clicking the option “Add Photo”. Or you can simply drag and drop your photos to this program directly. By the way, you can also right click on the loaded photos to delete them as you like. Furthermore, Leawo Photo Enhancer allows users to edit the photos in batch. You only need to click on “Add Files” to load other more photos.
Step 3. Enhance scanned documents and photos
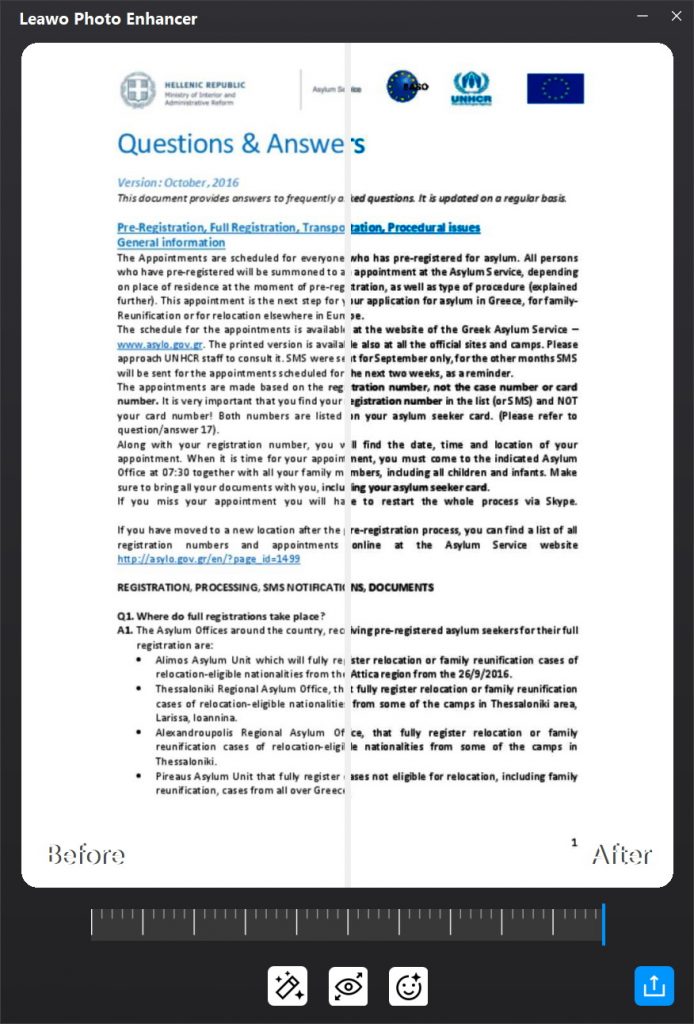
After loading your preferred photos to the tool, then you can start to enhance the photos. You can click the AI Enhance tab to choose the features, including "Automatic Lens Correction", "Face Enhance" and "Enlarge Eyes". Furthermore, you can find an effect adjuster bar right below the previewer which could allow you to set the degree of each effect.
Step 4. Set output parameters
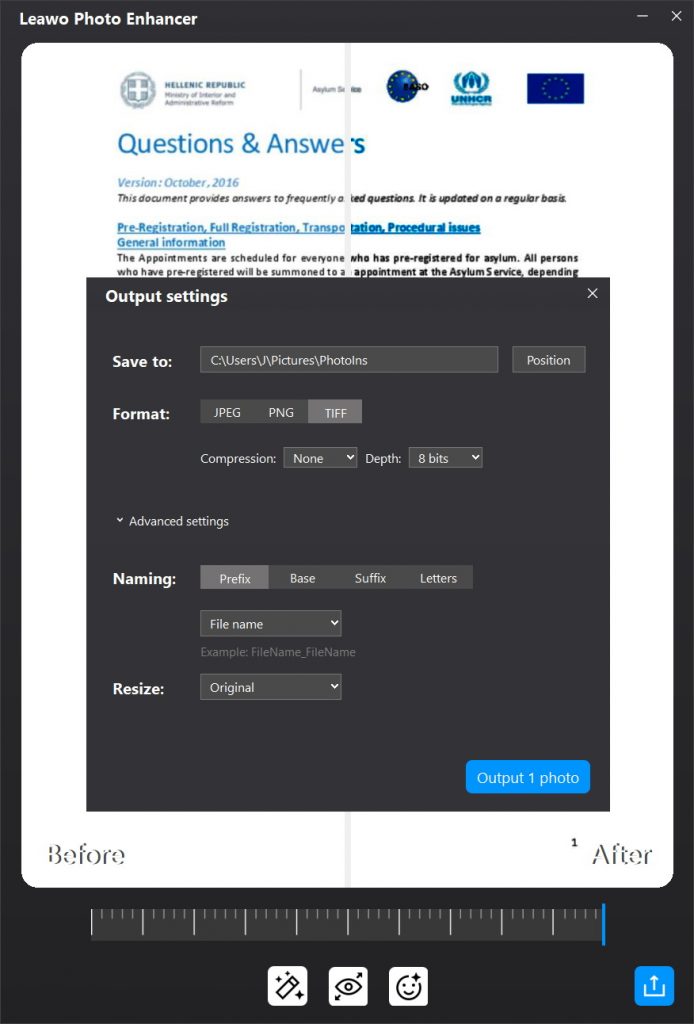
Once you have chosen your preferred effects and you have applied the AI Enhancer to your chosen pictures, now you need to click the bottom right output icon to proceed for output settings. On the Output Setting panel, you can complete the following things: “Save to” route, “Format”, “Quality”, “Naming”, “Resizing” and so on. Finally click “Output” to export the enhanced photo to your computer.


 Try for Free
 Try for Free

