
In the current society, people are carrying out all kind of works on the Internet. For most people, computer has already become the portable notebook for them. You must have a lot files on your computer, ranging from working resources, important proposals, public information to personal files. There is no doubt for any of you that the most important thing you care about is the safety of these files. Maybe some of you have encounter the situation that some of the significant files have been lost in that you delete them accidently, and then you have to seek the help from some powerful third-part programs so as to restore these files. If you have ever been confused by such a "disaster", then I have to say sorry because I deeply know how it feels. Are there any ways to keep your files away from being deleted with no intension? Compared with the post-restoration with a third-party tool, a more efficient way is to prevent your files from deletion and lock the files from been any changes like deletion. If you still have the need to carry out Windows file protection, you can refer to the following article for further information. How to protect files in Windows 10? Actually, there are many ways to protect files from deletion in Windows 10, next I will elaborate several methods, and you can choose the best for you.
Part 1: Change security permission
How to protect files in Windows 10? Well, in order to achieve the goal, one of the easy way for you to grasp is to change the security permission. But this method will may cost you much more time. And it will not require you to install any third-part security tools at all. What you need to do is set some security parameters of the files you would like to protect from being deleted. For the detailed instructions, please refer to the below steps.

Step 1. Find the file you would like to protect from being deleted accidently, and right click on the file to choose "Properties".
Step 2. Under the "Properties" subheading, select "Advanced" option under the "Security tab". Click on disable inheritance.
Step 3. Choose a user "Principal" and enter the "Edit" option.
Step 4. On the main panel of the "Edit", you can find a dropdown menu of "Type", select "Deny" and finally click "OK" to save the settings.

Part 2: Use folder locker program
Besides changing security permission on the files you want to protect from deletion, you can turn to the folder locker program. But here, you will need the help of a third-party program. By using the folder locker tool, it will be much easier for you to do this. Among the folder locker tool, Folder Lock is one of the most popular. It is easy to handle with this tool. You only need to enter the main interface of the program and click "Add Items to Lock", then choose the files, and it will help you to lock these files immediately.

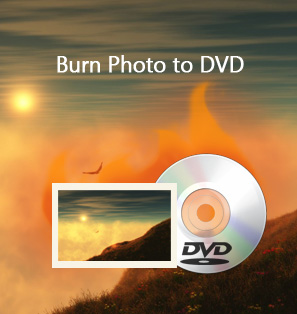
Part 3: Store files on a DVD disc
Besides, you can also find a simpler way to protect your files. That is to make a backup of these files. How to protect files in Windows 10 by utilizing this method? Well it is quite easy. You only need to prepare a DVD disc with enough capacity and insert it to the disc drive on your computer. Then burn these files into a DVD and you can let your heart down when you have made a backup on these files to a DVD.

Part 4. How to protect your movie from deletion by using Leawo DVD Creator?
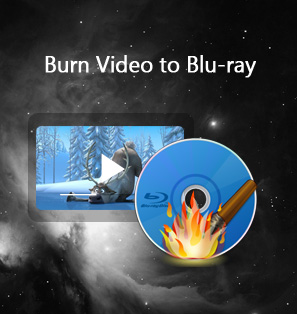
If you are movie lover, you must preserve many movies on your computer. So how to protect your movies from deletion. Just as the method mentioned above, you can make full of use a DVD disc. You can burn these movies into a blank DVD disc which could be used as a backup when you delete the movies accidently. Before burning the movies into a DVD, you need to prepare a blank DVD disc with enough capacity and a powerful DVD burning program. In terms of DVD burning software, you can take Leawo DVD Creator into consideration.
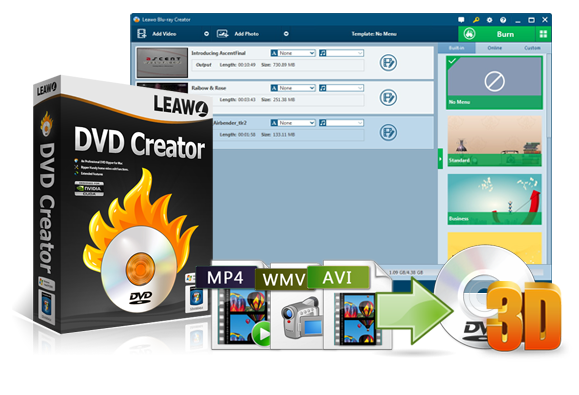
DVD Creator
☉ Convert all video files like MP4, AVI, MKV to DVD format fast.
☉ Create DVD-5, DVD-9 disc, folder and/or ISO image without quality loss.
☉ 1-click operation to create photo slideshows and burn to DVD easily.
☉ 1-click ISO image burner to burn ISO image file to DVD disc.
☉ Multiple built-in menu templates and edit disc menu with personal preferrences.
☉ Easily editable video effects, 2D to 3D conversion support.
![]()
![]()
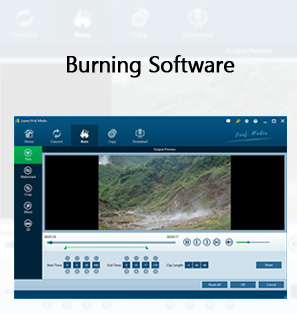
Leawo DVD Creater can burn DVD from more than 180+ formats of videos and photos with 6X faster speed. including AVI, MKV, MP4, WMV, FLV and so on. Additionally, it can allow you to experience all kinds of DVD menu templates for free and you can edit your video according to your own preference. Besides, you can freely choose subtitles and audio tracks as well as preview changes in the video instantly and screenshot taking. Please refer to the following detailed instructions.
Step 1. Download Leawo DVD Creator and install it on your computer.

Step 2. Insert a new blank DVD disc in the disc drive.
Step 3. Import the movie that you want to protect from deletion to the software by clicking "Add Video" on the main menu. Or you can just drag the movie directly to the program.

Step 4. Set the disc menu. After importing the movie, you can also set the disc menu which contains "Standard", "Business", "Education", "Childhood", "Holiday", etc. And you can DIY your own disc menu with your images and audios.

Step 5. Start burning the DVD. After setting the templates, you can just click the green icon "Burn" to start the DVD burning process. When you click "Burn" icon, you will see burning settings panel where you need to figure out "Burn to", "Disc Label", and "Save to" options. Finally, you need to wait in patience and the movie will be burned into the DVD disc within several minutes.

Conclusion
That's about it. Maybe you have been confused by the question on how to protect files on Window 10. From the above solution, you now know how to carry out Windows file protection easily. Furthermore, You can also grab a free DVD player software to play the DVD on your PC. Enjoy your DVD!
 Jul. 06, 2018 by


 Prof. Media
 Blu-ray Ripper
 Blu-ray Copy
 iOS Data Recovery
 [12/29/23] MAX Downloader V15.0.0
 10,000,000 people are using Leawo!
 All Transactions are protected!
 30-Day Money Back Guarantee!