
Making personalized videos are more and more popular these days. It doesn't matter if you are a YouTuber or a video editing enthusiastic, you can make a unique and special video with ease. There are so many video editor programs out there, and the functions of this kind of software are getting more and more powerful. As a result, we are enabled to make fantastic videos with simple steps. When we make a stunning video of our own, we need to share it and preserve it. Besides sharing it online and save it in our computer, another good way to share our videos and save them is by using a DVD. But saving a video on your computer is easy, how about saving it on a DVD? Is it possible to make the DVD play on a DVD player instead of being only playable on a computer? Well, today we are going to show you exactly how to burn your video made by Final Cut Pro to a DVD on your Mac computer.
Part 1: About Final Cut Pro
Before we talk about how to burn Final Cut Pro videos to a DVD, let me explain something about Final Cut Pro, and why we will take Final Cut Pro as an example to show you how to burn your video to a DVD.
Whether you're a video hobbyist or independent filmmaker, believe that you're familiar with Final Cut Pro, especially Final Cut Pro X. It is a series of non-linear video editing software programs first developed by Macromedia Inc. and later Apple Inc. It is one of the most popular professional editors around the world which have outstanding functions in many areas just like high-performance digital nonlinear editing, facility-class extensibility and interoperability as well as native supporting for virtually any video format.

Final Cut Pro is built on a powerful 64-bit architecture, which allows you to work with complex projects, larger frame sizes, higher frame rates, and more effects. It's optimized for the high-performance CPU and graphics card in your Mac. With Final Cut Pro, you can Improve the look of archival and low-light images with powerful noise reduction tools that reduce or eliminate grain and video noise. The Simple Controls let you quickly adjust intensity, and it's easy to change processing order by dragging the effect in the inspector. Final Cut Pro also includes a complete toolset for importing, editing, and delivering both monoscopic and stereoscopic 360° video.
Despite the powerful functions of Final Cut Pro, it's still not able to meet all of users' needs. As we can know from Final Cut Pro's official website, Final Cut Pro provides non-linear, non-destructive editing of any QuickTime-compatible video format including DV, HDV, P2 MXF (DVCProHD), XDCAM (via plug-in), 2K, 4K and 5K film formats. Unfortunately, all the output formats supported by Final Cut Pro cannot be imported to a playable DVD disc directly.
That is to say, we need a Final Cut Pro to DVD burner to help us burn Final Cut Pro videos to DVD. In the following, I will show you how to burn Final Cut Pro videos to a DVD on Mac easily.
Part 2: How to burn Final Cut Pro videos to DVD with professional burner
To burn a playable DVD from the video you created by Final Cut Pro, your best choice is to use a professional DVD burning program. With a DVD burning program, you can have professionalized experience of the burning process and set some advanced features like disc format, DVD menu and so on. Today the burning program that I would introduce to you is Leawo DVD Creator for Mac, which is an excellent Final Cut Pro to DVD burner and it can help you to complete this job.
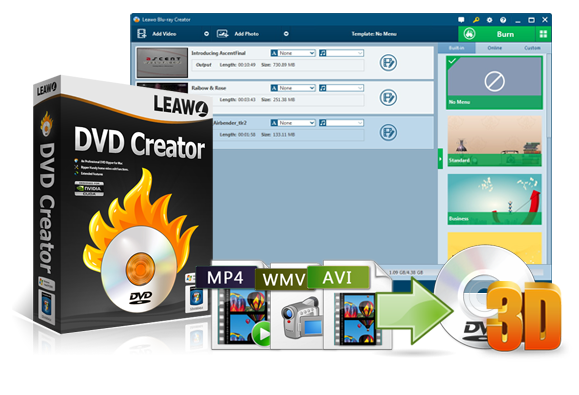
DVD Creator
☉ Convert videos like MP4, AVI, MKV to DVD format fast.
☉ Create DVD-5, DVD-9 disc, folder or ISO image without quality loss.
☉ 1-click operation to create photo slideshows and burn to DVD.
☉ Easily editable effects, 2D to 3D conversion support.
☉ Built-in menu templates and edit disc menu with personal preferences.
![]()
![]()
Leawo DVD Creator for Mac is an all-in-one DVD creator which is able to let you burn Final Cut Pro videos to DVD so that you can watch them on any standard DVD player and TV. As the best Mac DVD creator software, it can burn video to all popular formats like MP4, MKV, AVI, FLV and 3GP. There is no doubt that it can also convert Final Cut Pro Videos to DVD without taking a lot of trouble. In addition, you can even design disc menu and template by yourself. For further function, Leawo DVD Creator can burn an ISO image file to DVD disc in one click, create DVD photo slideshow on Mac easily. All in all, Leawo DVD Creator can be regarded as an effective Final Cut Pro to DVD burner that can help you convert Final Cut Pro video to DVD. Here is the detailed guide on how to make a DVD from Final Cut Pro video with Leawo DVD Creator for Mac.
Step 1. Add videos to DVD creator
You can import your videos in two ways:
a. Click the "Add Video" button to load videos and images.
b. Directly drag and drop files to the program.

After loading source video files, you could select subtitles and audio tracks from source videos, play back videos, etc. Set the output DVD disc type (DVD-5 or DVD-9), quality and aspect ratio (16:9 or 4:3) at the bottom.
Step 2. Set disc menu (optional)
If you want to design disc menu to output DVD movie, you could choose from the right sidebar. Leawo DVD Creator offers you multiple preset disc menu templates in different themes like Standard, Business, Education, Childhood, Holiday, etc. Also, it allows you to DIY disc menu with your own images and audios. You could get instant preview of the menu you've selected. If you want no menu, just select "No Menu" option on the right sidebar after you load source videos.

Step 3. DVD burning settings
After setting disc menu, click the big green "Burn" button to call out the burning settings panel, on which you need to figure out Burn to, Disc Label, and Save to options.

Step 4 Burn video to DVD
After the burning settings, click the "Burn" button on the popup burning settings panel to start burning videos to DVD. This DVD Creator would immediately start its work and finish it in a few minutes.

Part 3: How to export Final Cut Pro videos to DVD
Although you cannot burn a playable DVD in Final Cut Pro like you can with a professional DVD burner program, you can instead export the video to a DVD. This is different from burning your video to a playable DVD, but I'll introduce this method as well.
Step 1: Select a project or a clip in the browser. To share just a portion of a project, you must make a range selection. A clip selection is not sufficient. You can use the I and O keys to set the range start and end points. If you're sharing a project that is set to use proxy media for playback, open it in the timeline, then click the View pop-up menu in the top-right corner of the viewer and choose Optimized/Original. This ensures the highest quality in the exported file. When you choose this setting, Final Cut Pro uses optimized media to create the shared file. If optimized media doesn't exist, the original media is used. For more information about optimized and proxy media, see Control playback quality and performance.
Step 2: Choose File > Share > DVD, or click the Share button in the toolbar, then click DVD.

Step 3: Move the pointer over the image to skim the video. Or, in the Info pane, view and modify project or clip attributes, such as the title and description. By default, the title field lists the project or clip name. Changing the title does not change the project or clip name, which is the name used for the exported file.

Another way of doing this is, at the bottom of the window, view information about the file that will be exported, including frame size and frame rate, audio channels and sample rate, duration, output file type, and file size.
Step 4: Click Settings, then choose your preferred DVD settings. To burn a disc, choose an optical drive. To create a disk image (.img) file that you can copy to an external storage device or burn to DVD media later, choose Hard Drive. For Layers, choose whether to burn a single-layer or dual-layer disc. Automatic means automatically detects the type of disc you can use. The Single-layer option identifies the disc as a single-layer disc. You can use this option to force a double-layer disc to be treated as a single-layer disc. The Double-layer option Identifies the disc as a double-layer disc. You can use this option to force the disk image to be formatted for a double-layer disc when you choose Hard Drive as your output device. Choosing "Double-layer" when using a single-layer disc can result in an error during burning, depending on the project's length.
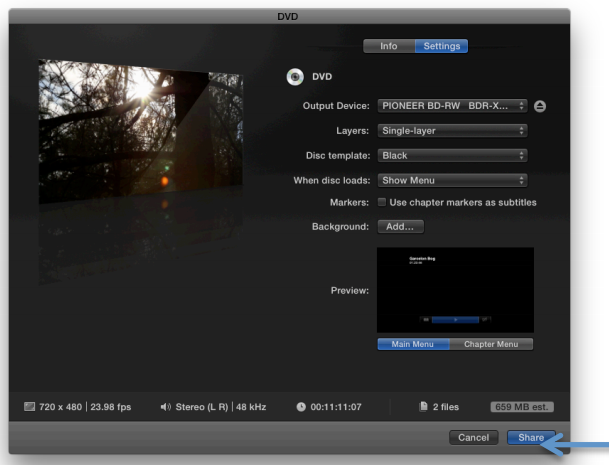
Choose File to save a disk image (.dmg) file, or Folder to save a set of files in a folder in Build Type option and choose an available template in Disc template. You can also set Title, Volume name, Color space, when disc loads, Markers, Loop, Background, Logo image, Title image, Preview and Include captions. After all the settings, click the share button.
Step 5: If you're burning to a disc (instead of creating a disk image): Click the Eject button to the right of the Output Device pop-up menu, then insert a blank disc into your disc-burning device and click Burn. If you're creating a disk image file: Click Next, then enter a name for the file, choose a location to save it, and click Save. When the burning finishes, you will see a sign telling you the burning has been completed.

 Sep. 28, 2017 by


 Prof. Media
 Blu-ray Ripper
 Blu-ray Copy
 iOS Data Recovery
 [12/29/23] MAX Downloader V15.0.0
 10,000,000 people are using Leawo!
 All Transactions are protected!
 30-Day Money Back Guarantee!