As the world's second largest search engine and the biggest video community, YouTube has never been more popular than it is nowadays. Anyone can find his or her favorite videos on YouTube, and with a right YouTube download tool, you can even download the YouTube videos to your local hard drive within minutes. However, if you have ever downloaded a YouTube video, you'd know that the video you download is not always in a format you desire. For example, when you want a video encoded with Xvid, it's not likely that you can directly get one from YouTube. To acquire a YouTube video in Xvid format, you need to convert the YouTube to Xvid after downloading it. Then how to convert YouTube to Xvid becomes a major problem for most of us. Well, if you still have no idea on how to do it, don't worry. Because today We are going to introduce 3 different ways to convert YouTube to Xvid in the most detailed steps, you that you will have your YouTube video in Xvid format within several minutes.
Part 1: About the Xvid and video codec
Before we start talking about how to convert YouTube to Xvid, let's know something about the Xvid and video codec first.
As you may already know, the Xvid is actually not a video format like MP4, AVI or 3GP. An Xvid file is a file that uses the Xvid codec technology. Instead of simply being a video format, Xvid is a program that's used to compress and decompress video to MPEG-4 ASP. In other words, it's a compression standard, commonly used to save disk space and improve file-transfer speed.
So, one of the advantages of Xvid is that it can store high-quality video content in a highly compressed small file. Your disc storage room can be greatly saved by the Xvid codec. The Xvid codec makes it possible to compress a full-length DVD-quality movie enough to fit on a single CD, while still maintaining the original image quality.
So now we know that Xvid is a video codec technology. But what is a video codec? Well, A codec is a device or software that is used to compress or decompress a digital media file, such as videos or audios. You see, an original video or audio could be very large in size. With a codec, the video or audio could be compressed into a very small file but still keep most of the features remained. The “codec” can be dividing into 2 parts: encode and decode. The encoder performs the compression function, which makes the file smaller. And the decoder performs the decompression function, which opens the compressed file. Some codecs include both of these components and some codecs only include one of them.
Part 2: Convert YouTube to Xvid with Leawo Video Converter
Now that we have some basic knowledge about what an Xvid file is and what a codec is, let's talk about how to convert YouTube to Xvid. There are a lot of ways in which you can convert a YouTube video to Xvid. But in order to convert the video file efficiently and stably, it's suggested that you choose a professional video converter to do the task. When I have the need for converting YouTube to Xvid, I would usually turn to a video converter called Leawo Video Converter.

-
Leawo Video Converter
- Convert video and audio files between 180+ formats without quality loss
- Support 720P, 1080P and even real 4K video output
- Create photo slideshows from photos stored on camera, computer, camcorder, etc
- Built-in video editor to trim, crop, add watermark, apply special effect, etc
- 2D to 3D converter with 6 different 3D movie effects available
Leawo Video Converter is a professional video converter that can convert more than 180 video formats to one another. Due to the dedicated professional conversion core, Leawo Video Converter can convert video files in high speed while still maintain the original quality. Here's the detailed guide on how you can convert YouTube to Xvid easily within minutes.
Step 1: Import YouTube video to Leawo Video Converter
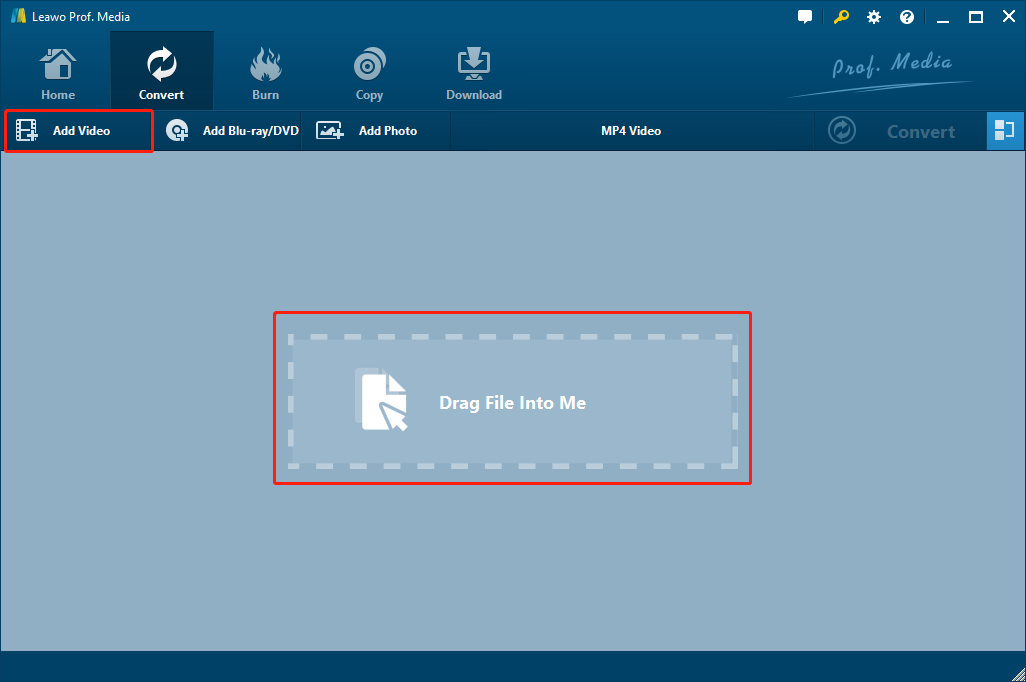
Download and install Leawo Video Converter, open the program and navigate to the “Video Converter” function module. Once you're there, you will have two ways to import your YouTube video into Leawo Video Converter: By dragging and dropping the file into the mainframe of the program, and by clicking the “Add video” button. You can also import a video folder by choosing the “Add folder” in the drop-down menu under the “Add Video” button.
Step 2: Set an output format
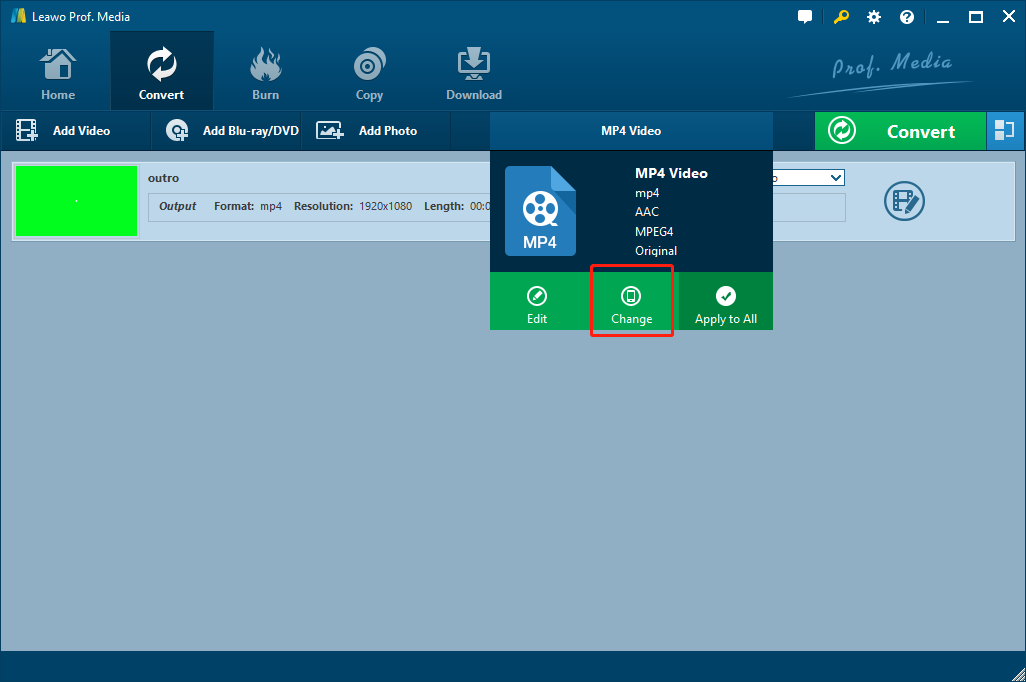
When the original YouTube file is imported, you need to choose an output format for your conversion. Click the button at the right of the “Add Photo” button, and then choose “Change” to set an output format for your video.
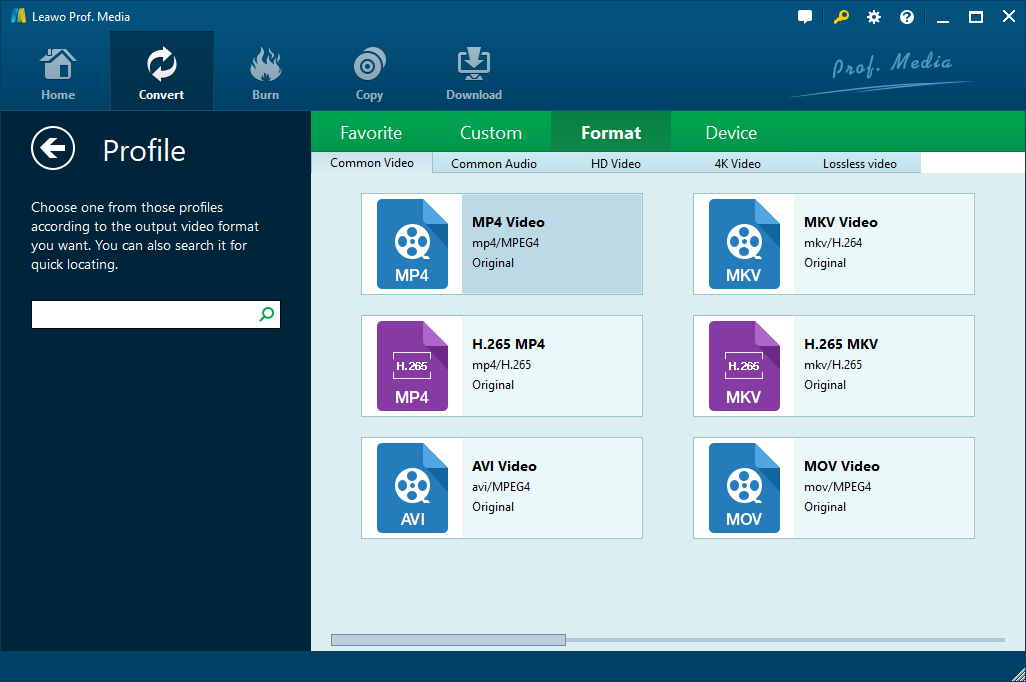
On the “Profile” panel, you can see all the available format categorized in different tags. Click on your desired output format to choose and then you will be brought back to the main video list.
Step 3: Further editing
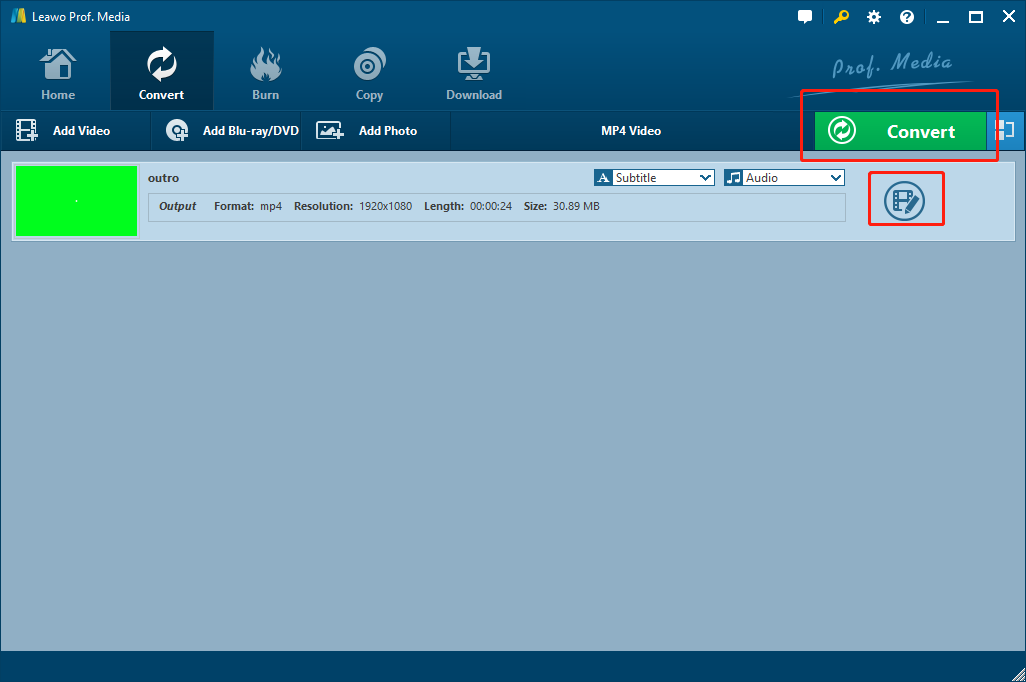
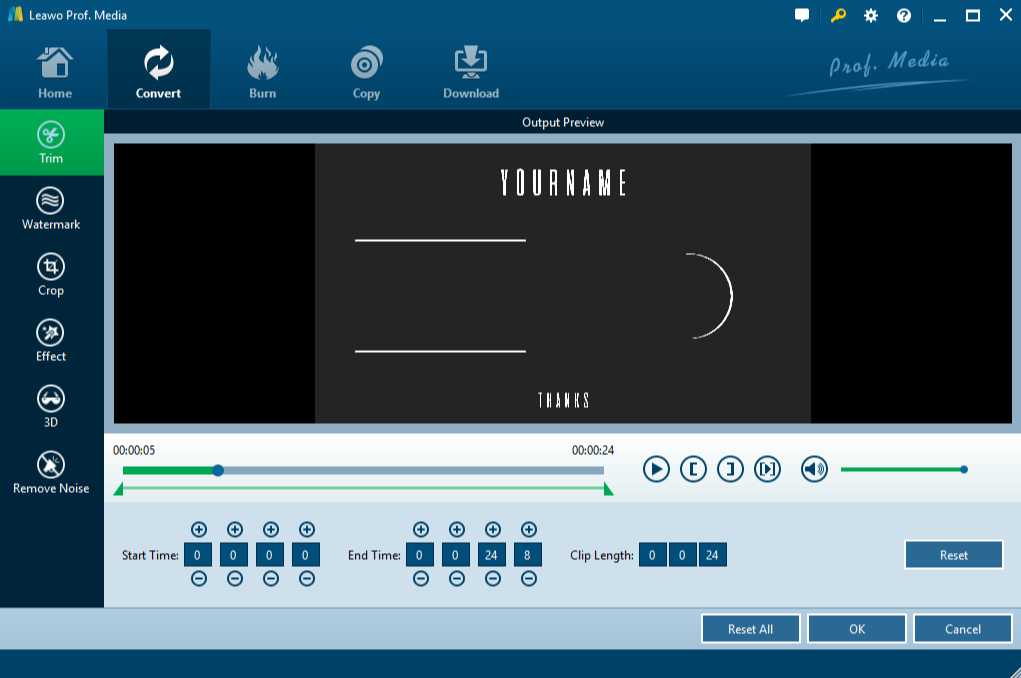
Leawo Video Converter provides not only basic conversion function, but also various editing options. To enable those functions, you just have to click the “Edit” button on the right of the video list, below the green “Convert” button to call out the “Edit” panel.
On the “Edit” panel, you can do trimming, cropping, adding watermark, adjusting parameters, turning 2D video to 3D, and removing noise to your YouTube video. All the options available are listed at the left bar. Once you have done all the editing you deed, click the “OK” at the bottom right corner to confirm your modifications, then you will be once again brought back to the main video list panel. If you think no more adjustment is needed, you can click the green “Convert” button above the imported video list to proceed.
Step 4: Start converting
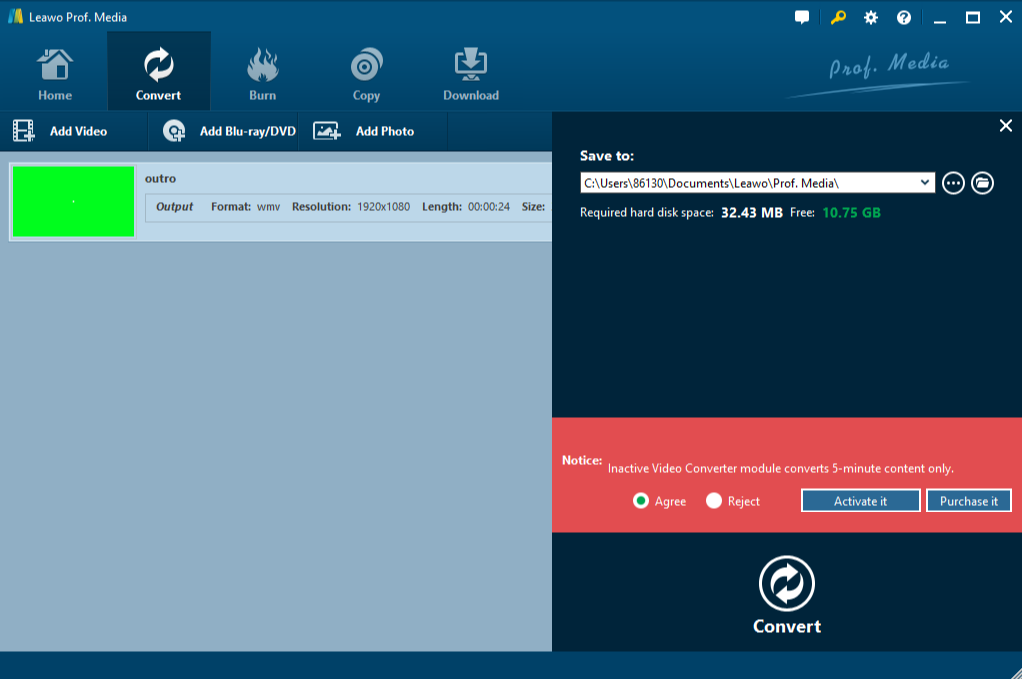
Once you click the green “Convert” button, a “Convert Setting” panel will be brought out, where you can designate an output format, and then click the “Convert” icon below to start converting YouTube to Xvid.
Part 3: Convert YouTube to Xvid with free desktop converter
As you can see, Leawo Video Converter is an efficient, user-friendly and multi-functional YouTube to Xvid converter. However, besides the professional way to convert YouTube to Xvid, there are also some cheaper way for you to do the task if you prefer. Any Video Converter is a free desktop converter that also allows you to convert YouTube to Xvid. The program has a charged version, but the free version is sufficient if you are not very demanding on the output result and the converting efficiency. Here is how you can convert YouTube to Xvid with the free desktop converter: Any Video Converter Free.
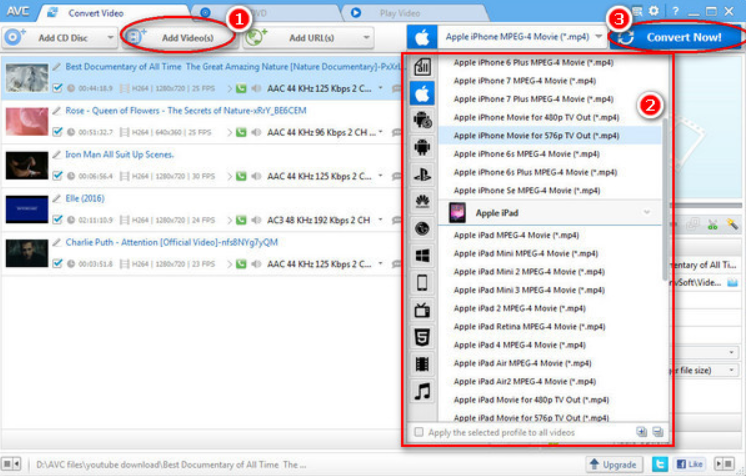
Step 1: Download the free YouTube to Xvid converter, launch the program and click "Add Video(s)" Button to add video file(s) you would like to convert.
Step 2: Select an output video format from the drop-down list. According to different versions of the software, the formats available may vary.
Step 3: After you have chosen an output format, click "Convert Now!" Button to start the conversion.
Part 4: Convert YouTube to Xvid with online Converter
Besides using a third-party YouTube to Xvid converter program, you can also convert YouTube to Xvid online with the help of some online video converter tools. Comparing to the third-party YouTube to Xvid converter programs, Online converter tools can offer a simplified workflow by skipping the process of downloading software. But if you convert YouTube to Xvid online, you will need a decent network connection to make sure the task does not get interrupted, and to make sure you can successfully download the converted file after the conversion is done.
If you decide to convert YouTube to Xvid online, Online Video Converter V3.0 would be a good choice. The website allows you to convert a YouTube video to various formats simply with a YouTube link. Also, the online YouTube to Xvid converter service is also really easy to use.
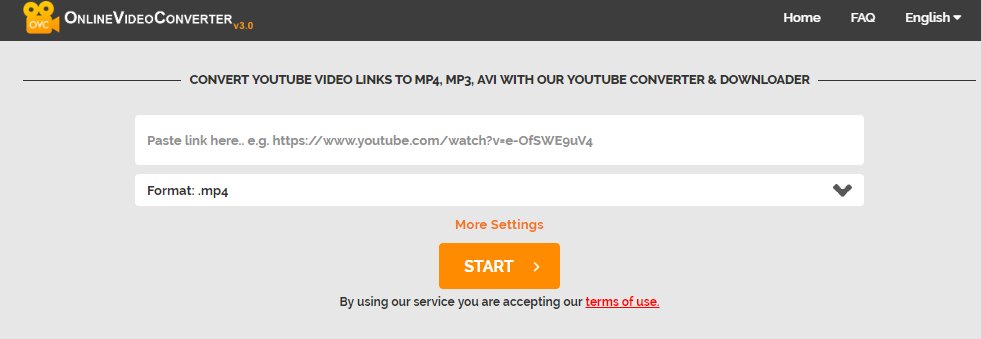
Step 1: Open the website, copy and paste your YouTube link into the link box.
Step 2: Choose an output format from the dropdown menu below the link box.
Step 3: Click the “START” button to start the conversion. Once the conversion is done, you can directly download the converted video file.
Part 5: A comparison of the above solutions
So today we introduced 3 different ways for you to convert YouTube to Xvid. The first one is by using a professional YouTube to Xvid converter, Leawo Video Converter. As one of the most professional video converter programs on the market, Leawo Video Converter is the most efficient choice among the three, and offers high speed, stable conversion along with advanced extra editing options. The second way we introduced today is by using a free desktop converter, Any Video Converter Free. This converter is sufficient for those who are not demanding on the output quality and the software flexibility. The third is by using an online YouTube to Xvid converter. It's easy but highly dependent on the network connection, and the output format choices are also pretty limited.
Which one is the best method for you? Take a look at the comparison chart below and I believe you'll have your own answer.
|
|
Leawo Video Converter |
Any Video Converter Free |
Online Video Converter V3.0 |
|
Basic Conversion |
Yes |
Yes |
Yes |
|
Output Video Formats Supported |
180+ |
12+ |
7+ |
|
Bulk Conversion |
Yes |
Yes |
|
|
Real-time Preview |
Yes |
Yes |
|
|
Mobile Device Optimization |
Yes |
Yes |
|
|
Advanced Editing |
Yes |
|
|
|
4K output |
Yes |
|
|
|
2D to 3D Conversion |
Yes |
|
|
Bonus Tip: Best YouTube Video Downloader
All these 3 tools need you to download the YouTube videos firstly before they are converted to Xvid. But YouTube won't let you download videos until you pay for the premium. This time, a YouTube video downloader is indispensable.CleverGet Video Downloader is the best 8K video downloader we recommend to download YouTube videos with ease.
With CleverGet, you can download videos, TV shows, live stream videos, and videos from 1000+ websites, including YouTube, Twitter, Instagram, and many more! Want to download YouTube Daily Show for future playback? CleverGet is here to help.
CleverGet also allows you to download live streaming video easily in two ways: direct live video URL and live video M3U8 link. That is to say, you can successfully download Facebook live video to a computer with just a few clicks!
Now let's see how to download YouTube with CleverGet in simple steps. Before everything else, just download and install CleverGet on your computer(PC & macOS)
◎Step 1. Launch CleverGet
Launch CleverGet on your computer.
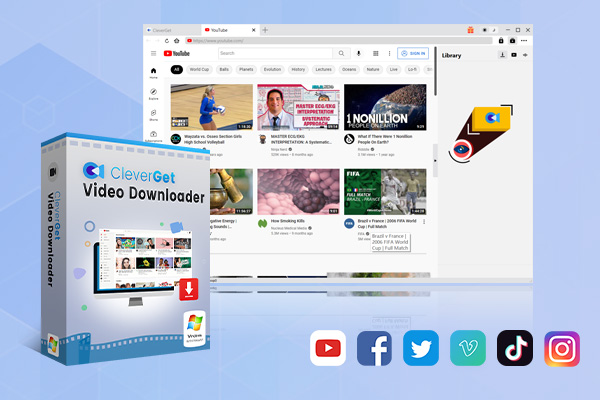
-
CleverGet Video Downloader
- Download Video & Music from 1000+ Sites
- Download Live Stream Videos from YouTube Live and Others
- Up to 8K UHD Video Downloading with 320 kbps Audio Quality
- Smarter Downloading Settings
- 1-Click to Play Downloaded Videos
- Provide Precise Video Info
◎Step 2. Set Output Directory
Click on the Settings icon to enter the setting panel and set the output directory.
◎Step 3. Locate YouTube Video
Click on the YouTube icon to enter the YouTube website directly and search target video. Or you can copy and paste the video link to the address bar and the video will be detected directly once you enter the link
◎Step 4. Download YouTube Video
Choose a preferred quality and format. Click on the "Download" button to download YouTube to MP4 as a local file.


