If you plan to control the content type that your children or others can access on your iPhone or iPad when make use of the Safari, I am happy to inform you that this is feasible. You are also able to block certain websites on Safari Mac effortlessly.
Part 1: How to Block Certain Websites on Safari iPhone
To fix how to block sites on Safari iPhone is an urgent task for your iPhones are now being used by children at home. It is quite embarrassing when kids access to some objectionable contents, especially when your children ask you “what is this” in the presence of guests. If this is an anxiety that you want to get rid of by learning how to block specific websites on iPhone Safari, the following steps will be what you want.
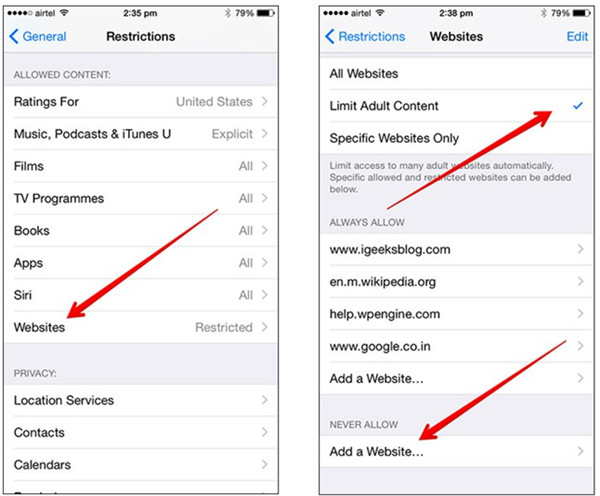
1. Run Settings app on iPhone home screen and then click on “General> Restrictions”. You need to enter your passcode to continue.
2. Drag down to go to the section of “ALLOWED CONTENT” and then click on “Websites” option under this menu.
3. Click on “Limit Adult Content” under the menu of “ALLOWED WEBSITES” and then you can choose “ALWAYS ALLOW” or “NEVER ALLOW” on the basis of you need. After that, you can hit “Add a Website” under “ALWAYS ALLOW” or “NEVER ALLOW” menu.
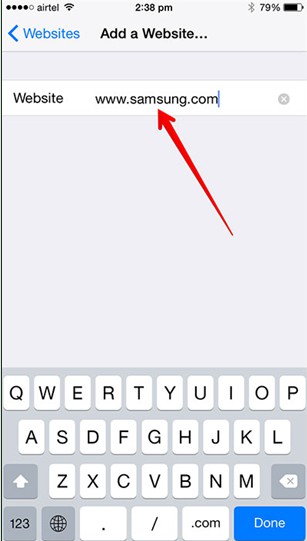
4. Type in the website name that you would like to block and click on “Done” from iPhone keyboard. If you desire to block more websites, you can go back to the interface of “Websites” and then click on “Add a Website” option to type in the URL of the website.
Can you block websites on your iPhone now? I’m sure you have mastered this method after reading this part for one time. It is quite easy to understand each step and you can now have a try to block a website on iPhone to practice this solution.
Part 2: How to Block Certain Websites on Safari Mac
After you fix the issue of how to block certain websites on iPhone, you can continue to see how to block a website on Safari Mac in this part. The “Parental Controls” panel will play an important role in dealing with this problem. Let’s begin to check out the step-by-step instructions listed underneath.
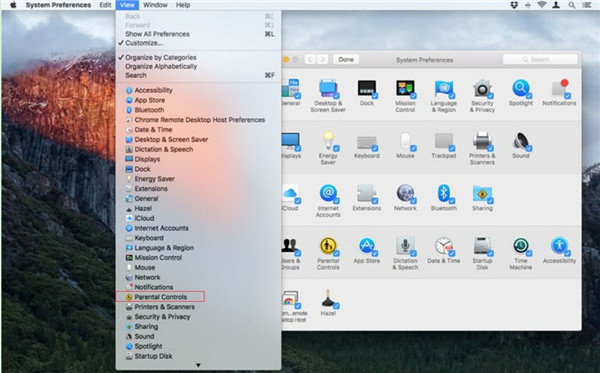
1. On Mac computer, you need to click on Apple menu and then move to “System Preference”. Afterwards, you need to click on “View> Parental Controls”.
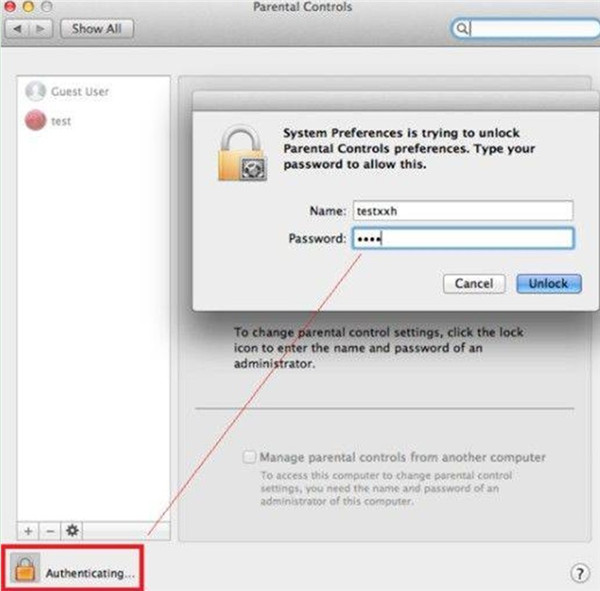
2. Hit on the lock icon at the bottom left of the interface and then enter the password. Click on “Unlock ” button in the panel to continue.
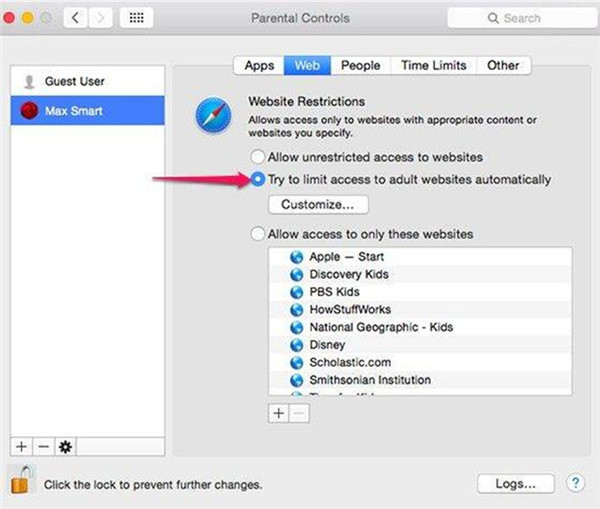
3. Choose one user account on the left side of the interface that you would like to block websites for and then hit “Enable Parental Controls”. Click on “Web” tab to choose “Try to limit access to adult websites automatically”.
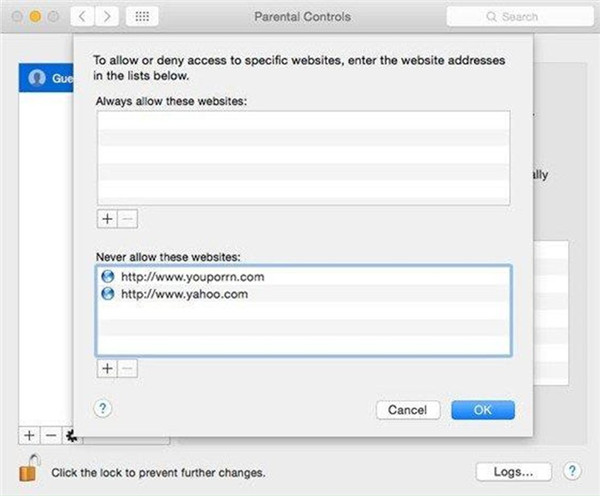
4. Hit on “Customize” and then click on the “+” button to add the website you desire to block under the menu of “Never allow these websites”.
If you read the contents shown above carefully, you will be able to address how to block websites on Safari iPhone and Mac with ease.
Part 3: How to Transfer Safari Bookmarks between iPhone and Mac via iTransfer for Mac
When you are on the goal, iPhone will be your portable tool to browse some online contents. When you are at work or at home, Mac computer will become much more convenient for you to finish tasks or watch videos. This can result in the need of transferring Safari bookmarks between iPhone and Mac to enable users to access their favorite websites on both Apple products. If you have not come up with any idea to achieve this aim, I would like to instruct you to make it with Leawo iTransfer for Mac. This software is good at solving distinct transfer issues among iTunes, computer and iOS devices, which supports 12 kinds of files, including music, video, bookmark and etc. The following paragraphs will show you how to transfer Safari bookmarks from Mac to iPhone and how to export iPhone Safari bookmarks to Mac via iTransfer for Mac respectively.
Leawo iTransfer for Mac
☉ copy files among iOS devices, iTunes and PCs with ease.
☉ copy up to 14 kinds of data and files without iTunes.
☉ Support the latest iOS devices like iPhone 7, iPhone 7 Plus, etc.
☉ Play back, view, and delete data and files on iOS devices.
3.1 Transfer Safari Bookmarks from Mac to iPhone
In order to transfer Safari bookmarks from Mac to iPhone, the first task you need to finish is to export Safari bookmarks to Mac in the format of HTML. After that, you can import the HTML file to iPhone directly via iTransfer for Mac.
3.1.1 Export Bookmarks in Safari to Mac
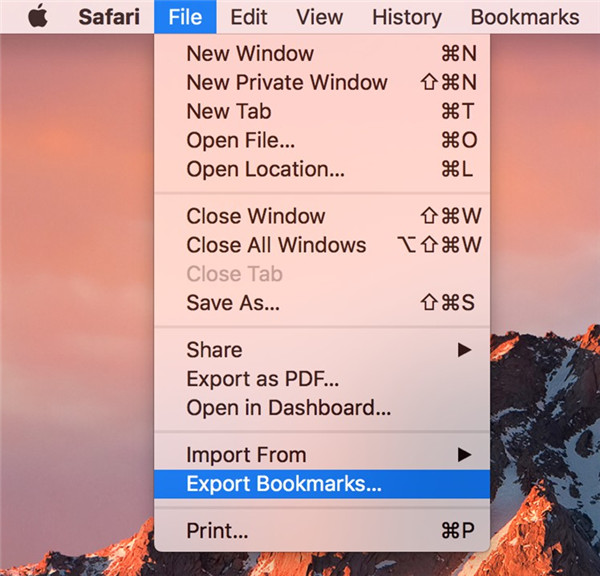
1. Run Safari on Mac computer and then click on “File> Export Bookmarks”.
2. Name the bookmark file and then set one target folder on Mac to save the exported Safari bookmarks. Hit “Save” button and you will be able to get one HTML file that contains all Safari bookmarks.
3.1.2 Import Safari Bookmarks HTML File to iPhone via iTransfer for Mac
After you get the HTML file that includes all Safari bookmarks, iTransfer for Mac can come into play.
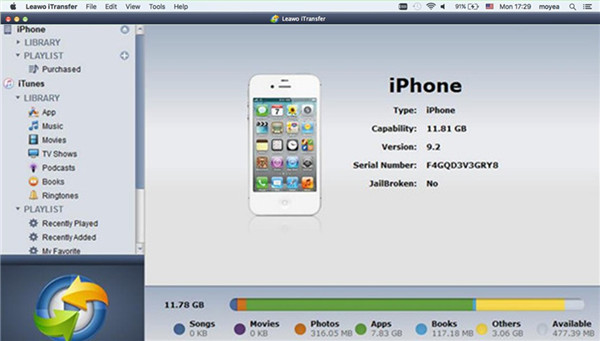
Run this amazing third-party tool on Mac and then use one proper USB cable to connect iPhone with Mac.
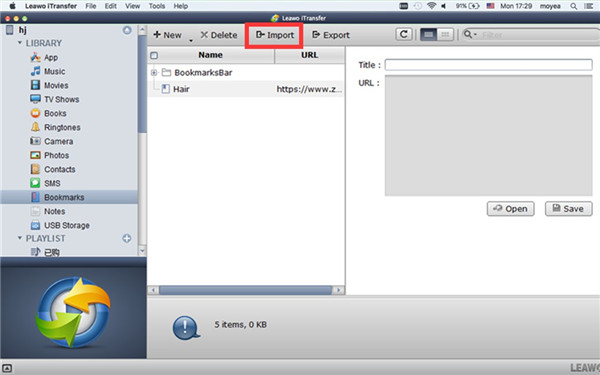
Hit on iPhone icon and then move to “LIBRARY> Bookmarks > Import” tab in the interface to choose the exported HTML file you have just saved on Mac folder. Click on “Open” button and the HTML file will be added to iPhone immediately. In a few seconds, you will be able to access Mac Safari bookmarks on iPhone.
3.2 Transfer Safari Bookmarks from iPhone to Mac via iTransfer for Mac
To transfer iPhone Safari bookmarks to Mac is much easier than the opposite transfer shown in Part 3.1, for you only need to bookmark some websites in Safari iPhone for later use.
Step 1. Run iTransfer for Mac and Plug iPhone into Mac
As for how to make it, please refer to the first step in Part 3.1.
Step 2. Transfer Safari Bookmarks to Mac
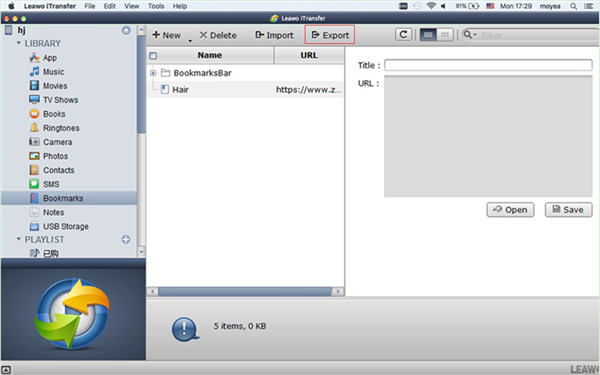
Hit iPhone icon and then click on “Bookmarks” tab under the menu of “LIBRARY” in the left sidebar to check all iPhone bookmarks in the right part of the interface. Choose to check the bookmark you want to transfer to Mac and then tap on “Export” button.
Step 3. Choose Destination Folder
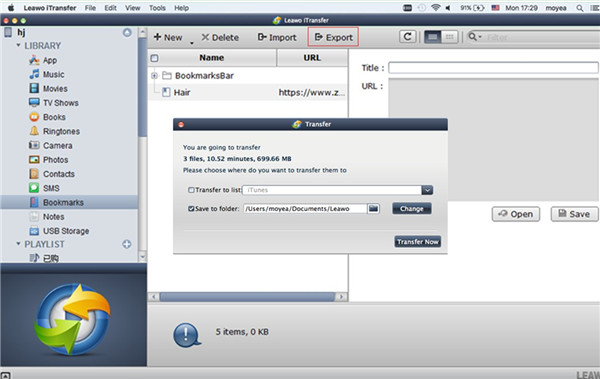
In the panel that shows up on the screen, you need to check “Save to folder” to browse Mac computer to set the destination folder. At last, click on “Transfer Now” button to begin to export iPhone Safari bookmarks to Mac at once.
The transfer processes between iPhone and Mac are really facile with the aid of iTransfer for Mac. This software is worth using, which is useful for working out various transfer issues. Have a try with its free version and you will understand why so many users choose to pay for it.


