There will always come a time when the need arises to capture or record an iPhone screen. There are many reasons why we may need to capture an iPhone screen. Some of them include: sharing an experience with others, for instructional purposes, to obtain evidence, for reference purposes, etc.
As a game lover, at times I felt the urge to show off some incredible feats I achieved after scoring many magnificent goals, an incredible dribbling skill and so on while playing FIFA17 on iPhone to my friends. The only way to get this done is by exploring the iPhone screen capture ability/feature.
Screen capture on iPhone can be classified into two, namely "iPhone screenshots taking" and "iPhone screen video recording". Taking screenshots is more like taking a snapshot of the iPhone screen, which can be done on the iPhone. Screen recording, on the other hand, means to take a video recording of the iPhone screen by itself. Taking a snapshot of the iPhone screen is relatively easier as it usually doesn’t require the use of third-party software, but iPhone screen recording is usually done by installing third-party applications and sometimes even involves the use of a computer. I will quickly take you through the processes involved in both iPhone screenshot and iPhone screen recording.
Part 1: How to Capture iPhone Screenshots?
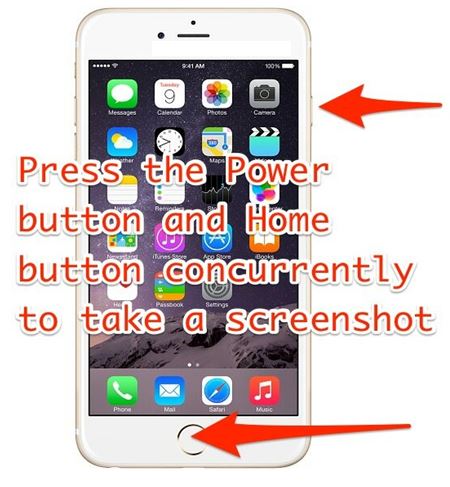
Taking a screenshot on an iPhone is a relatively easy task as stated above. All that you need are the iPhone power button and the home button. Listed below are the steps involved in doing this.
- Step 1. Navigate to the page that you intend to capture. For example, if you want to take a screenshot of the app store homepage, you need to click on the app store icon to open it, and you must remain on the opened page.
- Step 2. Press both the power button and the home button on your iPhone concurrently, i.e. at the same time (you should hear the sound of a camera roll).
If you have completed step 1 and 2 above correctly, the shot of iPhone screen capture will be saved immediately.
Part 2: How to Capture iPhone Screen Videos?
Unlike the easiness to capture iPhone screenshot, it is not usually easy to capture iPhone screen video. Sometimes, it requires the use of a computer or even jailbreaking. To capture iPhone screen video, you need to employ the services of a third-party application. However, we need to understand the fact that some of these applications are computer software, while others are designed for iPhones. The big difference here is the fact that, virtually all those iPhone applications are paid apps while the iPhone screen capture applications that are meant to be used on computers are usually free.
If you choose to go with a free option (using a computer), you should note that two major computer operating systems are presently supported. They are Mac Operating System and Windows Operating System.
I will be showing the steps for recording iPhone screen with a Mac computer in this article since Mac computers are also Apple products. Below are the requirements (things needed) to get this job done:
- A computer running “Mac” OS i.e. Apple computer
- The iPhone in question
- A USB cable that can connect the iPhone to the Mac computer
Follow the step-by-step guide below to capture iPhone screen videos with the helo of QuickTime Player. Check them out!
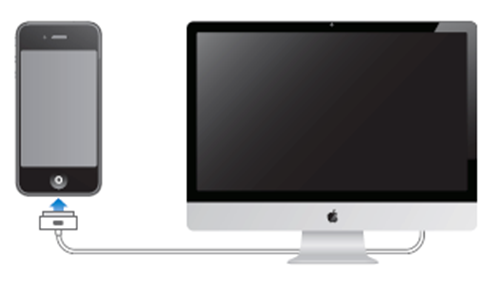
1. With your iPhone and Mac computer running on, connect your iPhone to the Mac computer via a USB cable. To make sure your iPhone is well connected to Mac computer, click "iTunes" icon on the Mac(you should see that your iPhone is connected), and then Minimize iTunes application.
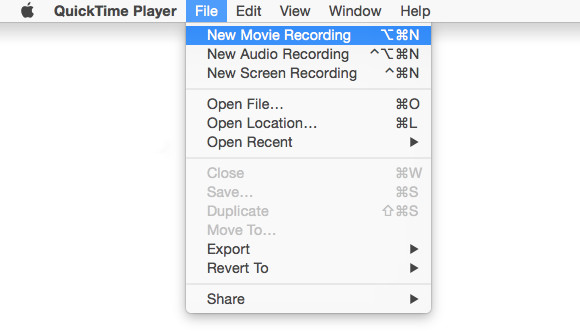
2. Launch QuickTime Player on Mac, and click "File" button on the top left, and then select "New Movie Recording" from the list of options as shown below.
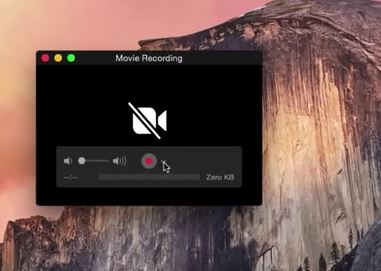
3. After you select to record new movie, you will see a screen that looks like the one below.
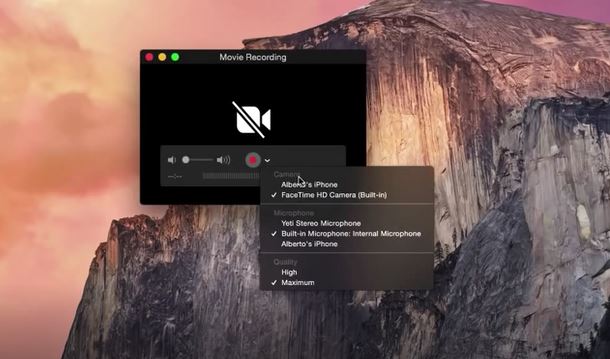
4. Click the little arrow and select your phone as shown below.
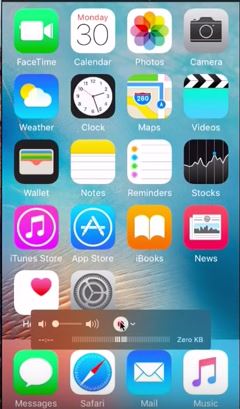
5. To start recording, click the red button as shown below and it will start recording everything you do on your iPhone. When you feel like stopping the recording, go back and click the red button again.
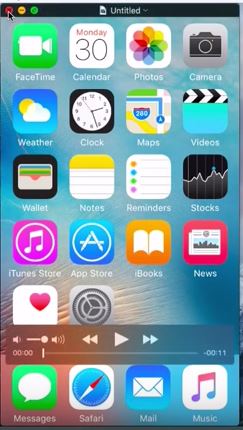
6. To save the video, click the red "x" as shown below, and then you need to click "save" on the page that appears. You should find your recorded video on the computer desktop now.
See? Capturing iPhone screen videos is more complicated than capturing iPhone screen shots. But all in all, those two methods are the easiest ones for people to capture iPhone screen.

