
Photo is the most common tool we use to capture and preserve precious moments in our lives. What's kept in photos are not just moments, but also memories, emotions and life experiences, and that's what make photos so important to us. Having so much content in the photos, simply viewing them one by one is sometimes not enough to feel everything behind them, so in some occasions, we need to make a movie or slideshow out of these photos to express our feelings to these memories. Making a movie from still images is a good idea, so today we will talk about how to make a movie from still images on Mac.
Part 1: How to make a movie from still images on Mac with iMovie
To make a movie or slideshow with photos, the first thing that comes to our mind might be iMovie. iMovie is a video editing software application sold by Apple Inc. for the Mac and iOS . It was originally released in 1997 as a Mac OS 8 application bundled with the first FireWire-enabled consumer Mac model – the iMac DV. Since version 3, iMovie has been a macOS-only application included with the iLife suite of Mac applications. Since 2003, iMovie is included free with all new Mac computers. Since it's now free and easy to acquire, let's talk about how to make a movie from still images on Mac with iMovie first.
Step 1: Create a new project
Open iMovie and select to create a new movie by clicking "File" > "New Movie". Choose the theme that can suit your project best from the various themes options.
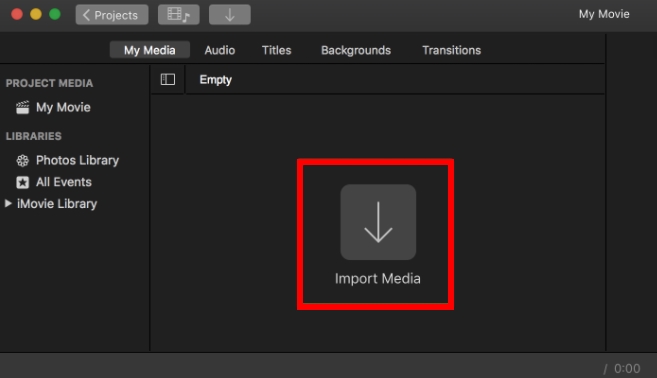
Step 2: Import media
Click "Import Media" and open the photos folder. Here just easily press the "Command key" on keyboard and click to select each of the images that you want to add, click "Import All". Highlight all the images and drag them to the timeline.
Step 3: Change transitions
To change the transitions between slides, double click on them afterwards select to edit the transitions. Double click the opening and closing screens to edit the texts.
Step 4: Background music and preview
Finally, to import a new song as background music, go to the "Import" tab and select the track and click "Import". Click the "Play" button to play the slideshow. You can view it in full mode by clicking the "Full Screen" icon. You may save the project after editing.
Part 2: How to make a movie from still images on Mac with Leawo DVD Creator for Mac
iMovie is not the only choice to make a movie from still images on Mac. If you really want to make a beautiful photo slideshow and burn it to a DVD disc, it's suggested you choose a professional program to do it. The program that I would recommend is Leawo DVD Creator for Mac, and here is how you can make a movie from still images on Mac with Leawo DVD Creator for Mac and burn it to a DVD disc.
Leawo DVD Creator for Mac is regarded as one of the most powerful DVD authoring software for Mac OS in recent years. It can allow you burn more than 180+ formats videos and photos into a DVD with lossless quality retained. It has a variety of menu templates for your option in order to make a personalized DVD disc. Also, its comprehensive processing technology make its authoring DVD speed to be 6X faster than others. With it, you can burn different types of DVD disc with ease and accuracy.
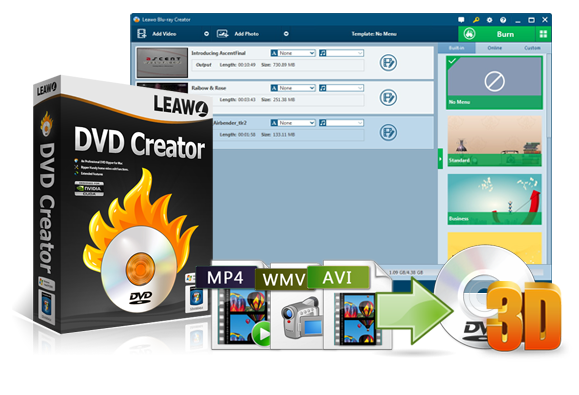
DVD Creator
☉ Convert videos like MP4, AVI, MKV to DVD format fast.
☉ Create DVD-5, DVD-9 disc, folder or ISO image without quality loss.
☉ 1-click operation to create photo slideshows and burn to DVD.
☉ Easily editable effects, 2D to 3D conversion support.
☉ Built-in menu templates and edit disc menu with personal preferences.
![]()
![]()
Here is how you can make movies from photo in Mac with Leawo DVD Creator for Mac
Step 1: Add photo. Launch Leawo DVD Creator for Mac, in the main interface there is a button labled as "Add photo". Click on it and import the photos you want to make into movie
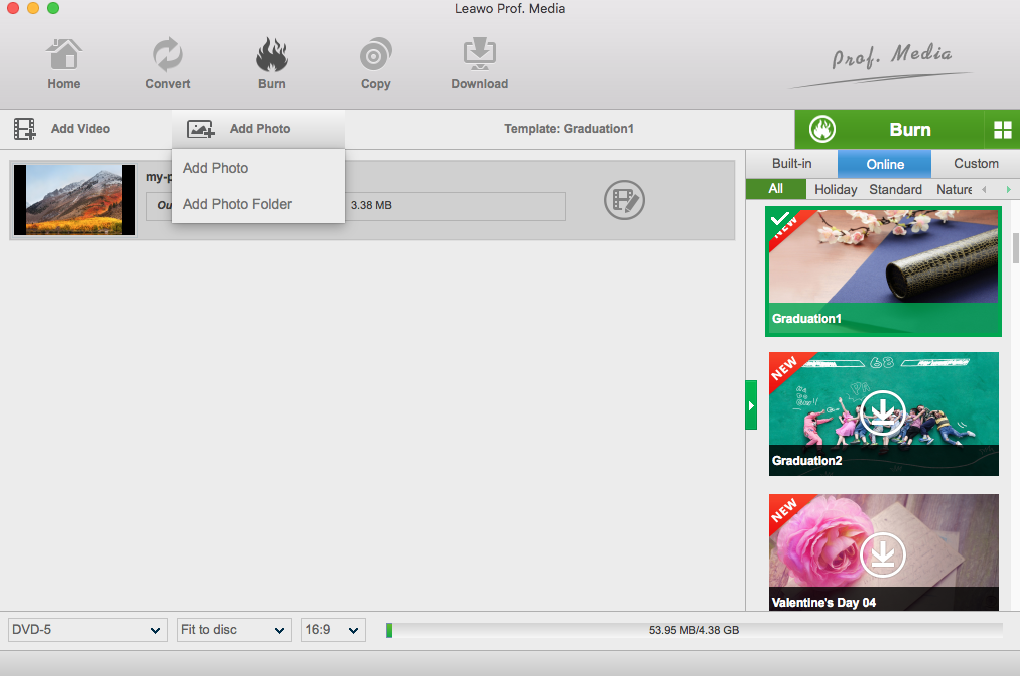
Step 2: Edit photo. After importing the photo, you can click on the edit button on the photo item you just imported to edit the photo. you can also add background music here.

Step 3: Design menu. You can design a menu for your photo slideshow if you want to. there are a lot of menu templates on the right of your imported photo list, choose one and you can edit on it to make it the way you like it.
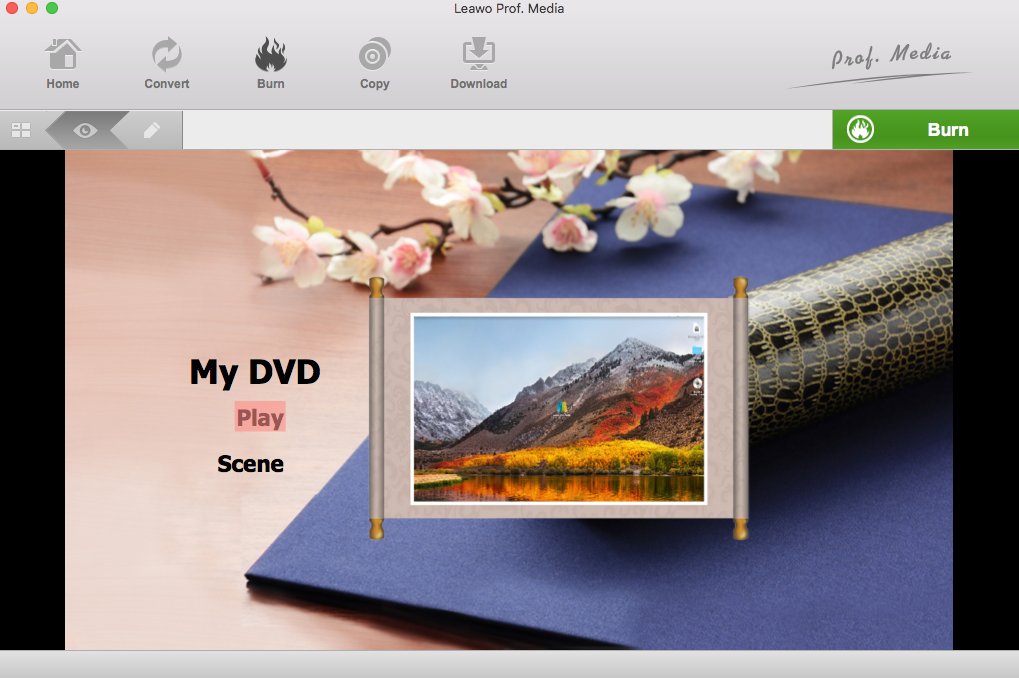
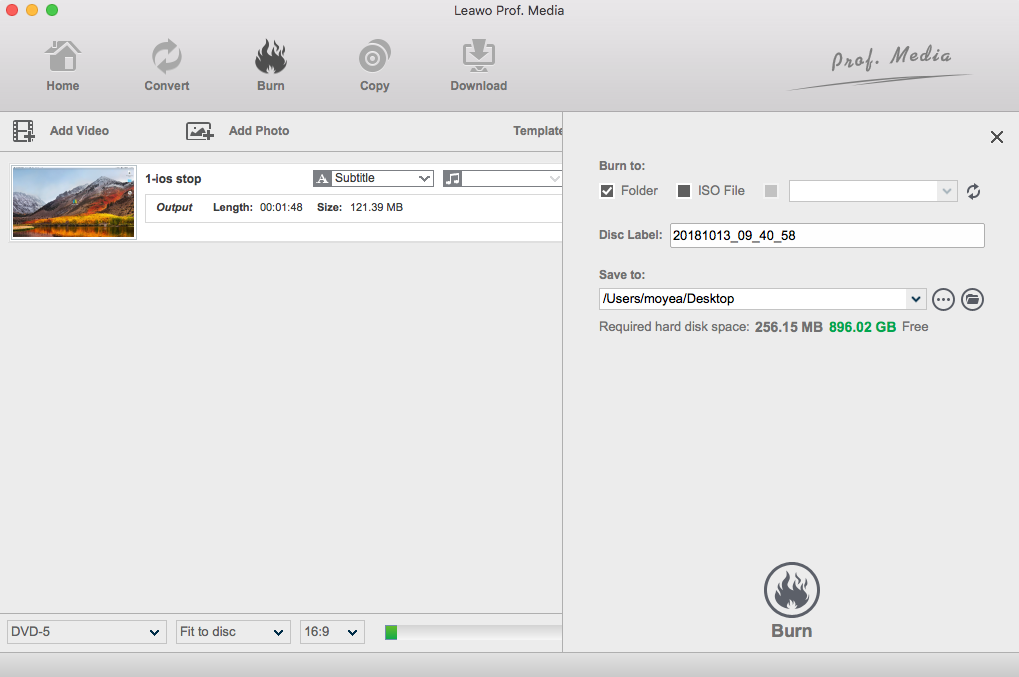
Step 4: Burn to DVD. After everything is well set, click the green "Burn" button at the top right corner to start burning your DVD. You can set some burning parameters first.
Part 3: A simple comparison between the two
Today I introduced two ways to make movie from photos in Mac. One is by using iMovie, the other is by using Leawo DVD Creator for Mac. Which is better?
Well, iMovie is free, and easy to acquire. However, in movie making, the program is not professional. iMovie can only provide limited functions for you, and the output file that iMovie produce is not as compatible as Leawo DVD Creator for Mac. Leawo DVD Creator for Mac however, can provide various professional photo and video processing functions like adding menus and special effects. What's more, Leawo DVD Creator can not only deal with photos and videos, but also can burn all kinds of media files to a playable disc easily.
So, it's hard to tell which one is better than the other, I guess you have to try yourself to find out!
 Sep. 08, 2021 by


 Prof. Media
 Blu-ray Ripper
 Blu-ray Copy
 iOS Data Recovery
 [12/29/23] MAX Downloader V15.0.0
 10,000,000 people are using Leawo!
 All Transactions are protected!
 30-Day Money Back Guarantee!