Have you meet an issue that iTunes won’t open on your computer suddenly or after the system updates. Here are some methods to teach you how to solve this problem. Generally speaking, this issue usually appears on the computer with the system Win10/7, particularly for new iTunes or the update of Windows system. What are you going to do when iTunes cannot launch on your computer? You can have a try on some troubleshooting tips like restarting your device and running iTunes one more time, discharging iTunes and re-installing the latest version of it, or ensuring the adequate space for iTunes.
Part 1: Why won't iTunes open on my PC
iTunes cannot open on PC is a common issue that you may find many people around us will meet this problem easily. Why won’t iTunes open on my PC? The possible reasons are mainly summarized as below:
iTunes issue:
1. Meet a bug during the process of installing or operating iTunes.
2. No update in iTunes or updating process is being performed in iTunes
3. The account or library of iTunes has errors.
Computer issue:
1. Firewall problem or the errors exist in the settings of plugin.
2. No update in Windows Drivers.
3. There is something wrong with network settings.
Part 2: How to fix "iTunes Won't Open on PC"
Here we will list some effective solutions to fix the issue iTunes won’t open on PC.
1. Have a try on launching iTunes under the “Safe Mode”.
iTunes running under safe mode is able to prevent any external plugin of third-party tool from interfering its working. You can refer to the steps as below to make iTunes work in the safe mode.
* Press the option Shift+Ctrl on keyboard and have double click on the icon of iTunes on your computer.
* A dialog will pop up in iTunes and prompts that iTunes is working in the safe mode. The installed visual programs have been disabled for the time being.
* If iTunes is running in the safe mode without any obstacle, what you can do is to get rid of the external plugin from the third-party tool and restart this software one more time in a normal way.
2. Disable the network connection with your computer.
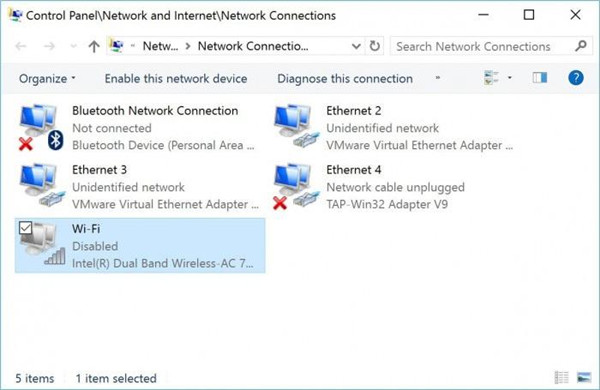
To prevent Apple servers from connecting with iTunes and cause errors, you can follow the steps to disable the network connection with your computer and then run iTunes one more time. Turn off your WiFi connection or get the computer disconnected with network via the Control Panel.
If the Ethernet card is being used to connect with the network, make it unplug from the computer and try to run iTunes again. If iTunes works in a normal way, you definitely need to get the computer drivers upgraded. Thought iTunes is a software, it allows the communication between the computer and the hardware.
3. Change Window account
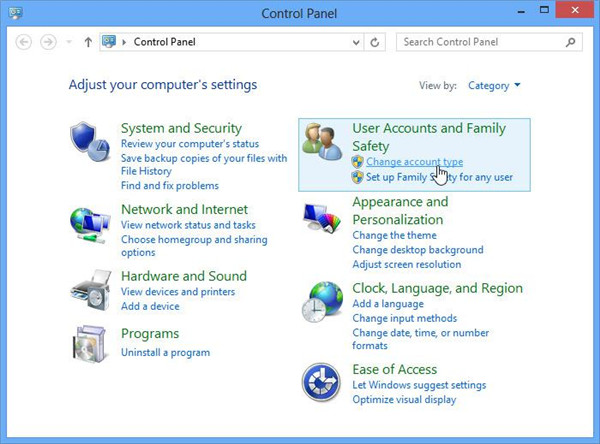
You can have a try on changing Windows account to correct the error if iTunes won’t open on Windows 10. You can refer to the following steps to gain a new account.
I. Get access to Control Panel, then choose the option “User Accounts”. Then click on “Change Account Type”.
II. Choose “Add a new user”.
III. Click on the option “Add someone else on this PC” as the picture shown as below. Then pop-up instructions will guide you what to do.
IV. A new account will be set up and then get it to access to your computer. Then launch iTunes again. If it still cannot open, a check for system is needed.
4. Set up a new iTunes library
You need to set up a new iTunes library if iTunes cannot open on the specific user accounts of Windows. Follow the procedure as below to fix “iTunes won’t open on PC” issue.
I. Enter C drive and find the iTunes folder, where the file of iTunes Library can be found. Then transfer the file to the desktop. Now launch iTunes and its library is definitely empty.
II. Run iTunes menu and click on “Choose File”, then choose “Add Folder to Library”.
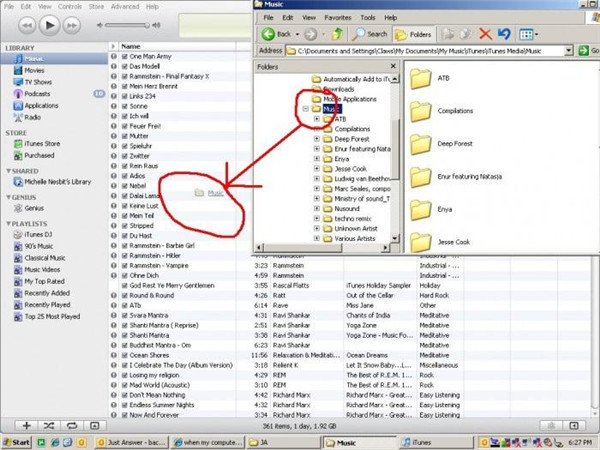
III. Get access to the folders with all music stored. Select the music according to the category like the song, the album or the artists, and then add the music to iTunes by dragging it to iTunes Window.
This operation successfully gets rid of the files which will lead to the iTunes not opening issue. After the new iTunes library is set up, iTunes can be used without any interference.
5. Configuration on firewall
A firewall is able to protect your computer from visiting by the private networks with non-authorized. You should have check on your firewall whether it causes tuned not to work normally.
The following procedures ensure that the configuration on firewall makes iTunes have a connection with the network.
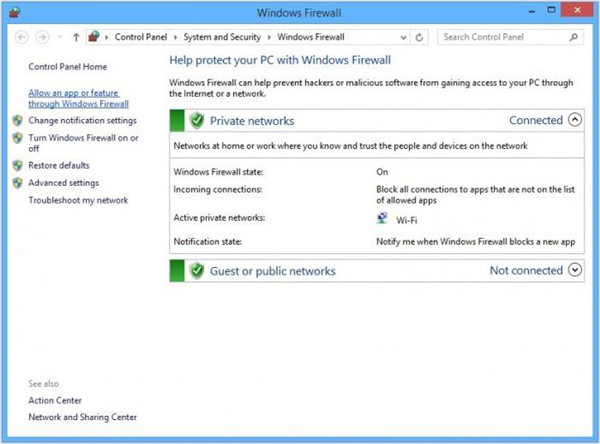
I. Search firewall.cpl in the Start Menu.
II. Wait until the firewall has been turned on, then click the option “Allow App or Feature via Windows Firewall”.
III. Click “Change Settings”.
IV. Get iTunes enabled for the private network and the public network, and choose Bonjour for the private network only.
V. If the software cannot be found in the list, click “Allow another App/Program”, then browse the list to search iTunes and Bonjour.
VI. Finally, click on “Add” and click the button “Ok” to go out of the firewall.
This only changes the security settings of iTunes on firewall, if iTunes not opening issue still exists, go ahead to re-install iTunes on your computer.
6. Re-installation of iTunes software
Re-installation of iTunes is deemed as a cumbersome way to troubleshoot iTunes. It might take much in re-installing iTunes, but it is a quite great solution to the iTunes error issue. You can follow the specific steps as below:
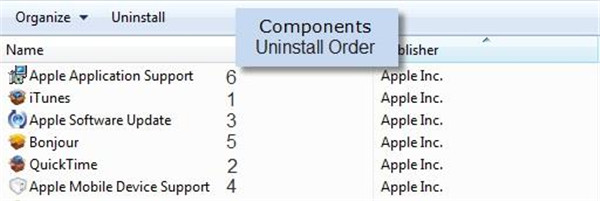
I. Get access to Control Panel and enter “Programs” or “Programs and Features”. Then choose the option “Uninstall a Program”.
II. Uninstall all software related to iTunes from your computer. Then follow the given instructions to perform the uninstalling task.
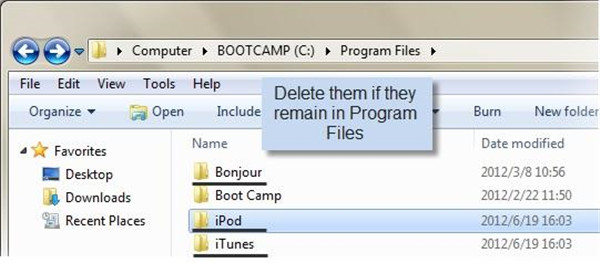
III. Open C drive and remove the specified folders which are shown as the picture below.
IV. The recycle bin can also be emptied before iTunes is re-installed to your computer from Apple official site.
This solution is only used under the condition that all other methods mentioned above cannot work on the iTunes not opening issue.
Part 3: Alternative to iTunes to manage iPhone files
Leawo iTransfer is a powerful transfer software to solve the problem of transferring files between iOS devices, iTunes and computer. Up to 12 types of files can be supported by iTransfer, such as apps, music, photos and videos and so on. It also can act as a backup tool for the files on computer. Additionally, it is an excellent music manager which is able to help you get iTunes and the playlist of the Apple devices managed well. Due to its advanced technology of scanning and transferring, iTransfer is able to transfer the different kinds of files in a rapid and safe way.
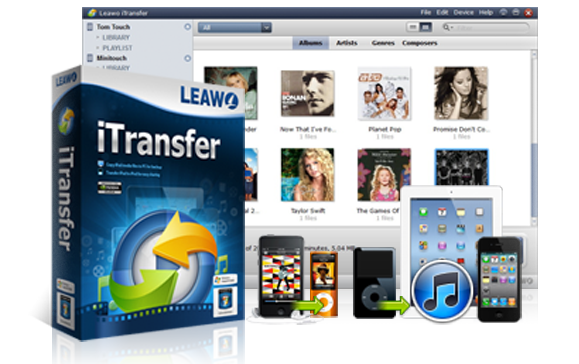
Leawo iTransfer
☉ Transfer up to 14 kinds of data and files without iTunes.
☉ Support the latest iOS devices like iPhone X, iPhone XR, etc.
☉ Play back, view, and delete data and files on iOS devices.
Transfer iTunes music to iPhone from computer
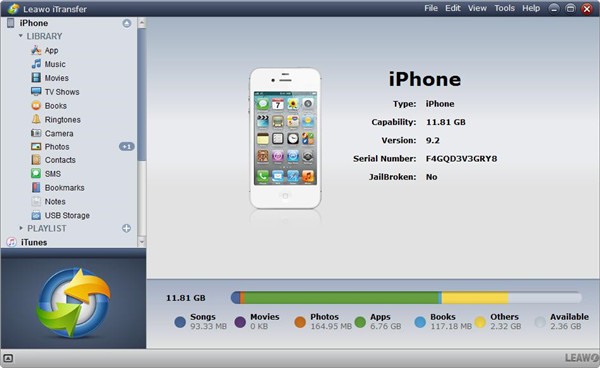
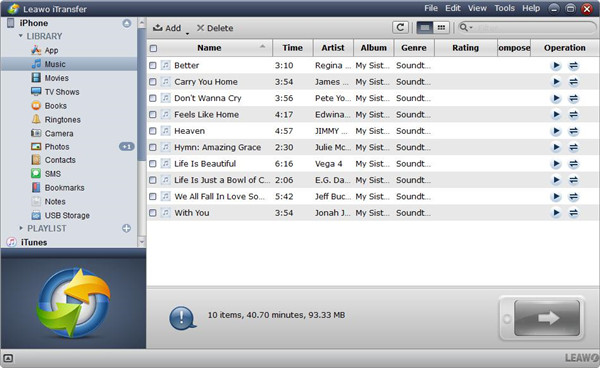
1. Connect your iPhone to the computer and then your iPhone will be detected and recognized automatically. Your iPhone library along with iTunes library will be shown in the left sidebar.
2. Import files to the software from computer in four ways as below.
I. Drag and drop the files to iTransfer window directly.
II. Click “Add” button on the middle top of the software
III. Choose the option File > Add > Add File/Add Folder on the top right corner of the window.
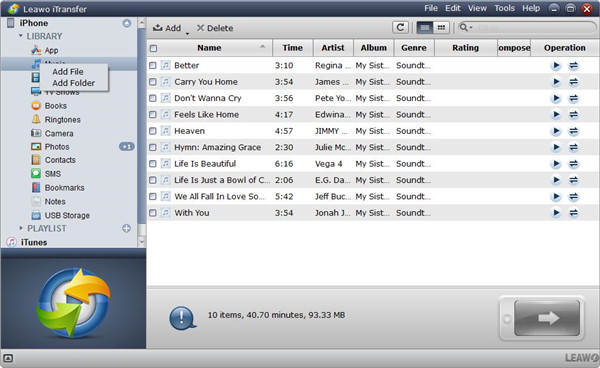
IV. Click on “Library” and select “Add File or Add Folder”.
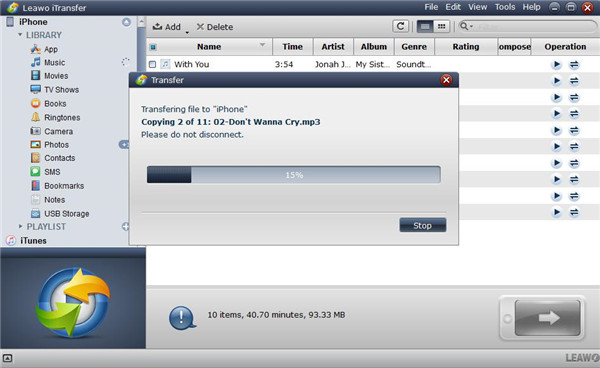
3. When the files have been imported to iTransfer, the transfer process will begin. A dialog will pop up to show you the number and the title of the files which are being transferred. Remember do not interrupt the connection with iOS devices until the transfer is finished.
Transfer music from iPhone to computer
To make iPhone files get well managed and organized, you can transfer them to the computer and use Leawo iTrasnfer to complete the transferring task and management task.
1. Connect your iPhone to computer and your iPhone will be detected and recognized in an automatic way, the library will be displayed in the left sidebar as the step 1 mentioned above in transferring files to iPhone from computer.
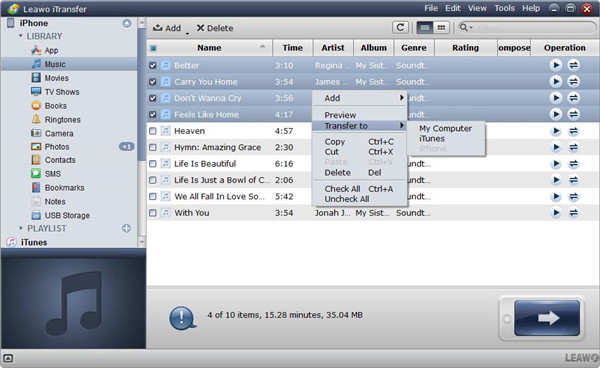
2. Select “Music” in the library, enable the square checkbox next to “Name” to choose all the music files to transfer, then click on “Transfer” button on the right bottom corner. Or you can select some file that you want to transfer by holding the key Ctrl/Shift, then right click on the files that you have selected and chosen the option Transfer to > My Computer.
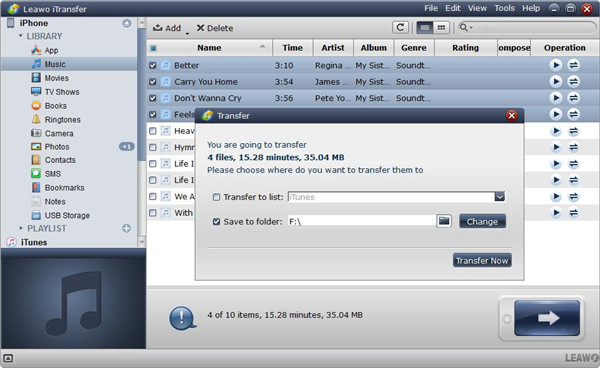
3. A dialog about transfer settings will show up after the files have been selected, you are required to choose a destination folder to save the transferred files by checking the option “Save to folder” and clicking on the button “Change”. Finally, click the button “Transfer Now” to begin to transfer the file to your computer.


