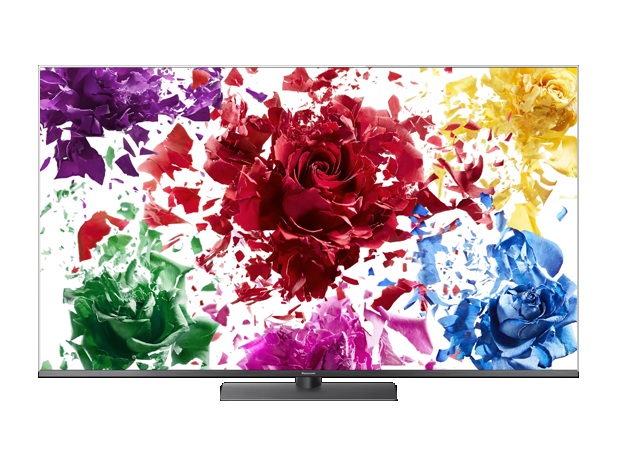
First there were black and white TVs, then came the color TVs. In the present day, the human race has been introduced to smart TVs. Quite simply, a smart TV is just a traditional color TV with integrated Internet. Other features will allow users to do more, for example streaming videos, music and viewing photos. Many manufacturers have been making smart TVs, and those from Panasonic have been described as coming straight out of Hollywood because of the amazing technological features they offer. Panasonic is selling the Vierra TH-Series OLED and LED Smart TVs. They ranger from 32 to 75 inches in screen sizes and they offer excellent cinematic pictures, at the same time offering other goodies like narrow bezels. They also have excellent viewing angle characteristics no matter where you view from. As with all Smart TVs, you can connect them to the internet and enjoy movies, TV shows, streaming videos, on demand services as well as using useful apps. You can also connect external drives, and use SmartCast services to stream and play content on the Panasonic Smart TVs.
Part 1: Why not can watch iTunes movies on Panasonic Smart TV?
With iTunes being ranked one of the top digital media stores worldwide, you can find almost any movie or TV series ever produced. From time to time, iTunes offers some deals on videos and music, for instance it offered 50% off select movies in October 2019, and these offers are always available. However, you cannot directly play these movies on your Panasonic Smart TV, mainly because of Apple’s FairPlay policies. Basically this means is you cannot watch or share those movies on any devices except yours, as they are protected by the DRM system. The other reason is that iTunes videos come in the M4V video format, which is specifically designed for the Apple ecosystem and will not work natively on other operating systems, and even smart TVs. The good news is there are software tools designed to reverse engineer the DRM system, and you can use them to convert DRM protected files into normal media files that you can play on any device. Below is a selection of the tools that can be used for that job.
Part 2: Pick a tool to Remove DRM from iTunes movies(list several tools)
1. Leawo Prof. DRM
Leawo Prof. DRM is the ultimate DRM removal tool, which is designed for both Windows and Mac OS. You will not only get to remove DRM from iTunes files, but also Spotify Music, Audible Audiobooks, and even protected e-Books from Amazon, Kindle and Kobo. With advanced technology, you will get to convert your files at 50X faster speed, since the conversion theory is deciphering. 100% of the original quality is also reserved whenever you do a conversion job, at the same time batch processing is supported. The most important factor about Leawo Prof. DRM is that it is constantly updated to cope with the latest security measures, especially when Apple and other digital media companies are striving to find new ways to block DRM removal technologies. Other bonus features are a very clean and super simple interface that is easy to use.
2. NoteBurner M4V Converter Plus
This software tool is available for both Windows and Mac OS, and will basically help you to convert iTunes purchased and rented M4V videos into DRM free files. The file formats available for output are MOV, MP4, AVI, MPEG and 3GP. Not only can you convert to video files, you can also convert to audio files. The conversion theory is deciphering, and it is important to note that this software will only work with iTunes DRM videos only which might be bad news to some users. According to the developers, you can do a conversion job at 20X speed, and you will get to keep the original video quality.
3.Audials Tunebite
This software is for Windows only which was designed to legally remove DRM protection from audio and video files which include music, movies and TV shows. This software can also record music from Internet channels, as well as recording and downloading video clips. The biggest advantage of this software is that it can output between 100 audio and video formats. The conversion theory of this software is recording, which essentially means this is a very slow method of removing DRM. It is not available as free software and you will have to fork-out some cash to use it.
4. Aimersoft DRM Media Converter
This DRM converter is only available for Windows and it is almost similar to Audials Tunebite. The conversion theory is recording and of course, that is a slower way of removing DRM. According to the developers, their conversion speed is rated at 6X faster speed. It has a host of tools that you can use before conversion, like adjusting the frame rates of videos, resolution and more. Just like Leawo Prof. DRM, batch processing is supported. A host of optimized format and device profiles are available for users to pick from. This software is also not free of use, and you will have to pay to get a license.
5. Pavtube ChewTune
This software is available for Windows and Mac OS, and is uses both recording and deciphering theories for conversion. It will only work with iTunes files, and other services are not supported. The key features of this software are audio conversion, video conversion and of course DRM removal. It will install a virtual sound card for audio recording. Generally this software is not very stable, and the Mac OS version is not compatible with Mac OS 10.8 and above.
Part 3: Convert iTunes movies to Panasonic Smart TV with Leawo Prof. DRM
Being the best DRM removal tool as clearly shown above, you can download and install this software for use on either Windows or Mac OS. The following steps will allow you to remove DRM from iTunes movies which you will conveniently be able to play on your Panasonic Smart TV.
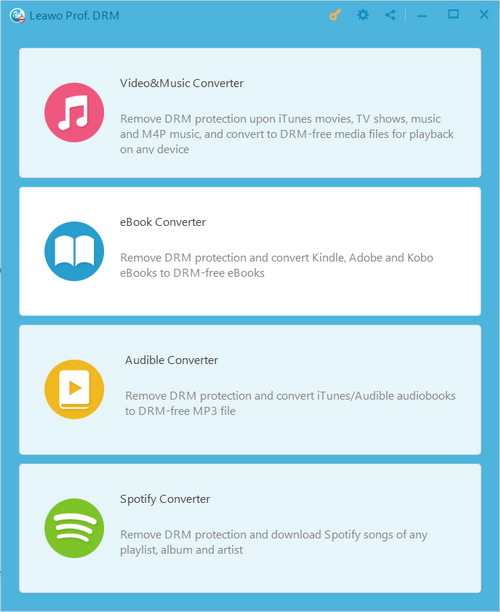
Step 1: Open the iTunes module. After you launch the program, the first thing you will see are the modules. The iTunes module should be at the top, and is labeled “Video & Music Converter”. Simply click it to begin the process of DRM removal.
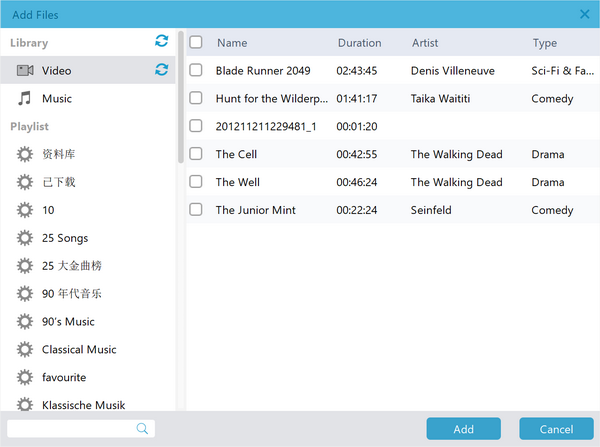
Step 2: Importing your movie files. Click “Add Files” on the menu bar, and a window with all your iTunes library movies will open. Manually select the movies/ TV shows you wish to convert, then click “Add”, or simply click “Add All” if you wish to convert all of them. This program will automatically search and find your iTunes M4V movie files which will save you lots of time.
Step 3: Set your output folder. By default, your converted movies will be saved to the installation directory of Leawo Prof. DRM, which can be a headache to computer newbies, and amateur users. Click the browse icon, next to the “Output” text-box, then conveniently choose the output location.
Note: You can choose audio tracks or subtitles. Your imported files will now show on the program. Click the edit icon at the right side of each file to select the audio track and the subtitles of your choice. The subtitles can be used if you wish to convert to video.
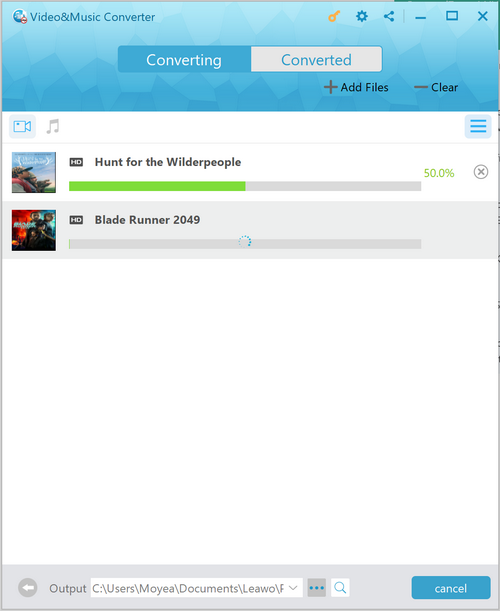
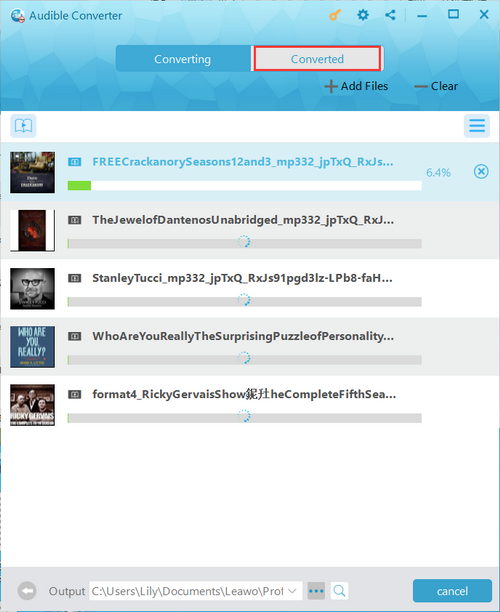
Step 5: Conversion. The last step is to click the “Convert” button when you finish with all the above steps. There are two tabs, that is “Converting” and “Converted”. When your movies finish converting, go to the “Converted” tab to look for the files. The converted videos should be in the MP4 video format which you can directly play on your Panasonic Smart TV.
Part 4: Transfer iTunes converted movies to Panasonic Smart TV for watching
USB
To play the movies from a USB storage device, have the video files ready and saved to a location that is convenient for you to find them when you have finished removing DRM. Copy them to the USB device, and simply stick it to the Smart TV once done. The TV should recognize your USB device, and simply follow the on-screen instructions to begin playing the movies.
SmartCast by using Mirror for Panasonic Smart TV
Step 1: Download and launch the app on your mobile phone. The app will automatically look for the TV, and make sure both the phone and the TV are connected to the same WiFi network.
Step 2: Click on “Start Mirroring” to start mirroring on the TV you selected in the previous step.
Step 3: Select “Mirror Panasonic TV” and press “Start Broadcast” to begin watching your movie(s) and video(s).

