Google Drive allows users to store files in the cloud, share files, and edit documents, spreadsheets, and presentations with collaborators. You may have a bunch of old movie DVDs you'd love to get rid of but still have access to on the cloud. If you're looking for a way to upload DVD to Google Drive, just read on.
We can see that DVD disc movies are not the accepted format by Google Drive. Therefore, you need a DVD Ripper in hand. There are many programs out there that allow you to convert DVD to Google Drive compatible MP4, MOV, AVI, WMV, FLV file. You can convert DVD to Google Drive readable format file first and then upload the video file to Google Drive.
Part 1: How to convert DVD to video via Leawo DVD Ripper
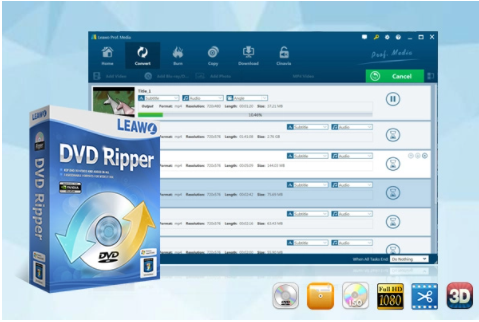
There are many programs out there that allow you to rip DVD for using anywhere. Here the Leawo DVD Ripper is highly recommended to help you rip DVD movies to MP4 files at high speed and high output video quality. In addition to MP4 files, it can also rip and convert DVD to all other regular video files like DVD to MP4, DVD to AVI, DVD to MKV, etc. Leawo DVD Ripper is our favorite video encoder for a reason: It's simple, easy to use, easy to install, and offers a wealth of tweaking options to get the best possible file as a result. Now follow the guide below.
-
Leawo DVD Ripper
☉ Decrypt and rip DVD discs with disc protection and region code
☉ Convert DVD to MP4, MKV, AVI, MOV, FLV, and other 180+ HD/SD formats
☉ Convert DVD main movie to videos for space saving
☉ Convert 2D DVD movies to 3D movies with 6 different 3D effects
☉ Fast conversion with NVIDIA CUDA, AMD APP and Intel Quick Sync acceleration technologies
Step 1: Download and install Leawo DVD Ripper on your computer
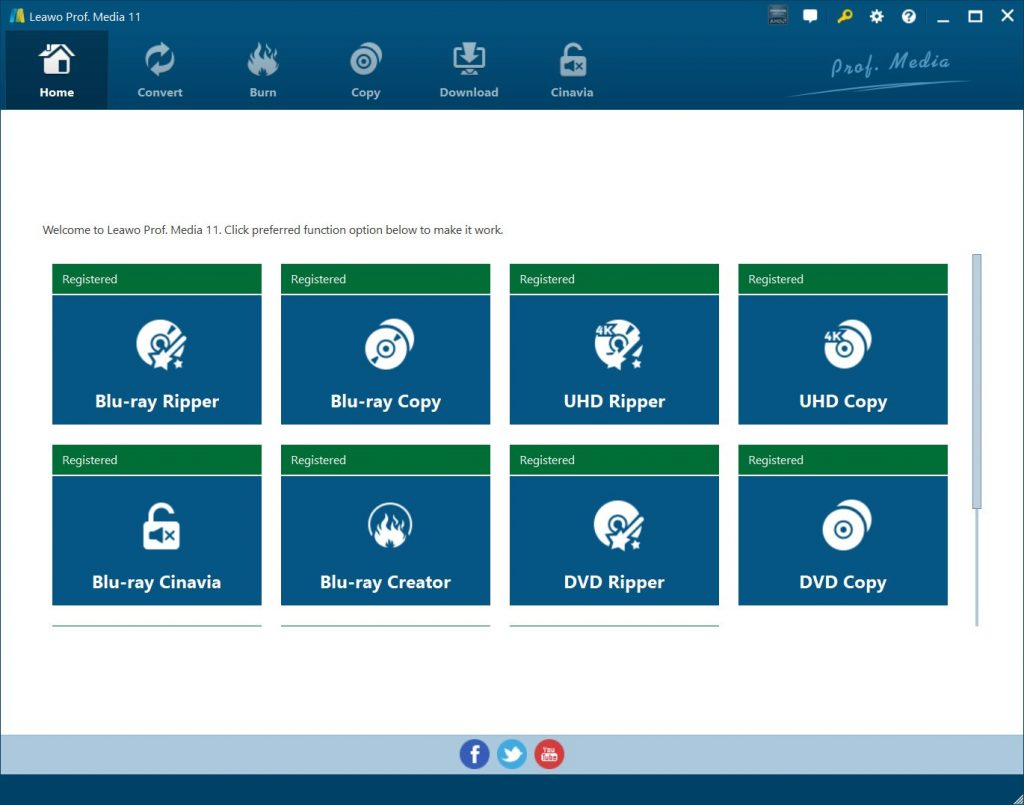
After installing the program, click “DVD Ripper” to enter the converting interface. Or you can also enter the interface of Leawo DVD Ripper by clicking the “Convert” button on the sub-menu bar, which is beside the “Home” button.
Step 2: Import your DVD files
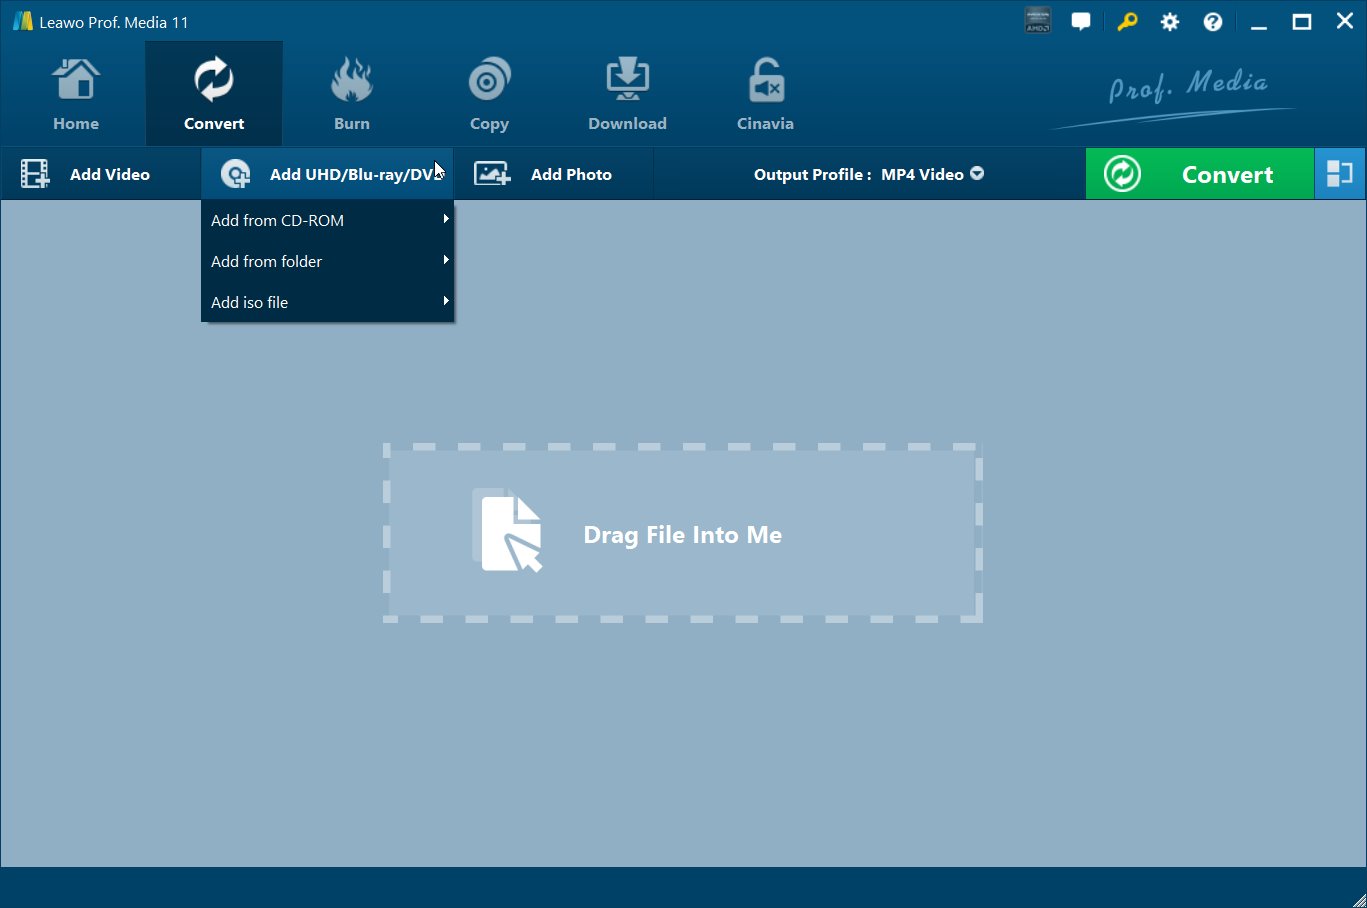
Click the “Add UHD/Blu-ray/DVD” button on the menu below the “Convert” button. And on the following drop-down menu, select “Add from CD-ROM” and you will see the name of your disc in the following menu. Or you can also click “Add from folder", "Add iso file" buttons to import DVD files.
Step 3: Select the movie mode
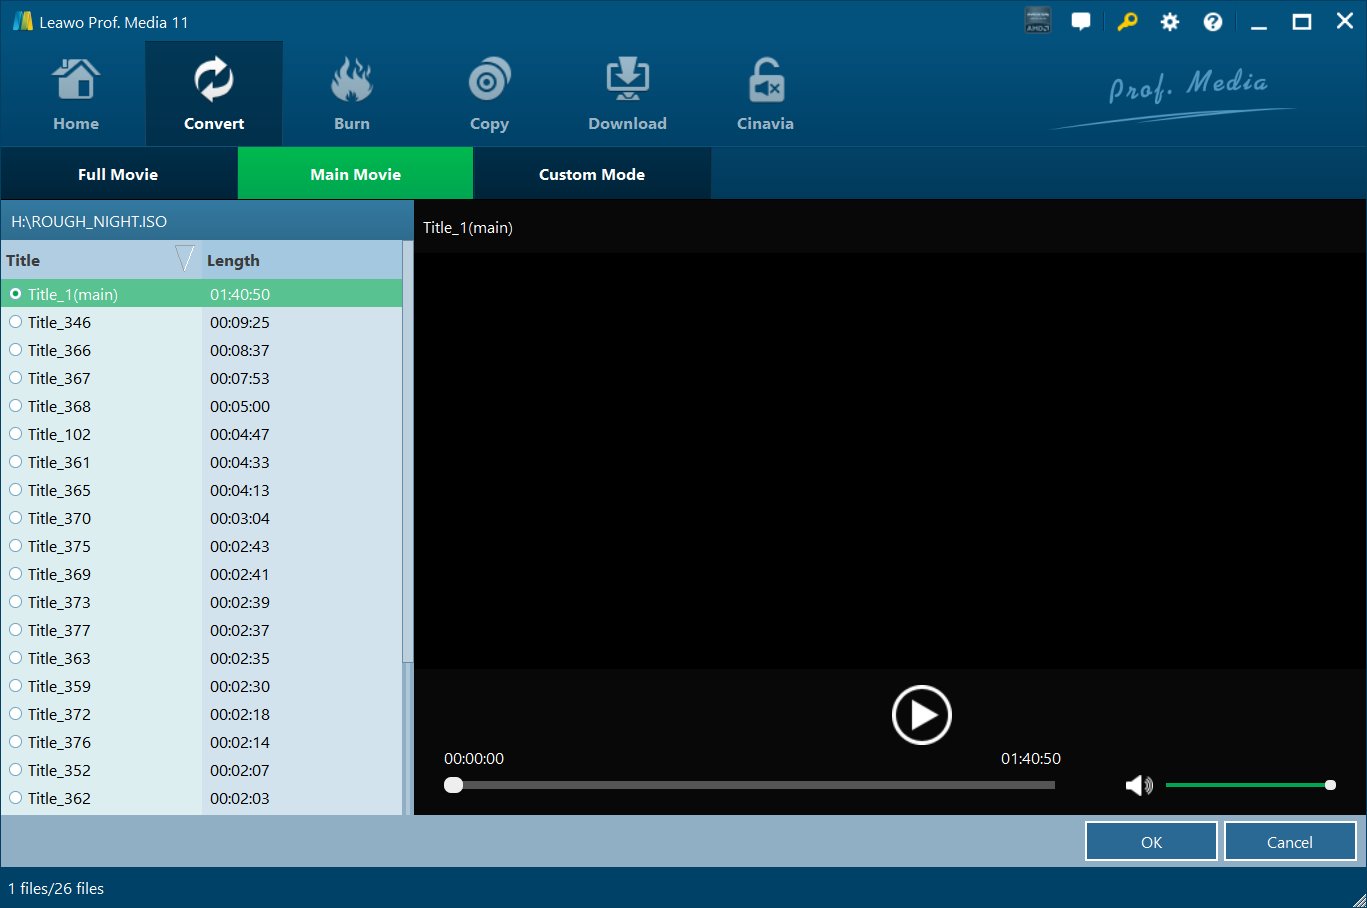
Once movie content in the DVD disc has been added to the program, you can choose one of the three options below the “Convert” button (“Full Movie”, “Main Movie” or “Custom Mode”) to select the videos in the disc to convert. Full Movie is supposed to import all titles, and Main Movie only imports the longest title, while Custom Mode allows you to choose titles freely. Choose a mode and select title(s) if you need, then click “OK” on the bottom-right to start importing.
Step 4: Select the subtitle and audio track
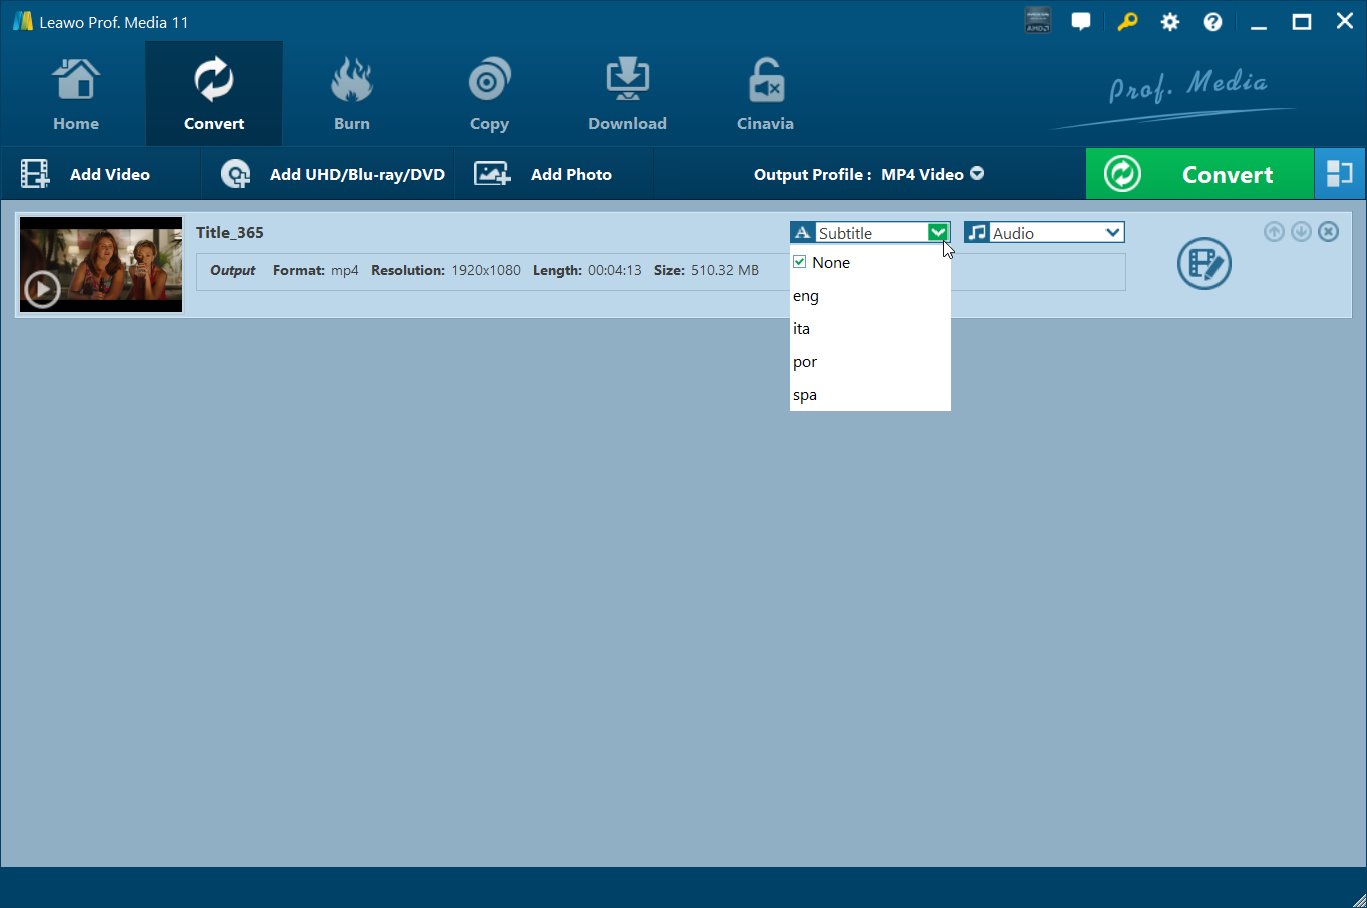
Click the “Subtitle” and “Audio” drop-down menu to choose certain subtitle language and audio track for the output movie video.
Step 5: Choose the output format
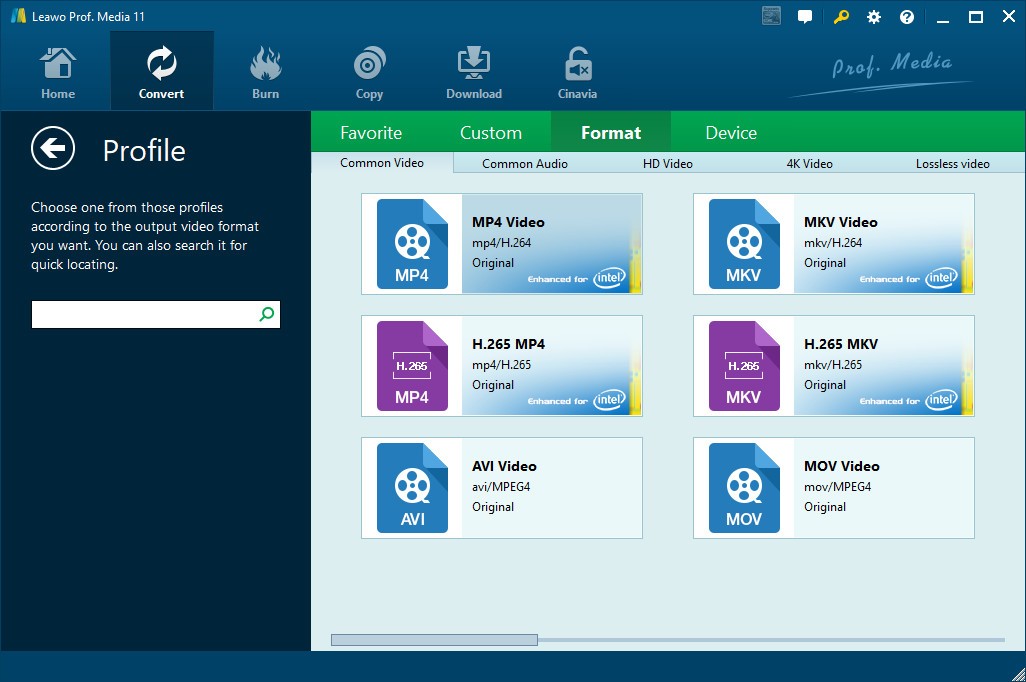
Please click the button “MP4 Video”(by default for first-time users), which is next to the green “Convert” button. You will see a small panel. Then click “Change” to enter the “Profile” panel. You can choose either video/audio format or mobile device as output profile which is under “Format” or “Device” group. You can also search the profile you desire on the left box to fast locate it.
Step 6: Start converting
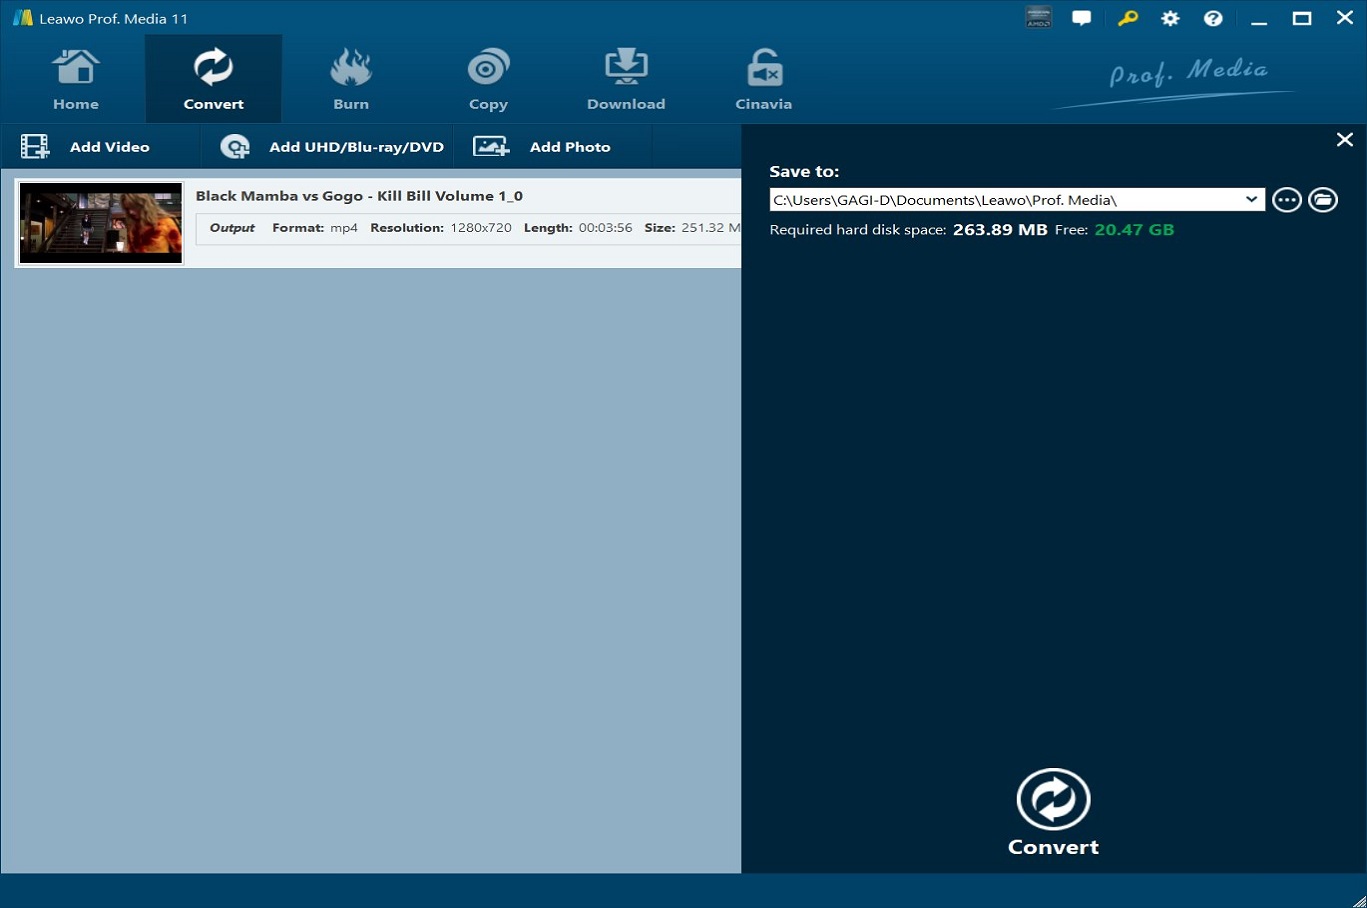
After selecting the profile, you will back to the converting interface. Then click the green “Convert” button and a small sidebar will pop up. Please set a directory under “Save to” box for the destination you expect the output files to lie in. Then, click the “Convert” button at the bottom of the sidebar, which is shown above, to start the conversion process. During the conversion process, you could click the “Cancel” button to call off the process.
Part 2: How to convert DVD to video via Format Factory
Format Factory is a comprehensive audio, video and photo converter and ripper, which can convert DVD to various video formats. It is a Video/DVD/Blu-ray Software, which can process most common multimedia files and any DVD or Blu-ray sources that do not contain any kind of copy protection, ripping them to videos for video editing software, video-sharing websites, tablet PCs, mobile phones. It is multi-featured and allows you to convert Blu-ray/DVD to a video format of your choice.
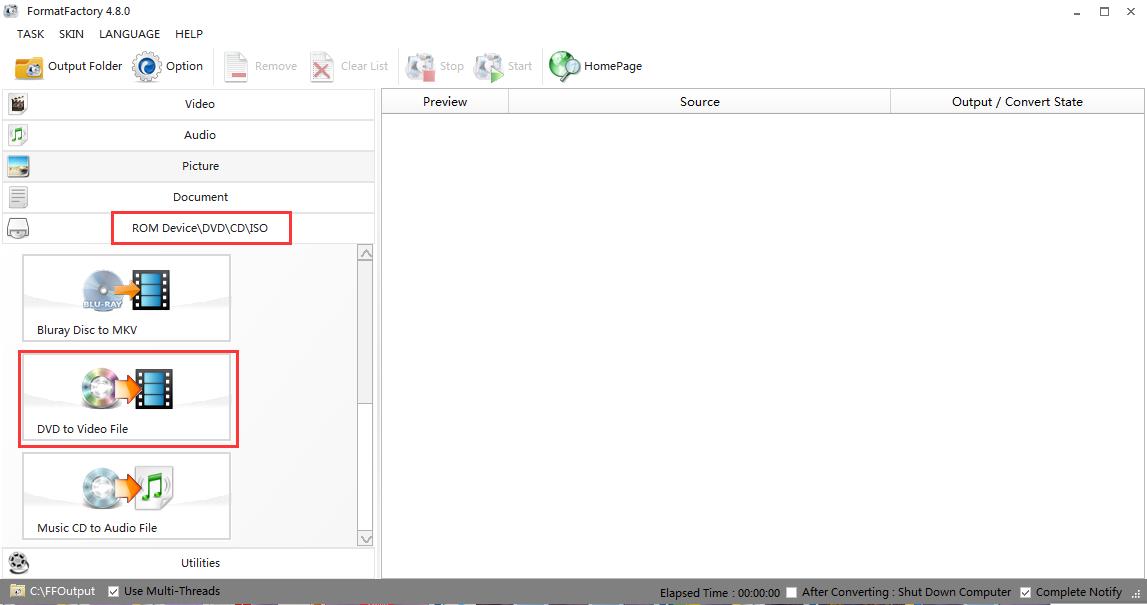
Step 1: Download and install Format Factory on your computer. Select “ROM Device\DVD\CD\ISO” and then click ”DVD to Video File” button.
Step 2: After clicking ”DVD to Video File”, you will enter the below-picture interface. In the top area, you will see the name of your disc in the following menu. All the content will be automatically added in the DVD disc to the program.
Step 3: Select the “formats” and “subtitle language” (EN, JA), “Audio stream” (EN, JA, DE) drop-down menu and check the box of each for the output movie video. It enables users to convert DVD to a standard video of all kinds of formats: MP4, AVI, WMV, 3GP, MPG, FLV and more. Additionally, please type the file title in the blank box.
Step 4: Start the conversion process. Click the “Convert” button beside your files to start the conversion process. The conversion screen will display progress. The time to convert the disc is determined by how fast your drive is capable to read. The typical time to copy a disc is about 15 minutes.
Part 3: How to convert DVD to video via Handbrake
Handbrake is also well-known for its ability to rip and backup DVD.
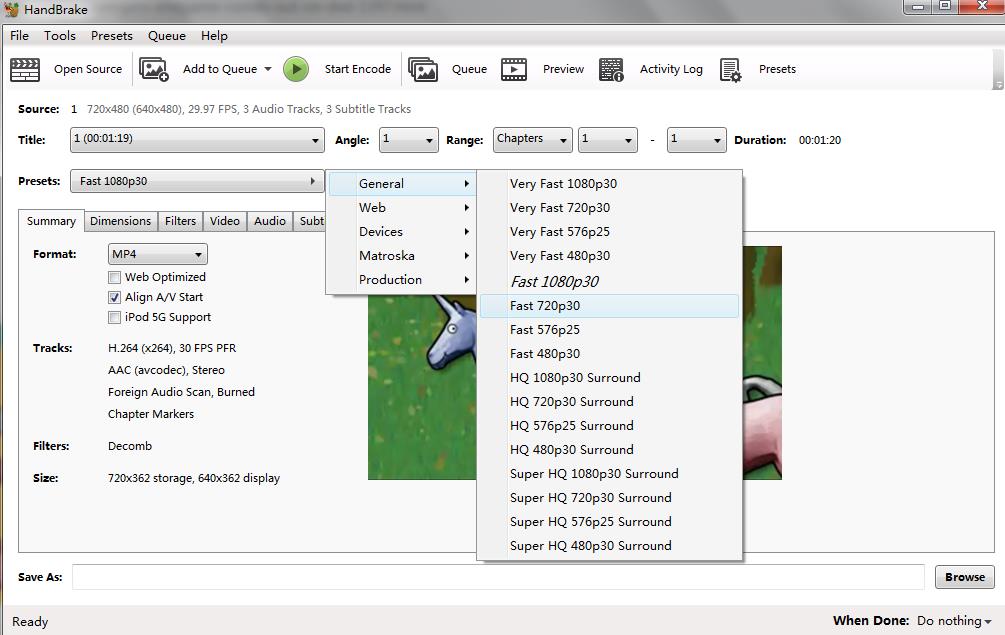
Step 1: Open HandBrake, and you will see the below interface. Click the “Open Source” button on the toolbar to import your DVD files. You could also drag your DVD files onto HandBrake’s main window.
Step 2: HandBrake provides a few settings presets, which allows you to find the best format to make your new video work well with your devices and software. As can be noticed, presets could also affect compatibility and encoding time. Technically speaking, the default Fast 1080p30 preset is always a good choice because it is fast and compatible with most devices.
Step 3: Find the following “Save As” box. Then you can choose the exact destination where you want HandBrake to place your new video in. You can select the “Browse…” button to choose a specific location.
Step 4: Click the “Start” button on the toolbar. HandBrake will get started to encode and will alert you when it is finished. Then you go to have a check at the destination you selected, there should have one new file.
Part 4: How to upload DVD movies to Google Drive
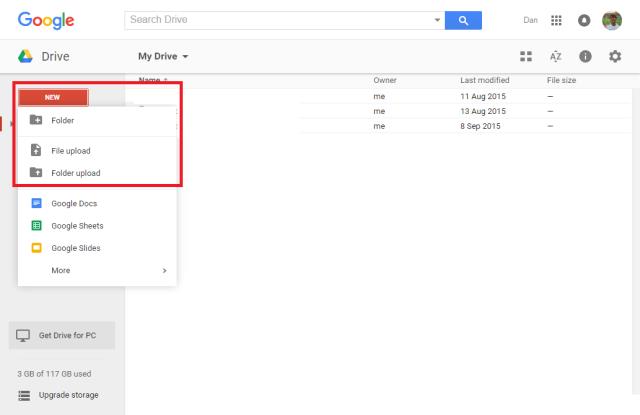
Step 1: Login to your Google Drive account using your Google ID (email address) and password. Click on the New button and next, click on File upload from the drop-down menu.
Step 2: Once you click on File upload, you will be able to locate and select files for upload from your desktop or any other location on your computer. Locate the file on your computer that you want to upload to Google Drive and click on it.
Step 3: The selected file will be uploaded to Google Drive and will show up immediately on Google Drive. Larger files might take a while to show up on Google Drive, depending on the file size and the speed of your internet connection. The progress of the upload can be monitored via the status bar in the bottom right-hand corner. This is also where you can cancel an upload once it has started.
Conclusion
Google Drive makes it really easy to store and access files stored on its cloud servers across multiple devices and from any place in the world where you can get hold of an internet connection. In this post, I have shown you how easy it is to upload DVD to Google Drive.
The instruction above is about how to use those 3 DVD rippers to convert DVD to Google Drive compatible MP4, MOV, AVI, WMV, FLV files with the video quality reserved and upload files and folders to Google Drive.
Ripping DVD to MP4 is pretty simple if you have the right tool. The above 3 programs allow us to extract the contents from a DVD disc and convert them to a digital format file like MP4. If you are seeking for a DVD converter that gets the functions of the best video output quality, the highest video conversion speed, and the most formats supported, Leawo DVD Ripper will be your best choice.

