If you’ve got your iPhone or iPad updated to iOS 11, you should notice a lot of changes. One important new feature on iOS 11 is the screenshot tool. Now you can do a lot of things with the screenshot after you capture it. If you haven’t have time to give it a try, check out what you are missing out on from the content below.
Top 10 Tips for the iOS 11 Screenshot Tool
1. Take a screenshot on iOS 11
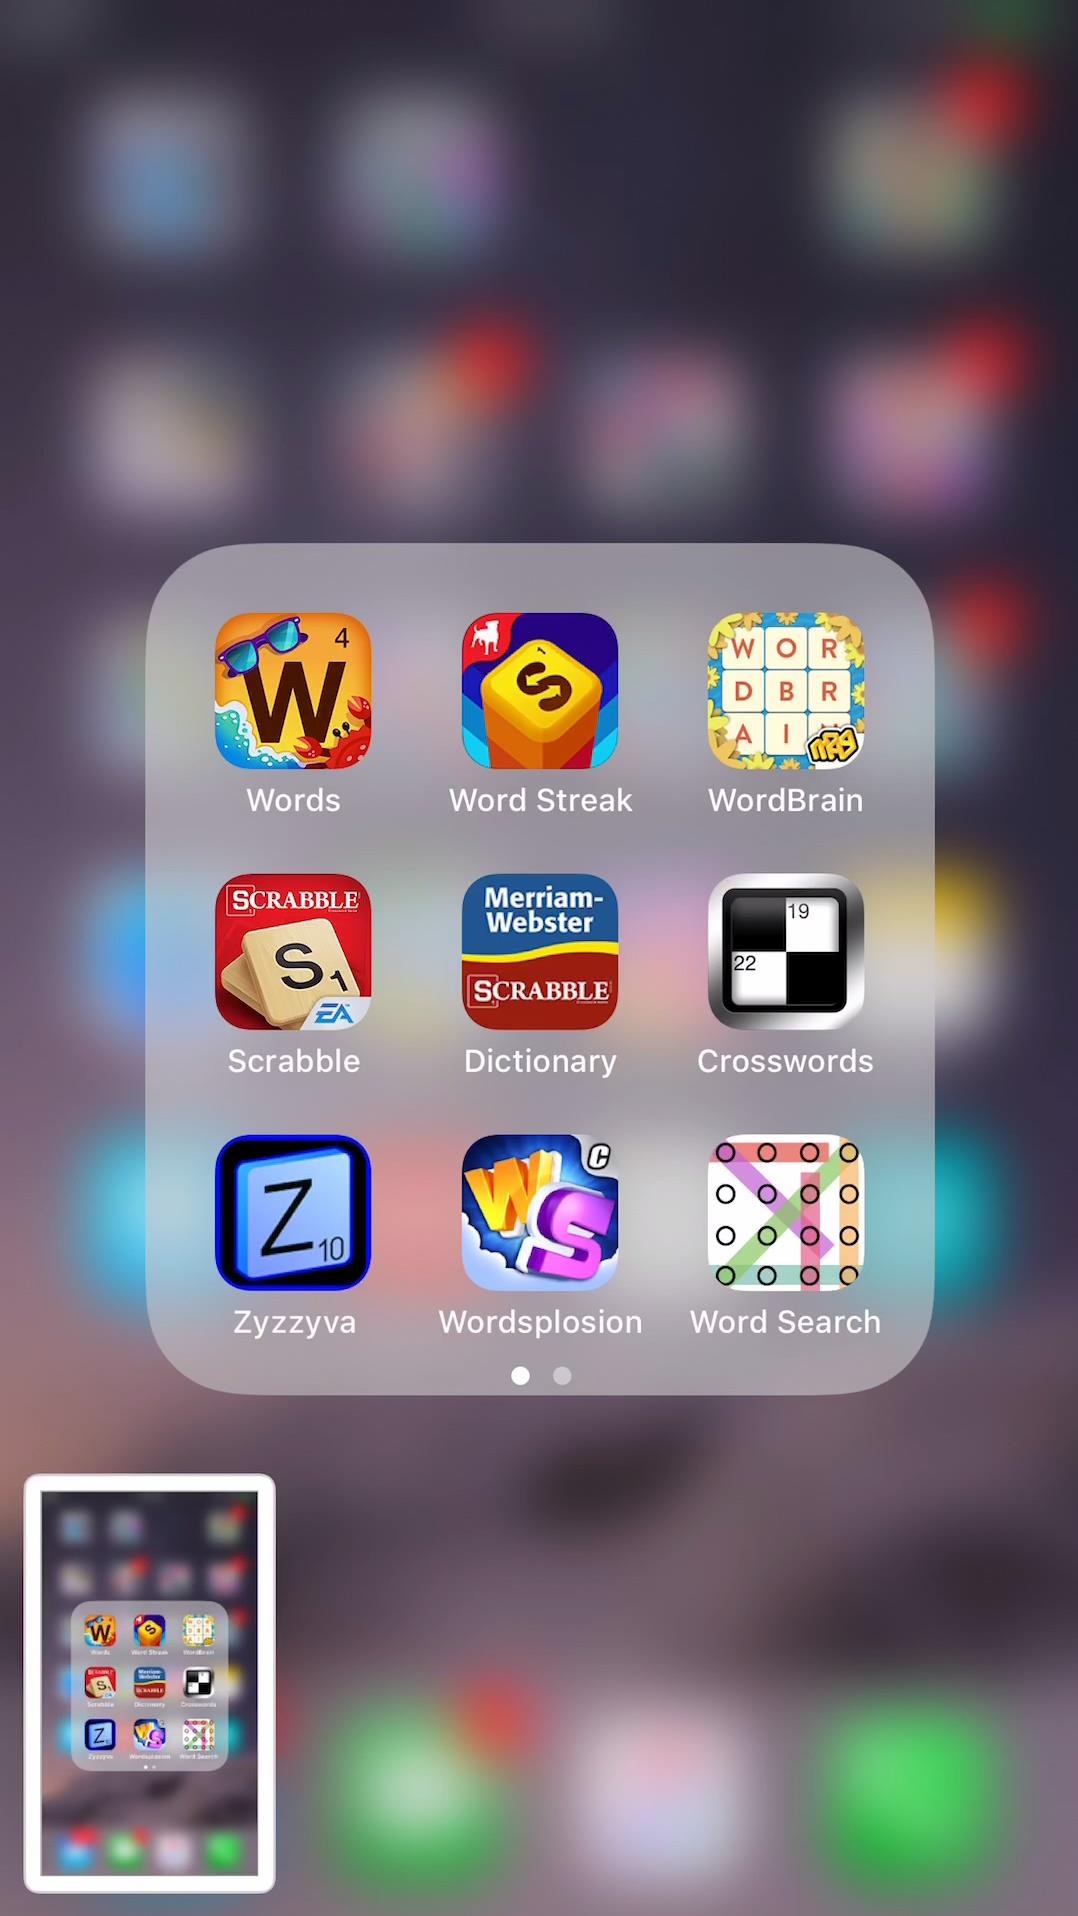
The way to take a screenshot hasn’t been changed. You can still press the Home button and the Sleep/Wake button at the same time to take a screenshot. What’s changed is that there will be a thumbnail in the bottom of the left side of the screen after you take a screenshot. The thumbnail allows for a lot of further processing, which we will introduce in detail in the content below.
2. Share the screenshot you just captured
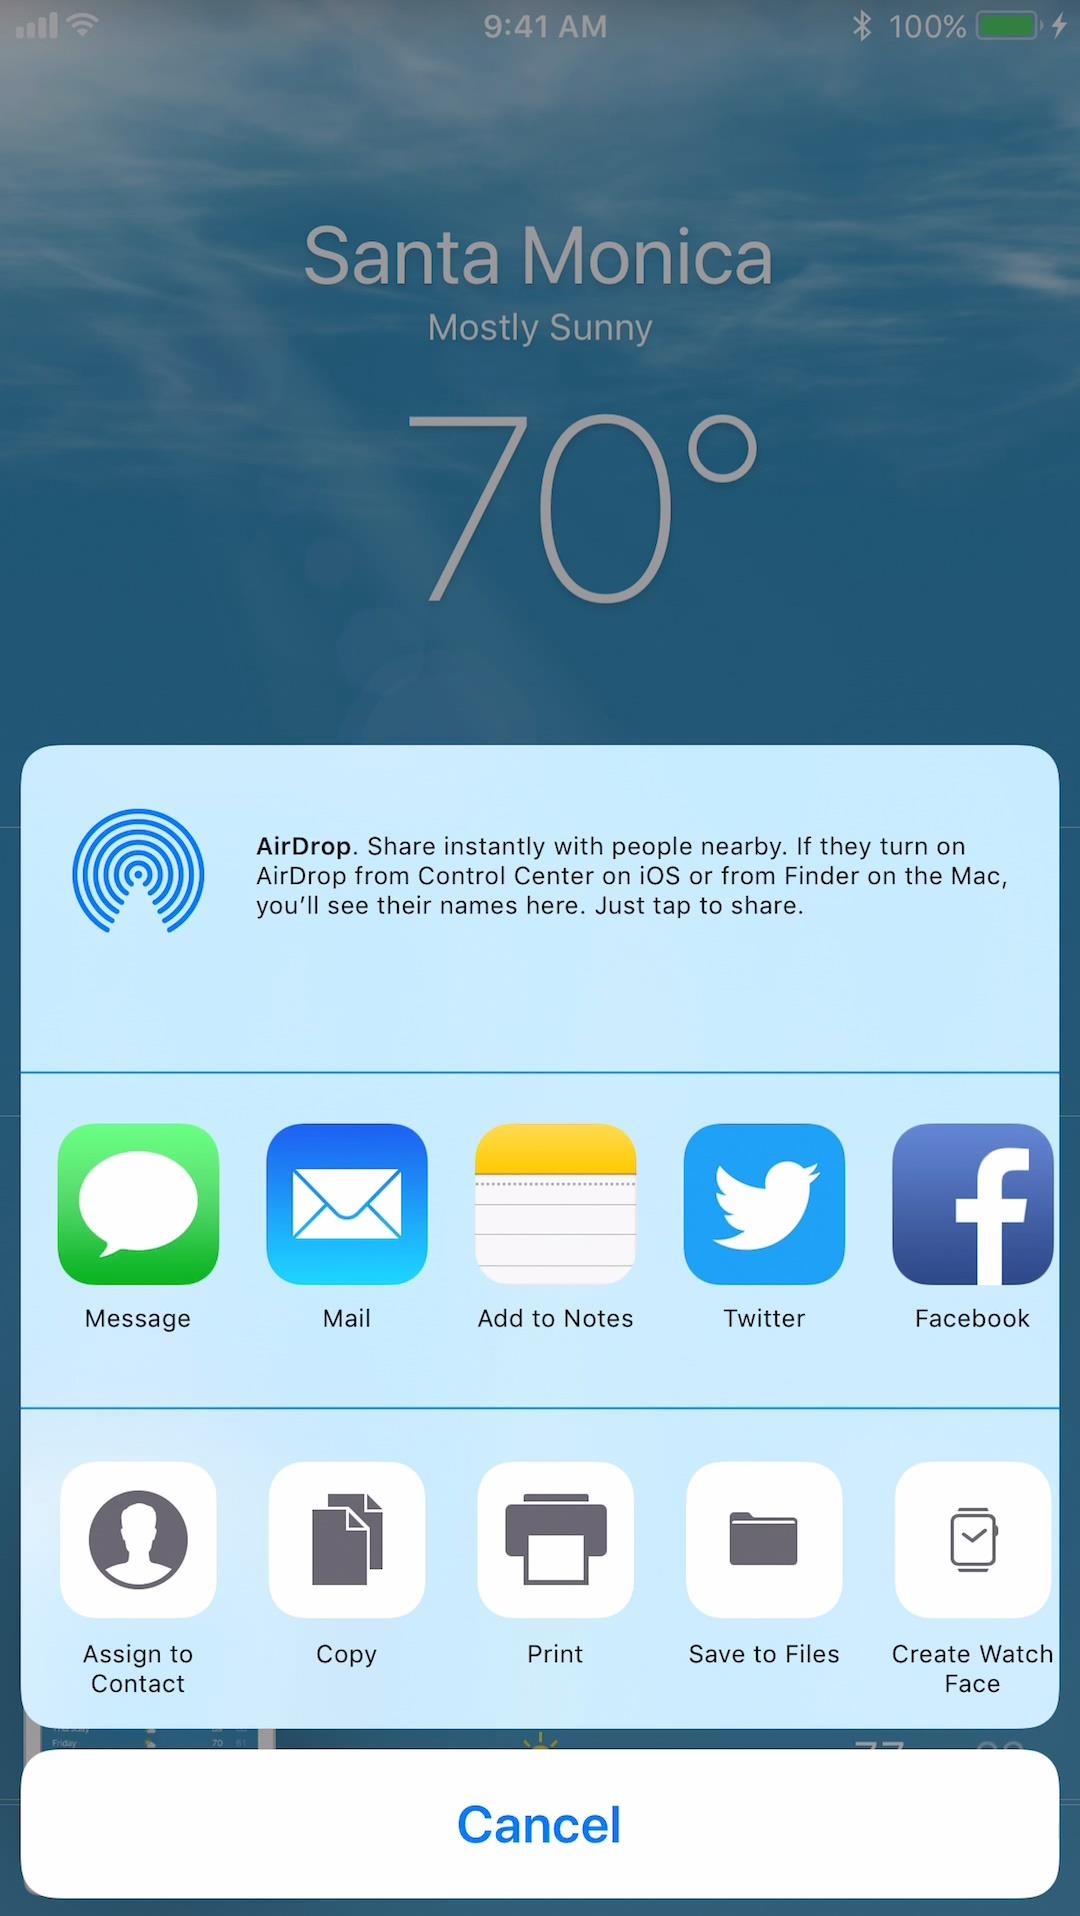
Most of the time, when we capture a screenshot, we want to share it with other people. On iOS 11 screenshots can be easily shared right after you capture it. You don’t even have to open the Photos app. After taking a screenshot, tap and hold the thumbnail of the screenshot and the sharing options will show up. It would allow you to send it to another Apple device via AirDrop, to another person via text, email, and a lot of other things you can do when you open it in the Photos app.
3. Edit the screenshot
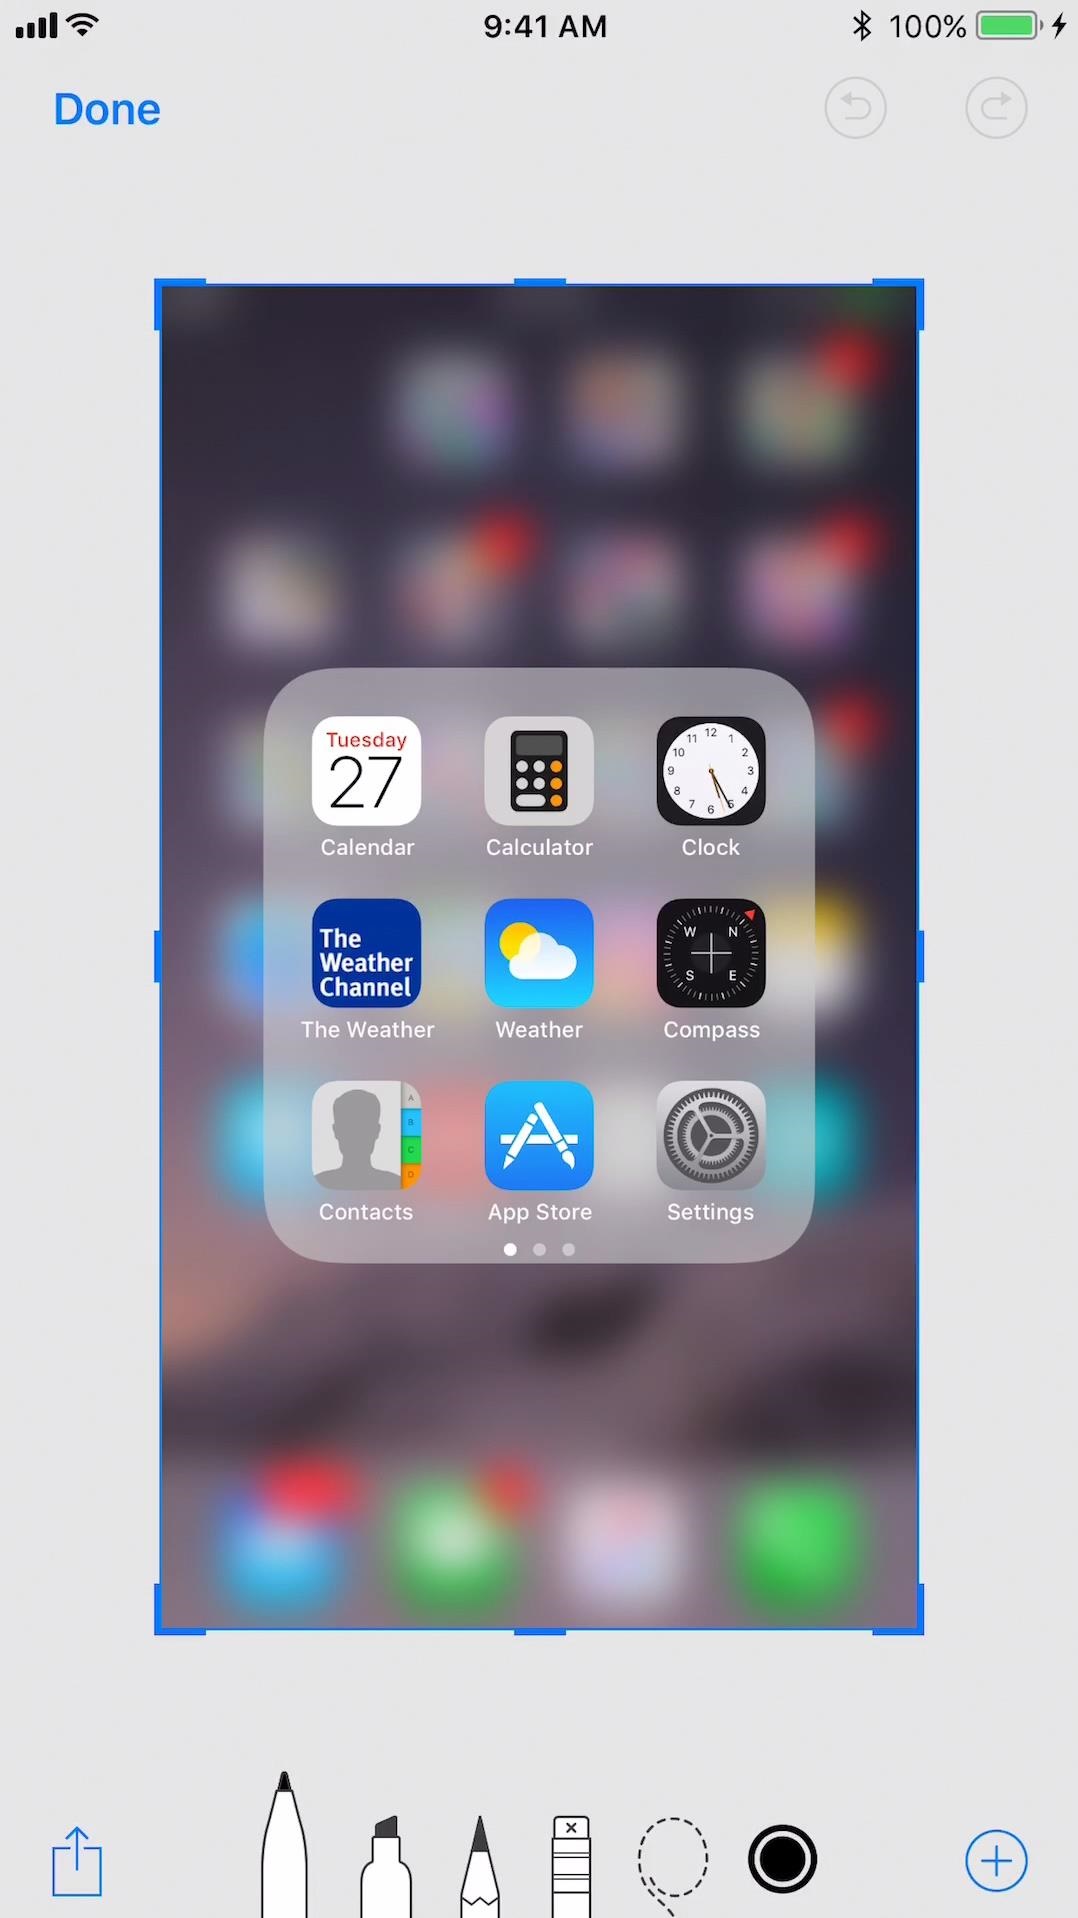
After taking the screenshot, you can directly tap on it to enter the editing window. You can do a lot of things with the built-in editing tool like drawing on it, adding text, signature, etc.
4. Draw on the screenshot
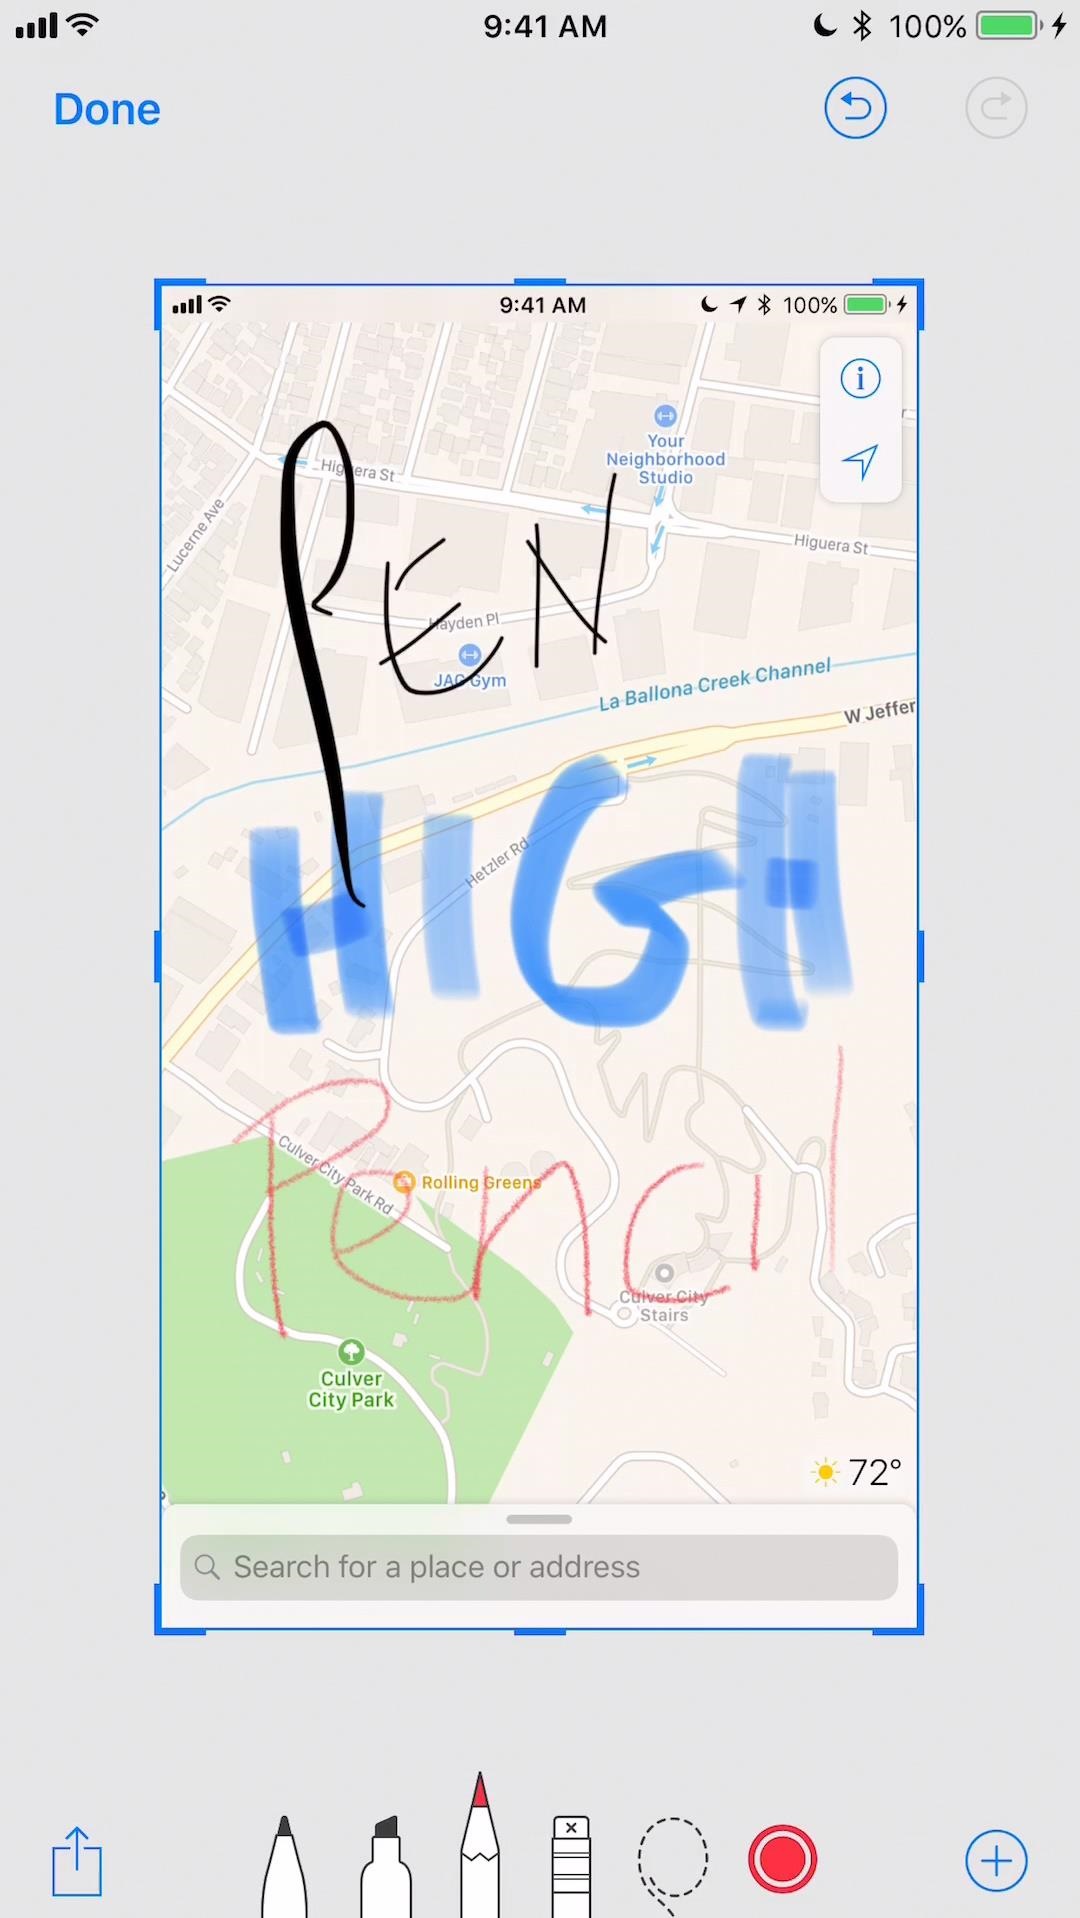
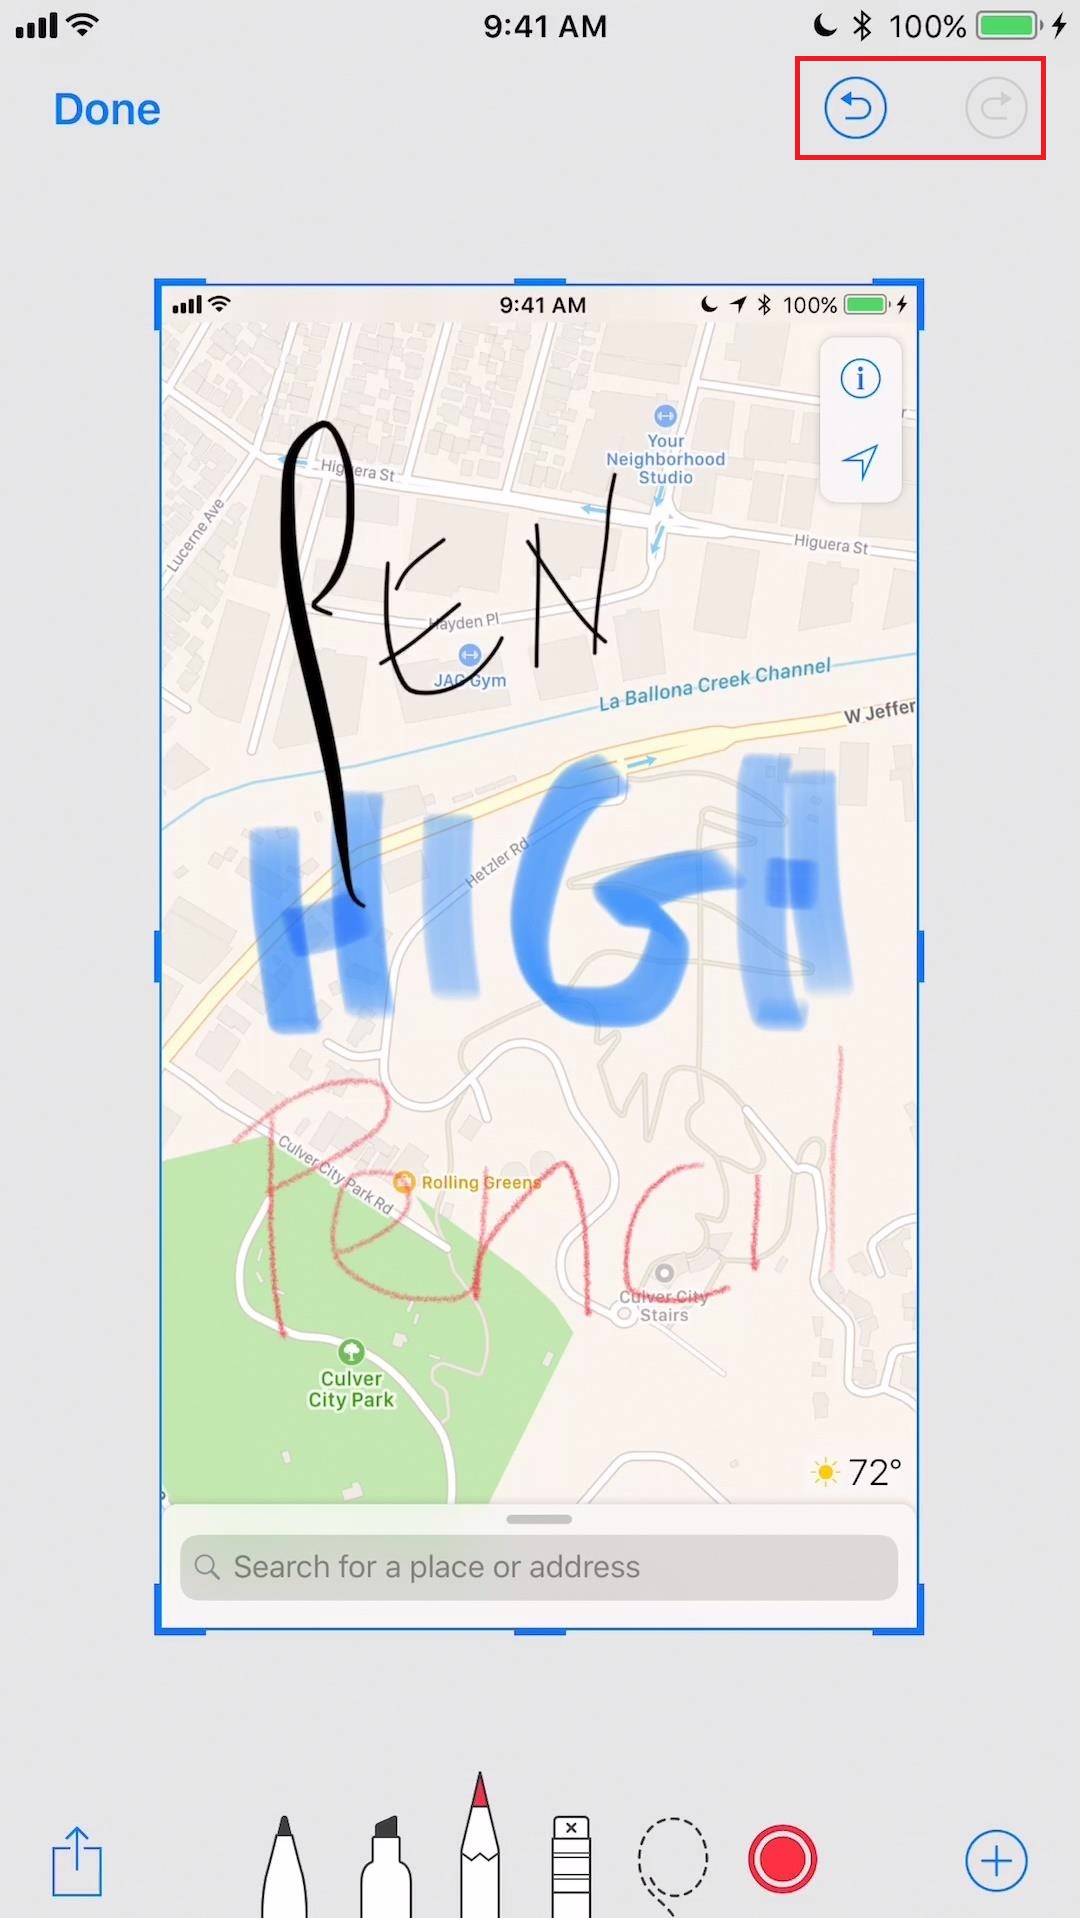
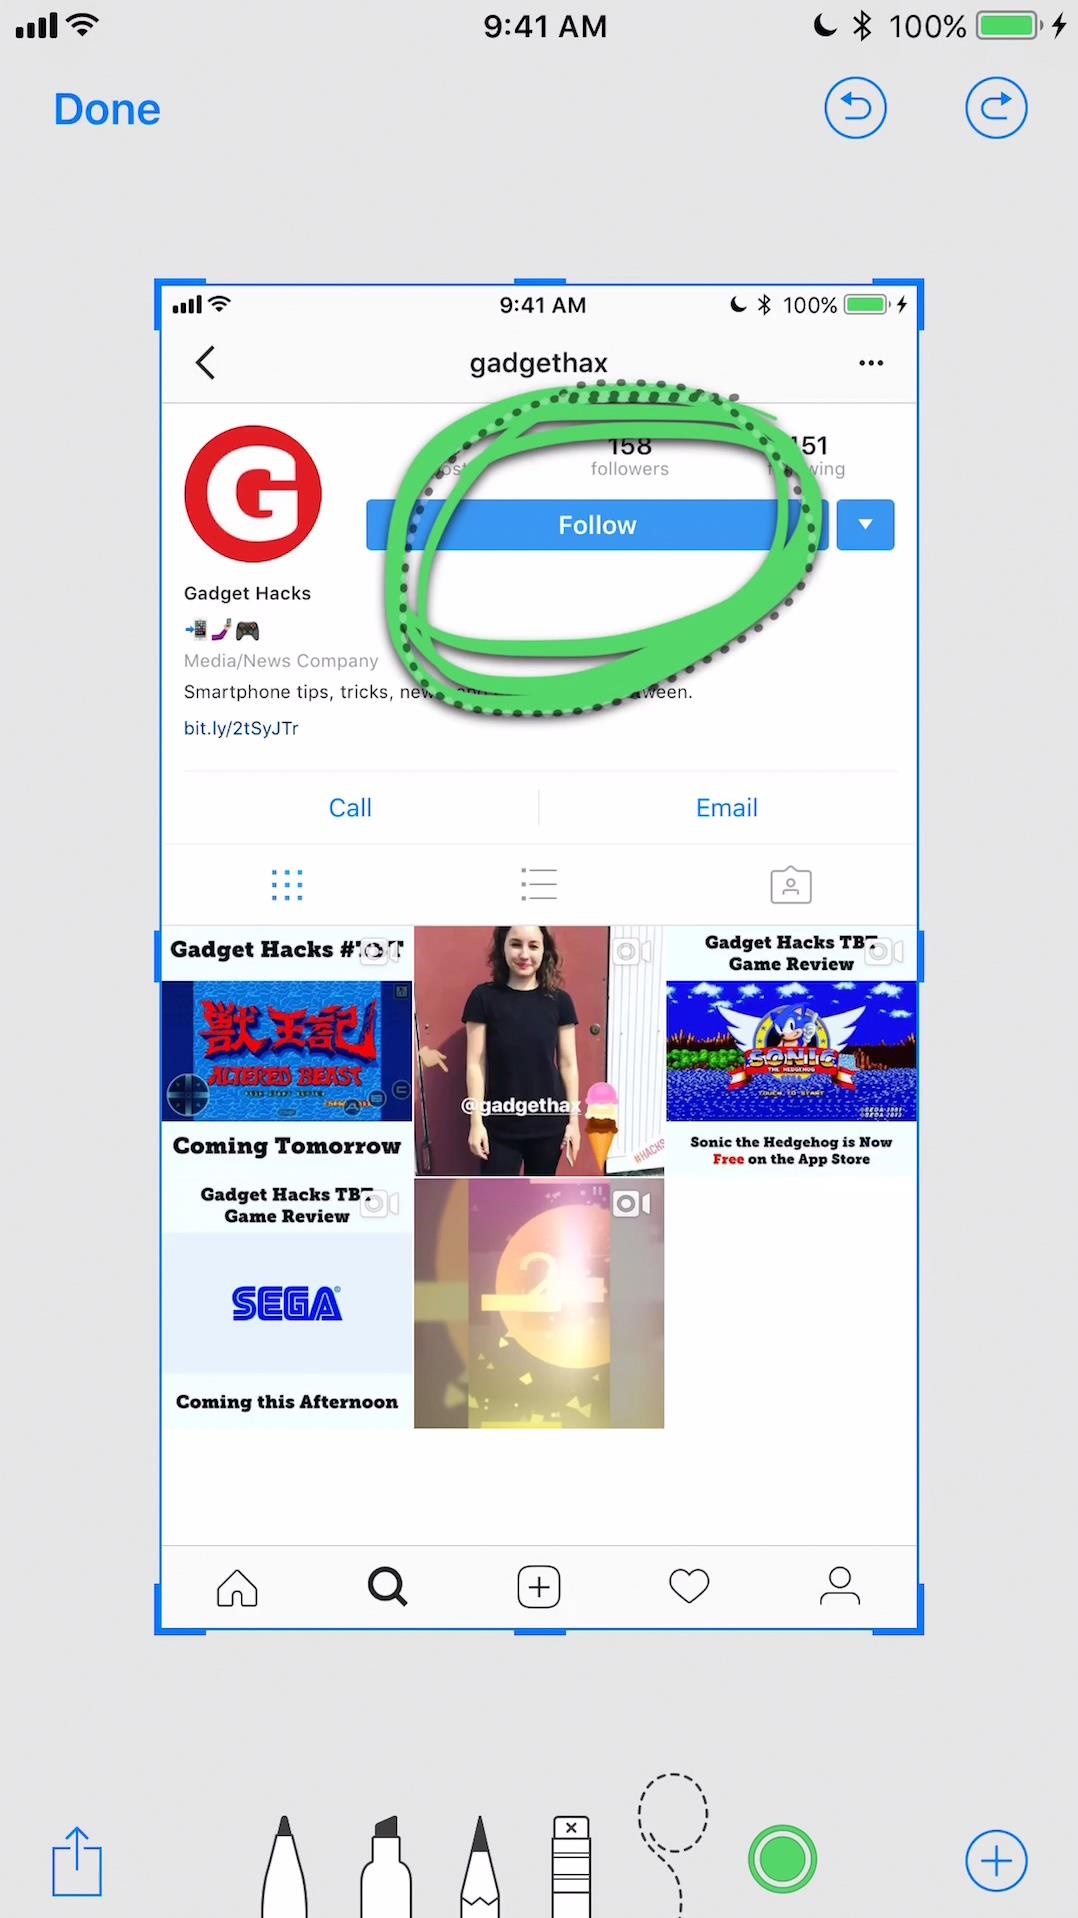
After entering the editing window, you can choose to draw on the screenshot with a pen, highlighter, or pencil from the toolbar at the bottom of the screen. If you want to change colors, just tap on the color dot. If you want to change the size of the the tool, you should find that there’s no such option anymore. Now the new gesture-based system allows you to change the size of what you draw through different gestures. Go try it by yourself, it’s fun.
5. Undo and Redo
If you want to undo your last change to the screenshot, there’s an Undo button in the top right corner of the screen. You can also find the Redo button next to it which, needless to say, will redo what you just undo.
6. Move drawings around
If you find yourself doodling in the wrong spot, there’s a dotted lasso tool for you to select what you draw and move it to another place. Just tap on the tool and then select what your doodle on the screenshot. Tap on it and then you will be able to move it to a new spot.
7. Crop and Zoom the screenshot
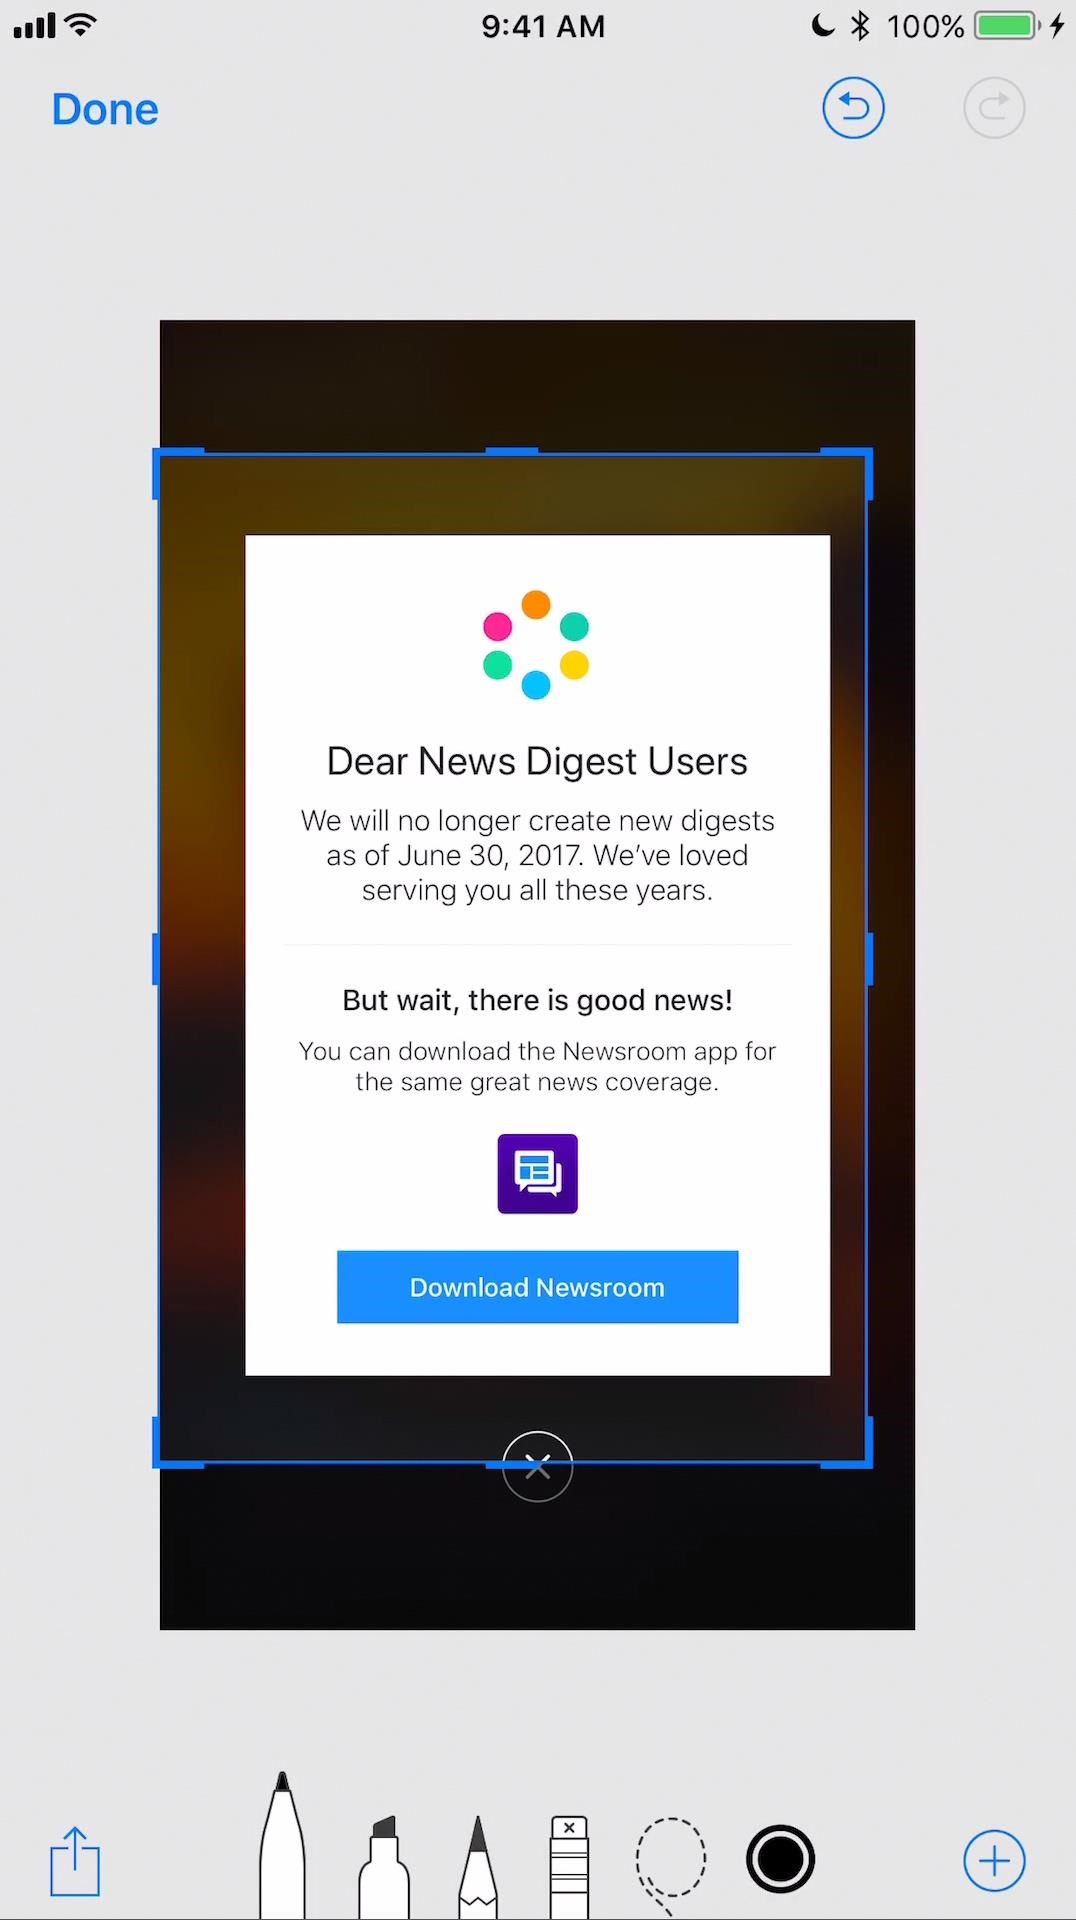
Cropping the image is an easy one, you can do it right after you enter the editing window. Just tap on the blue frame around the screenshot and move it to get the ideal picture. Zooming is even simplier, just pinch to zoom in and zoom out.
8. Add text to the screenshot
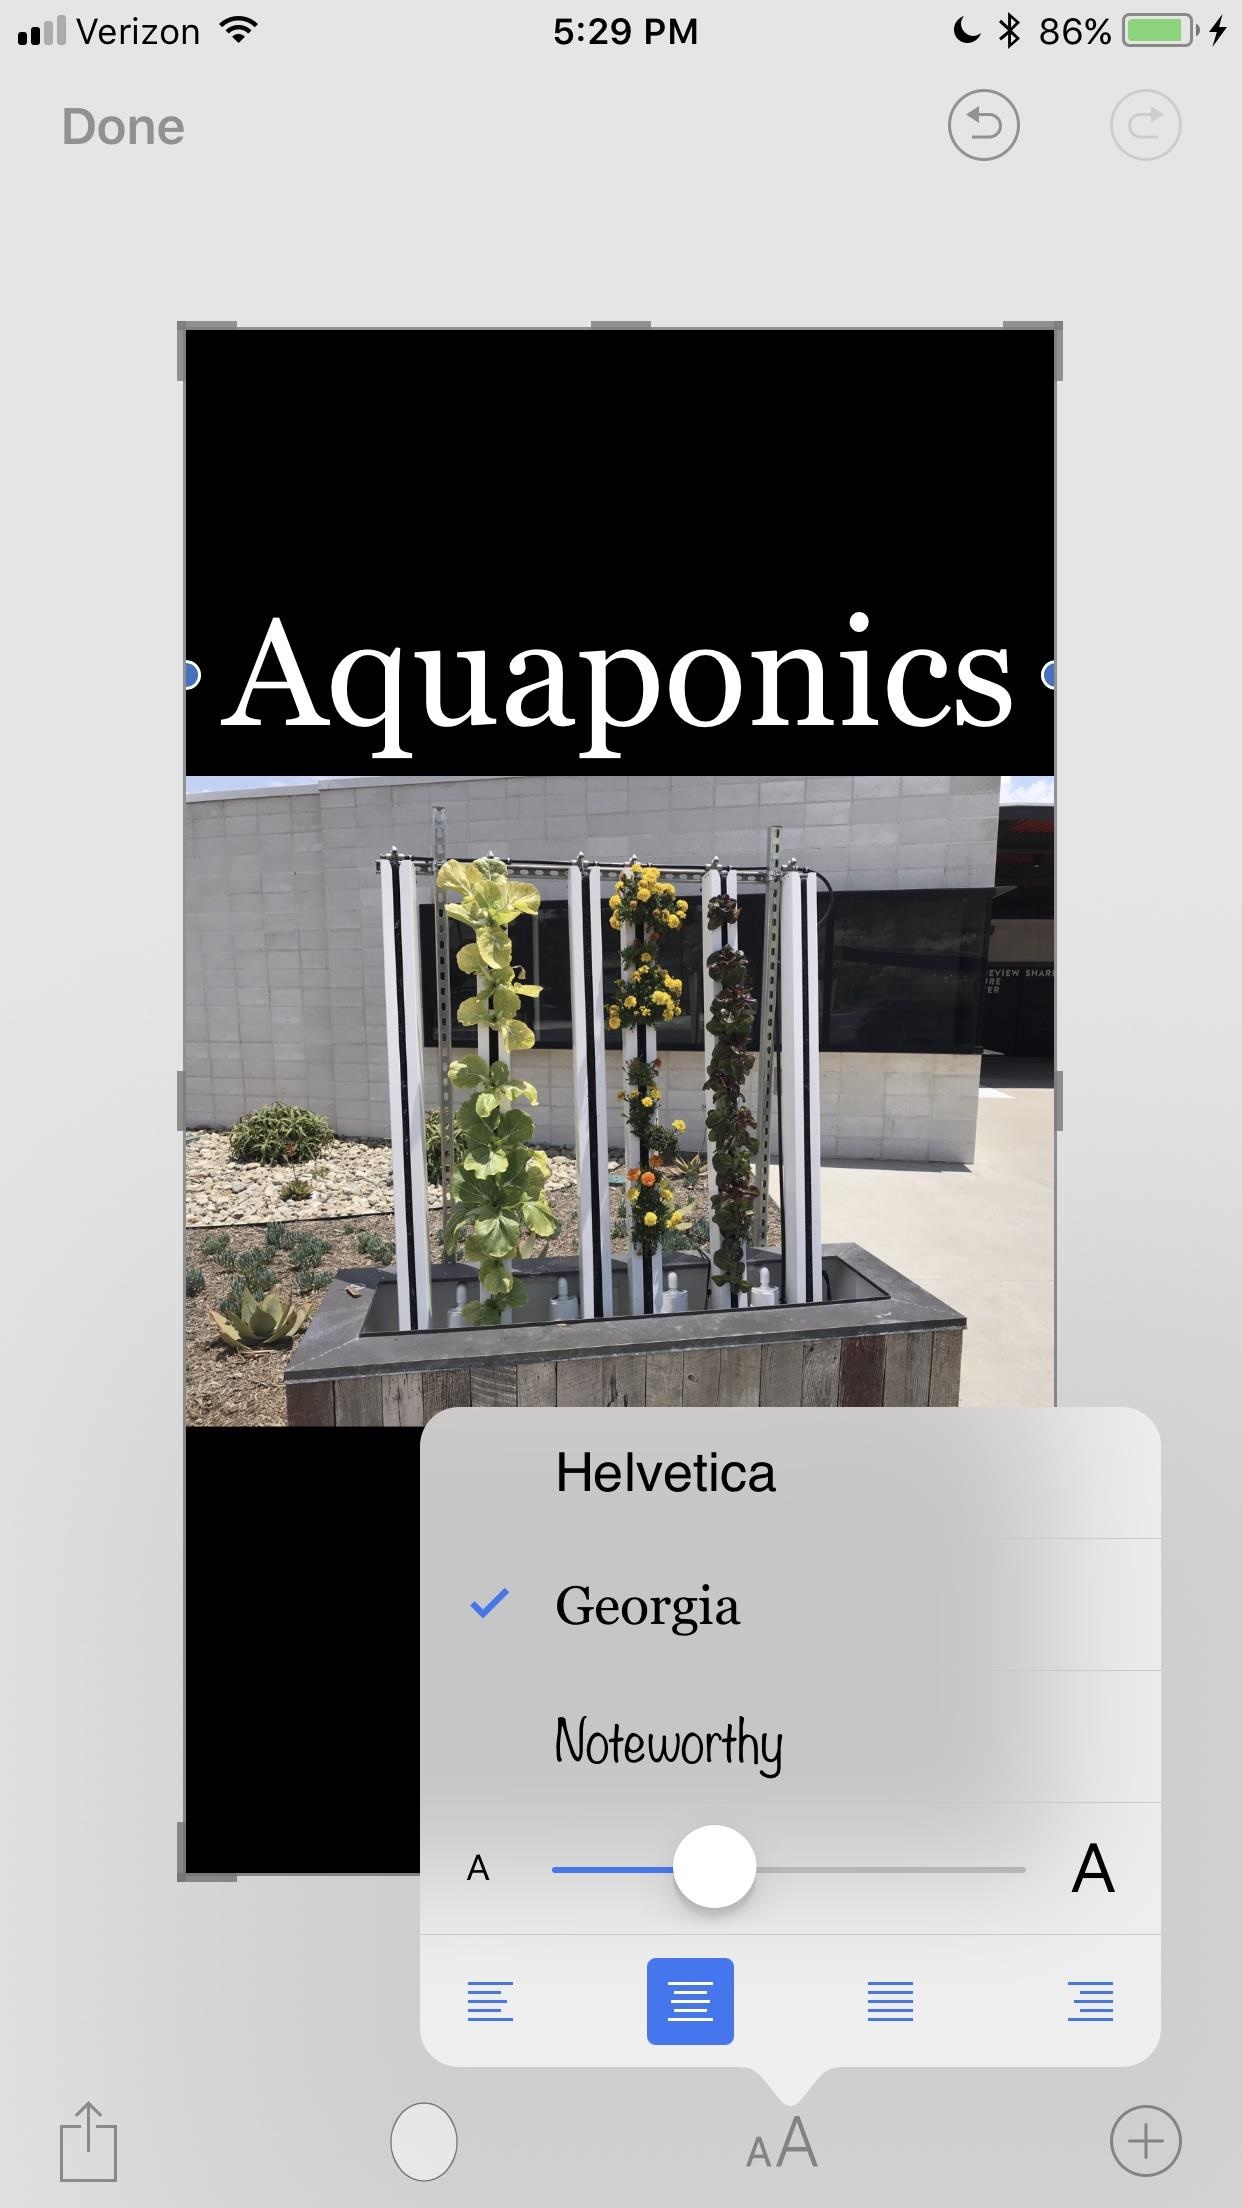
The text option is hiden in the “+” button. Tap on it and then tap Text. And you can start typing on the screenshot. You can change the font, size, color and position of the text.
9. Add your own signature to the screenshot
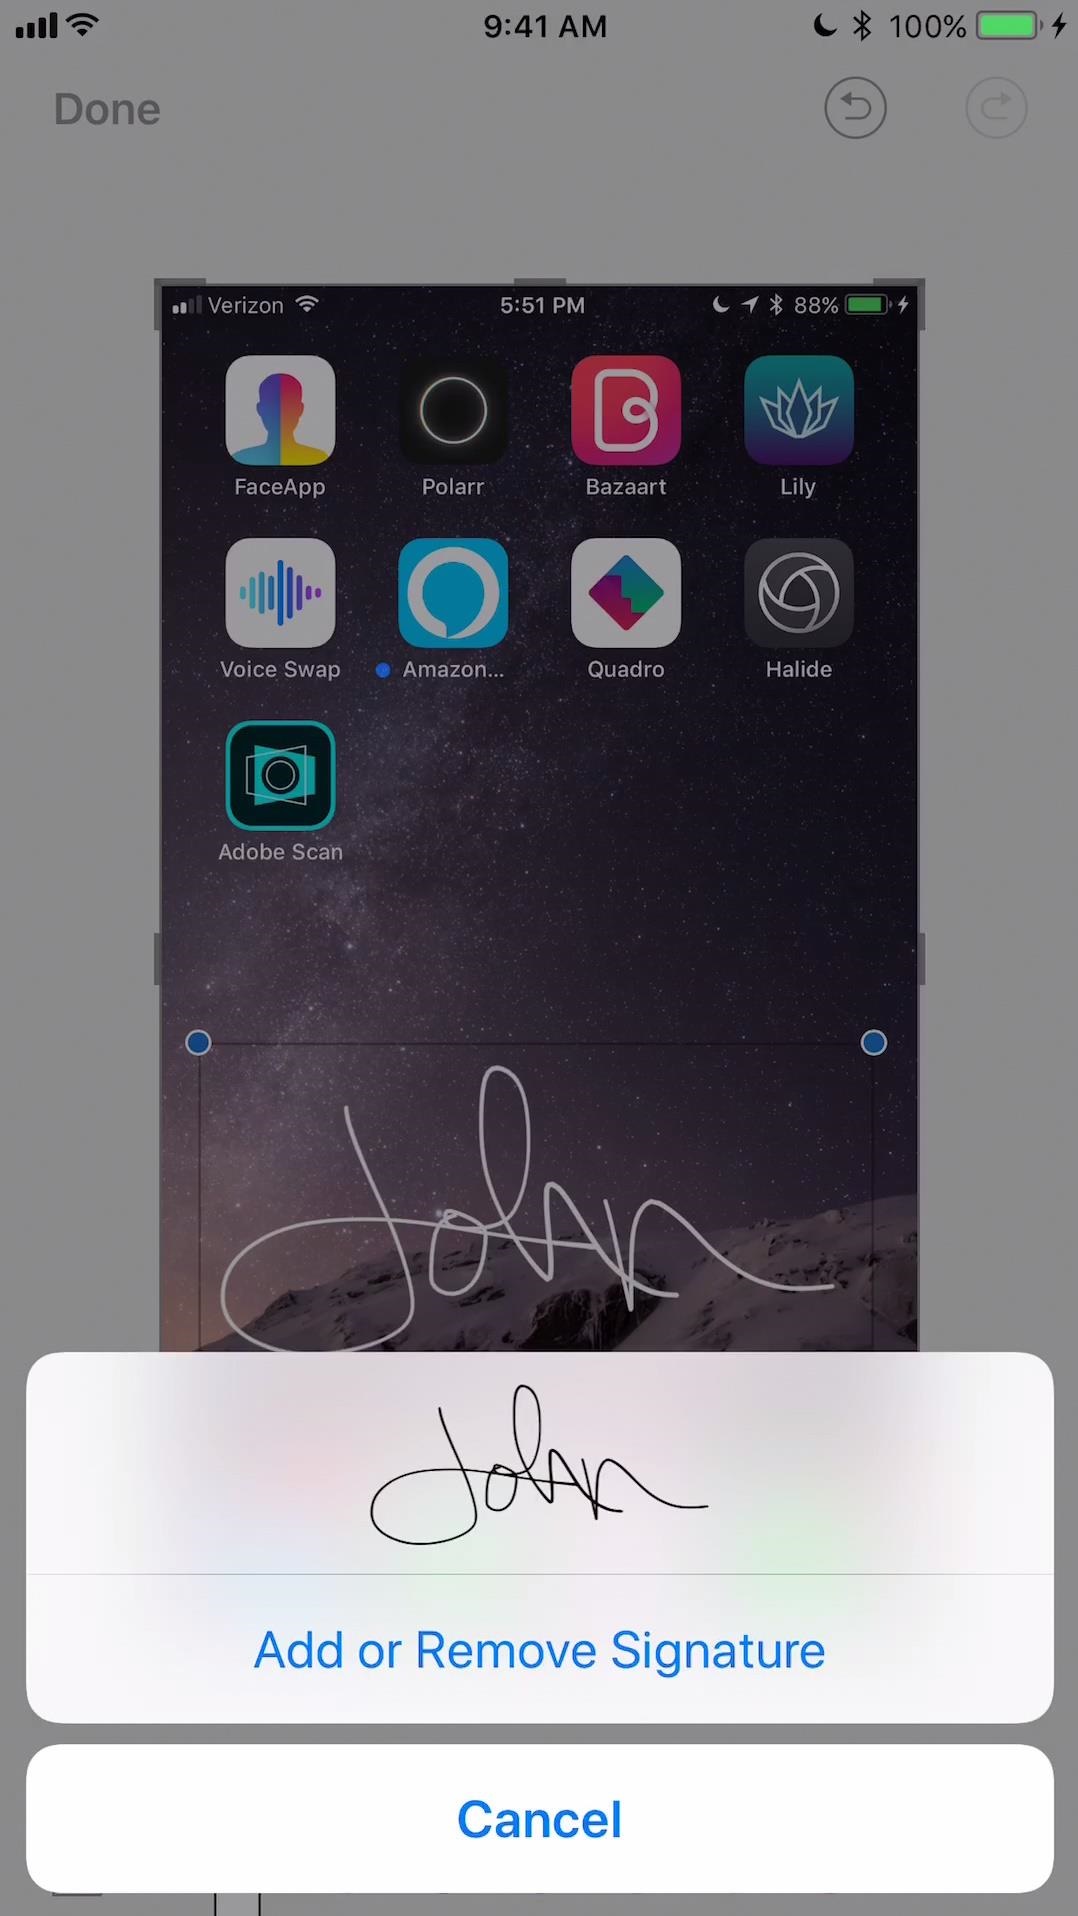
You can also create your own signature to apply on the screenshot every time you capture one. Just tap on the “+” button in the bottom right corner and then tap Signature. If you don’t have one before, you will be asked to create one first. If you’ve had signatures added, you can choose which one to add on the screenshot.
10. Add customizable patterns
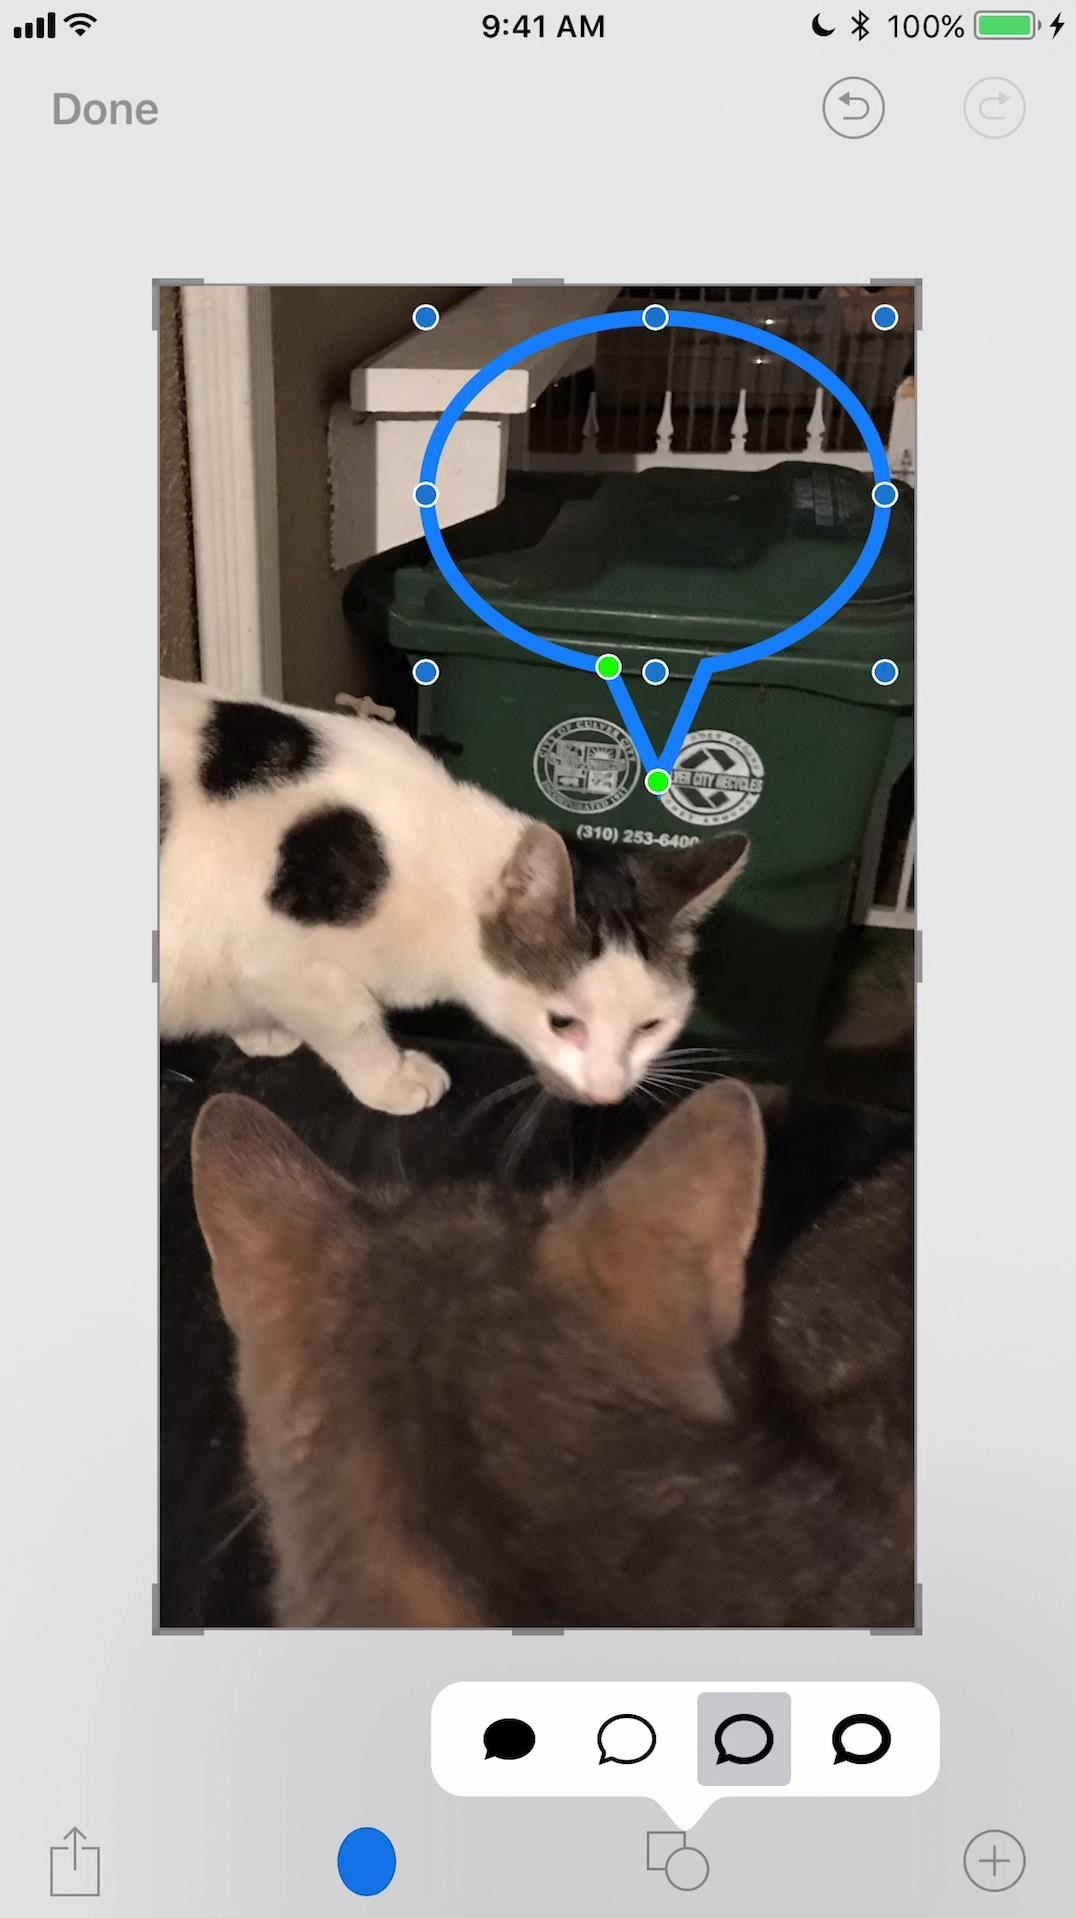
You can also add patterns like an arrow, a square, a circule or even a speech bubble. Tap on the + button and on the popup, directly tap on the shape you’d like to add to the screenshot.
Above are the 10 new features added to the iOS 11 screenshot tool. If you want to make the iOS 11 screenshot alerts(aka thumbnail) disappear right away, just swipe them to the left after taking a screenshot. If you take screenshots all the time, this could be a good reason why you should update to iOS 11. When taking a screenshot iOS 11 allows you to process it right away with a lot of interesting and useful options provided. All you need to do is tap on the iOS 11 screenshot notification, and then you can start the customization.
How to Recover iOS 11 Screenshots After They Got Deleted by Mistake
Mistakenly deleting something is one mistake we encounter all the time, especially when using our smartphones. When you got a screenshot deleted on iPhone, you can find it back immediately from the Deleted folder in the Photos app. But if you delete the screenshot from the Deleted folder and want to get it back, you are going to have to use help from a third party data recovery program. Check out Leawo iOS Data Recovery, a comprehensive and powerful iOS data retrieval tool designed to help iOS device users to get back lost and mistakenly deleted data. It can easily help you get your iOS 11 screenshots back directly from your iPhone. Also if you have backups in iTunes or iCloud, you can also use this program to extract the screenshots you need from those backups. This iOS data recovery program is powerful and easy to use at the same time. You can easily learn how to use it even when you are using it for the very first time. Check out how to recover iOS 11 screenshots from iPhone using this data retrieval program.
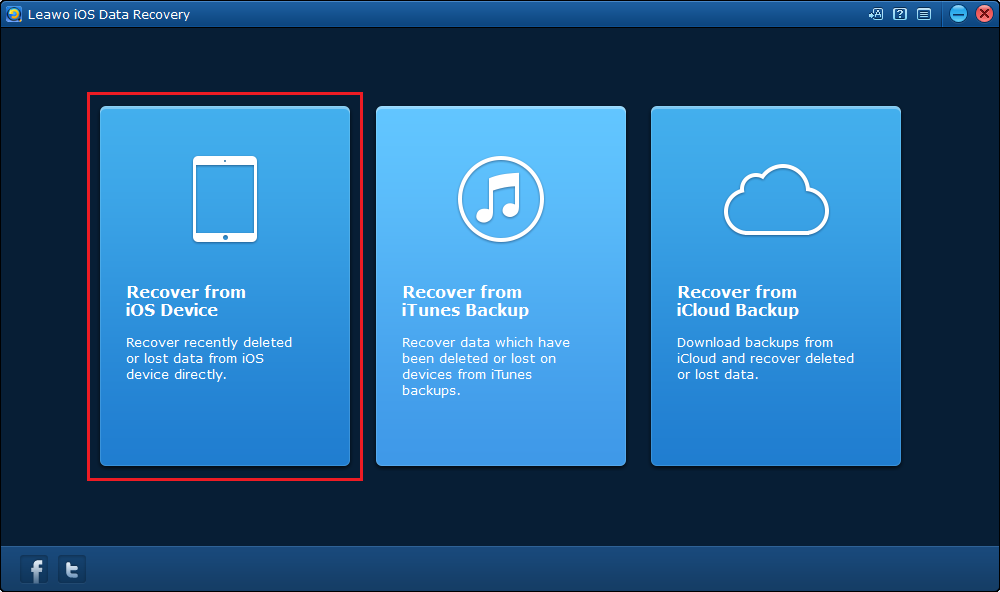
1. Launch this data retrieval tool on your computer. And click on Recover from iOS Device.
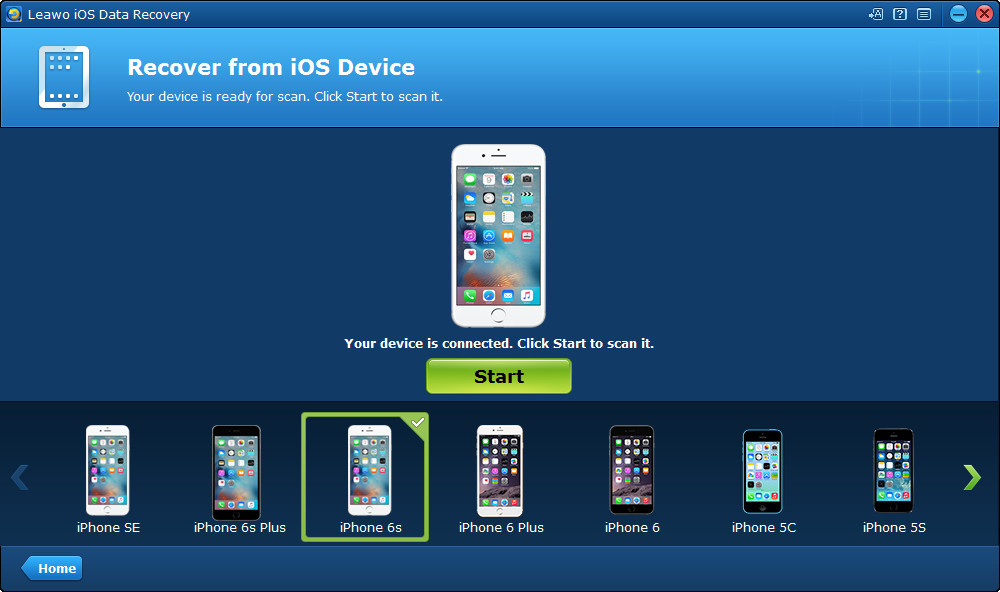
2. Plug your iDevice to your computer, and click on the Start button in the center of the interface, and the program shall start to scan your iDevice.
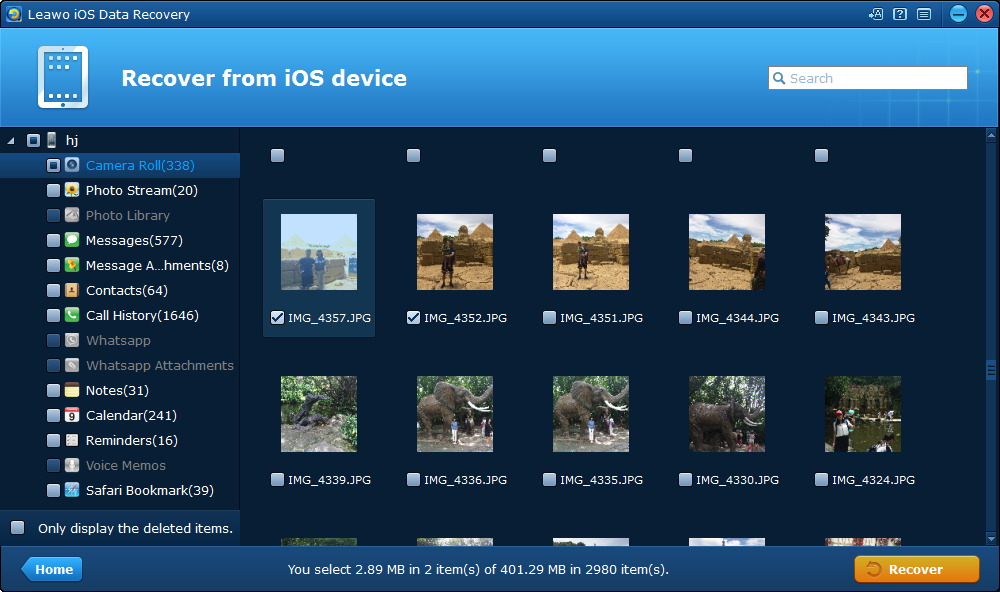
3. After the scanning process is finished, click on Camera on the left column to check out your photos on your device. Enable Only display deleted items option to enable the program to show you the deleted files only. Find the iOS 11 screenshot you wish to recover, select it and then click Recover.
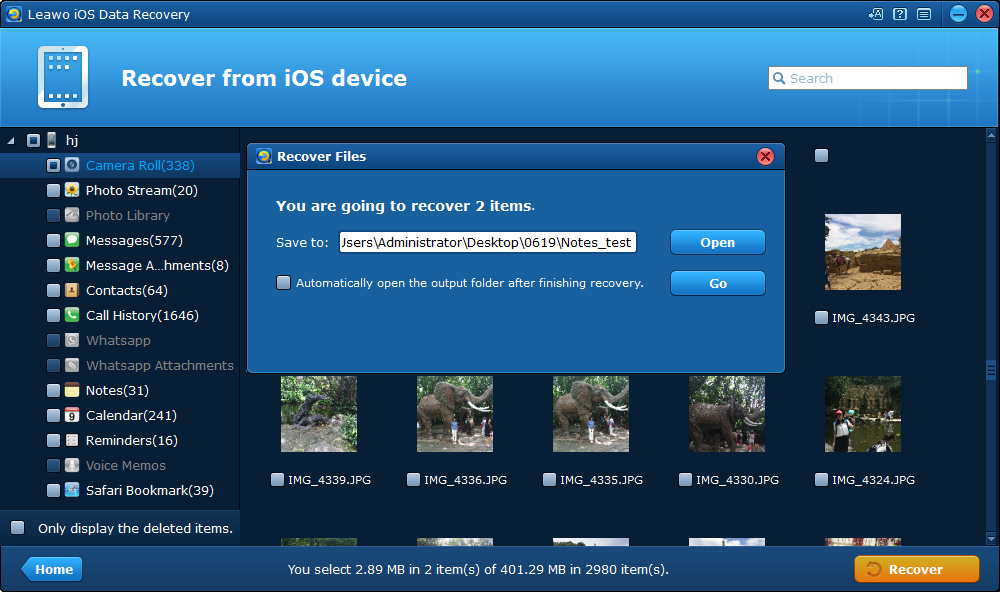
4. Click on the Open button on the following window to set a folder for storing your iOS 11 screenshot. And then click Go to start the recovery.
Above are just 10 of the most obvious features you can find on the iOS 11 screenshot tool. There’s absolutely more to discover. If you have any new discovery, remember to share with us. Here are several other iOS 11 tips you might need: how to record screen on iOS 11, how to turn off auto brightness on iOS 11, how to enable dark mode on iOS 11.

