Most people know how to add events on Apple calendar. But did you know you can also share your calendar to others? You can improve family ties and working efficiency by sharing your calendar with your family and co-workers. Now, let’s take a look at how to share calendars on iPhone.
Share Calendar with One Person:
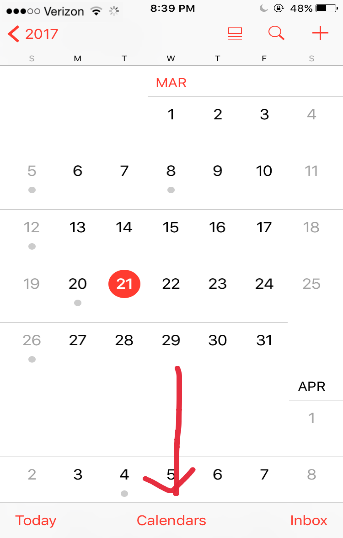
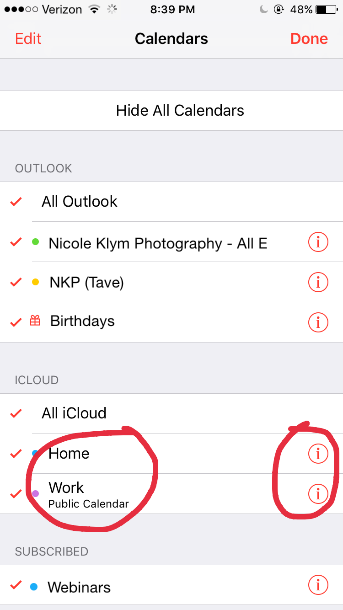
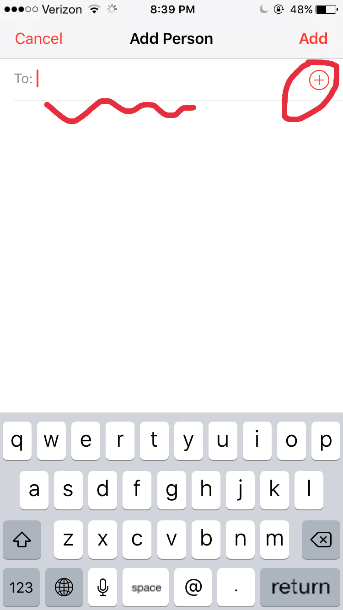
Open Calendar. Click “Calendars” down below,then you’ll see a list of calendars, including “Home” and “Work”. Let’s take “Work” calendar for example, click the red button “i”, you’ll see “Add Person…” You can share this calendar by imputing his Apple ID or choosing from your contacts.
The invitee will have the authority to see and edit this calendar on his device after he agreed and input his account information. You can also close the permission for editing by choosing the target invitee in calendar editing and resent the mail. If you want to cancel the public calendar you can close it in settings, calendar.
Share Calendar with Multiple People:
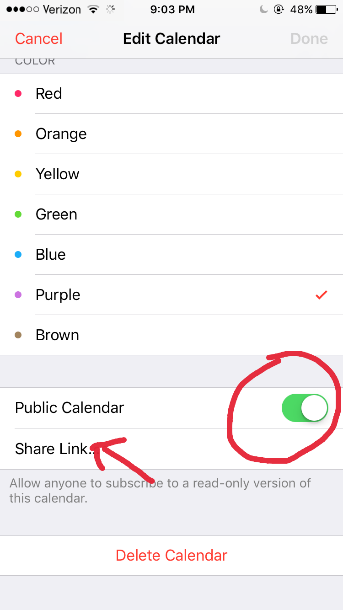
Let’s take “Work” calendar for example again. After you click the red button “i”, slide to the bottom of the screen and open “Public Calendar” and click “Share Link…”
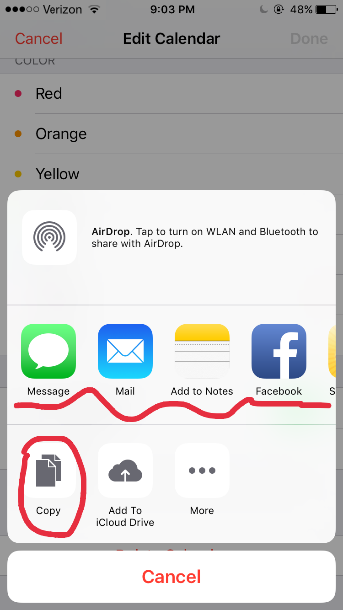
Then you can:
- 1. Send this calendar through message or mail;
- 2. Click button “Copy” at the left corner, then paste it to Facebook, twitter or instagram;
- 3. Add to Notes or to iCloud Drive.
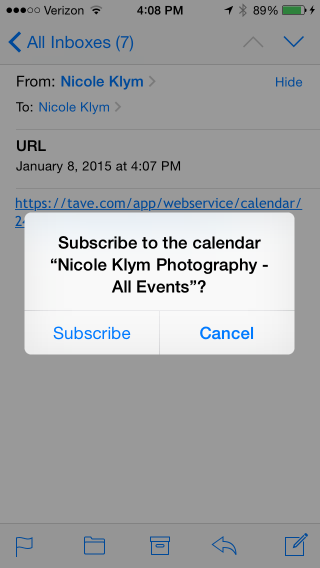
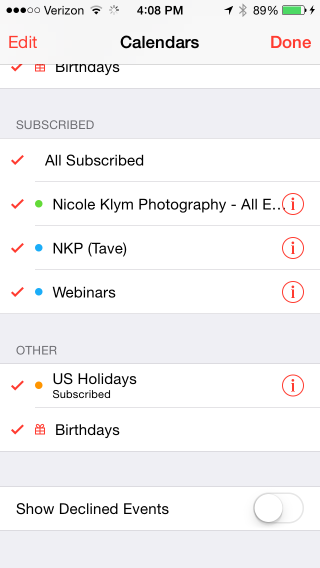
The receiver will have to copy the whole link, including “webal://p35-“, and paste it to Notes. After saving the link will change color to yellow. Click the link and subscribe, then you can see this calendar under “Subscribed” session in your Calendars.
Attention: The receiver will have to put a tick before “Home” in “Subscribed” session.
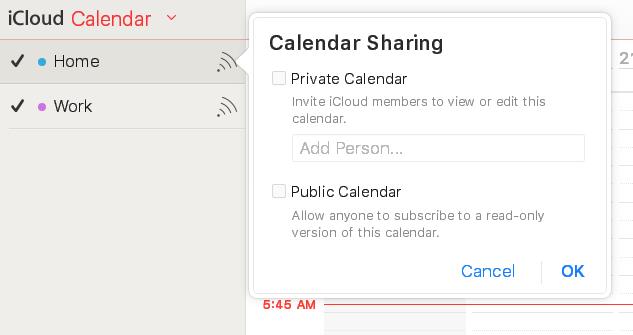
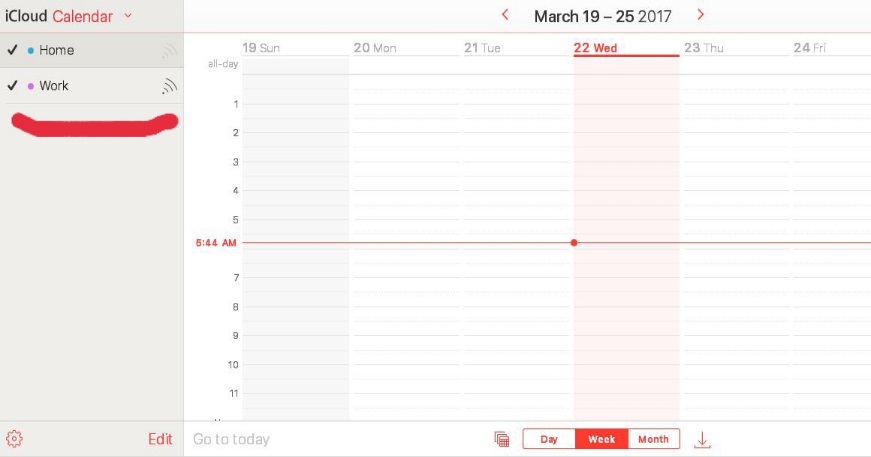
Share calendar on computer is so much easier: go to iCloud.com and log in with your Apple ID and get into Calendar:
it has two sections: Home and Work, and both of them have private and public calendars. You can share your calendar in Private Calendar to your friends by inputting his or her Apple account. If you are a public figure, you can copy the link of your Public Calendar (Allow anyone to subscribe to a read-only version of this calendar).
How to Share Calendar with your Family Members using iCloud:
Family Sharing is a new function of IOS that can bring harmony to your family’s digital life. It can share purchased apps, movies and music with up to 6 people in your family without sharing their accounts. All the purchasing can be made by one credit card and parents can accept or decline purchasing requests from their kids. In addition, Share photos, a family calendar, and more to help keep everyone connected. And with an Apple Music family membership, up to six people can get full access to Apple Music, too.
You ready to sync up your family's digital life? Here's a step-by-step guide on how to activate and use the handy Family Sharing feature in iOS 8 or later:
1. Make sure you have IOS 8 or later.
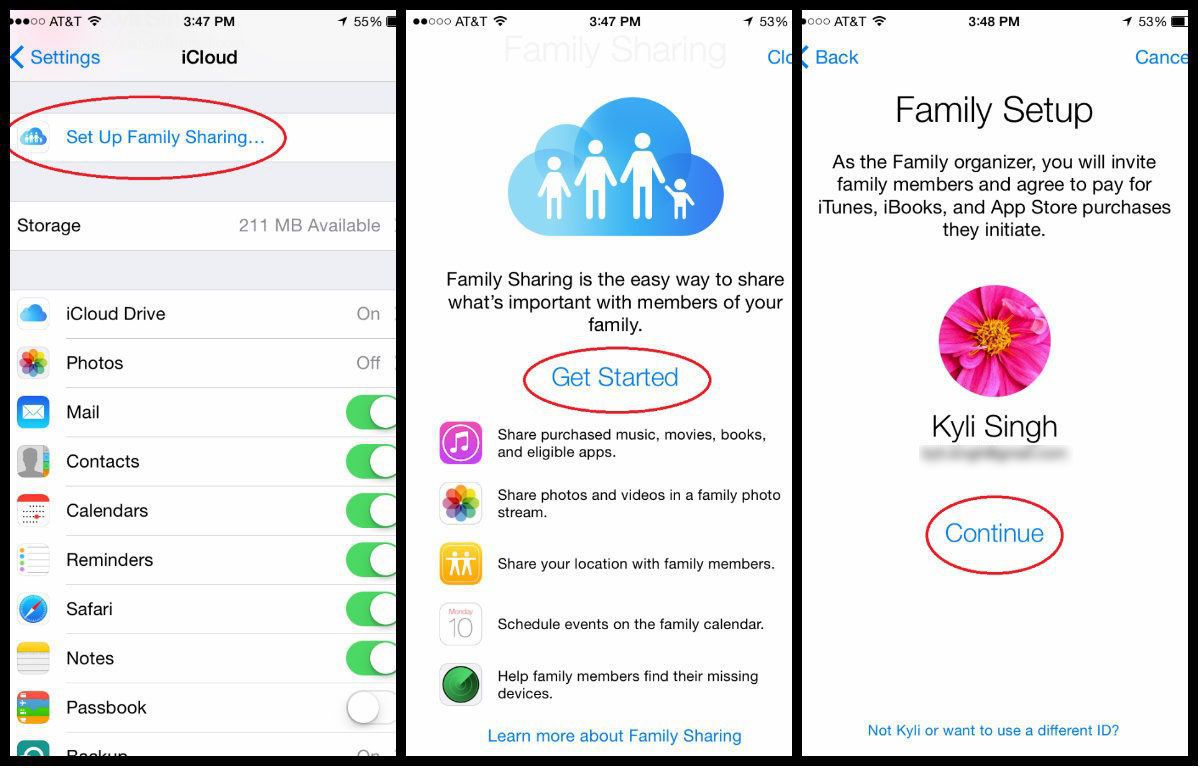
For Family Sharing to work, all devices must be running iOS 8 or later. If you or your family members haven't already, download the update. Go to Settings > General > Software Update on your iOS device, and follow the directions to install it.
2. Enable Family Sharing.
To use Family Sharing, there needs to be one organizer who heads up the account. Once you enable Family Sharing, any purchase made from the connected devices will be charged to the family organizer's iTunes account.
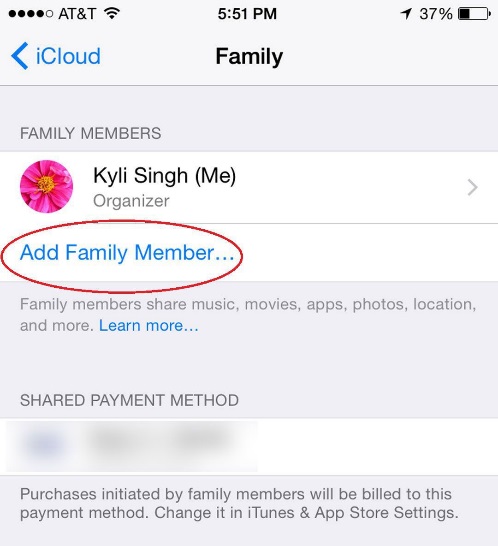
To set up a Family Sharing account, the family organizer should go to Settings > iCloud > Set up Family Sharing... > Get Started > Continue on his iOS device. If asked, enter your Apple ID, agree to the terms and conditions, and tap "Continue" to confirm that you agree to pay for all iTunes, iBooks and App Store purchases made by family members, and that your payment method is correct.
Next, you'll be asked if you want to share your location with the Family Sharing group, which means all family members can see where you are. If you decide to change your mind later, you can turn off the location setting in Settings > iCloud > Share My Location.
To add family members to your group, tap "Add Family Member..." and type in their names or email addresses. When you add family members, they'll each receive an email that will ask them to accept the Family Sharing invite. Remember, you can add up to five other family members.
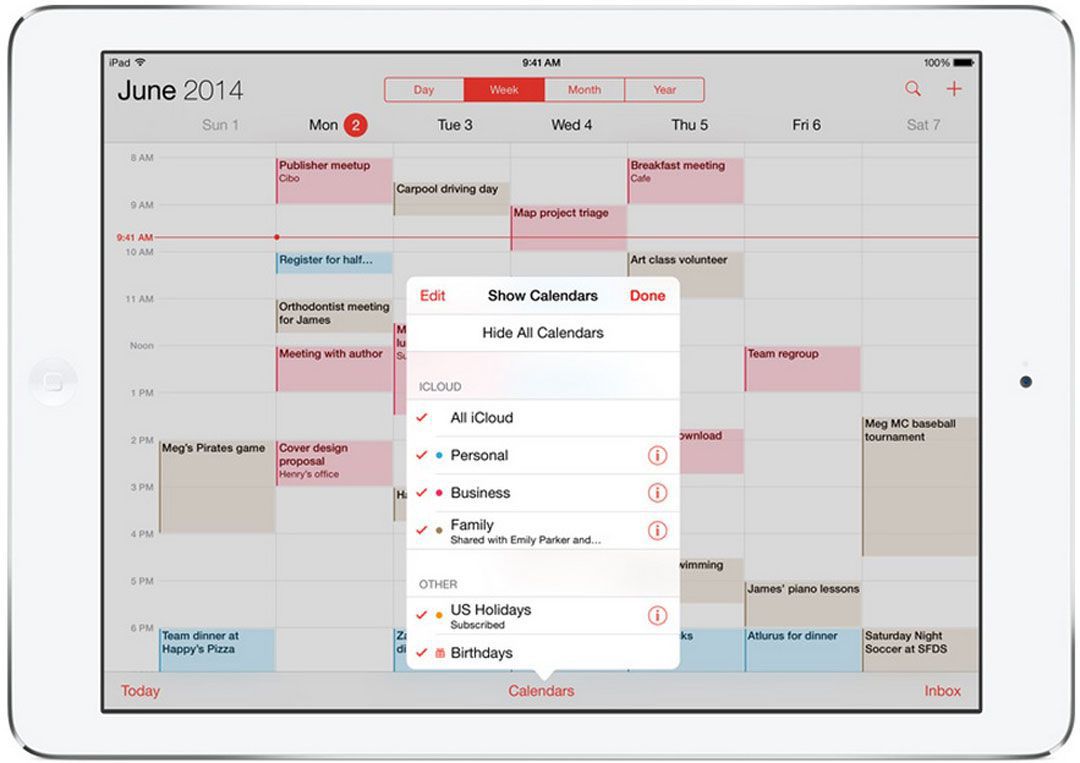
With Family Sharing's calendar, you can keep your family organized and on schedule. If you go to your Calendar app, you'll notice that a new "Family" calendar appears. Everyone has access to this calendar and can easily add, remove or modify events. You can also set up notifications to remind everyone about certain events.
2 solutions for junk invitations from iCloud calendar:
1. With regard to loads of spams users get from iCloud calendar, Apple Inc. have now added “Report Junk” in web-based iCloud calendar which support users to delete junk calendar invitations and report the inviter to Apple for further research.
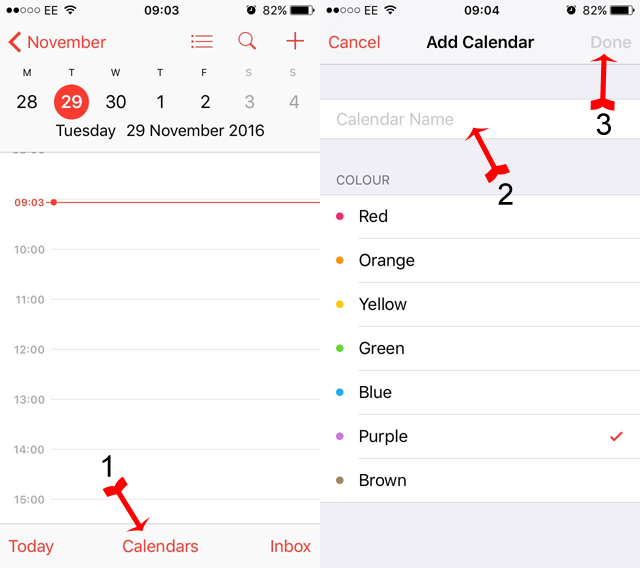
2. Create a Calendar called SPAM.
Start by finding and tapping the Calendar App on your Home screen. On the next screen, tap Calendars, which you will see at the bottom,. Give the new calendar a name you can remember, like SPAM, and tap Done. This should take you back to the calendar screen.
Now it’s time to select the iCloud Calendar spam invite and move it to the SPAM Calendar you created above. When you’ve moved it, tap Calendars at the top of the screen, and then tap the “i “button; it should be next to the SPAM Calendar. Next, look at the bottom of the screen and tap Delete Calendar. And that’s it. You have removed this iCloud Calendar spam event without the spammer’s knowledge.
Alternatively, the following method will prevent you from receiving all those spam invites in your calendar.
Disable auto-add Calendar via your iCloud account
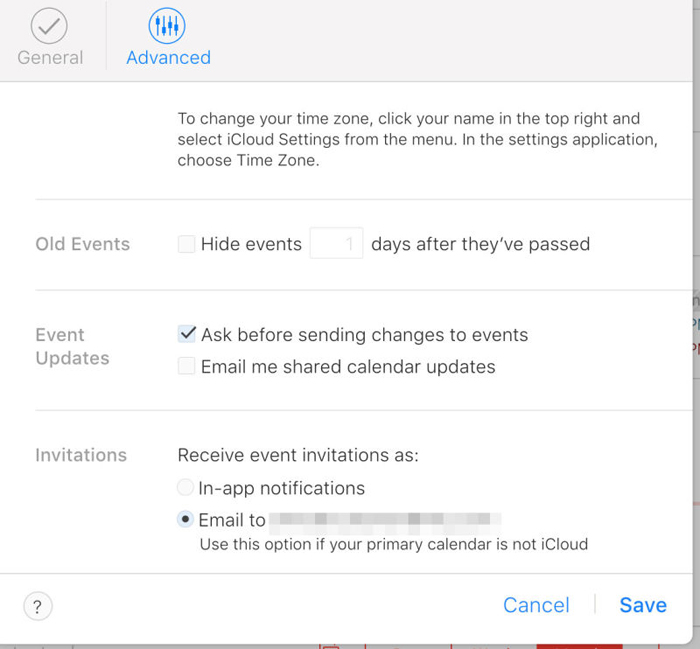
To use this method, you need to go to iCloud.com and log into your account. Go to Calendars and then click the Gear icon, followed by Preferences. Next, click on Advanced. In the following screen, scroll down to Invitations and select the option to Receive event invitations via email. This will prevent you from receiving them in the iCloud Calendar app. Finally, click Save.
And that is it; you won’t get any more spam invites. However, it also means that you won’t see any good invites either.
There is one more solution, but it is the most extreme. However, if you don’t use the iCloud Calendar app, it will solve the problem.
Disable iCloud Calendar
Disabling the iCloud Calendar is easy, but it does mean that you won’t won’t be able to use it, so think about whether you will need it in the future before going ahead with this.
To disable the app, go to Settings –> iCloud and switch it to off by flipping the switch.
It’s unclear whether Apple is looking into all these spam iCloud Calendar invitations. We do know that many have informed the company of the problem, but it has yet to announce anything concerning it officially. Probably the best option for a resolution would be if Apple marked calendar invites as spam to begin with.
10 hidden functions of Calendar:
- 1. If you received an e-mail with a specific time, you can create event or show it in calendar by click the title or time.
- 2. You can choose time zone override in settings-calendar.
- 3. You can ask Siri to check or make plans without actually opening the calendar.
- 4. Open settings, iCloud, and open calendar, then you can share your calendar with your families automatically.
- 5. You can turn on or turn off event alerts in calendar outlook or in event editing.
- 6. You can sync events or holiday calendars by logging into the Mac system.
- 7. You can add locations and time to the event and check it in the notification center.
- 8. It may be hard to notice when you have locked your screen to portrait. But if you put it on landscape view, you can actually drag the events to other time.
- 9. You may want to set an event more accurately. Double tap the time row to change 5-minute-range to 1 minute in “Starts” or “Ends”.
- 10. You can set different alert time to different events in Settings, Calendar, Default Alert Times.
Recover Lost Calendar to iPhone:
If you accidentally delete the events in your calendar, here's how you can restore them back to your phone.
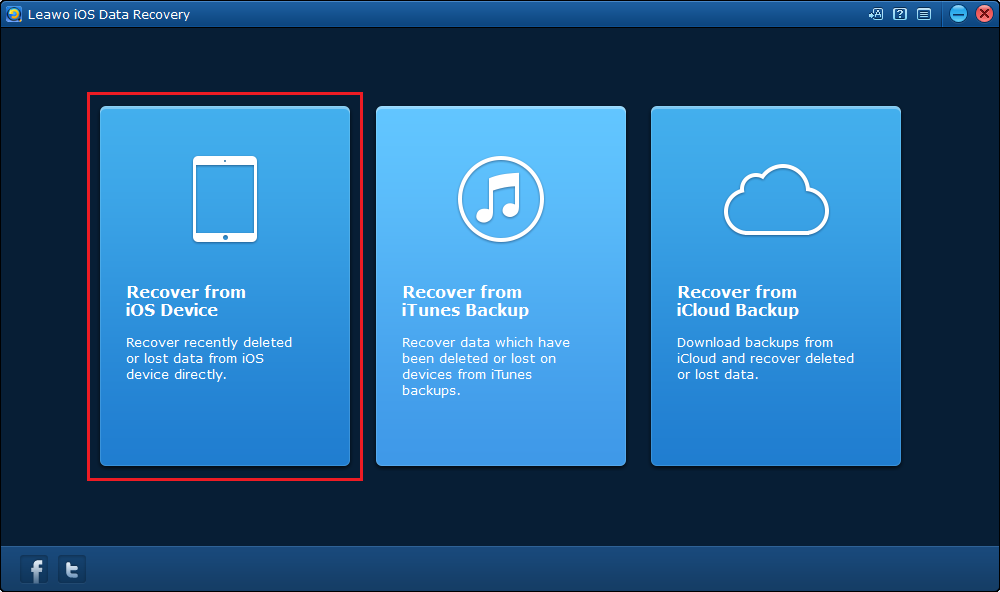
You can use Leawo iOS Data Recovery to recover loss or mistakenly deleted data to your iPhone. It's a powerful iOS data recovery program developed for performing data recovery on iOS devices. It provides 3 different modes to recover in total of 14 types of data to iOS device. Users can recover data from the device itself, iTunes and iCloud backup.
Below are the instructions for using Leawo iOS Data Recovery to recover mistakenly deleted Calendar events on iPhone.
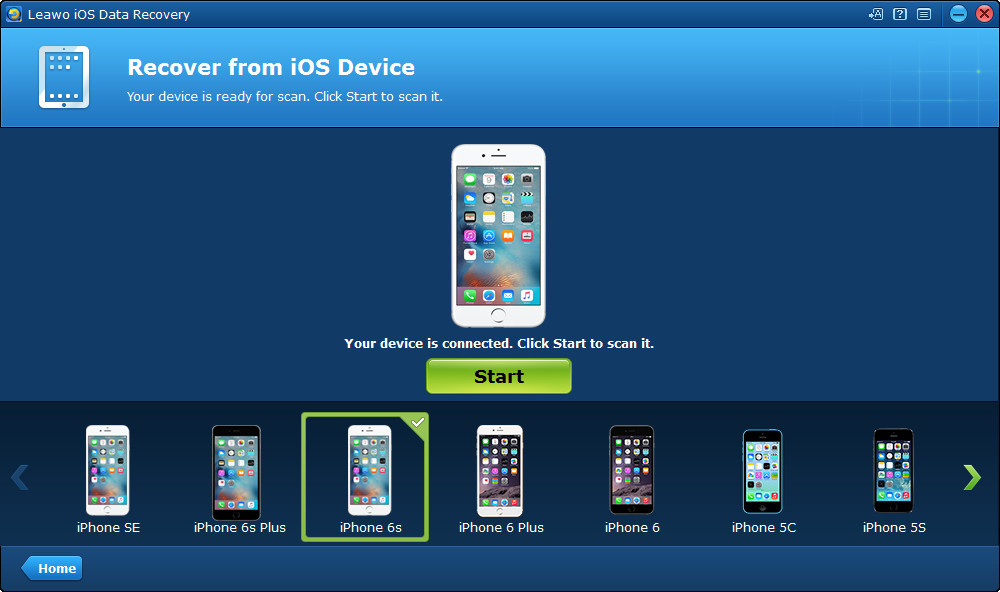
Connect your iPhone to your computer and choose your device on the device list and the iOS data recovery program would start scanning your iPhone.
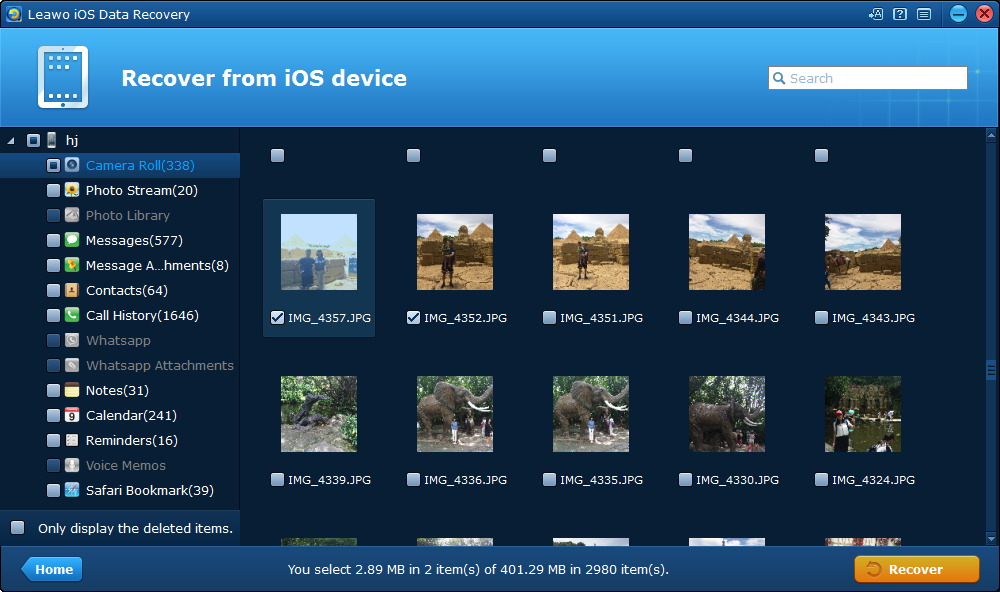
When it finishes scanning, all the files on your phone would be presented on the main interface. On the left column, pick Calendar and choose the items you want to recover and click the Recover button on the bottom right to start recovering.

 Mar. 23, 2017 by


 Prof. Media
 Blu-ray Ripper
 Blu-ray Copy
 iOS Data Recovery
 [12/29/23] MAX Downloader V15.0.0
 10,000,000 people are using Leawo!
 All Transactions are protected!
 30-Day Money Back Guarantee!