
Producing a high-quality video can be very time-consuming, especially when you want it to be original and interesting. But sometimes your hard-work can be stolen by intellectual property thieves. If you have ever been troubled by this problem, or want to nip this kind of thing in the bud, continue to read and you will find ways to prevent your video from being a stolen video on platforms such as YouTube.
Part 1: How to Find Your Stolen Video on YouTube?
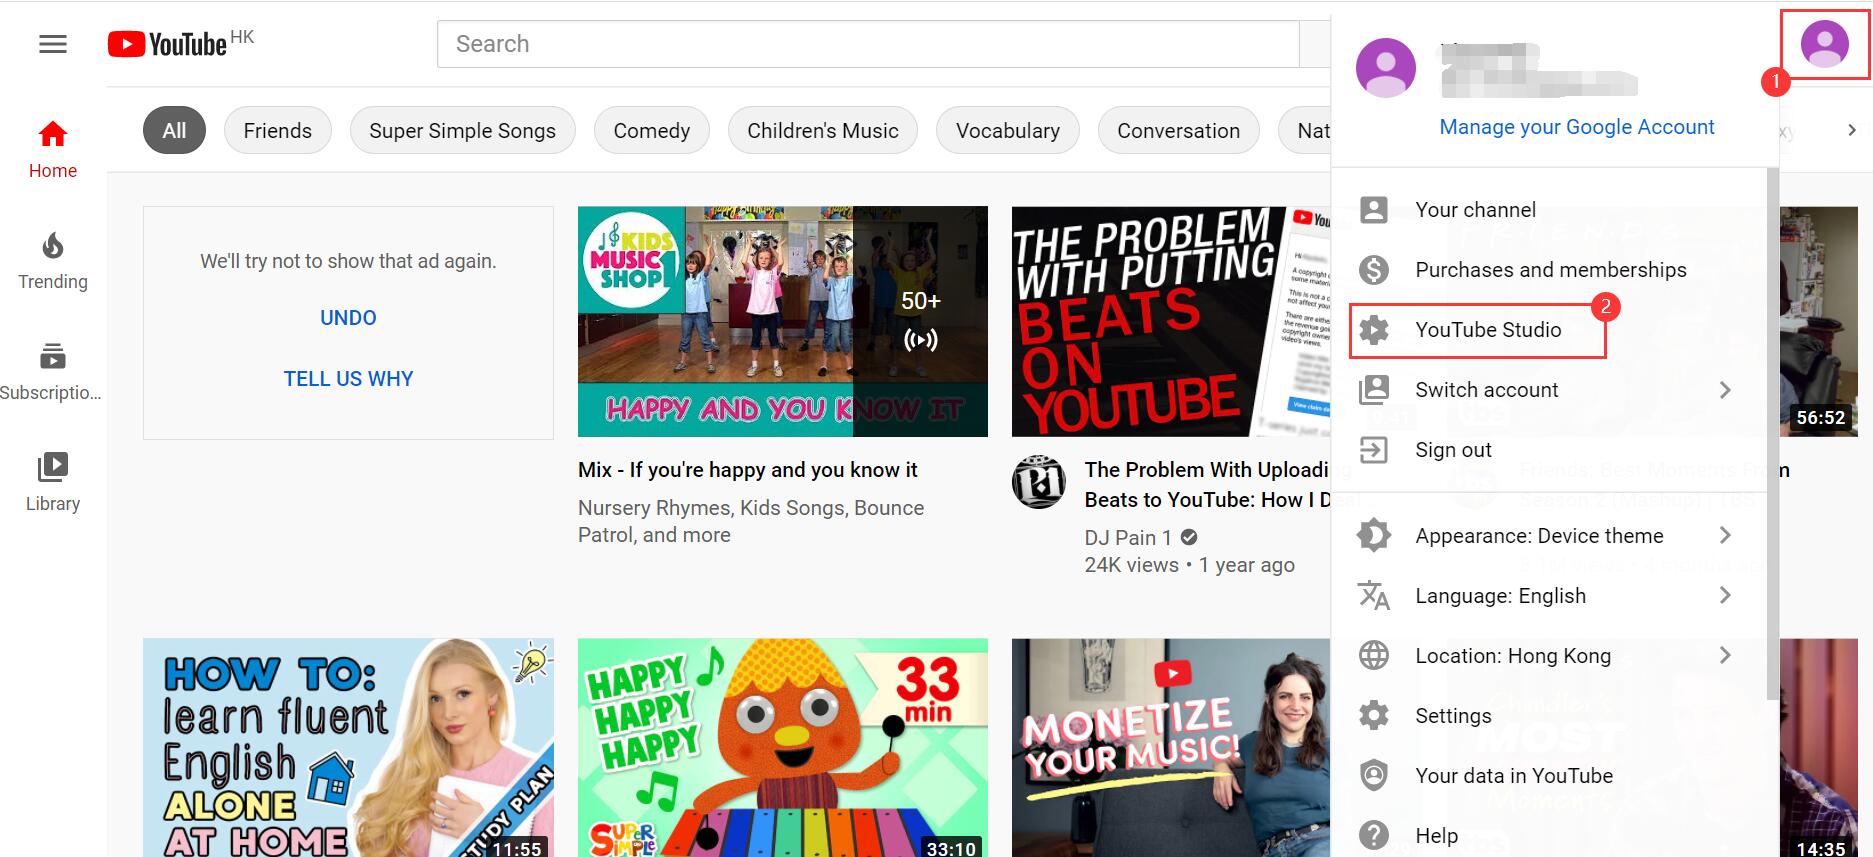
Before taking any further steps, you need to check whether your videos have been infringed. There’s an easy way to find your stolen video on YouTube. Open your YouTube home page, click your profile photo that shows your account on the upper-right, and click “YouTube Studio” in the drop-down box.
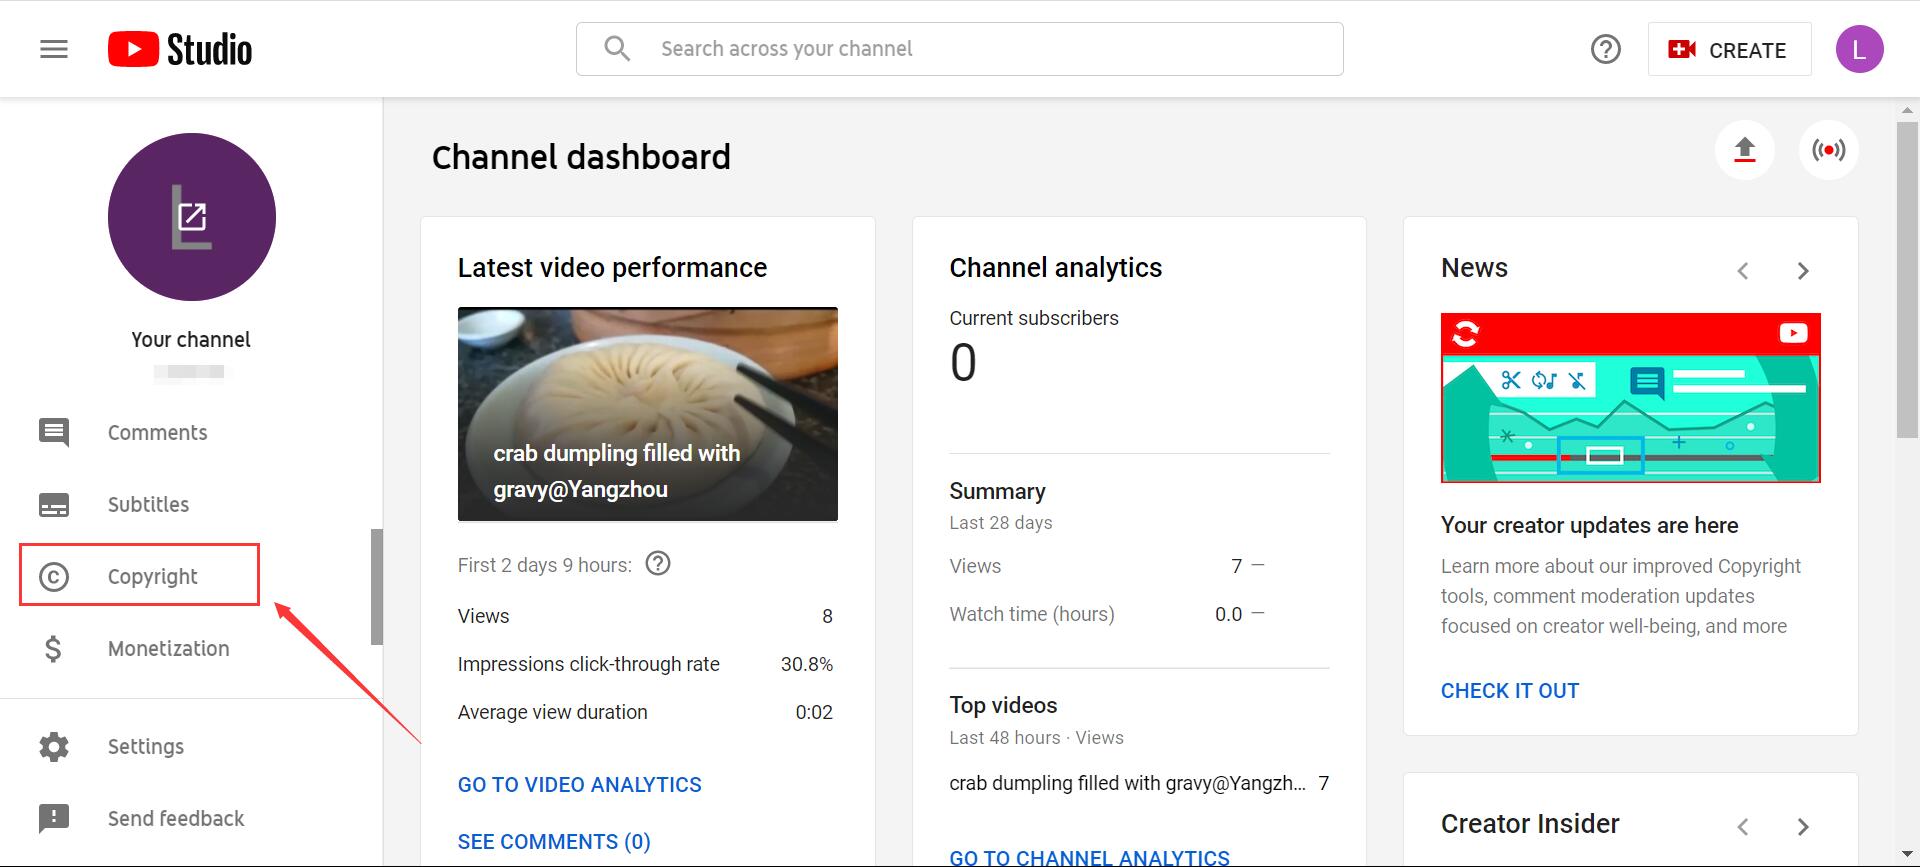
On the “Studio” page that opens, find “Copyright” in the very left menu and click it.
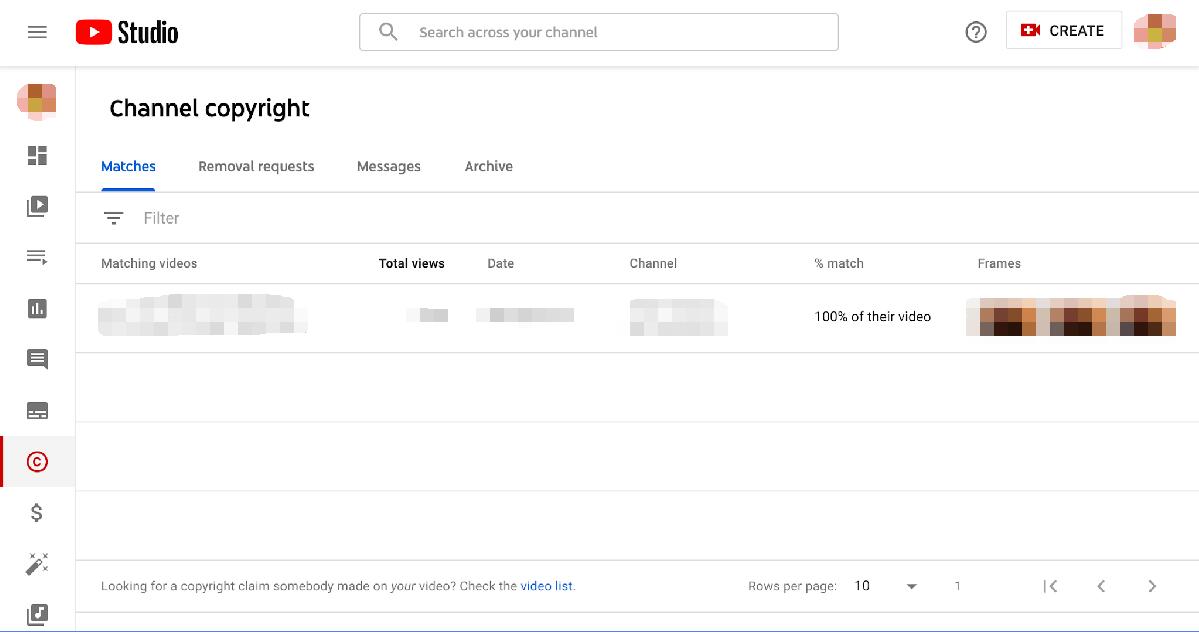
If your channel is in the YouTube Partner Program, on the “Channel copyright” page, the video that is uploaded by others and that matches or partly matches yours will be shown under the tab “Matches”. On the same page, you are able to track the channel that steals your video.
Part 2: How to Report a Stolen Video on YouTube?
After finding out which of your videos are re-uploaded by others without your permission on YouTube, you may proceed to report those stolen videos to safeguard your rights. YouTube provides such a function.
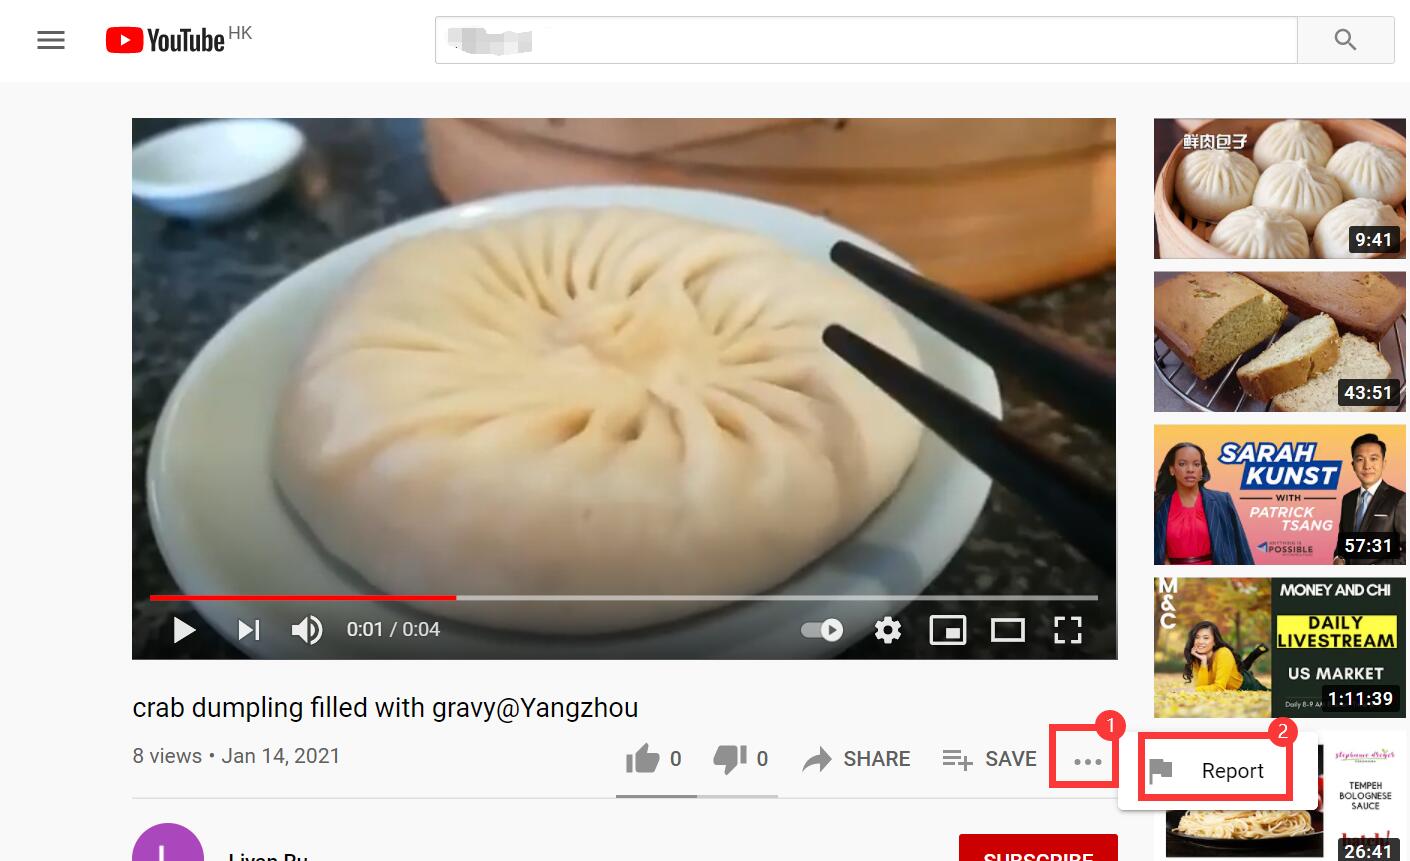
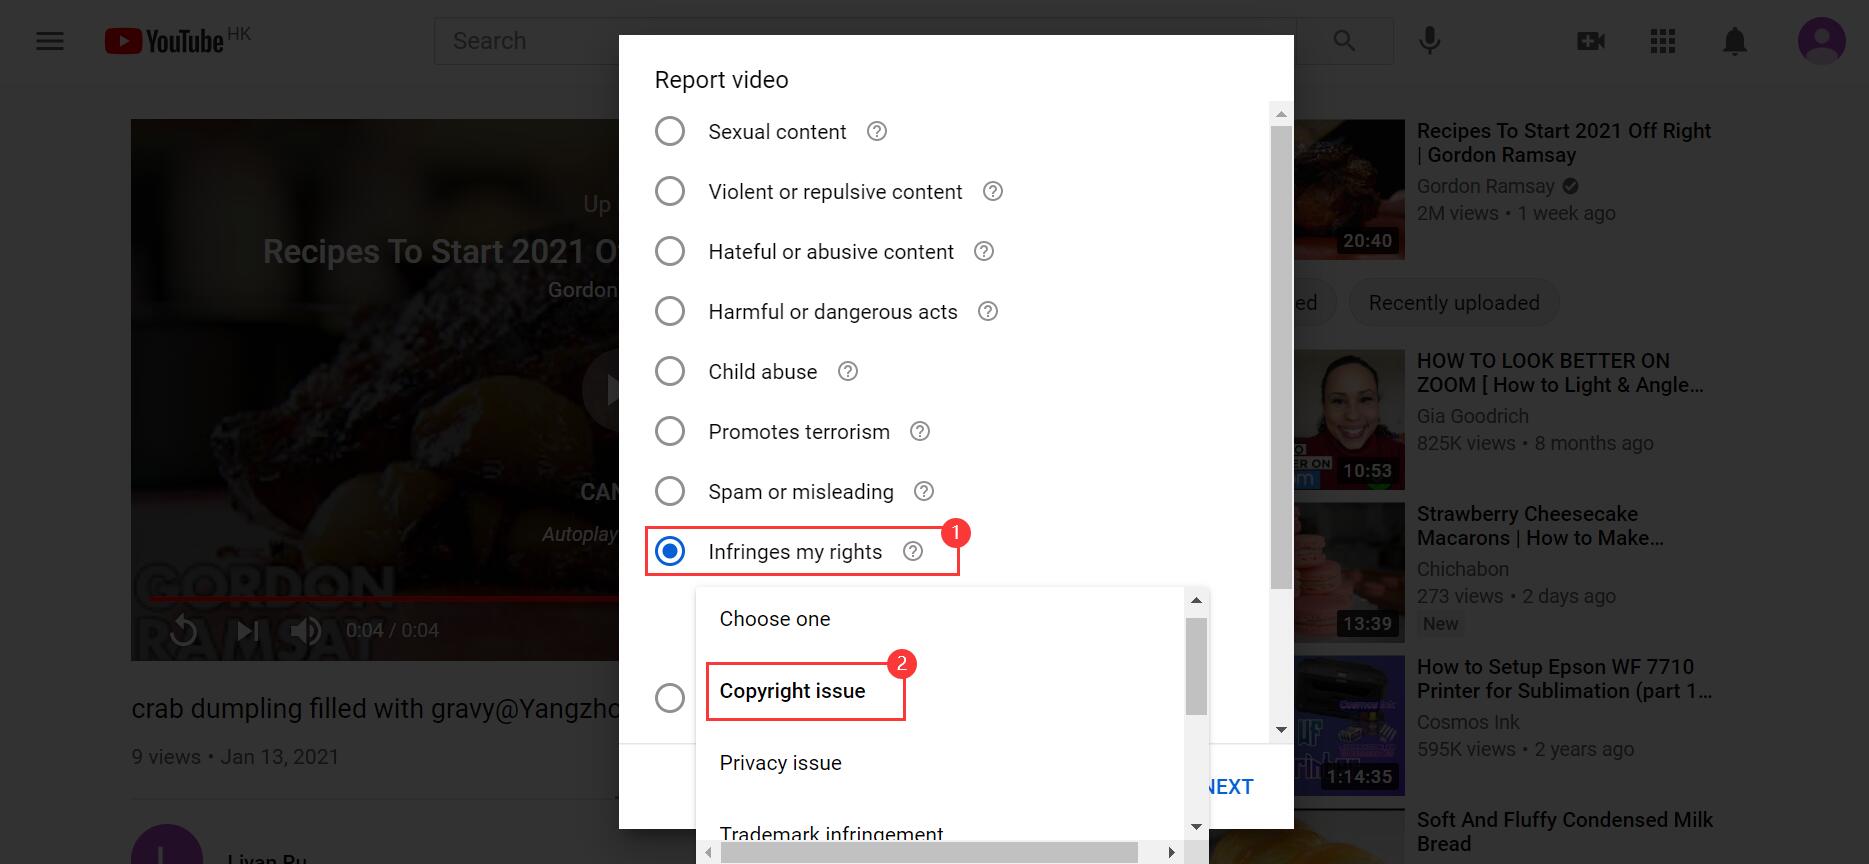
On the page playing the video that you are sure belongs to you, click the more options icon in three dots, and click “Report” to flag and report this video. Let’s take this video in the following screenshot for an example.
On the “Report video” page that shows, you need to select the reason for your report. In this case, select the dot before “Infringes my rights”, and click “Copyright issue” in the drop-down box. Then go to the next step.
After you have selected the “Copyright issue”, the “YouTube Help” will show up and ask you to submit a copyright takedown notice. To do this, just click the blue “Submit a copyright complaint” button, and continue to fill out the application form as directed by the website.

After YouTube has validated your submission, you may choose either to remove the stolen video, or to add advertisement against it (in which case you will be entitled to the earnings made therefrom).
Part 3: How to Protect Your Video from Being a Stolen Video on YouTube?
In Part 1 and Part 2, we’ve talked about how to find your stolen videos and how to report them. In this part, 3 other methods will be introduced to help you protect your video from being a stolen video on YouTube.
3.1 YouTube Content ID
YouTube Content ID is a content management system that helps content owners to identify and manage their copyrighted content.
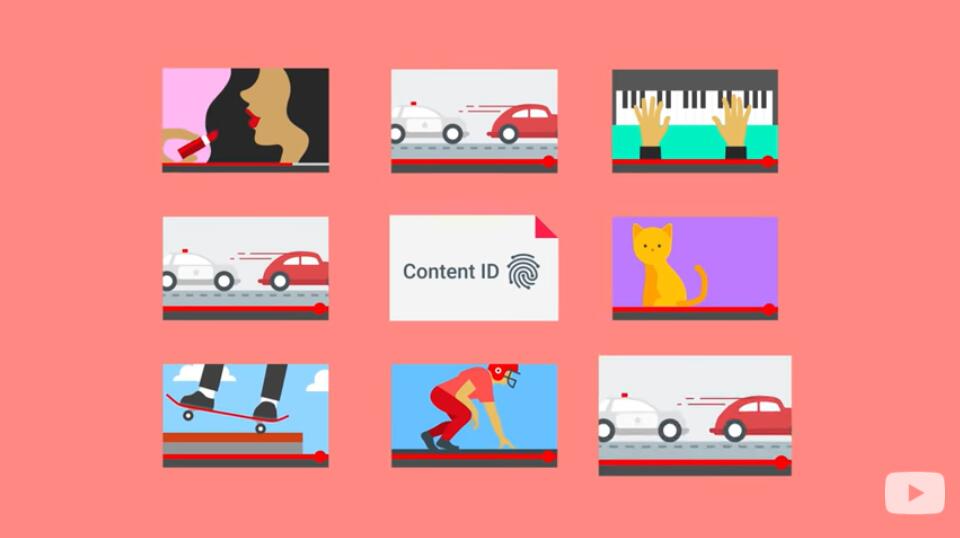
Owners need to firstly give YouTube their audio or video files that can be used to identify their works. The Content ID system stores all the files received in a database, and then scans all uploaded tracks on YouTube against these files to check whether there is a match.
When there does show a match, the content owner may choose to:
- a)Block the content that is re-uploaded without authorization;
- b)Monetize the content for their own benefit;
- c)Track the user data to get detailed analysis.
The system can be a great help if you are an eligible Content ID user. You can apply for your Youtube Content ID on the official website and see if you’re qualified.
3.2 Watermarks
An effective way to prevent your videos from being poached is adding watermarks. A conspicuous watermark reminds audience to whom the video copyright belongs.
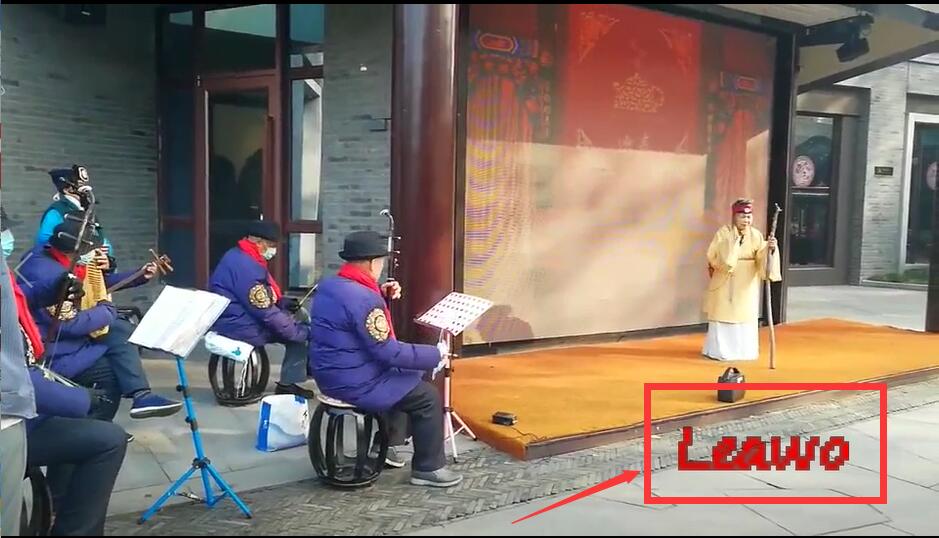
You can use a logo or a text as the watermark to customize your videos. By doing so, when someone else re-uploads or forwards your content, the audience will recognize you and come to your channel to find more content that interests them.
3.3 Password Protection
In some cases, you may not want to share your videos in public, but only with authorized individuals or groups. You can do that through password protection.
There are various tools you can find online to password protect your videos. You just need to set a password for your video, and then it can only be accessed by the ones who are entrusted with your password number. Password protection ensures that your protected video can’t be played or down-loaded by people not wanted.
Part 4: Stolen Video Preventer - Leawo Video Converter
Adding watermarks is a practical and common way to protect your videos from being a stolen video on YouTube and other online platforms. You can realize that easily with Leawo Video Converter. Whether the watermark you want to add is a text or an image, Leawo can help you to do that.

-
Leawo Video Converter
- Convert video and audio files between 180+ formats without quality loss
- Support 720P, 1080P and even real 4K video output
- Create photo slideshows from photos stored on camera, computer, camcorder, etc
- Built-in video editor to trim, crop, add watermark, apply special effect, etc
- 2D to 3D converter with 6 different 3D movie effects available
Now open the software on your computer, and let’s see how to do that.
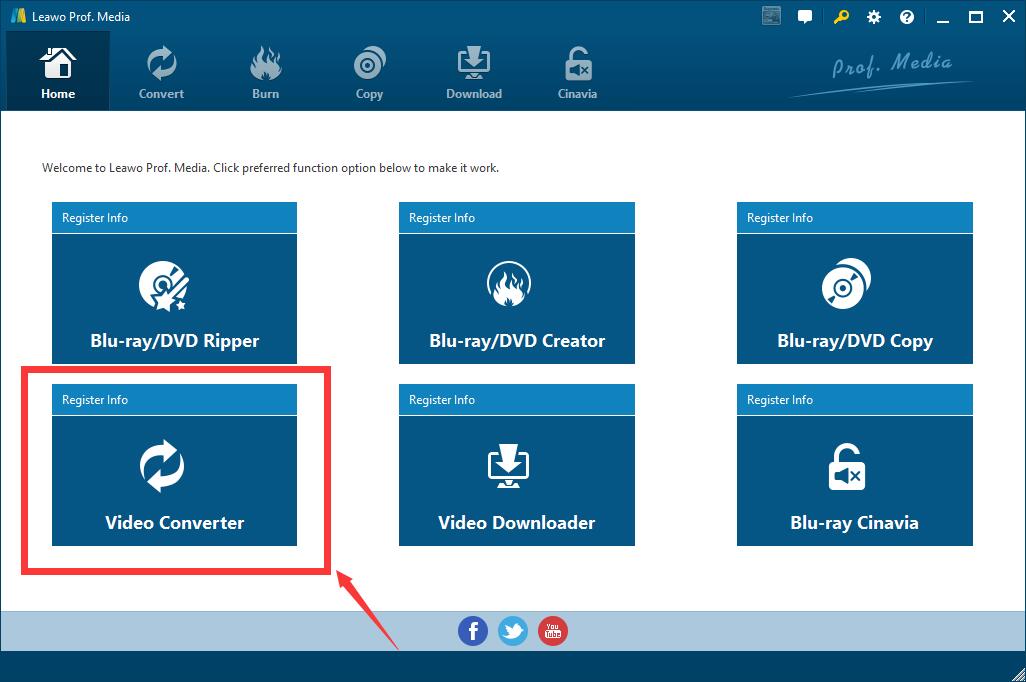
4.1 Find Leawo Video Converter
The Converter is a module integrated in the application Leawo Prof. Media, so our first step is to find and click the “Video Converter” in the bottom-left corner on the main panel.
4.2 Add Video File
After the Converter is opened, it’s time to add the video you are going to watermark. There are 2 ways to add your video. You can either directly drag the file into the dotted box as directed on the main panel, or click the “Add Video” menu, choose the “Add Video” tab in the drop-down box and then select the file.
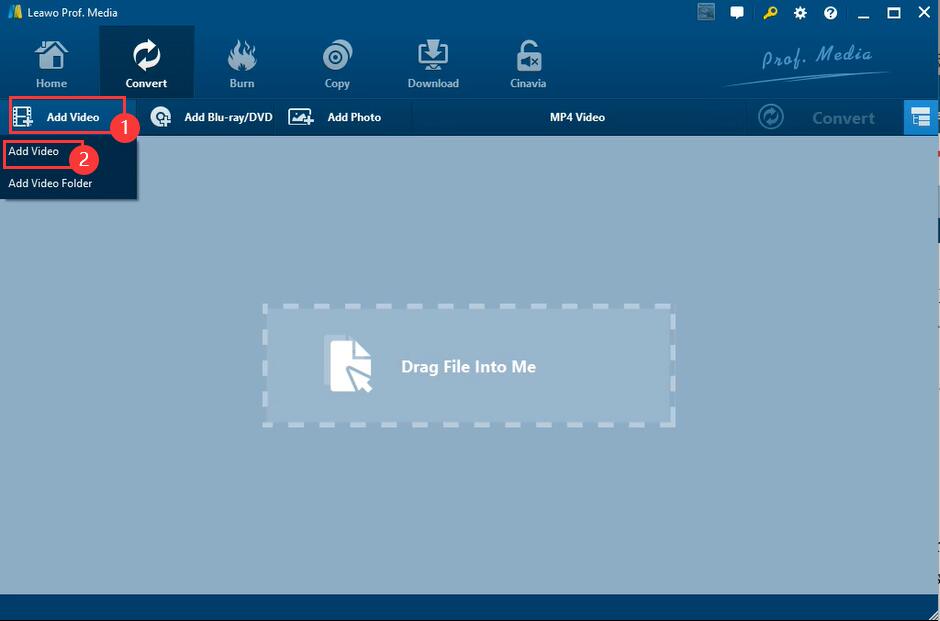
If you want to watermark videos in a batch, in the drop-down box you can select “Add Video Folder” which helps you load multiple videos at one time.
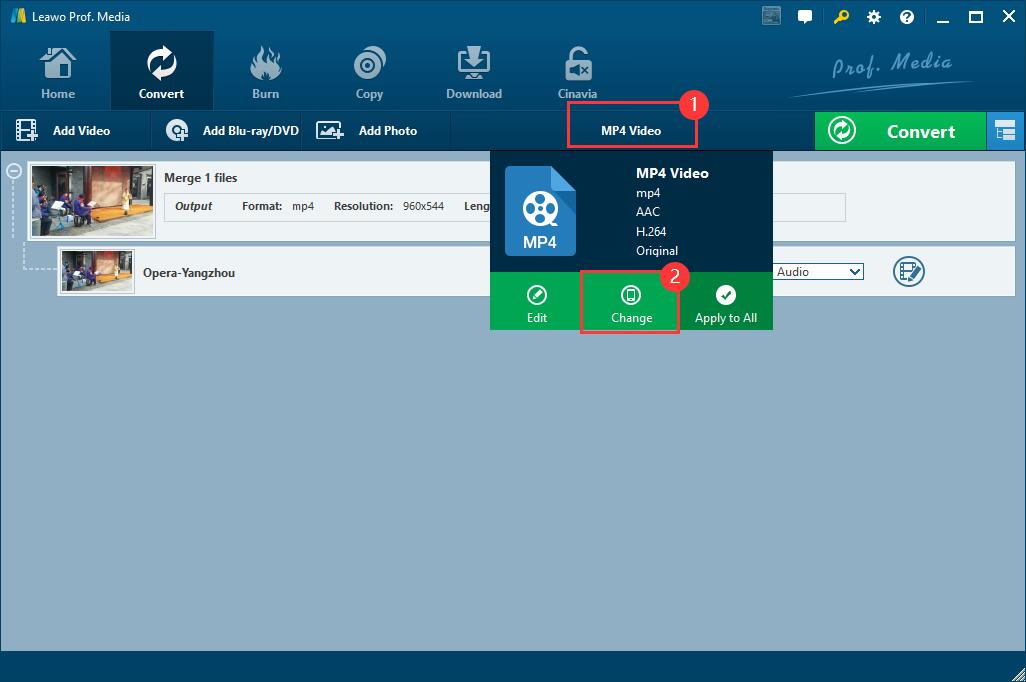
4.3 Set Output Format
Before further operations, you may set the output file format you want. Go to the format tag located right before the green “Converter”, and click “Change” in the drop-down box.
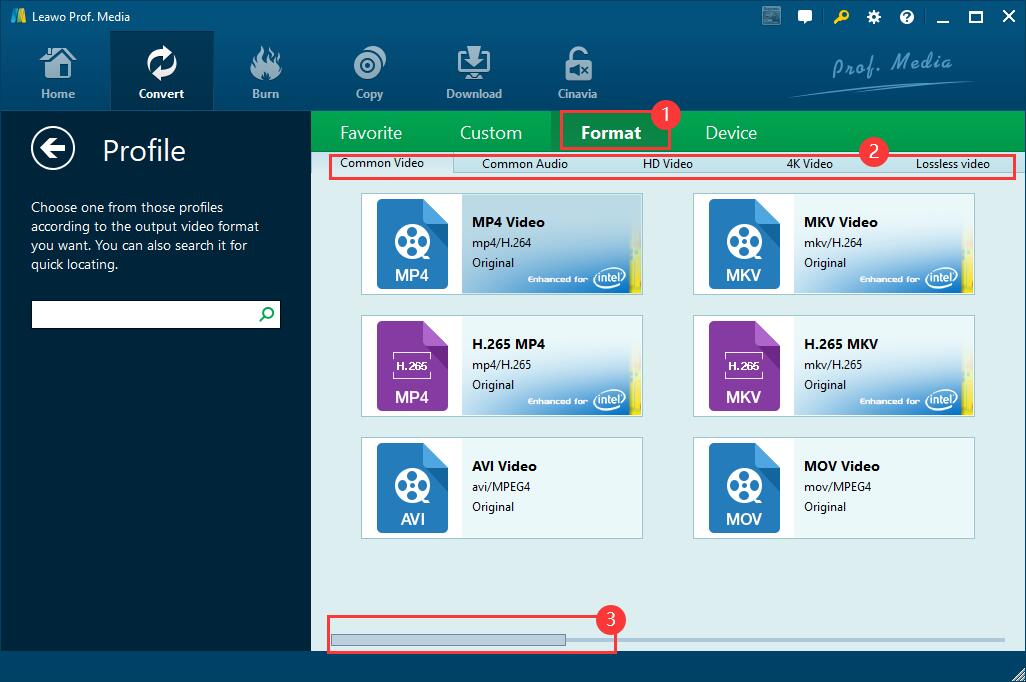
On the “Profile” panel, you may choose the output format you want the new file to be. Slide the bottom scroll bar for more options.
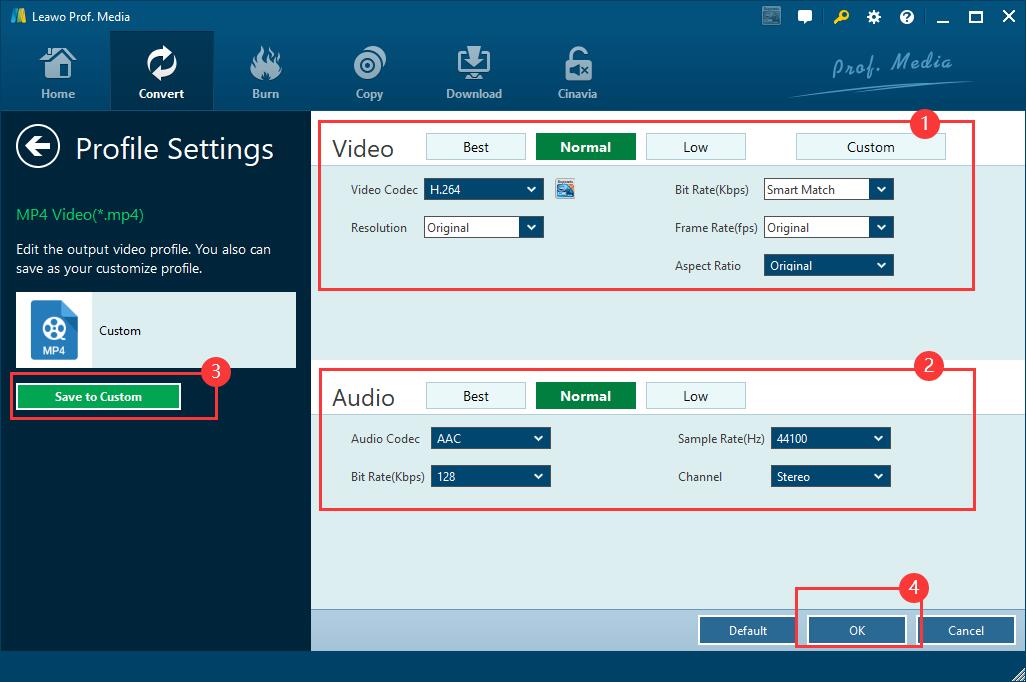
After that, let’s go on to set parameters for the output file. Click again the format tag, go to “Edit” in the drop-down box.

You will see the “Profile Settings” panel where the video Bit Rate, Resolution and Frame Rate, as well as the audio Sample Rate, Bit Rate and more can be defined by yourself. On the left side of the panel, you may also save the settings as your customize video profile. After the settings are done, click the “OK” button at the bottom.
4.4 Watermark the Video
After you have done all the settings, go to the next important part—adding watermarks.
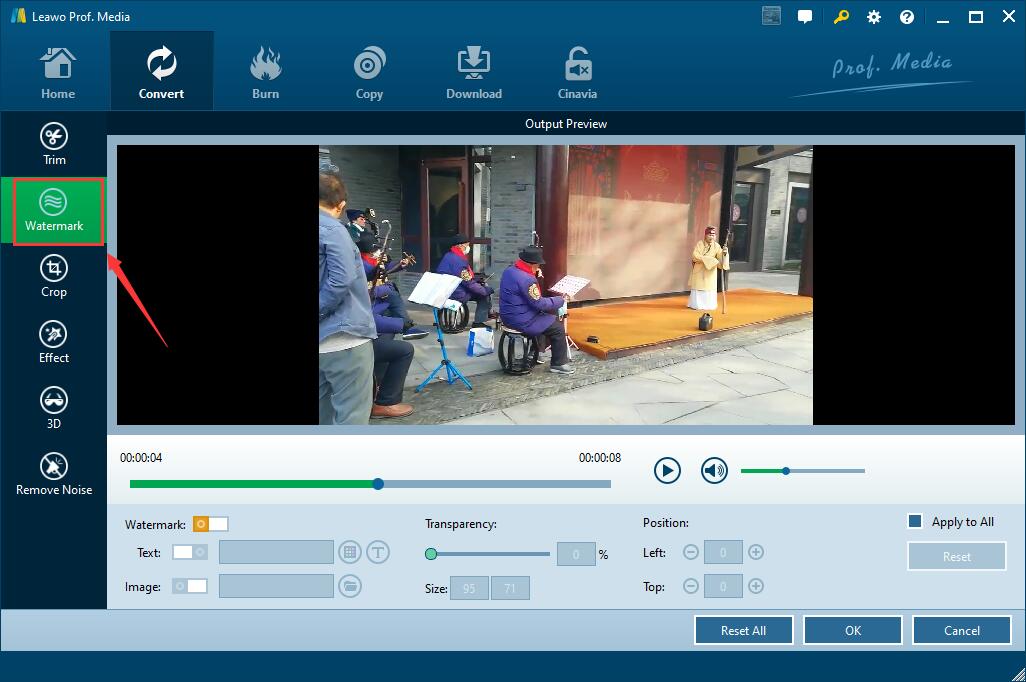
Leawo Video Converter supports 2 types of watermarks: text and image. In order to protect your videos, you can choose whichever suits your file best to show your copyright. Now let’s mark the video together. Click the circle icon with a pen on the right side of the file to edit.

On the new page that shows up, we can see from the very left menu that the Converter provides 6 functions for us to edit the file. Click “Watermark” and continue.
To enable the watermark function, flip the yellow switch on the right side of “Watermark”.
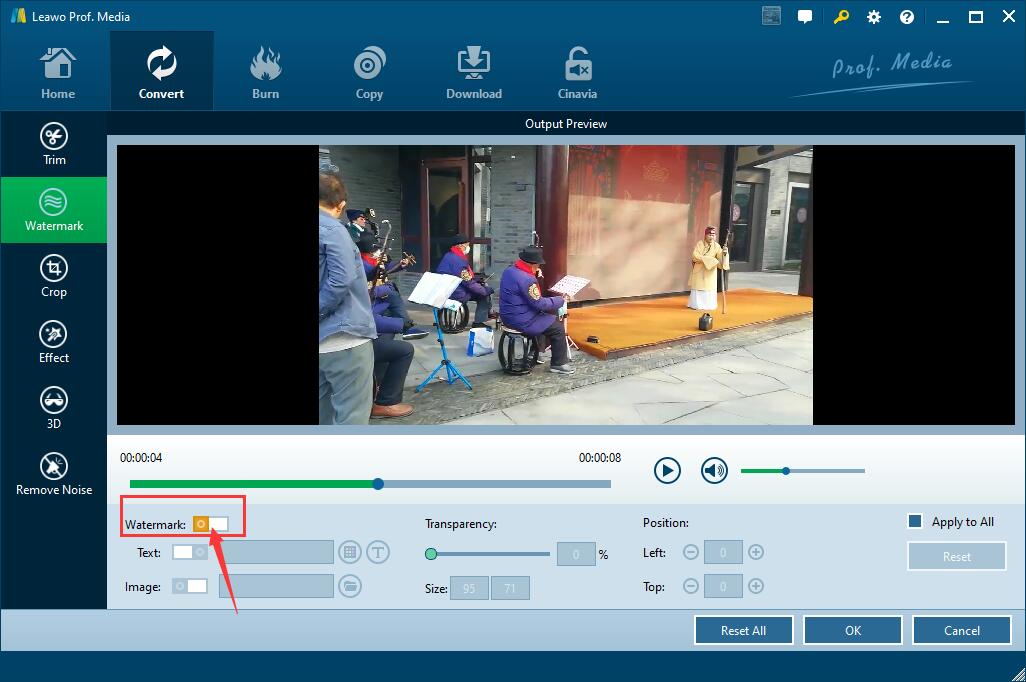
When the switch is green, the function is enabled. The default watermark is a text of “Leawo” in the upper-left corner of the video.
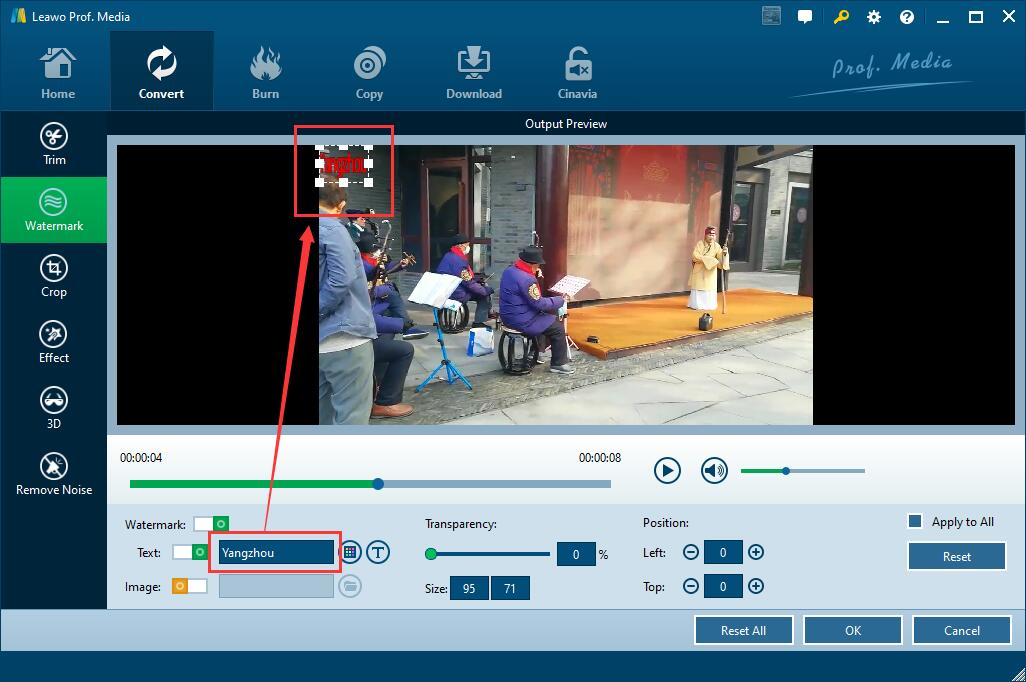
△ 4.4.1 Add text as watermark
You may choose a text as your watermark.
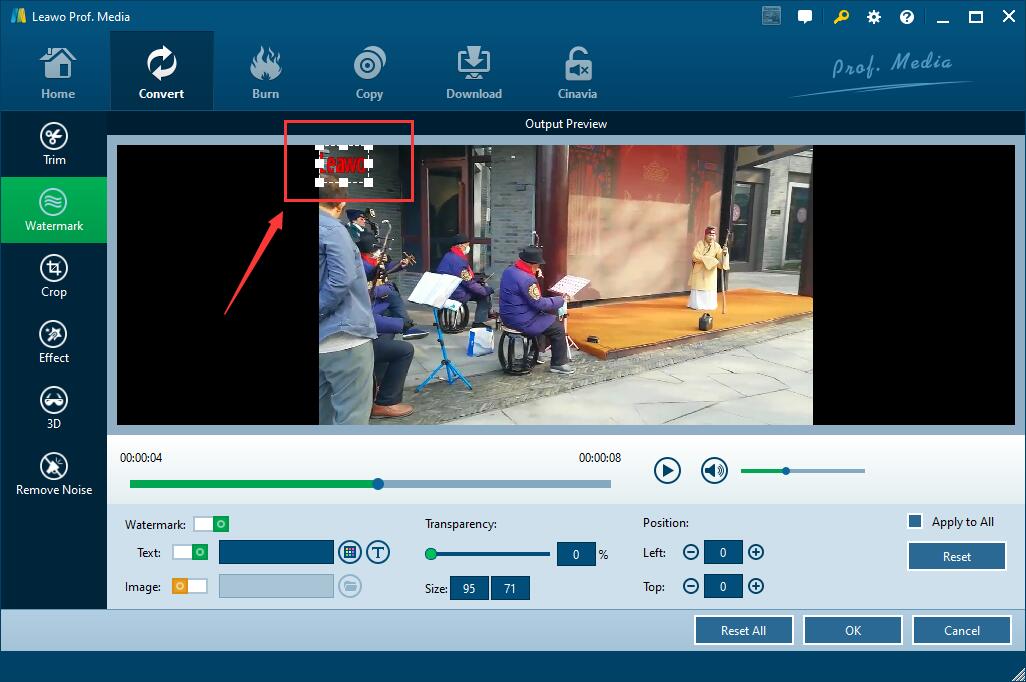
Make sure the switch on the right of “Text” is turned to green, and type the text you want to show in the dark blue input box. The corresponding watermark will be shown on the video.
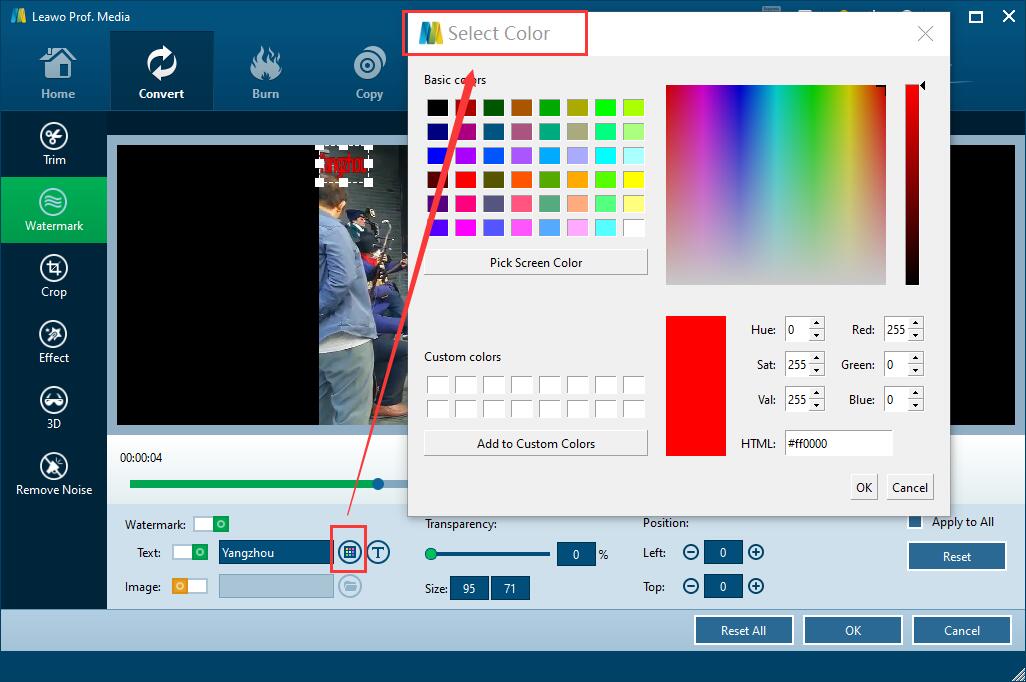
You can also adjust the text’s color and font with the 2nd icons on the very right side of the input box. Click the color icon, and either choose basic colors or set your custom colors for your text.
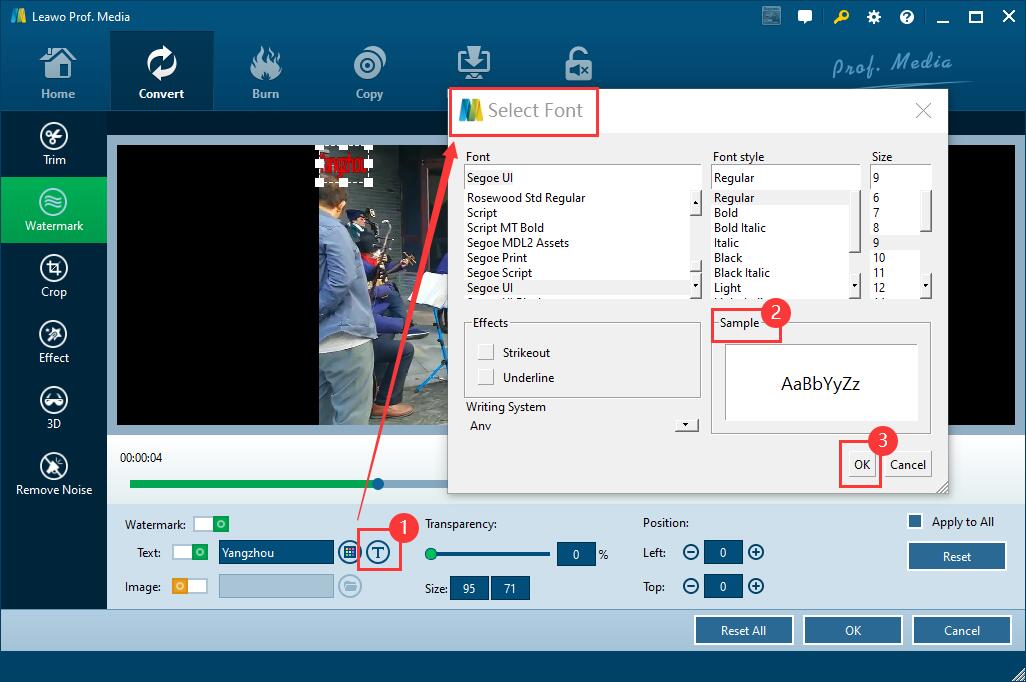
Click the icon with a “T” beside the color icon, you will see that multiple fonts, styles, sizes and effects are available on the “Select Font” panel. Set the parameters according to your needs, and preview the result in the “Sample” box. Do not forget to save your settings by clicking the “OK” button.
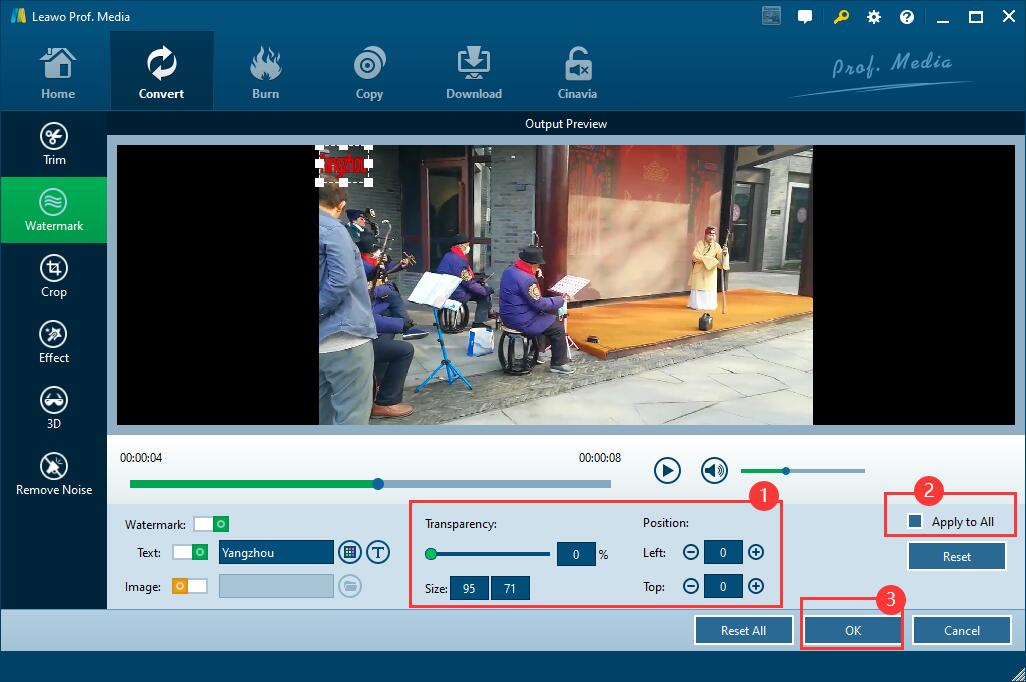
After the text is input, you may set the watermark’s transparency, size, and position based on your specific needs. If you have added a video folder, you also need to decide whether to apply your settings to all. Click “OK” to save all your settings. The text is added on your video.
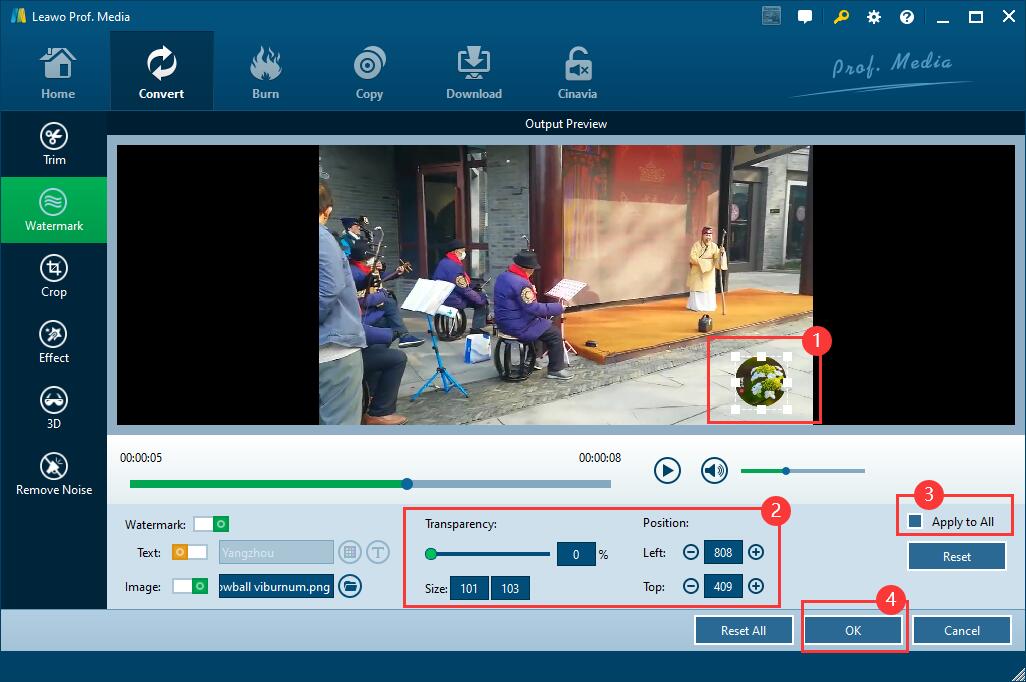
△ 4.4.2 Add image as watermark
Apart from a text, you can also use an image to watermark your video. Flip the switch on the right of “Image” to enable this mode. Note that when you enter the image mode, the text you’ve just added is automatically deleted.

After the switch of “Image” is turned to green, click the folder icon on the right, and select the image you want to use as your watermark. Make sure that the image is pre-saved on your computer.

You may drag the image and place it where you think is better. Continue to set the watermark’s transparency and size, as well as whether to apply the mark to all the videos if you have input a video folder to the Converter. Click “OK” to save your settings. The image-adding part is done.
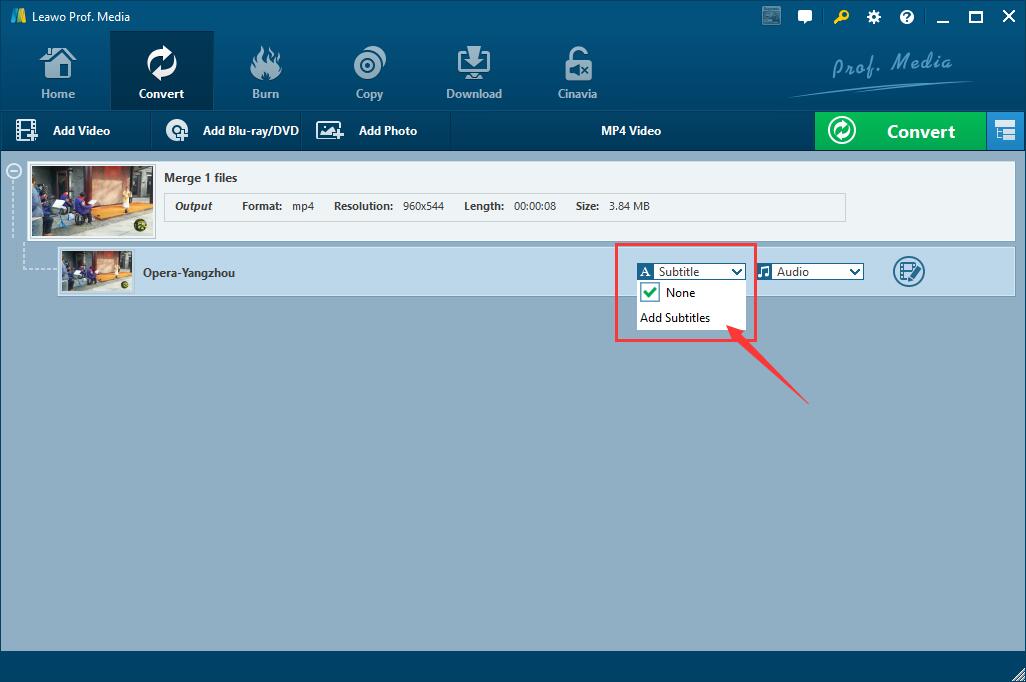
4.5 Add Subtitles
One of the features of Leawo Video Converter is that it can be used to add subtitles to your video. The “Convert” panel will show up after the watermark part is done. You can choose whether to add subtitles or not. If needed, you can click the “A” icon, select “Add Subtitles” and choose a subtitle file from your computer.
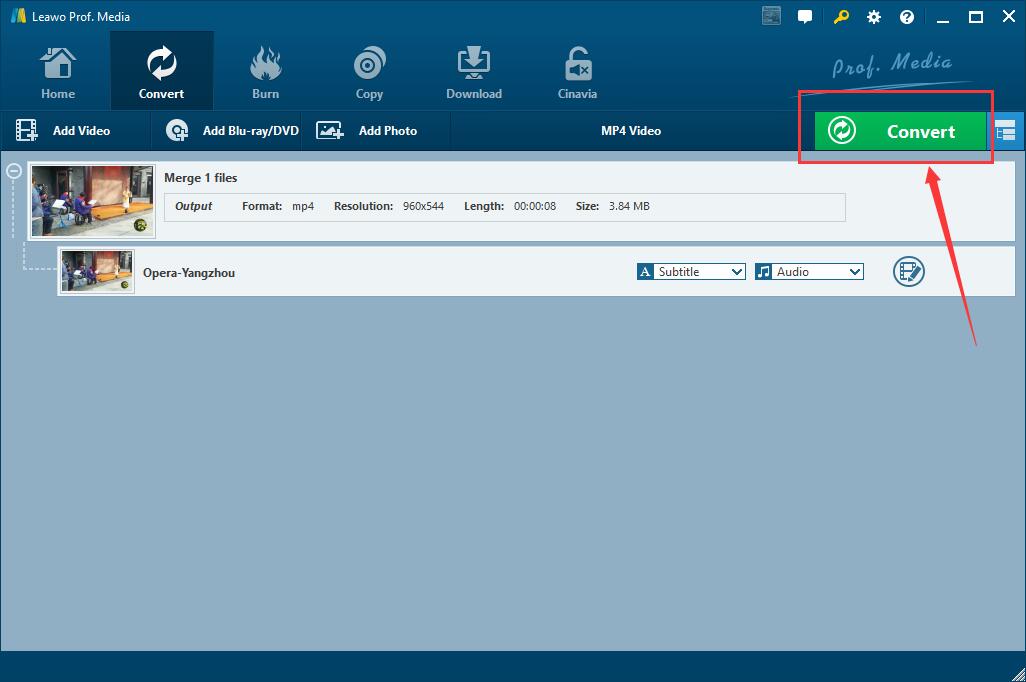
4.6 Output the Video
The last step is to output the watermarked video. On the “Convert” panel, click “Convert”.
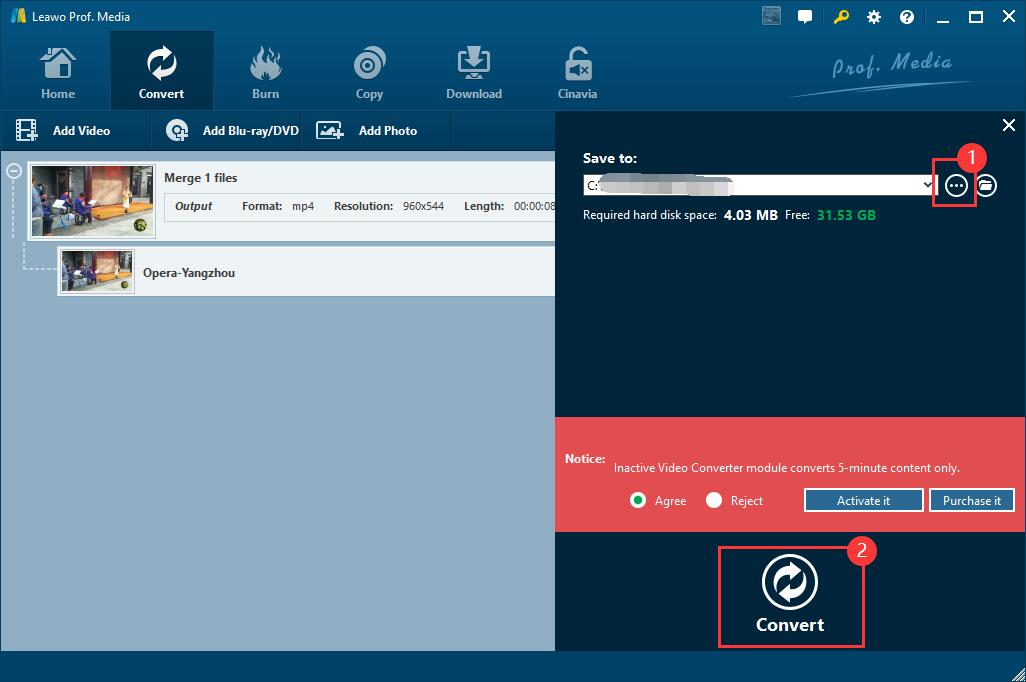
On the “Save to” panel that appears, click the more options icon on the right and select the location you want to save the new file. At last, click the “Convert” button at the bottom. The file with a watermark is saved.
Before finally saving your file, the multi-functional Leawo Video Converter is also helpful if you want to do more with your video, such as trimming and cropping.
Compared with reporting and blocking, adding watermarks is easier to operate and very efficient in protecting your videos from being stolen from the source. With Leawo Video Converter, it can be much easier for you to watermark your videos. What’s more, it supports not only regular video formats, but also Blu-ray and DVDs. Go to Leawo Video Converter to find more possibilities.
 Jan. 21, 2021 by


 Prof. Media
 Blu-ray Ripper
 Blu-ray Copy
 iOS Data Recovery
 [12/29/23] MAX Downloader V15.0.0
 10,000,000 people are using Leawo!
 All Transactions are protected!
 30-Day Money Back Guarantee!