Q: "How do I get a song to put on Movie Maker? I really want one of the favorite songs for my Movie Maker to make my video trendier and more fantastic, but I do not know how to make it. Because I found that Spotify music seems in protection of copyright policies. Please give me some advice so that I can add songs from Spotify to Movie Maker successfully."
Generally speaking , it is very easy to some extent to add songs to Windows Movie Maker from iTunes when you have free songs. However, some errors might occur when you add music to Windows Movie Maker from iTunes, which is common since iTunes music you purchased or downloaded on iTunes store are protected by DRM. But don’t worry about this, there are feasible and preferable solutions that would figure it out.
Part 1: How to add music from iTunes onto Windows Movie Maker step by step
It is well-known that Windows Movie Maker is the one-minute way to turn photos and videos into great-looking movies, more vivid with excellent music added. After that, the movies become more attractive and easier to be shared for free. Thus you may have wondered how to add music to Windows Movie Maker from iTunes and tried several times. Nonetheless, you may have failed without knowing the exact reasons. Now you are luck to follow the steps for adding music to Windows Movie Maker from iTunes below to make it.
Step 1: Launch iTunes to change Importing settings
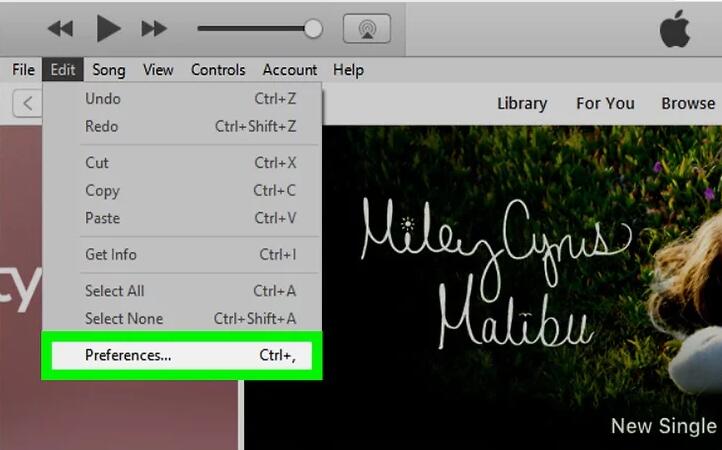
At the beginning, you should open iTunes and click “Edit” to choose “Preferences”.
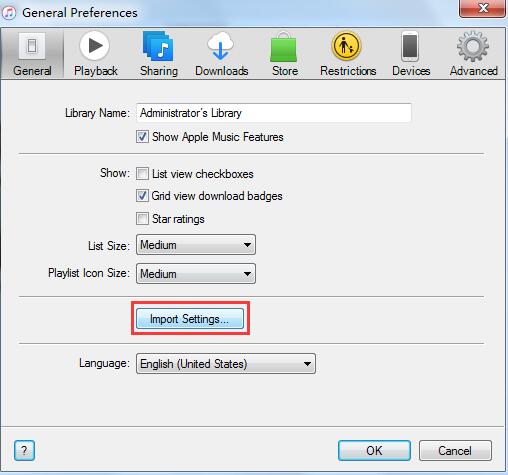
And then, you enter the “General Preferences” page where you can click on “Importing Settings” panel to make some necessary changes.
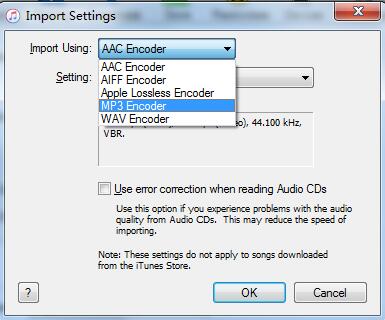
To choose MP3 Encoder in a drop-down list that says “Import Using” for preparing. And then hit “OK” to confirm the setting and press it again on the preferences window.
Step 2: Convert the music file to MP3 with iTunes
Download the song you prefer and then right-click the music file in your iTunes Music Library and choose “Convert Selection to MP3”.
Step 3: Open Windows Movie Maker and Import the source video.
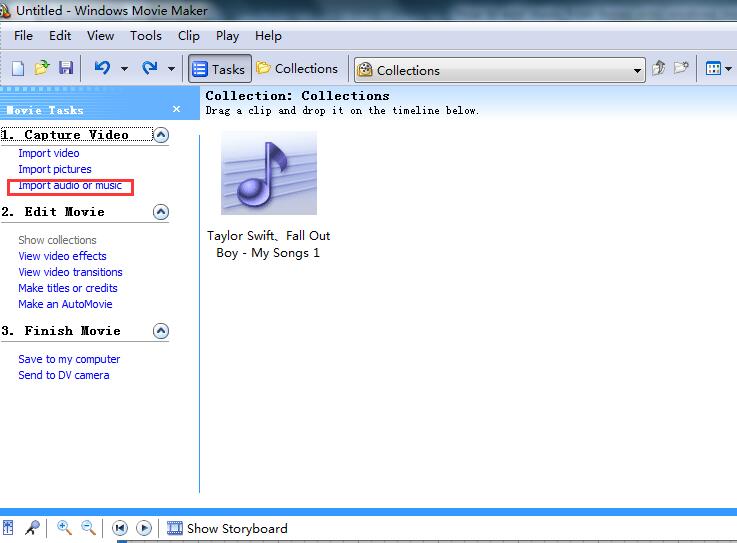
When you enter Windows Movie Maker, click “Import audio or music” to find your way to the ITunes library folder, and choose the converted MP3 music file that is compatible with movie maker for importing.
Now you can feel free to get it played or add it to your favorite video clips if you like. This is quite simple for you to get grasp on how to add songs to movie maker from iTunes when there is no DRM protection here. If your loved music files are unfortunately protected by DRM, you couldn’t be worried, neither. There are powerful programs that can settle it quickly for you to add music to Windows Movie Maker from iTunes.
Part 2: Remove DRM and share iTunes music to main stream music player with Prof. DRM
Initially, the most commonly used professional DRM removal software is Leawo Prof. DRM, an integrated program which can work as DRM video converter, DRM music converter, DRM audiobook converter, DRM eBooks converter and DRM Spotify converter to bypass DRM protection and convert the original file to common formats. For example, as DRM video converter, it can simply convert iTunes M4V movies and TV shows to MP4 or convert M4V to WAV and so on. While as DRM music converter, it converts iTunes music to MP3 so as to backup iTunes music to Dropbox or any other music players, such as adding music to windows live movie maker from iTunes. What’s more, it works at 50X faster speed with original quality kept and channels/sampling rates/bit rates selectable so that you can freely transfer the DRM-free iTunes music songs to any media players and mobile devices for unlimited enjoyment. And the easy-to-use interface makes it even much easier on dealing with the problem how to add music to Windows Movie Maker from iTunes. You are required to download and install the program on your PC and then follow the simple steps to figure it out.
Note: Before you begin running the program, make sure that you have authorized the computer by signing in with your Apple ID to play the iTunes music file purchased or rent. After all, you are not allowed to open iTunes during the iTunes DRM removal process.
Step 1. Import iTunes Music to the program
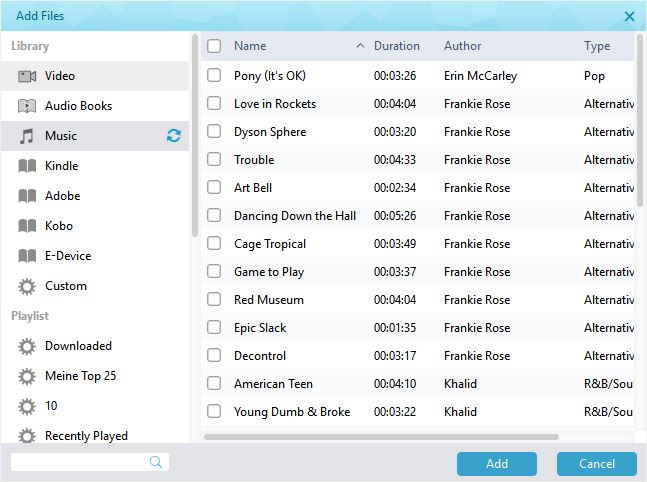
After launching the program and entering the main interface, you can simply click "Add Files" button to import one or more iTunes DRM music files from the pop-up "Add File" panel. Or you can drag and drop the target iTunes music files directly to the program.
Step 2. Set Output quality
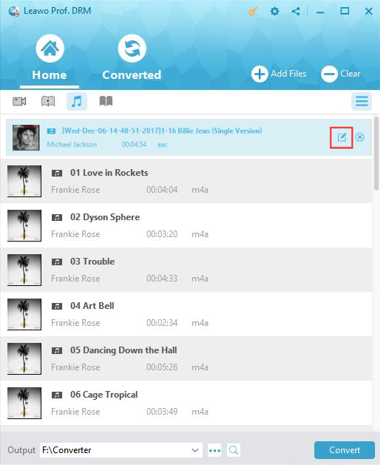
After importing Apple music files you need, all the imported files will be listed under the "Music" category. Randomly choose a music file and click the "edit" icon, then you can set MP3 as output format and freely choose "Channels", "Sampling Rates" and "Bit Rates" for the output MP3 music file.
Step 3. Remove DRM from iTunes Music and Convert to MP3
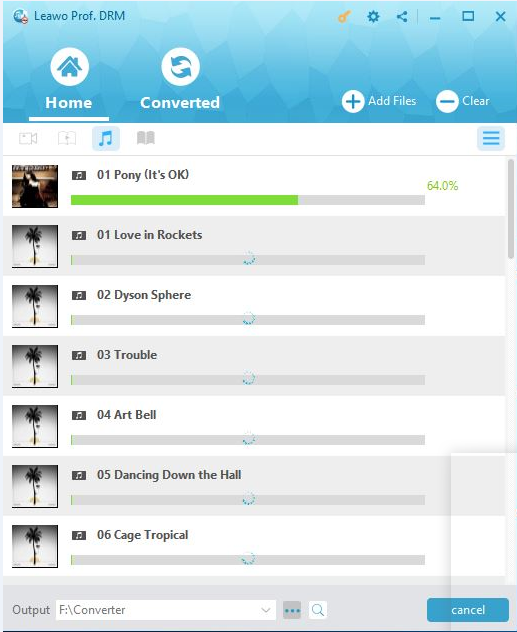
Click the blue "Convert" button at the bottom right of the interface to start removing DRM from the imported iTunes music and downloading in MP3 files. When the iTunes DRM removal and conversion process complete, you will get DRM-free MP3 files. You can check them on Converted tab or you can fast locate them here to find where you have saved them.
Now for the sake of adding music to Windows Live Movie Maker from iTunes, you can follow the steps mentioned at Part 1 and you will make it as simple as possible. Besides, the converted MP3 music files are with original quality and you can also share them on your preferable but unauthorized devices or players as you want. For instance, you can now stream iTunes Music on Google Pixel 2 or even listen to iTunes music on Sony PSP.
Part 3: How to use Leawo Music Recorder to record music for sharing
Removing iTunes DRM for adding music to Windows Movie Maker from iTunes is one of the most efficient and amazing ways. Then, can you use music from iTunes on Windows Movie Maker in other effective ways except this? Definitely, you can also be an expert on how to download music to Windows Movie Maker from iTunes by using the user-friendly music recording software and then solve the problem of simply adding music to Windows Movie Maker from iTunes as a piece of cake. In this case, Leawo Music Recorder, the most popular and top-notch music recording program, would be strongly recommended. It is so powerful that with 100% original quality retained, it can record music or audio from any source, including any built-in input audio, audio/music on the computer and online music sources, like YouTube, Spotify, AOL Music, Last.fm, and so on. The recorded music will be saved and downloaded in MP3 or WAV format. Likewise, it is so easy to use that anyone can grasp the operation.
After downloading and installing the program on your PC, you can simply record and download your favorite iTunes music at anytime you need, and finally achieve you aim at using music from iTunes on Windows Movie Maker. Now here comes the simple guide on how to download music to Windows Movie Maker from iTunes by recording.
Step 1. Launch the recorder on your PC
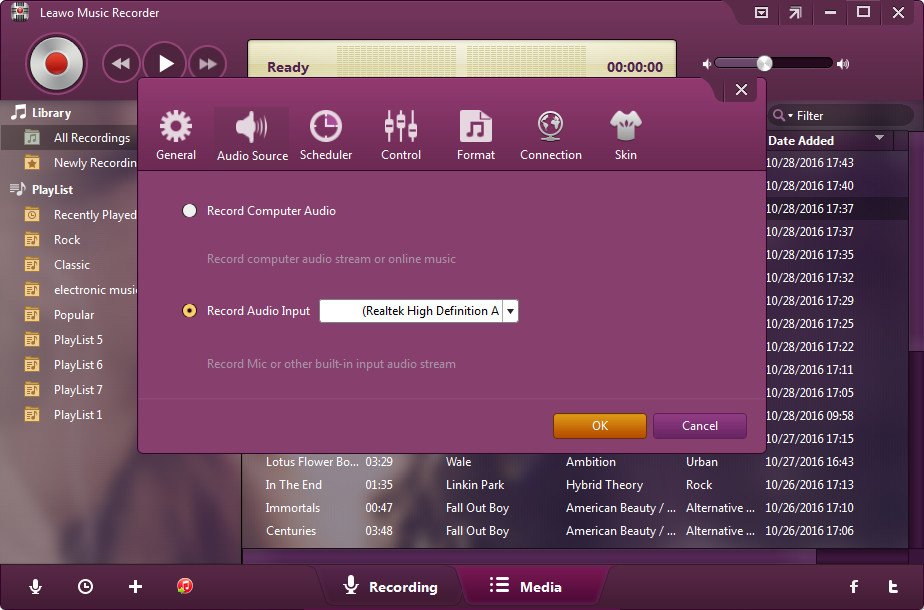
Start running the recorder to enter the main interface of the program, click the “Audio Source” icon here to select “Record Computer Audio” option for the audio source firstly since you are going to record iTunes music on your computer.
Note: if you are going to record audio from built-in input audio like Mic, click “Record Audio Input” option. On this setting panel, you can also make other settings, such as set the output format under “Format” option, set Start time and duration of the recording under Scheduler option if you need.
Step 2: Start Recording iTunes music
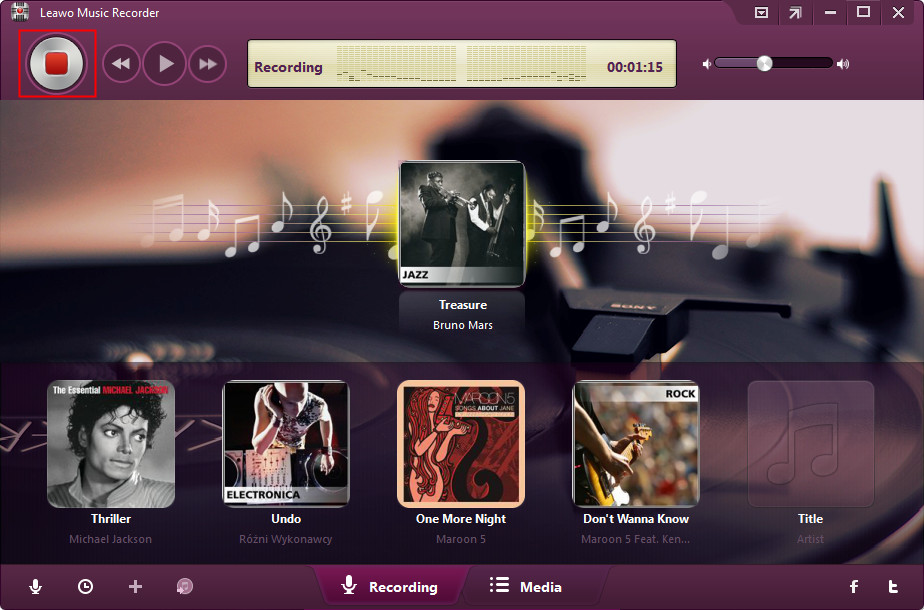
Click the red "Start" button at first and then click to play your iTunes music files. Notice the run-time sequence otherwise you might lose some content.
Step 3. Edit Music Tags if necessary
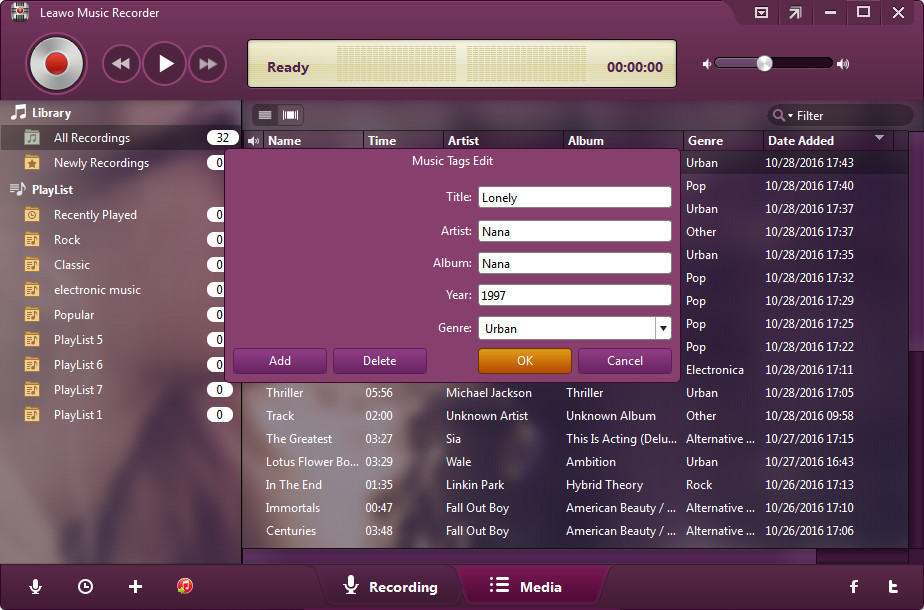
When the music is over and the recording completes, the program would automatically download and add music tags to your recordings. But you could still edit music tags manually if you need by clicking "Media" and "Library" to select a recording, and then choose "Edit Music Tags" for manual editing.
Anyway, now you are able to play and enjoy the music in MP3 freely. It is no longer obstructive to add music to Windows Movie Maker from iTunes at all. Just start your Windows Movie Maker and import the recorded music to your beloved video clips to make an appealing movie for sharing with any of your friends. Now can you use music from iTunes on Windows Movie Maker? It definitely is yes. After all, the powerful programs and detailed guide on how to add music from iTunes onto Windows Movie Maker will make you a success no matter how poor you are at adding music to Windows Movie Maker from iTunes.

